Photoshop Auto Align Layers: Quick Guide to Perfect Alignment
Photoshop Auto Align Layers: Quick Guide to Perfect Alignment
Have you ever struggled with aligning multiple layers perfectly in Photoshop? You’re not alone. The Photoshop auto align layersfeature can be a game-changer, simplifying the process and saving you time.
Imagine how much easier your projects could be if you didn’t have to manually line up each layer. Intrigued?
Let’s dive into how this powerful tool works and how you can make the most of it.
Stick around; by the end of this, you’ll be wondering how you ever managed without it.
Table of Contents
How to Use the Auto Align Layers Command
With increasing complexity in editing tasks, knowing how to use auto-align layers command in Adobe Photoshop effectively becomes critical.
Step-by-Step Guide to Align-Auto Layers
The Align-Auto Layers command helps ensure multiple layers are neatly aligned.
Here’s a simple guide:
Open your project in Adobe Photoshop.
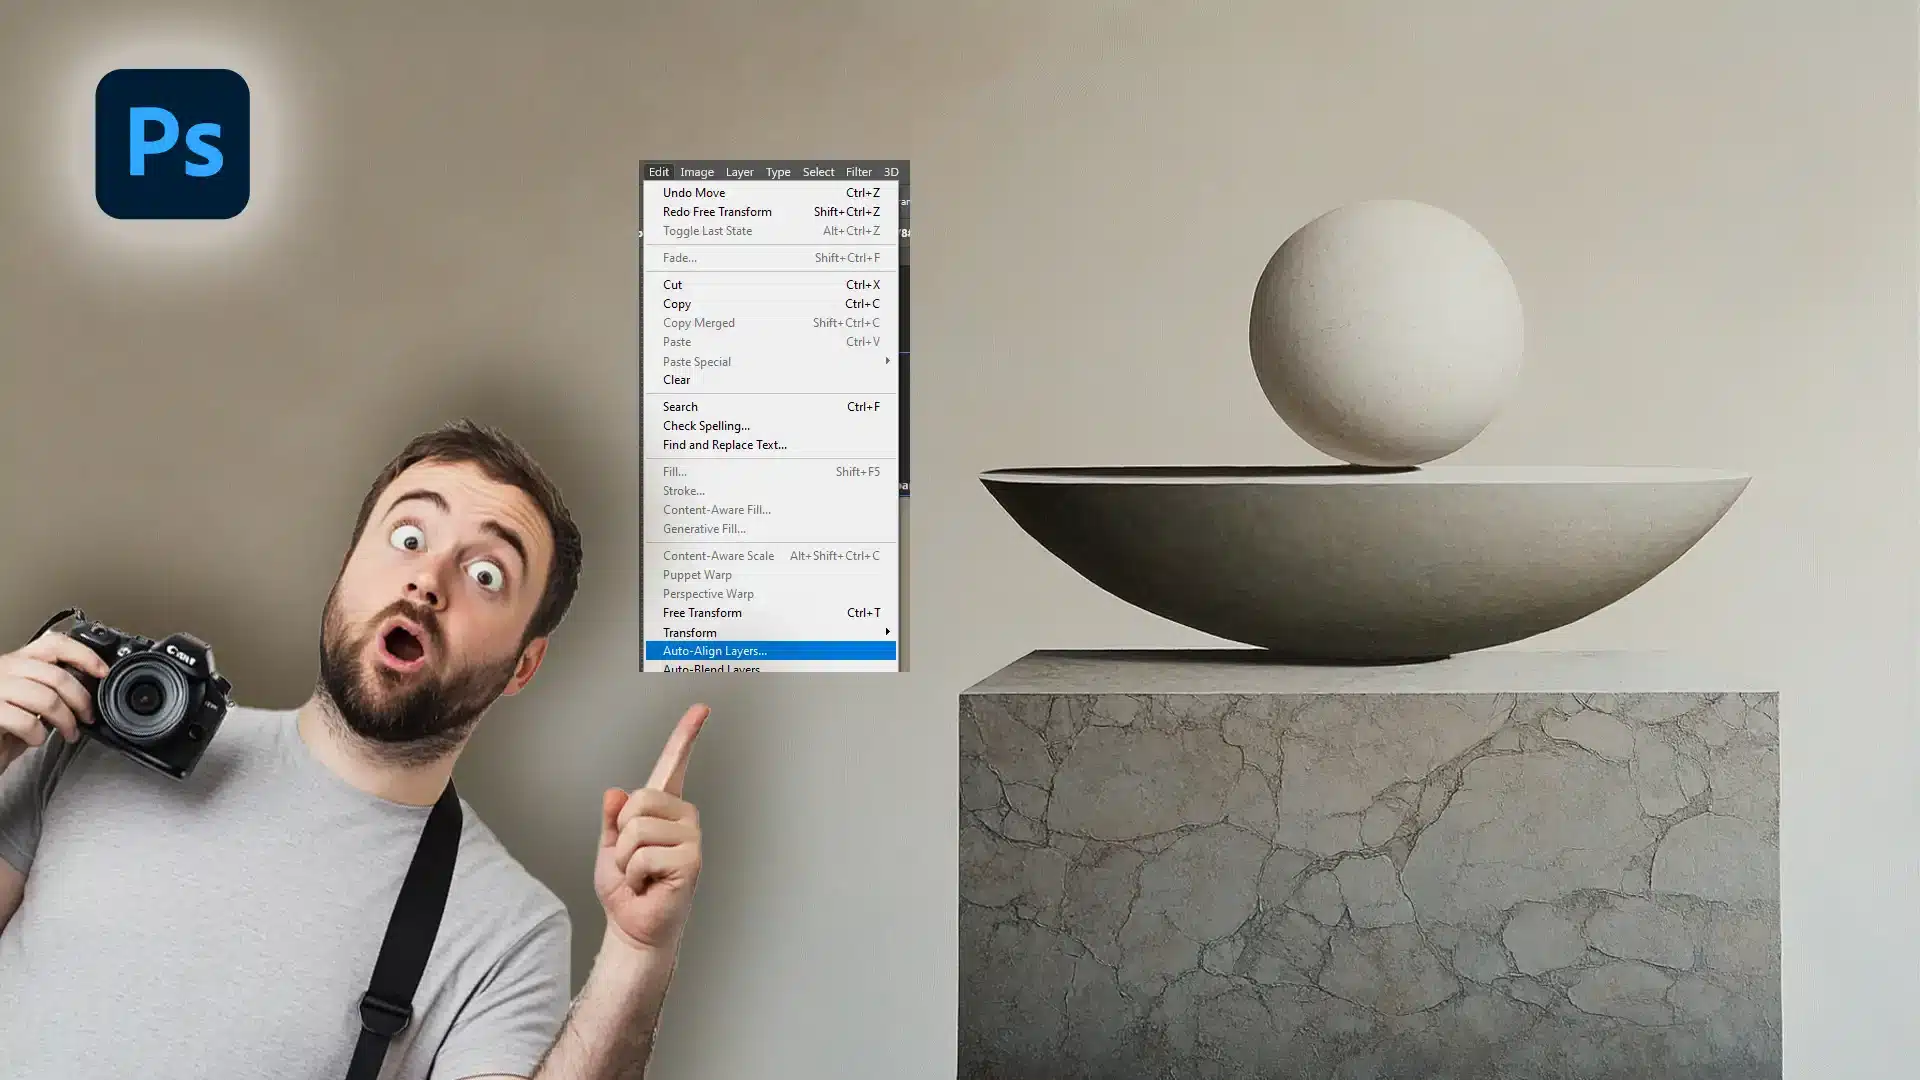
In the Photoshop layers panel, select all the layers you wish to align. Hold the Shift key to select multiple layers.
Go to the Edit menu and choose “Auto Align Layers.”
In the dialog box, select your alignment method: Auto, Perspective, Cylindrical, Spherical, Collage, or Reposition.
Click OK and wait a few moments for Photoshop to align the layers based on your choice.
Tips for Best Results
To achieve the best outcome when using the Align-Auto Layers feature, follow these tips:
Ensure source images have consistent settings.
Use high-resolution image layers for clarity.
Consider converting layers to smart objects for non-destructive editing.
Pro Tip: Combining align-autolayers with layer masks allows for seamless blending and creates professional-looking composites.
Creating a side by side picture layout is a great way to compare images or showcase progress. Mastering this technique enhances your editing skills, allowing for creative storytelling in visual projects.
Don’t forget to explore our other Photoshop and Lightroom tutorials to further enhance your editing skills.
The world of Photoshop truly opens up when you understand the layers panel. It may look complex initially, but with a bit of practice, the layers panel becomes your best friend.
Let’s take a closer look at its essential elements.
Navigating the Layers Panel
First things first, learning to navigate the layers panel helps you manage your project better.
Here are some steps to simplify the process:
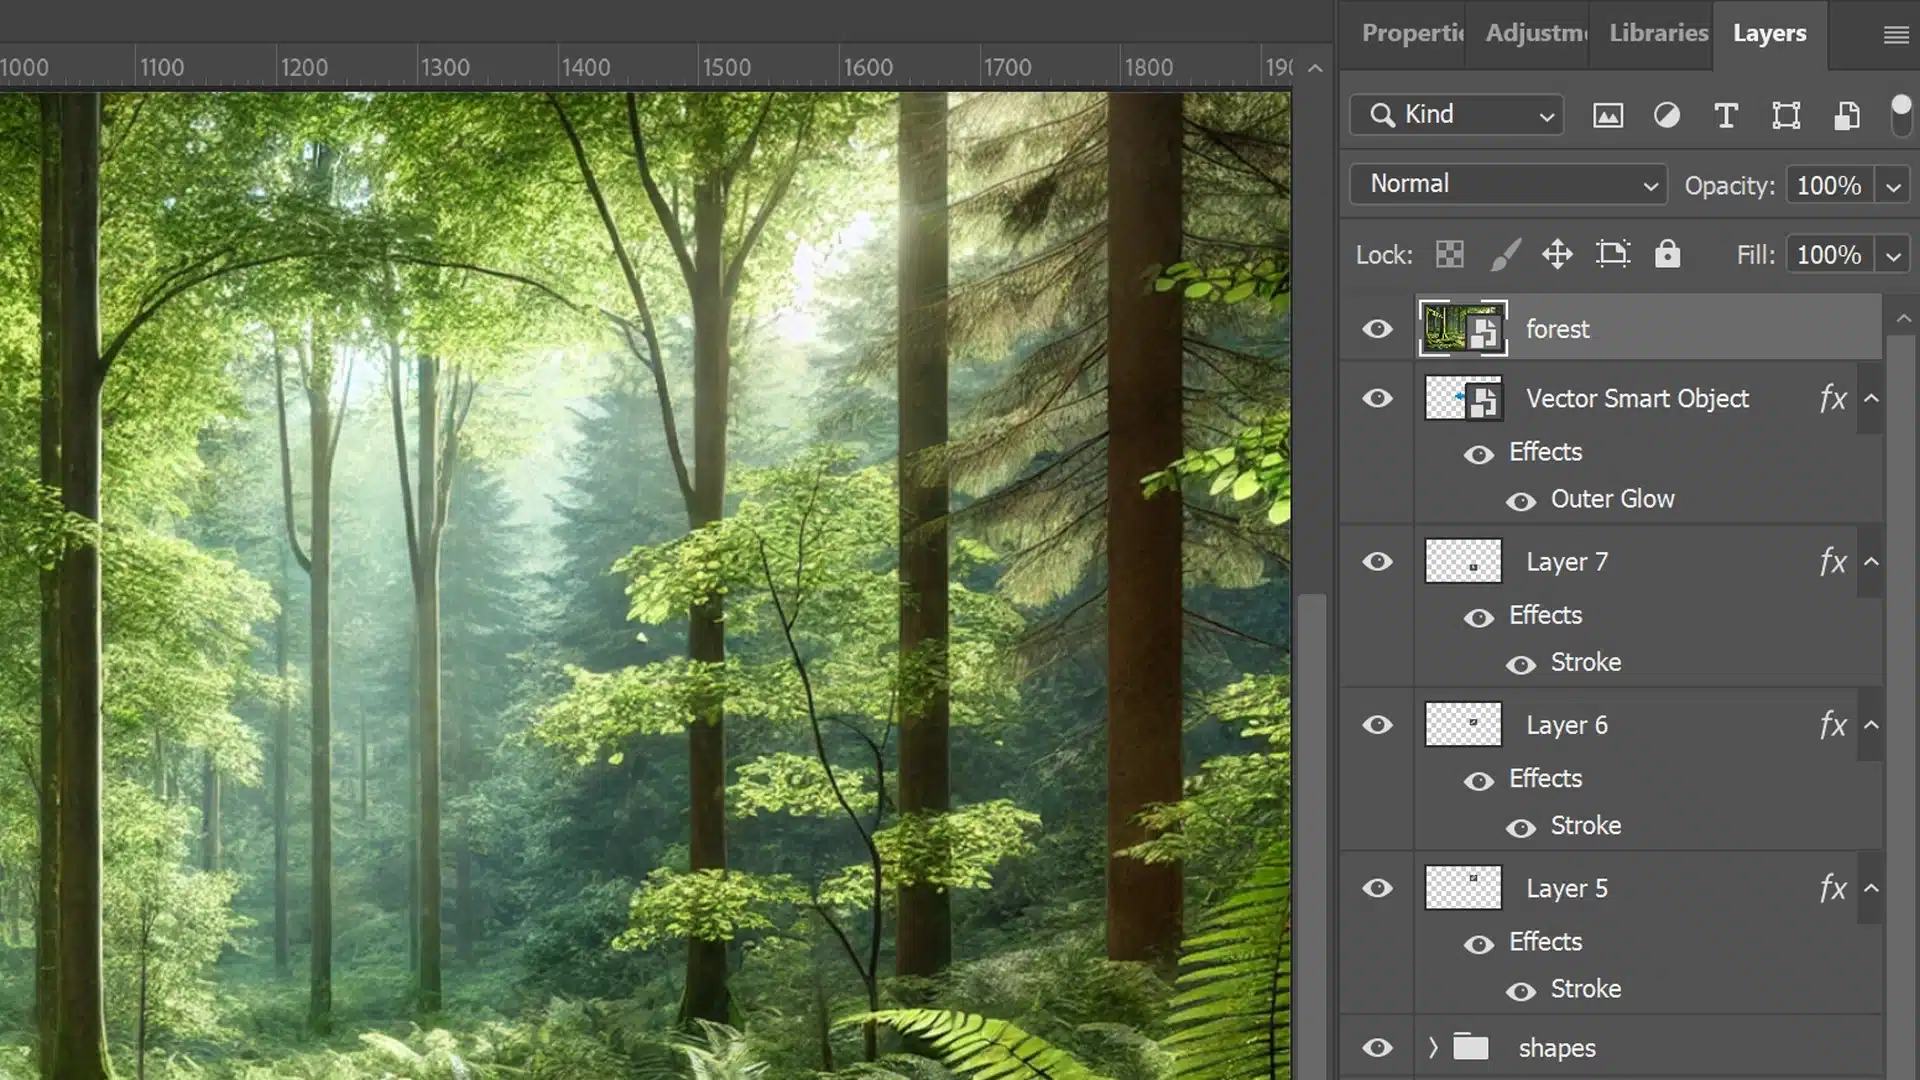
Open your project and find the layers panel on the right side of the screen.
Each element in your project exists on its own layer. It's like a stack of transparent sheets.
You can hide, lock, or link these layers depending on your needs. Trust me, this keeps things organized.
Click on a layer to select it, and then use the move tool to adjust its position.
Organizing Multiple Layers
When working with multiple layers, organization is important.
Here’s how you can achieve that effortlessly:
Rename your layers: This makes it easier to know which layer does what. Right-click on a layer's name and enter a new one.
Group related layers: Select the layers you wish to group, right-click, and choose 'Group from Layers.'
Use folders: Drag and drop layers into a folder rather than having them scattered.
Remember to always save your work frequently, particularly if you're making significant changes.
Pro Tip: Want to easily align different layers for that perfect composition?
Use the Photoshop align auto layers feature.
Go to Edit in the menu bar, then hit “Align-Auto Layers” after selecting the layers.
Your layers will be perfectly aligned in no time.
Essential Tools in Photoshop
Mastering the layers board is just the beginning. To fully leverage Photoshop, familiarize yourself with other essential tools in Photoshop such as the Content-Aware Fill and patch tool.
These tools can significantly enhance your editing capabilities, making your workflow more efficient and your projects more polished.
By combining a solid understanding of the layers board with these powerful tools, you’ll be well on your way to becoming a Photoshop pro.
Advanced Techniques with Align-Auto Layers
Understanding and mastering the align autolayers tool in Photoshop opens a world of creative possibilities. Done correctly, this tool seamlessly aligns multiple images, making your compositions look refined and polished.
Allow me to guide you through some advanced techniques.
Using Auto Arange for Compositing
When working on complex composites, choose auto align photoshop layers for precise alignment. Start by loading all layers into the same document, ensuring each image sits in its layer.
With all source images loaded, select all layers you want to align by holding Shift and clicking the layers in the layer panel.
Once selected, go to the Edit menu and click on “Align-Auto Layers.” You will see various alignment options such as:
Reposition Only
Auto
Perspective
For most projects, “Auto” works best, giving you flexible results. Adobe Bridge can also help load files if you’re importing numerous images simultaneously.
After choosing your alignment option, Photoshop handles the heavy lifting, aligning important features and ensuring a smooth fit.
Watch as individual selections come together perfectly. Remember, adjusting will be necessary if you spot misaligned edges or areas that need tweaking.
When exploring advanced techniques in Photoshop, understanding the art of moving images is essential. It allows for precise positioning, creating dynamic and professional compositions.
Creative Projects with Automatic Align
Beyond compositing, align autolayers can spice up creative projects. Think about combining multiple shots of the same, perhaps group shots, with everyone looking their best!
Use Adobe Bridge to simplify organizing. Once loaded, align all the layers efficiently so every smile and pose stands out.
Play around with the options even more. For example, create panoramas by stitching photos side by side. Ensure you load files in sequence and align them for an immersive, continuous image. Don’t stop there: try artistic effects by experimenting with the checkerboard pattern, filling gaps created by slight misalignments and adding to the collage effect.
Remember, the move tool is handy when repositioning. If a selection needs slight adjustments post-alignment, use the move tool to fine-tune.
As you practice, you’ll feel more comfortable with the process, boosting both creativity and efficiency.
Pro Tip: Save time and avoid hassle by frequently saving your work as you go; it’s easy to lose track during intricate edits.
Additionally, learning Photoshop shortcuts can significantly speed up your workflow and enhance your editing efficiency.
This setting offers control over depth of field, essential for capturing sharp images and enhancing your overall camera skills.
Troubleshooting Common Issues When Working with Align Layers
When troubleshooting alignment issues in Adobe Photoshop, ensure your source layers and source images are properly aligned by using layer masksfor precise adjustments and checking the bottom edges.
Issue
Solution
Details
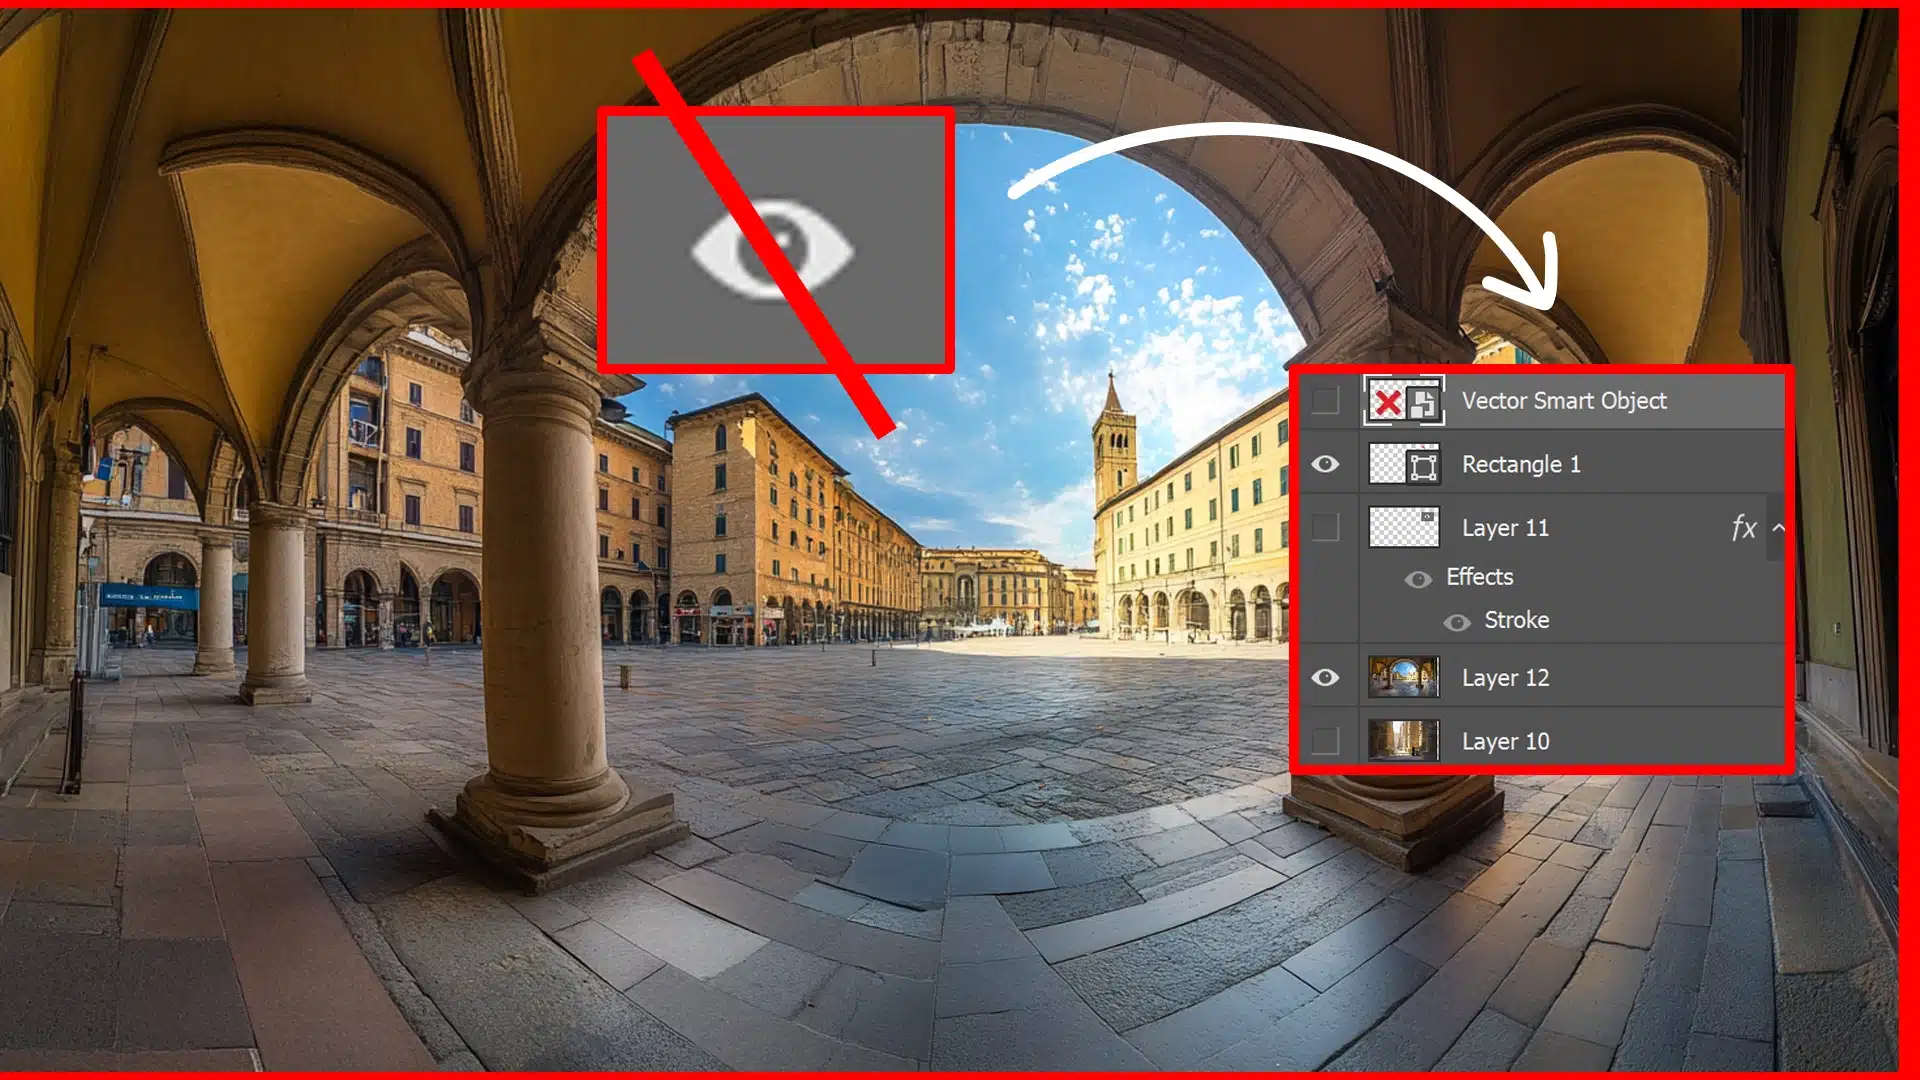
Hidden Layers
Check Layer Visibility
Ensure all layers are visible and correctly positioned.
Misalignment
Re-align Manually
Use arrow keys for precise adjustments.
Layer Positioning
Use Move Tool
Click and drag layers to tweak their positions.
Gaps in Edges
Examine Edges
Check and align top, bottom, and side edges.
Alignment Options
Experiment with Auto-Align Settings
Try “Perspective” or “Collage” if default options fail.
Batch Processing
Load Files Individually
Process images one at a time for better control.
Layer Transformation
Rotate and Scale
Use the transform tool for manual adjustments.
Layer Arrangement
Utilize Layer Stack
Arrange layers creatively for better alignment.
Use Adobe Bridgeto organize and load more layers, select all selected layers in the menu bar, and carefully do the alignment the second image to achieve a flawless composition.
Fixing Misalignments
Aligning layers in Photoshop isn’t always a smooth process. Sometimes, things don’t line up as expected.
Here’s how you can fix common misalignments:
Check your source layers: Ensure that all the layers you want to align are visible and correctly positioned. Sometimes a hidden layer might be causing trouble.
Re-align manually: You can manually move the selected layers using the arrow keys for precise adjustments. Pay attention to both horizontal centers and vertical centers when moving selected layers.
Use the Move tool: Click and drag your layers to tweak their positions for better alignment.
Look at edges: Alignments can sometimes leave small gaps. Check the top edges, bottom edges, and right edge to ensure they are even.
Employ guide lines: Using guides helps you align precisely by snapping the layers to these lines.
These quick fixes can drastically improve your composition, making your work look more professional.
When Align-Auto Layers Fails
Sometimes, the align-auto layers feature in Photoshop CC just doesn’t cut it. Here’s what you can do:
Experiment: If one automatically-align option fails, try the others like "Perspective" or "Collage."
Load files step by step: Process your images individually instead of all at once. It provides better control over each layer's position.
Rotate and Scale: Use the transform tool to manually rotate and scale your images for better manual alignment.
Use layer stack: Arrange your layers creatively in the stack for better results.
Add or remove layers: Sometimes, adding or removing a layer may solve alignment issues.
Your layers need attention and care for them to align perfectly. Employ these techniques if the auto feature lets you down.
Pro Tip: Always save a copy of your original work before making changes. You will avoid losing any important adjustments and can experiment freely!
Frequently Asked Questions
Why can't I align-auto layers in Photoshop?
Auto-align might not work if the layers don’t have enough similar details.
Check if the layers are selected. Only selected layers can be aligned.
How to perfectly align layers in Photoshop?
These steps will show you how to perfectly align layers in Photoshop:
Select the layers you want to align in the Layers panel.
Use the Move Tool and click on the alignment buttons in the top control bar (e.g., Align vertical centers, Align left edges).
How do I auto center a layer in Photoshop?
Follow these steps to auto center a layer in Photoshop:
Select the layer you want to center.
Choose the Move Tool, and use the Align vertical centers and Align horizontal centers buttons in the options bar.
How to auto arrange photos in Photoshop?
Easy steps to auto arrange photos in Photoshop:
Open the files as layers in a single document via File > Scripts > Load Files into Stack.
Select all layers and use the Move Tool with alignment options to distribute them evenly.
Using the Photoshop auto alignlayersfeature has really changed how I edit. It saves me a lot of time by automatically aligning layers, so I can focus on the creative side rather than manually adjusting each one.
If you’re working with multiple images or creating composites, this tool makes the process much smoother. I recommend giving it a try if you haven’t yet-it’s pretty easy to learn.
To get the best experience with Photoshop, you might want to consider getting the software through Adobe Photoshop or explore the combination of editing features available in Adobe Lightroom.
Both are great tools that can take your photo editing skills to the next level.
If this article has helped you, then Like and Share it with your friends
$2,061.00Original price was: $2,061.00.$1,061.00Current price is: $1,061.00. 27584
Download Your Free Guide Now!
Discover the secrets of photography with our printable guide! Master essential techniques like aperture, shutter speed, and ISO to create stunning images. Get your free printable PDF now and start turning your snapshots into masterpieces!