Master Type on a Path in Photoshop: A Guide for Creatives
Master Type on a Path in Photoshop: A Guide for Creatives
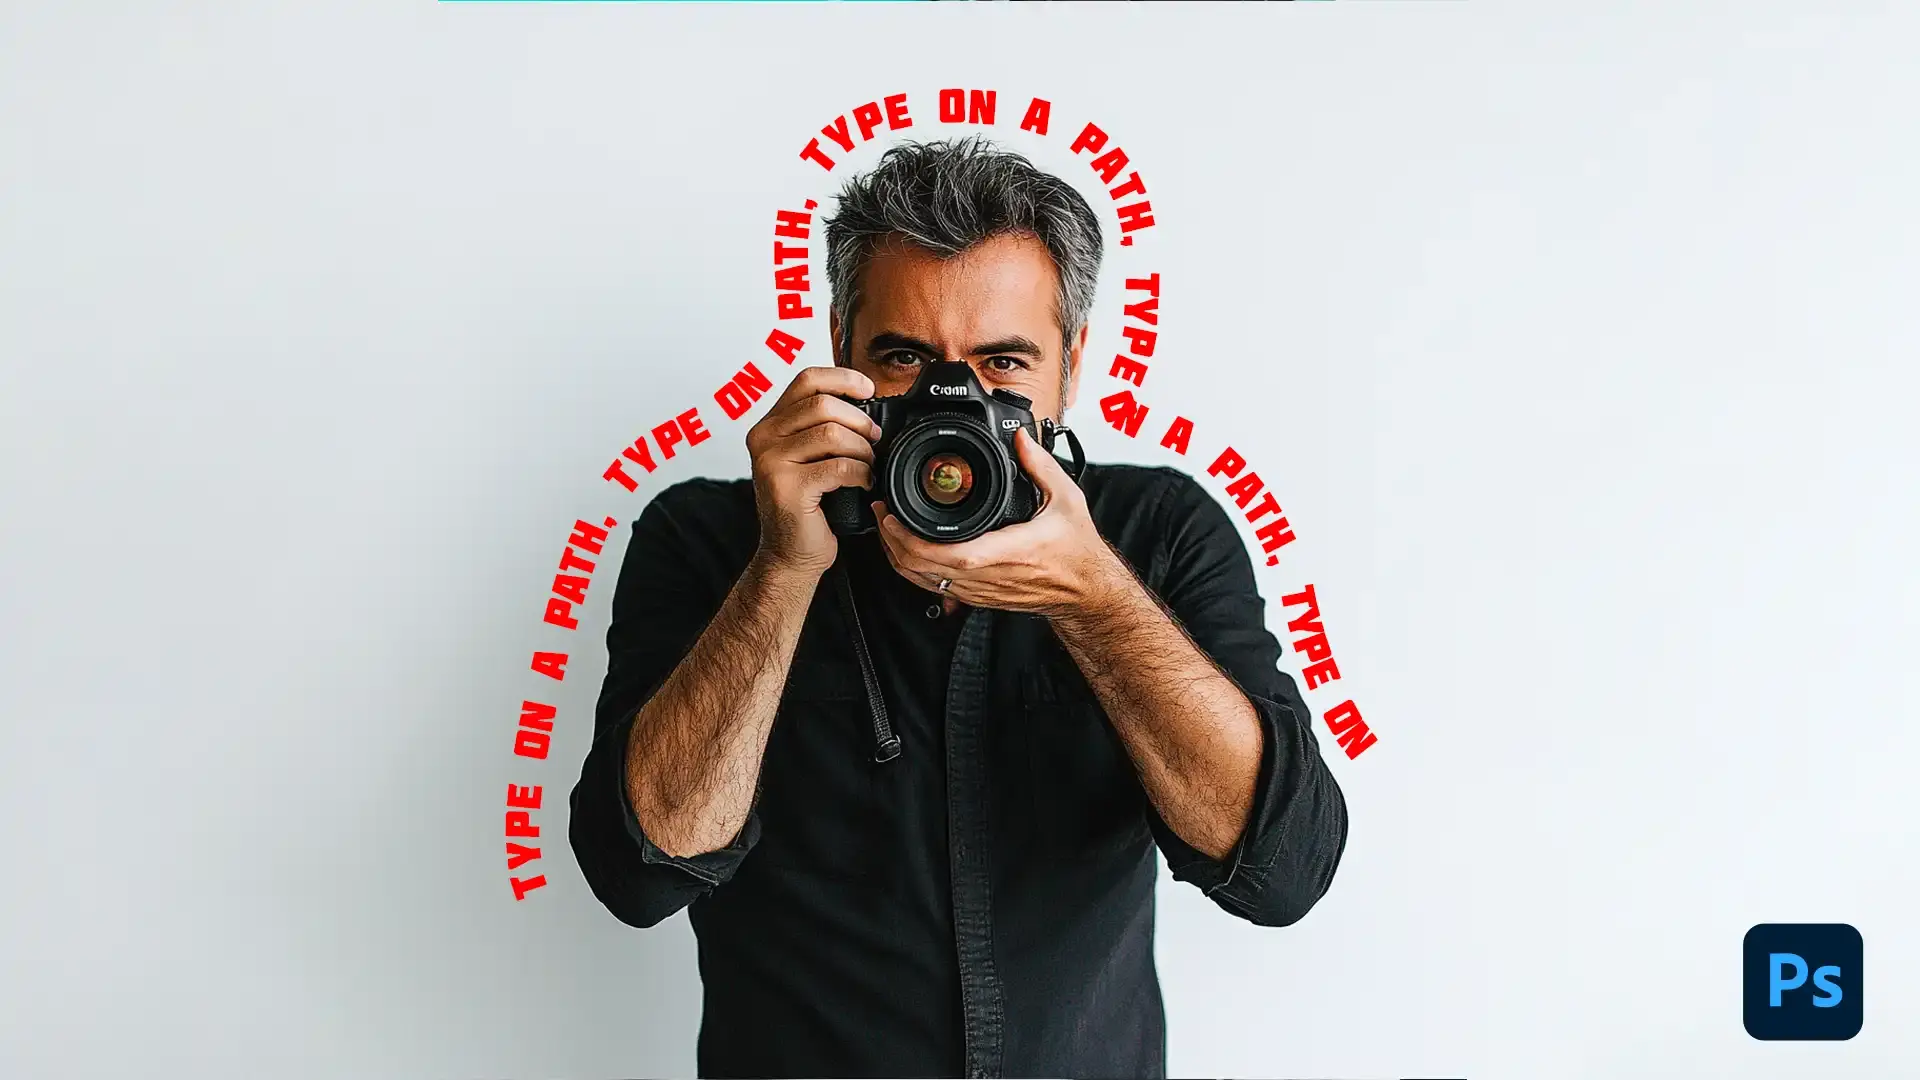
Have you ever wondered how to type on a path Photoshop to create eye-catching text effects?
You’re in the right place! In this article, I’ll guide you through the simple steps to master this technique, making your designs stand out.
Imagine the possibilities: curved text wrapping around objects, spiralling titles, or custom shapes that add flair to your projects.
With just a few clicks, you can transform ordinary text into a visual masterpiece. So, whether you’re a beginner or looking to refine your skills, stay with me to unlock the full potential of Photoshop’s text tools.
Let’s dive in and get creative!
Table of Contents
Why Use Type on a Path Photoshop?
Type on a path in Photoshop CC is useful for adding visual interest and guiding the viewer’s eye. It allows you to place text along the path of shapes, providing creative ways to enhance your designs.
This technique is frequently used in posters, advertisements, and logos.
Common Applications for Type on a Path Photoshop
Using the Photoshop type on a path has many practical applications:
Creating unique text effects for logos and branding.
Designing captivating advertisements and posters.
Adding dynamic elements to web graphics and social media posts.
When you create type on a path, you draw attention to specific areas of your design. It’s especially handy for making text follow circular paths or custom shapes.
Steps to Create Type on a Path Photoshop
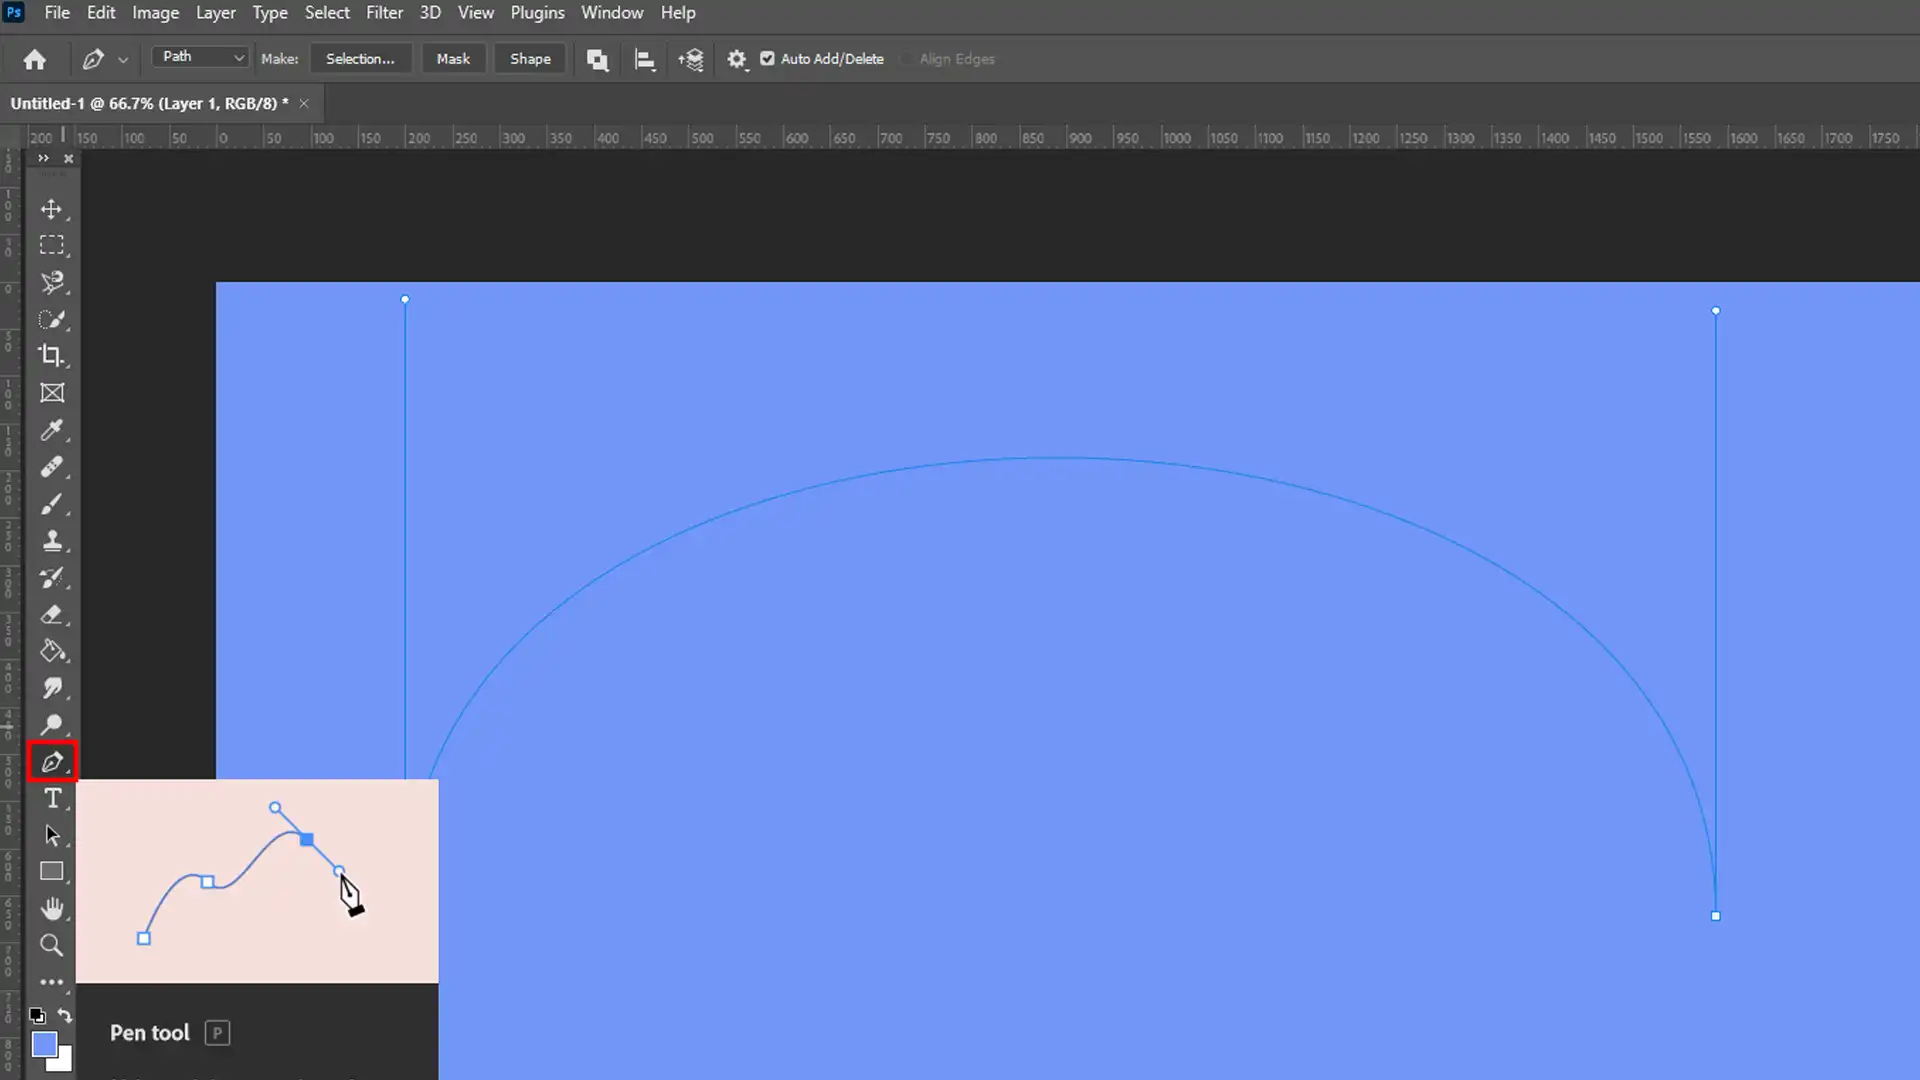
To start, select the type tool from the Tools panel. Choose the Pen Tool or an existing shape to create the path. Remember to switch back to the Type Tool and click near the path to start typing.
Fine-Tuning Text Position
You can use the Direct Selection Tool to fine-tune the position of your text. Hover over the text and drag to adjust around the path.
Creating Circular Text
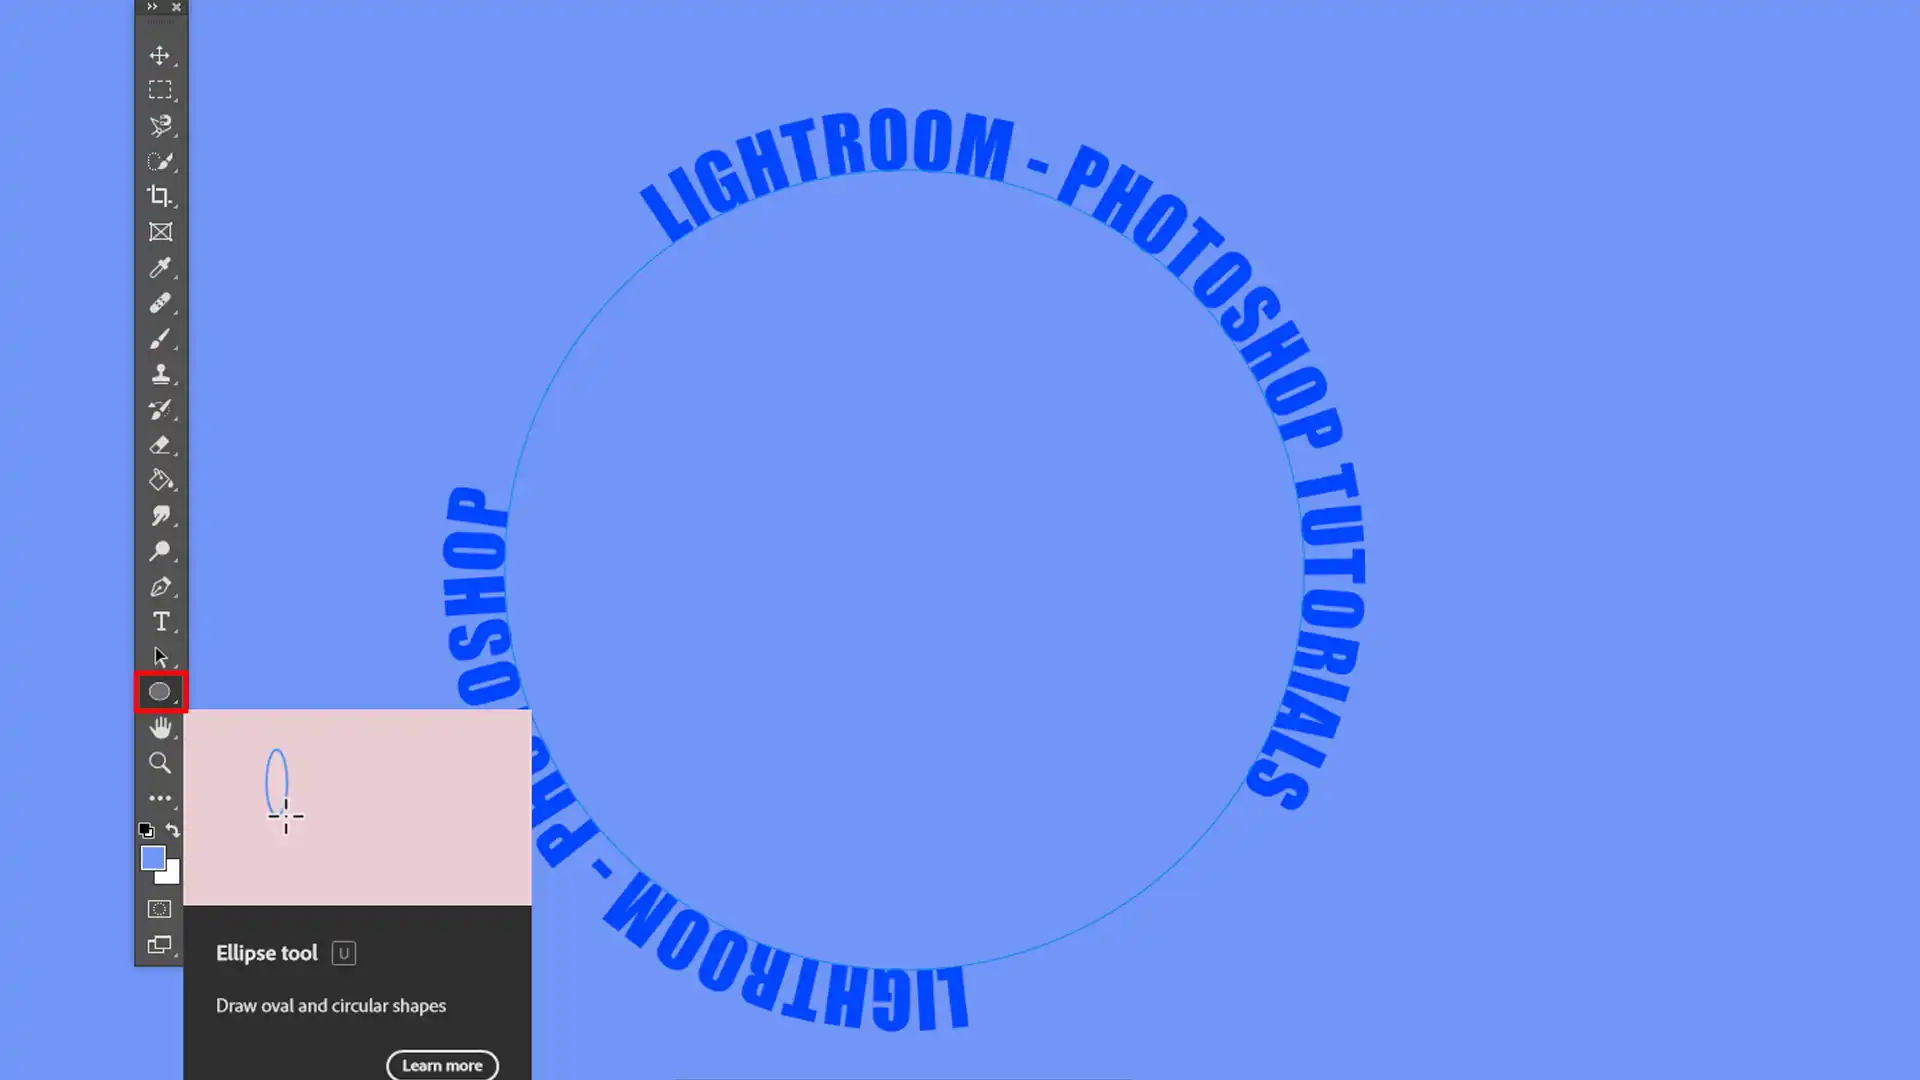
For circular text, select the Ellipse Tool and click and drag to draw a circle. Hold the Shift key for a perfect circle. Then, choose the Horizontal Text Tool and click on the circle’s edge to start typing.
Modifying Text Properties
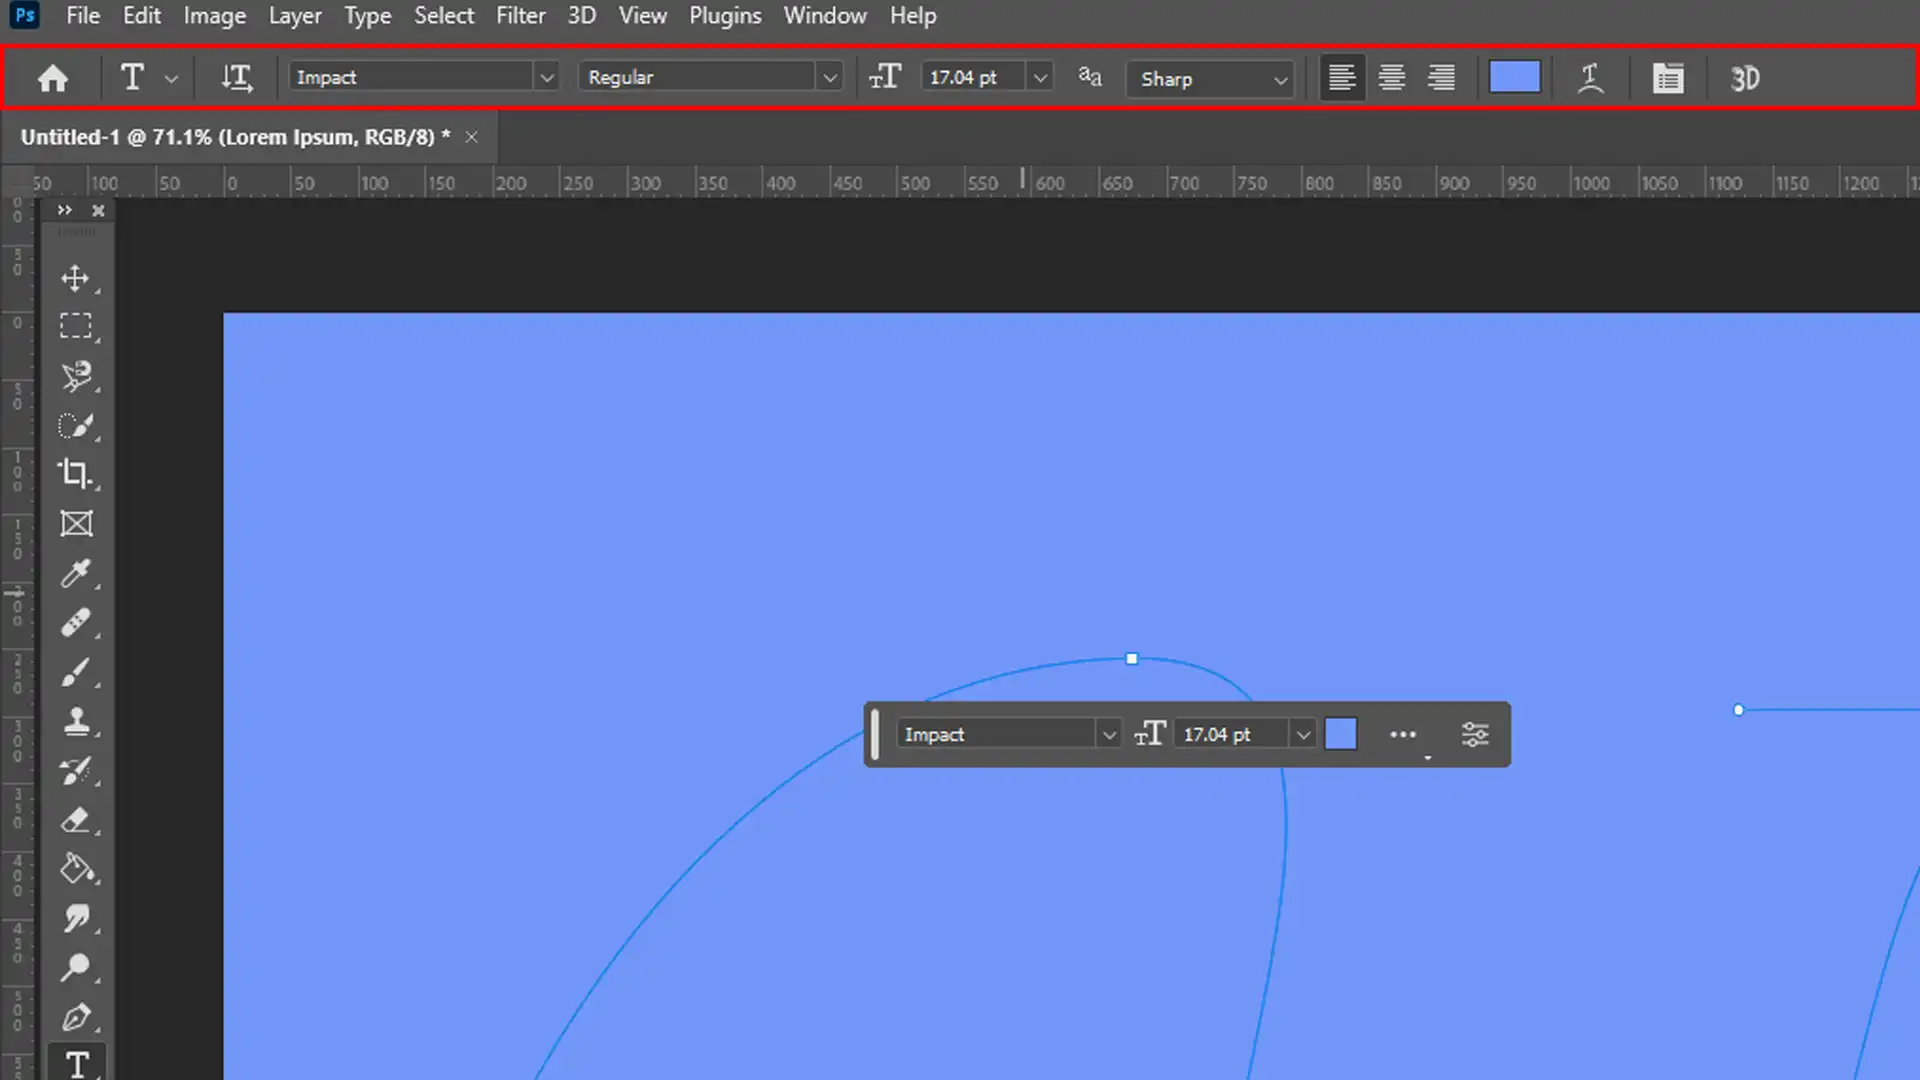
Use the Options Bar to modify font size, color, and alignment. Adjust the baseline shift for finer control over text positioning.
Organizing Text Layers
Grouping text into layers keeps your design organized. Open the Layers panel and ensure the type layer is active for easy editing. You can create groups by selecting multiple layers and clicking the Groupicon at the bottom of the Layers panel.
Pro Tip: To easily reverse the direction of the text, double-click the text and drag the cursor handle inside the path.
Additionally, experimenting with a Photoshop text box can help you manage and format your text more effectively within defined areas.
For a creative twist, try applying a text portrait effect by shaping your text to form an image or silhouette, adding a unique artistic touch to your design.
You can also use the warp text feature to bend and distort your text in various ways, enhancing the visual impact of your design.
Photoshop Text on Path tutorial
How to put in use the Photoshop CC path tutorial. In this guide, you’ll discover how to create and manage text on a path, making the most of the visible area in your designs.
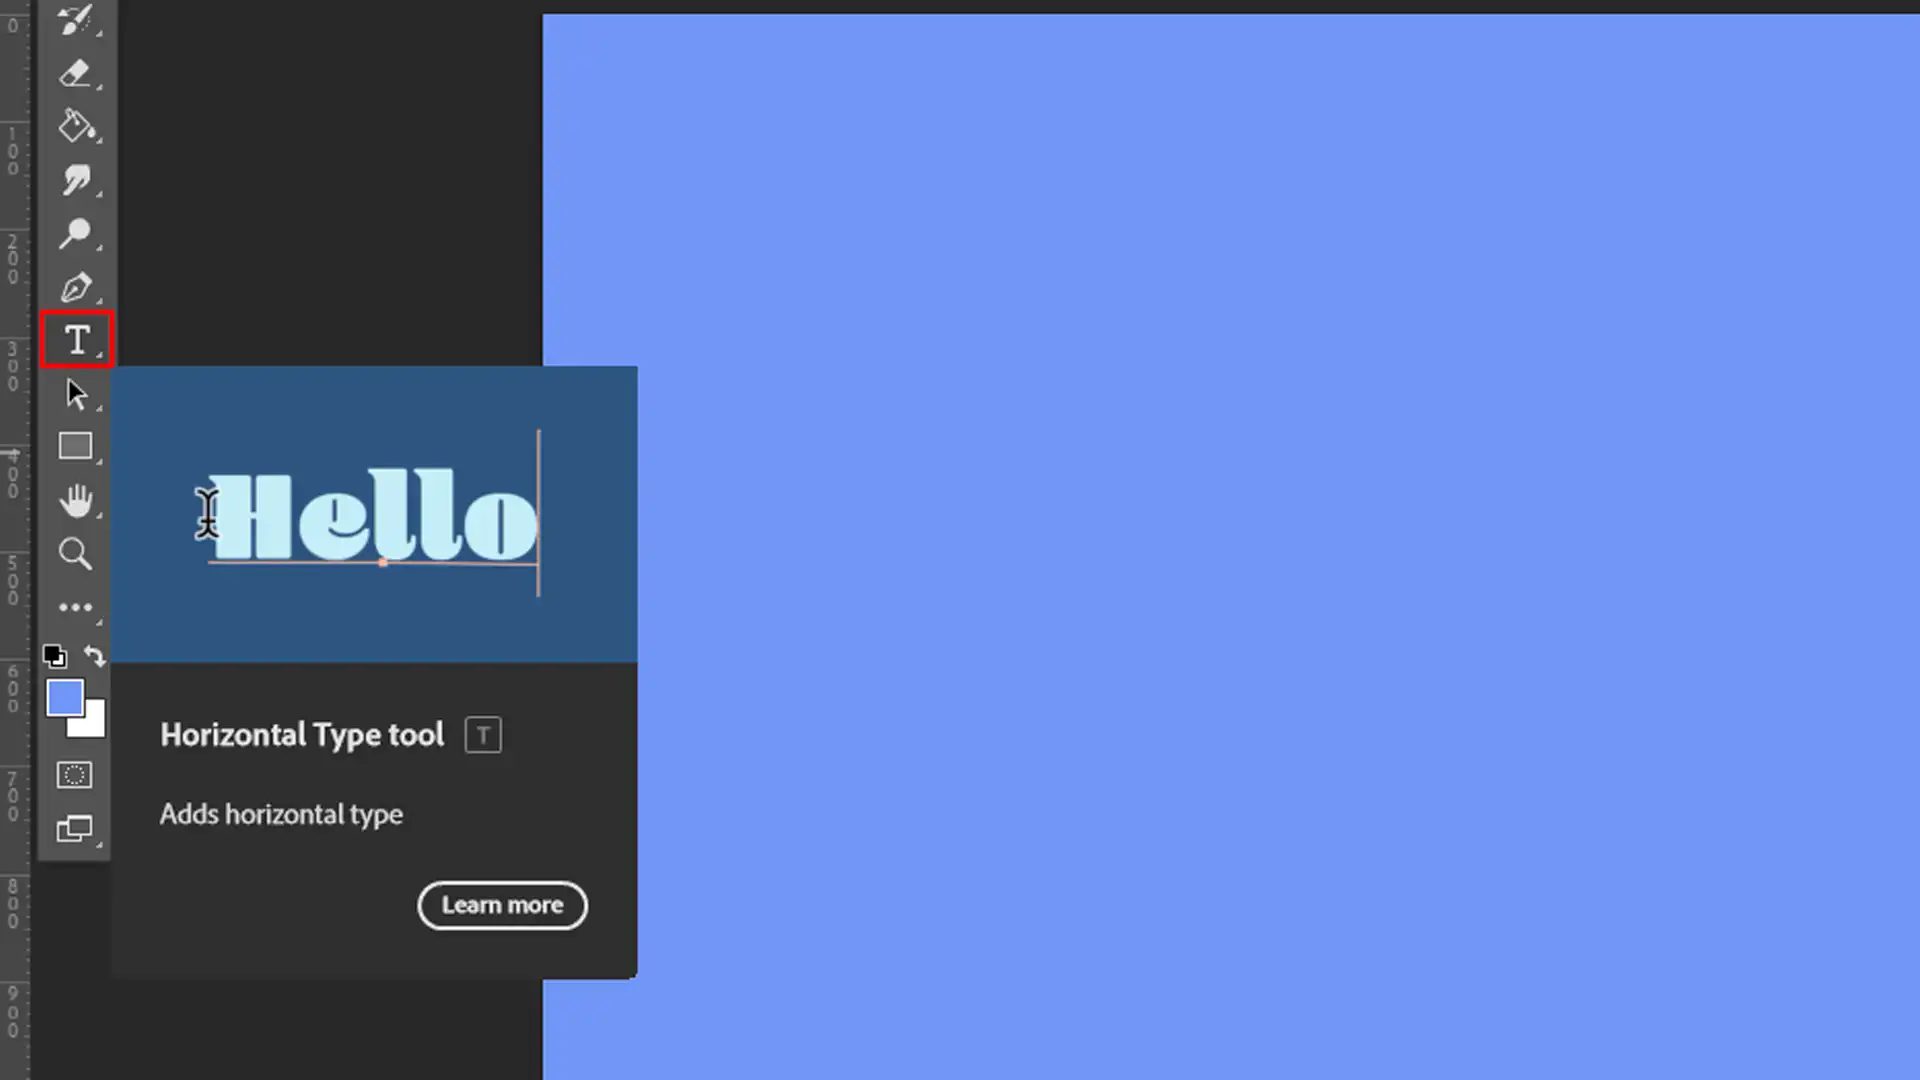
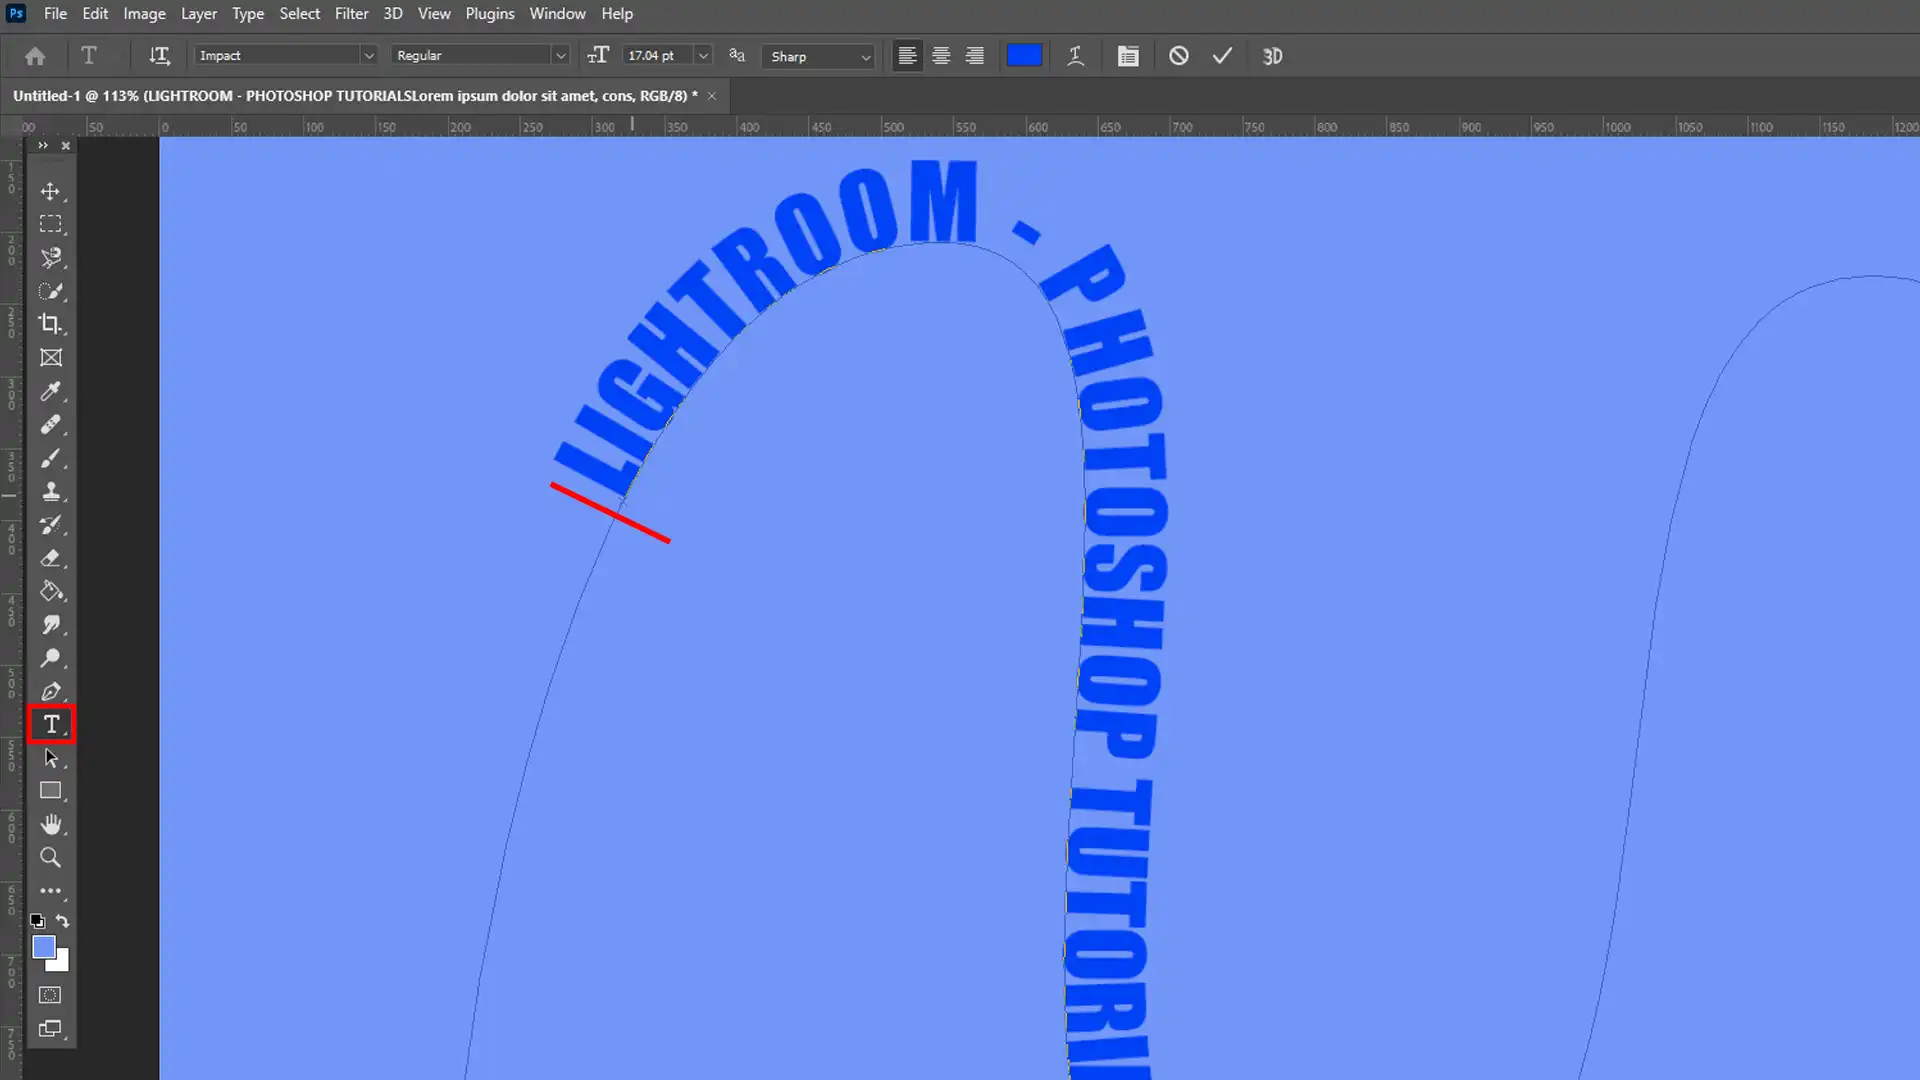
Locating the Text Tool
Finding the Type Tool in Photoshop is straightforward. Simply look for the T icon on the left-hand side of your screen, within the Tools panel.
This is your gateway to adding text. Click it once with your mouse button to activate.
Basic Text Tool Features
When you select the feature, you can add text anywhere on your document. Just click on the desired location. After clicking, start typing your text directly.
The Text Tool features an Options Bar that appears at the top, allowing you to change the text size, typeface, and color. These capabilities make basic text additions simple and effective.
Before diving into each feature in detail, here’s a concise overview of the important aspects and techniques for working with text and paths in Photoshop:
Aspect
Overview
Enhanced Features: Working Along a Path
Create text along a path for more flexibility and creativity. Draw a path using the Pen Tool or a shape tool, then click on the path with the Text Tool to type along it and create unique text shapes.
Adjusting Text Positions
Fine-tune text placement along a path using the Direct Selection Tool. Click and drag the text to adjust its position, or tweak the baseline shift in the Options Bar for precise control.
Organizing Layers
Manage text effectively by organizing layers. Group layers to streamline your workflow and ensure easy edits. Always keep the type layer active before making changes.
Create Circular Text
Use the Ellipse Tool while holding the Shift key to draw a perfect circle. Switch to the Horizontal Type Tool and click on the circle’s edge to start typing, ideal for curved or rounded text designs.
Text Features: Working Along a Path
Creating text along a path offers more flexibility and creativity. First, draw a path using the Drawing Pen or draw a circle with the Ellipse Tool.
After drawing the path, return to the Text Tool and click on the path. This allows you to type along the path to create unique text shapes.
Adjusting Text Positions
Fine-tuning the text position requires the Direct Selection Tool. After selecting this feature, click and drag the text to adjust its placement along the path.
You can also tweak the baseline shift in the OptionsBar for precise positioning.
Create Circular Text
For a circular text effect, use the ellipse tool to draw a circle while holding the Shift key for a perfect shape.
Then, switch to the Horizontal Type Tool and click on the circle’s edge where you want the text to start. This method is especially useful for designs requiring curved or rounded text.
Pro Tip: To reverse the text direction, double-click on the text within the path and drag the cursor inside the small circle handle at the top of your screen. It’s a quick trick to achieve a reversed text path.
Additionally, if you want to focus on a specific area of your design, consider using circle cropping in Photoshop before adding text along the path. This technique allows you to highlight important elements and can make your text-on-a-path effect even more impactful.
Utilize Photoshop shortcuts to speed up your workflow. For instance, pressing “T” on your keyboard will quickly activate the Type Tool.
Additionally, mastering essential tools in Photoshop, such as the Move Tool (V) and the Direct Selection Tool (A), can significantly enhance your editing efficiency.
Creating a Path for Text in Photoshop
To utilize the type on a path Photoshop feature, you’ll first need to create a path for your text to follow.
This allows you to curve and shape your text along lines and designs, adding a creative touch to your work.
Using the Path Selection Tool
To begin, you need to know about the path selection tool. This feature helps you select and move your drawn paths. First, look for the black arrow icon in the Tools panel.
Click it, and you will be ready to go. It’s important to manipulate the path correctly if you want your text to follow its pivot. Just drag the feature around the points or along the path.
You can also use the Direct Selection Tool, which is the white arrow icon.
The difference? The Path Selection feature moves the entire path, while the Direct Selection Tool can fine-tune each point.
Drawing Paths with the Ellipse Tool
Creating a circular path is simple with the Ellipse Tool. Start by selecting the Ellipse Feature from the Tools panel. Then, click and drag on your document to draw a circle. If you want a perfect circle, hold down Shift while dragging.
To add text along the path, hover over the circle’s edge until the cursor changes to a text icon. Click to start typing. Formatting text along the path in Photoshop is flexible; adjust font, size, and color per your preference.
Paths are versatile. For instance, you can create a path in Photoshop using just about any shape. Be it a flower, star, circle, or abstract line, as long as you outline it, you can add text along it.
Pro Tip: Remember that layers matter. Keep your text layer above the shape layer for visibility. Use the Alt key to duplicate paths efficiently in a single document.
In this guide, I will show you how to type on a pathin Photoshop. Trust me, it’s simpler than it sounds.
Whether you’re a beginner with Photoshop or looking to level up your skills, this tutorial will help you create amazing text effects.
So let’s get started!
Step-by-Step Guide
To create text that follows a path in Photoshop, follow these simple steps:
Open Your Image: First, open your image in Photoshop.
Select the Ellipse Tool: Choose the Ellipse feature from the toolbar. Holding down Shift, click and drag to create a perfectly circular path.
Access the Text Tool: Select the Text feature. Move your cursor along the edge of the circle until it changes to a text icon.
Type on the Path: Click on the path to start typing. Your text will follow the shape of your circular path.
Adjust Your Text: You can change the font, size, and color of the text by highlighting it and using the options in the top menu. Make sure it stands out against the background layer.
Fine-tune the Path: Use the Path Selection Tool to move the entire path or the Direct Selection Tool to adjust individual points, ensuring your text aligns correctly.
Unlock the full potential of your designs with flame text in Photoshop, a key part of the advancedtechniquesforcreatingtextinPhotoshop.
Discover how to blend these methods seamlessly for stunning results.
Tips for Better Results
To enhance your results when typing on a path in Photoshop, keep these practical tips in mind:
Keep Text Layer Above Other Layers: Ensure your text layer stays above any other shape or image layers in the layer panel. This maintains visibility.
Duplicate Paths for Consistency: Hold down the Alt key (Option key on Mac) to duplicate paths. This maintains uniformity across multiple shapes or images.
Experiment with Different Shapes: Don’t limit yourself to circular paths. Use vector shapes to create diverse designs. The Ellipse, Rectangle, and Custom Shape Tools offer endless possibilities.
Combine Path Techniques: Blend text along a path with other Photoshop functions, like Content-Aware Fill in Photoshop. This enhances the complexity and appeal of your designs.
Work Non-Destructively: Always keep your original image as a background layer. This allows for easy adjustments and revisions without affecting the main content.
Pro Tip: When working on a circular path, zoom in to ensure your text is positioned perfectly. This careful attention to detail can make your text pop and look professional.
For even more creative control, consider exploring masking techniques. Referring to a Photoshop masking guide can help you learn how to use layer masks to blend your text seamlessly with images or backgrounds.
Frequently Asked Questions
How do I add text on a path in Photoshop?
Select the Pen Tool or any Shape Tool from the Tools panel.
Draw the path where you want your text to follow.
Choose the Type Tool, then click on the path to start typing your text.
Your text will now follow the contour of the path you've created.
Why can't I type on a path in Photoshop?
Ensure you are using the correct Type Tool specific for paths, not the regular Type Tool.
Check if the path is visible and not on a hidden layer.
Make sure that you have selected the path itself. If not, the text will not align to it.
How do you put a type on a path Photoshop?
Create or select a path using the Pen Tool or any Shape Tool.
Switch to the Type Tool and move the cursor to the path until it changes to a Type-on-a-Path cursor.
Click on the path and start typing; your text will align to the path.
What does type on a Path Photoshop feature do?
This feature allows you to type text along a predefined path, giving text a curved or angular shape.
It's perfect for creating artistic effects with text in graphic designs.
The text can follow any complex path, offering creative control over the text layout.
Mastering the type on a path Photoshop technique has really changed the way I approach my designs. It lets me easily add text along any shape or line, adding a creative twist to my projects.
I’ve used this technique often, and it always helps make my work more interesting and unique.
If you want to learn more and improve your Photoshop skills, I highly recommend the Photoshop Course. It includes all the important tools and tips that have been very helpful to me.
For those interested in enhancing their photo editing skills, the Lightroom Course is also a fantastic resource. It has given me new ways to edit photos with ease and creativity.
If you’re looking to get Photoshop or Lightroom, you can explore more about Adobe Photosho or learn about Adobe Lightroom.
These tools have greatly helped my design process, and I’m sure they can help you, too!
If this article has helped you, then Like and Share it with your friends
$2,061.00Original price was: $2,061.00.$1,061.00Current price is: $1,061.00. 27584
Download Your Free Guide Now!
Discover the secrets of photography with our printable guide! Master essential techniques like aperture, shutter speed, and ISO to create stunning images. Get your free printable PDF now and start turning your snapshots into masterpieces!