How to Use Perspective Warp in Photoshop for Image Adjustments
How to Use Perspective Warp in Photoshop for Image Adjustments
Ever wondered how to use perspective warp in Photoshop to transform your images? You’re in the right place! Imagine having the power to adjust and manipulate the perspective of your photos, making them look more dynamic and polished.
This tool is a game-changer for photographers and graphic designers alike. Whether you’re a seasoned pro or just starting out, learning how to master this feature can elevate your creative projects to new heights.
Dive into this guide to discover simple steps and tips that will help you harness the full potential of perspective warp. Ready to transform your images and unleash your creativity? Let’s get started!
Table of Contents
What is Perspective Warp?
Perspective warp adjusts the angle or viewpoint of an image. It’s a tool in Adobe Photoshop used for correcting plant views, street scenes, or any element that seems awkwardly angled. The ultimate goal is to bring realism and symmetry to an image.
How to Use Perspective Warp in Photoshop
We can modify images using several techniques. Yet, the perspective warp tool simplifies this task significantly by allowing precise control over angles and lines.
Step-by-Step Guide to Perspective Warp Tool
Here’s how to effectively use the perspective warp tool for the best results.
Select Layer: We first choose the appropriate layers panel.
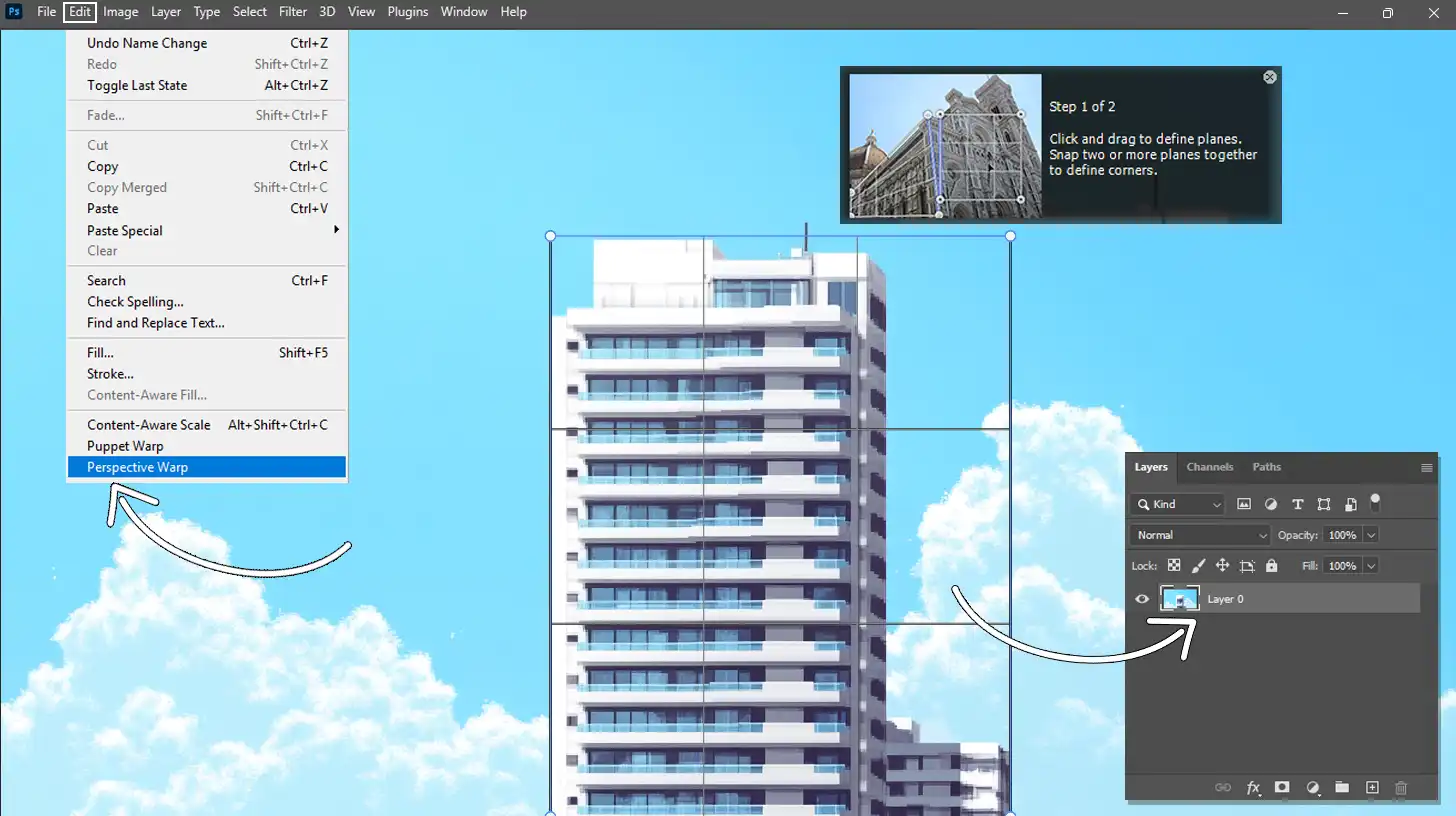
Choose Perspective Warp: Navigate to the edit perspective warp option.
Draw Quads: Click and drag to create the four-sided shapes around the areas you want to adjust.
Adjust Corners: Move the corners to align with the vertical lines and horizontal lines of your subject.
Setting Up the Warp Mode
Follow these steps to transition smoothly from layout to warp mode and maintain precise alignment during your adjustments.
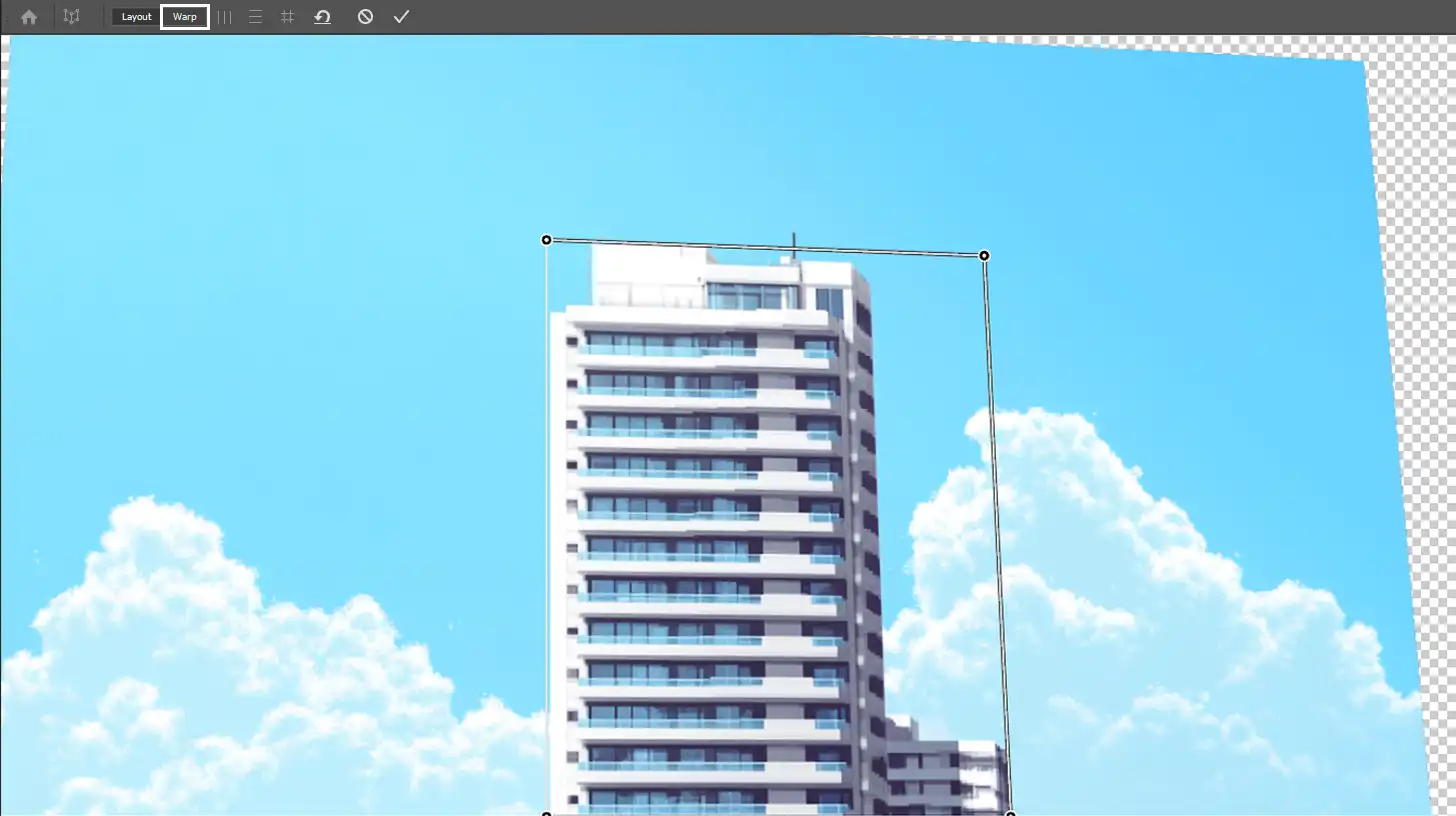
Switch Modes: Once the layout mode aligns perfectly, click the options bar to switch to warp mode.
Straighten Lines: Hold the shift key to ensure straight lines remain during this transformation.
Adjusting Vertical Lines
In warp mode, we can manage how these lines are restructured. Correct lines suggest architectural accuracy. Utilize warp mode to precisely calibrate these lines. This ensures buildings don’t look like they’re falling or leaning unintentionally.
Refining Your Image
Follow these steps to ensure full control and flexibility while making final adjustments.
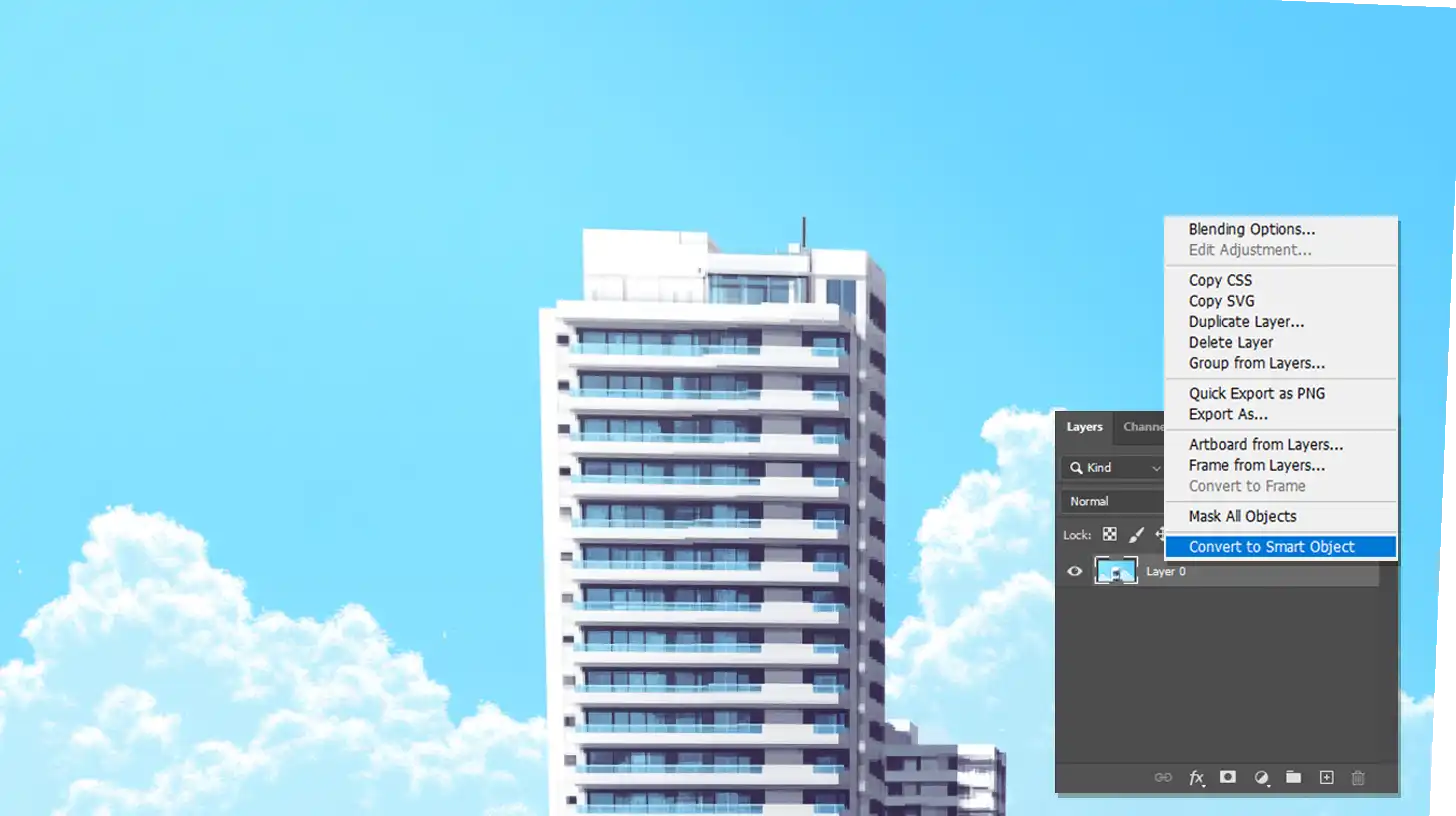
Create Smart Object
Transform your layer into a smart object for better control.
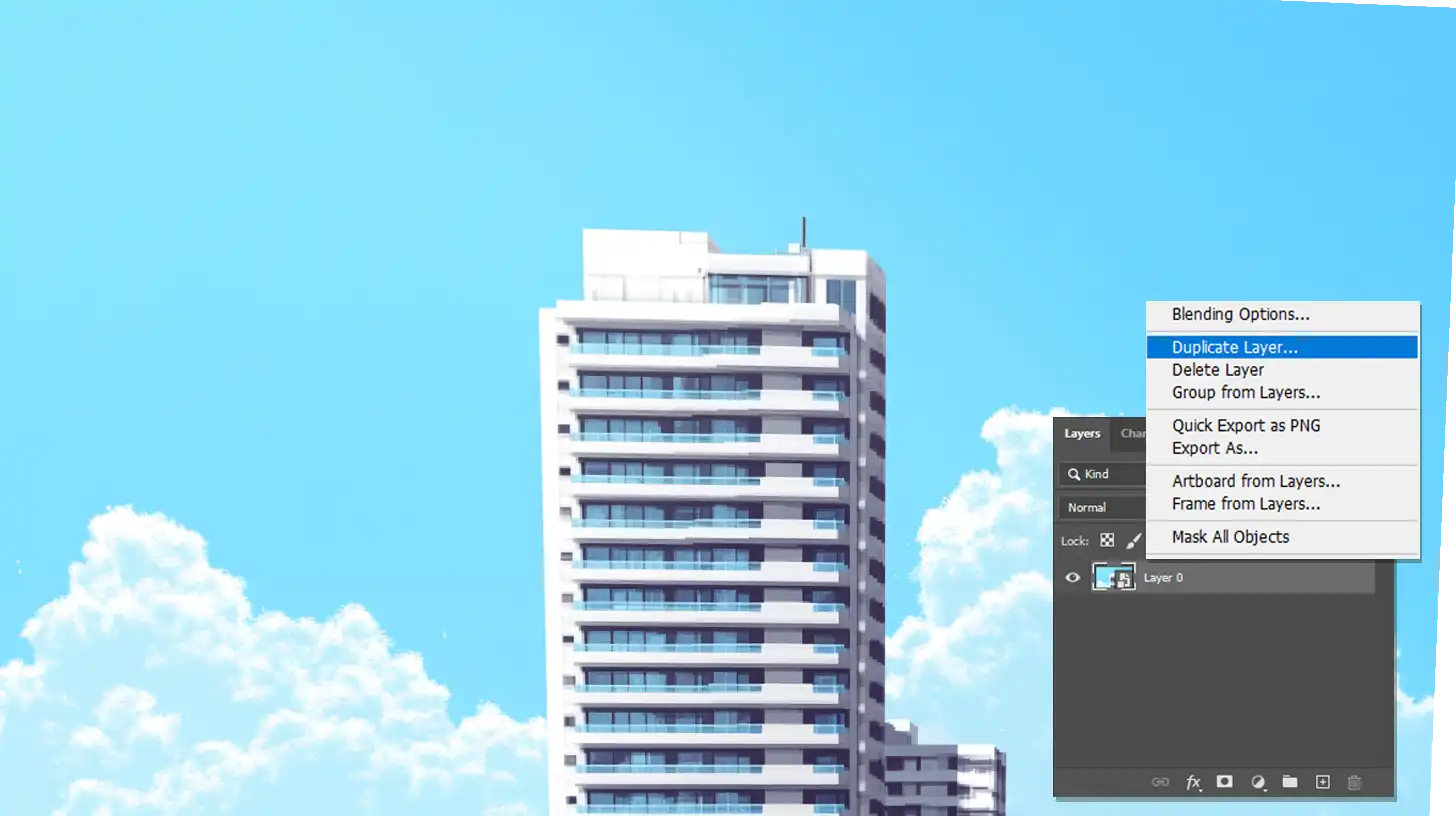
Review Changes
Always back up your changes by creating a duplicate layer.
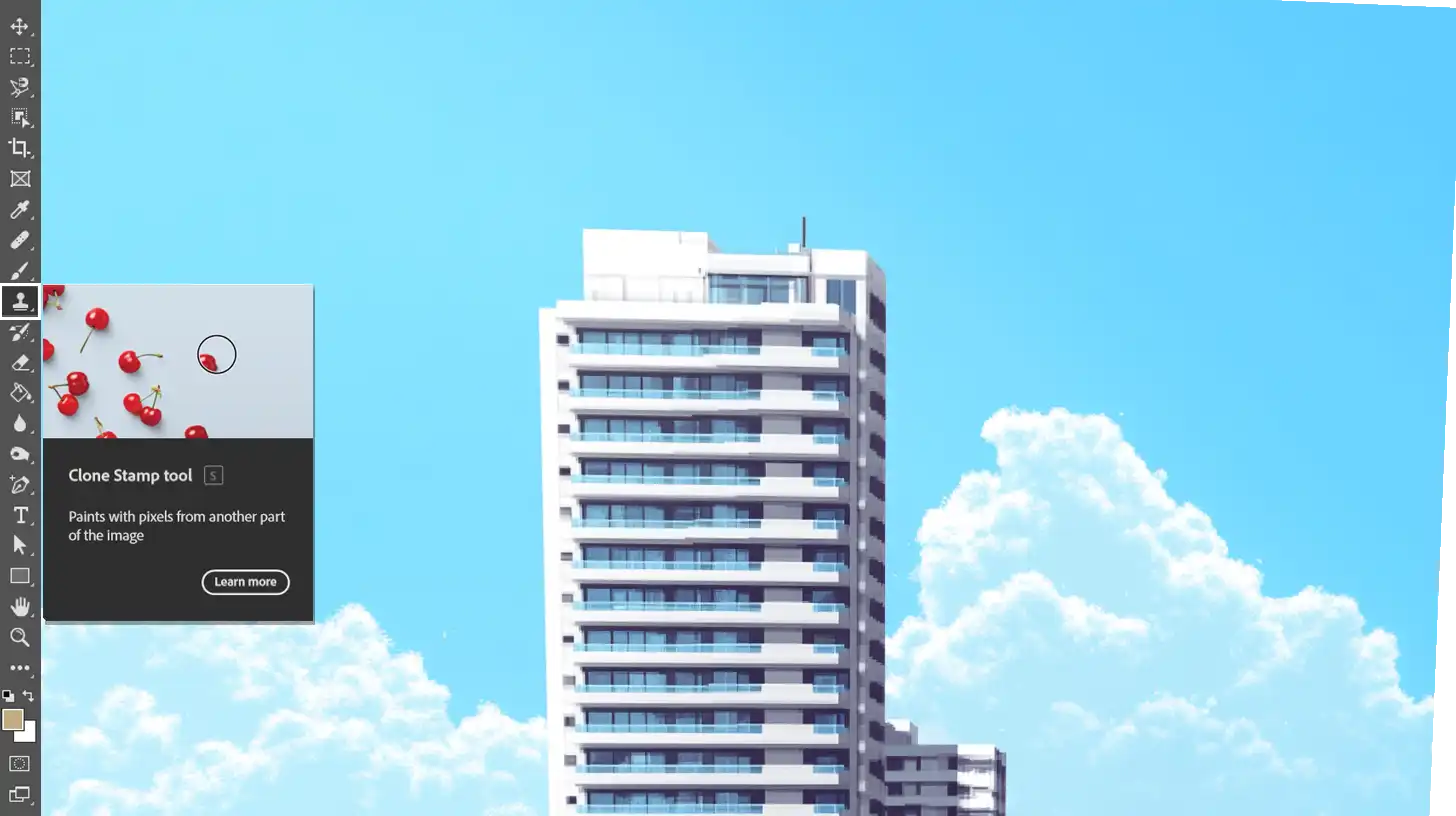
Final Tweaks
To refine, use the crop tool for unwanted areas or the clone stamp tool for anomalies.
Pro Tip: Always save your work as a new file. This keeps your original image intact.
If you’re looking to explore more about photo editing, consider learning aboutPhotoshop shortcuts to speed up your workflow.
Advanced Techniques with Perspective Warp
Let’s explore some advanced techniques together. Don’t worry, I’ll guide you through each step. Take a moment to get comfortable, and let’s focus on refining your images with a fresh perspective.
The table below outlines fundamental aspects of using perspective warp, from correcting architectural distortions to troubleshooting common issues, giving you a clearer path toward mastering this powerful tool.
Aspect
Overview
Using Perspective Warp for Architecture
Fix leaning buildings and adjust their angles for symmetry and realism using perspective warp.
Creative Applications for Landscapes
Modify horizon lines to create varied perspectives, giving the illusion of height or depth.
Troubleshooting Performance Issues
Check graphics processor settings if the tool is running slowly or adjust preferences for smooth operation.
Refining with Straight Lines
Use Shift and drag corners to straighten lines and align structures properly within the frame.
Layer Management Tips
Add new layers or layer masks to keep elements separate and organized for better control.
Fine-Tuning Distorted Images
Use layout mode to wrap shapes accurately before switching to warp for smooth adjustments.
Aligning Objects with Shift-Click
Ensure precision by using the Shift key to click and align objects during perspective edits.
Creative Uses for Perspective Warp
The perspective warp tool in Adobe Photoshop is a powerful feature. It’s useful not only for fixing buildings but also for creating imaginative landscapes or adding movement to structures in photos.
The ability to change perspective unlocks endless creative possibilities.
This brings a visual impact that can engage any audience. By adjusting the vanishing point along the horizon line, you can create landscapes with varying altitudes, offering perspectives that feel either expansive or cozy.
Troubleshooting Common Issues
If something doesn’t look quite right, no need to worry. Let’s approach these issues calmly and work through them together.
If perspective distortion occurs, remember to use graphics processor settings. If your tool is running slowly, it might be a graphics processor issue. Try adjusting the settings in preferences, and that should fix it!
Having trouble with a tricky perspective correction? Keep an eye out for those straight lines that don’t look quite right. Go easy on things by holding Shift and dragging corners to reposition. Use layout mode to cleverly wrap the shapes before moving on to warp. Always check your alignment; crooked buildings usually don't match the look you're going for!
Here’s a common issue: a background layer causing complications. Add a new layer or layer mask to separate your elements for easier control. A useful tip is to use a pop-up window to help keep your layer organization clear and efficient.
Lastly, remember when nothing seems to click? Choose warp, re-layer, or flick through the options bar. Simple tweaks can make your entire image work stunningly.
Pro tip: Align objects perfectly with a Shift-click on each one. And if you’re working with text, don’t forget to explore how to warp text in Photoshop and warp image like a pro to bring even more creative effects into your designs.
Practical Applications of Perspective Warp
Using perspective warp is like having a magic wand in Photoshop. It transforms the way we view images and opens doors to creativity. Let’s dive in and see how this tool can reshape your photo editing practices.
Enhancing Architectural Photography
Architectural photography often requires precise adjustments. With perspective warp, buildings no longer lean awkwardly.
Use perspective warp in your edits and bring a balanced harmony to structures. Focus on the angle and align the main elements effortlessly.
Rectify any unwanted perspective distortion. Look for the vanishing point, center it, and edit until satisfied.
Activating the perspective warp tool is a simple task:
Select your buildings' edges, turning mishaps into masterpieces.
Check this step with the shift click. A handy click system provides flawless alignment.
Want to remove the leaning tower effect? Rely on the graphics processor in Photoshop. With stable hardware performance, get error-free results.
Using perspective warp can trulyelevate your photography, helping you achieve precise and visually compelling edits.
Correcting Lens Distortion
Ever encountered images with disruptive curves or bulges? This occurs from lens distortion, and perspective warp is here to help. Just adjust the image and bend the angle back to reality.
For those using Lightroom, learning how to use lens correction can further enhance your editing process.
Steps to correct lens distortion:
Align the photo chips with a quick synch using a swift shift-click strategy.
Adjust the background layer when reorienting to stay smooth.
Finally, set vanishing points for perfect perpendicularity. You achieve a more natural look, free of belly bumps or rabbit holes.
Pro Tip: If ever in doubt, always shift-click to save your last changes. It’s a lifeline that guides you back to safety!
Mastering perspective warp takes practice, but a few helpful tips can make the process smoother. Let’s look at some ways to get the most out of this tool for precise edits and creative results.
Best Practices for Using Perspective Warp
First off, remember that practice makes perfect. Start with simple images before tackling complex ones.
Begin with clean, high-resolution images to achieve better results. Blurry images make it difficult to adjust the perspective accurately.
Define planes clearly using the four-sided shapes in the perspective warp tool. This is the foundation for natural adjustments.
Utilize shift-click. It locks your lines, ensuring a straight horizon or vertical line, which is important for maintaining realism.
Common Mistakes to Avoid
Mistakes happen to everyone, but here’s how to avoid some common ones. One of the biggest issues is rushing through the process. Always take your time.
Avoid neglecting the importance of shift-click. This mistake distorts your images and creates unintentional curves.
Over-correction is another trap. Keep changes subtle and ensure they enhance, not overpower the original image.
Don’t forget to save often.
Pro Tip: For those who want to delve deeper into photo editing, understanding thedifference between Photoshop and Lightroom can be beneficial, as each offers unique tools for enhancing your images.
Also, consider exploringdifferent types of photography to expand your creative horizons and apply perspective warp in diverse contexts.
Frequently Asked Questions
How do you do perspective warp in Photoshop?
Open the image you want to edit in Photoshop.
Go to the Edit menu and select Perspective Warp.
Click on the corners of the grid that appear and drag to adjust the perspective.
Press Enter or click on the checkmark to apply the changes.
How to use the warp tool in Photoshop?
Select the layer or area you want to warp.
From the Edit menu, choose Transform and then Warp.
Drag the control points, lines, or areas within the grid to bend and twist the image.
Hit Enter or the checkmark to commit the transformation.
Why can't I use perspective warp?
Ensure your image is in a layer, not a background. Double-click the background layer to convert it to a layer.
Perspective Warp does not work on Smart Objects or vector layers. Rasterize them first.
Check if your Photoshop version supports Perspective Warp. It’s available from Photoshop CC onwards.
How to use skew in Photoshop?
Select the layer you want to skew.
Go to Edit, select Transform, and then choose Skew.
Click and drag the handles of the bounding box to skew your layer.
Press Enter or click the checkmark to apply the skew.
Using the perspective warp tool in Photoshop has been a transformative experience for me. It allows me to manipulate images in a way that enhances their depth and realism, aligning them perfectly with my creative vision.
Learning how to use perspective warp in Photoshop changed that for me. It enabled me to adjust the perspective seamlessly, making my images more professional and visually appealing.
If you’re interested in stepping up your editing skills, my Photoshop Course and Lightroom Course have been game-changers in my journey, guiding me through everything from basic editing to advanced techniques.
They’ve helped me improve the quality and precision of my work and save time in the process.
By mastering perspective warp, along with other tools, I’ve been able to streamline my workflow, make better edits, and get more out of each project.
If you’re ready to dive in, I recommend starting with Photoshop, or try Lightroom for a comprehensive editing experience.
If this article has helped you, then Like and Share it with your friends
$2,061.00Original price was: $2,061.00.$1,061.00Current price is: $1,061.00. 27583
Download Your Free Guide Now!
Discover the secrets of photography with our printable guide! Master essential techniques like aperture, shutter speed, and ISO to create stunning images. Get your free printable PDF now and start turning your snapshots into masterpieces!