How to Unmerge Layers in Photoshop: A Step-by-Step Guide
How to Unmerge Layers in Photoshop: A Step-by-Step Guide
Ever found yourself stuck wondering how to unmerge layers in Photoshop?
Trust me, you’re not alone. It’s a common challenge that can disrupt your creative flow.
Imagine you’ve just merged a few layers to tidy up your workspace but now need to tweak just one layer. Panic sets in, right?
But fear not, because I’m here to guide you through this process. By the time you finish reading, you’ll feel empowered with the knowledge to undo those pesky merges and regain control over your masterpiece.
So, are you ready to dive in and learn this important Photoshop layers trick?
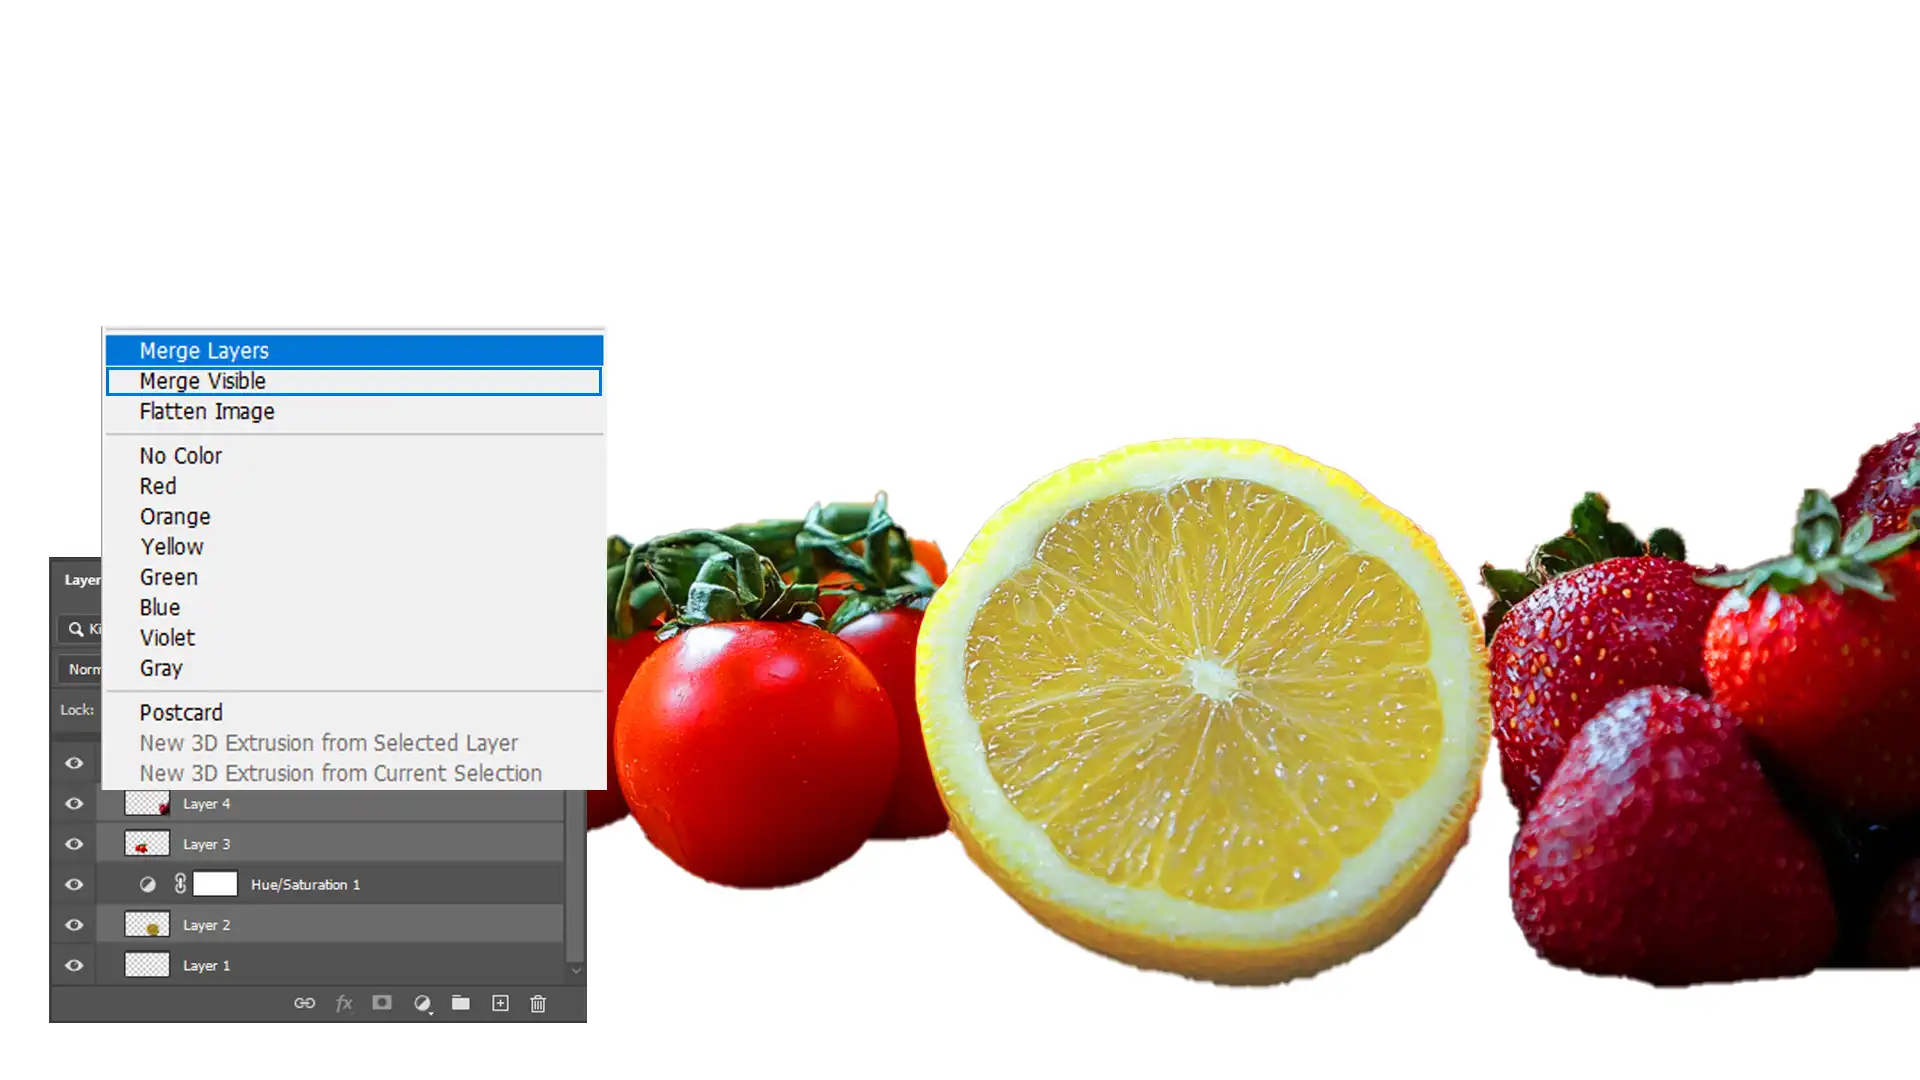
Select the layers you want to merge in the layers panel.
Right-click and choose "Merge Layers" or use the keyboard shortcut Ctrl+E.
To merge layers that are visible throughout the whole screen, select Merge Visible.
Remember, merging is permanent, so ensure you really want to merge them.
When to Merge Layers
Knowing when to merge layers in Photoshop can be beneficial in several scenarios:
It simplifies your project by reducing the number of layers.
Helps in managing limited resources by reducing file size.
Only merge layers when you're certain about the changes, as some effects can't be fixed with the undo command.
Having a single layer can keep your workspace organized.
Pros and Cons of Merging Layers
Consider the following pros and cons before merging layers:
Pros:
Reduces clutter by combining multiple layers into one.
Improves performance as there are fewer layers to process.
Cons:
Unmerging layers is only possible in the current Photoshop layers session.
Some content or effects might be lost unless saved as a smart object layer first.
Pro Tip: Save a copy of your layered PSD file before merging! This ensures you have original layers for future edits.
How to Unmerge Layers in Photoshop
Unmerging layers can seem daunting, but it doesn’t have to be. With a little patience and focus, you can easily get back to those initial layers you’ve merged.
Now, I’ll dive into the steps and tricks that can help you reverse those merges in Adobe Photoshop.
Step-by-Step Guide to Unmerging Layers
Ever imagine your excitement when merging layers for simplicity?
Now, picture the frustration if you need one layer back but it ‘fuses’ with others.
Here’s how to unmerge layers in Photoshop:
Use the History Panel: The first port of call is the history panel. It's a lifesaver for navigating back in time.
Find the Right State: Scroll until you find the moment before you merged those layers. Click on it, and voilà, you're back in business with those unmerged layers.
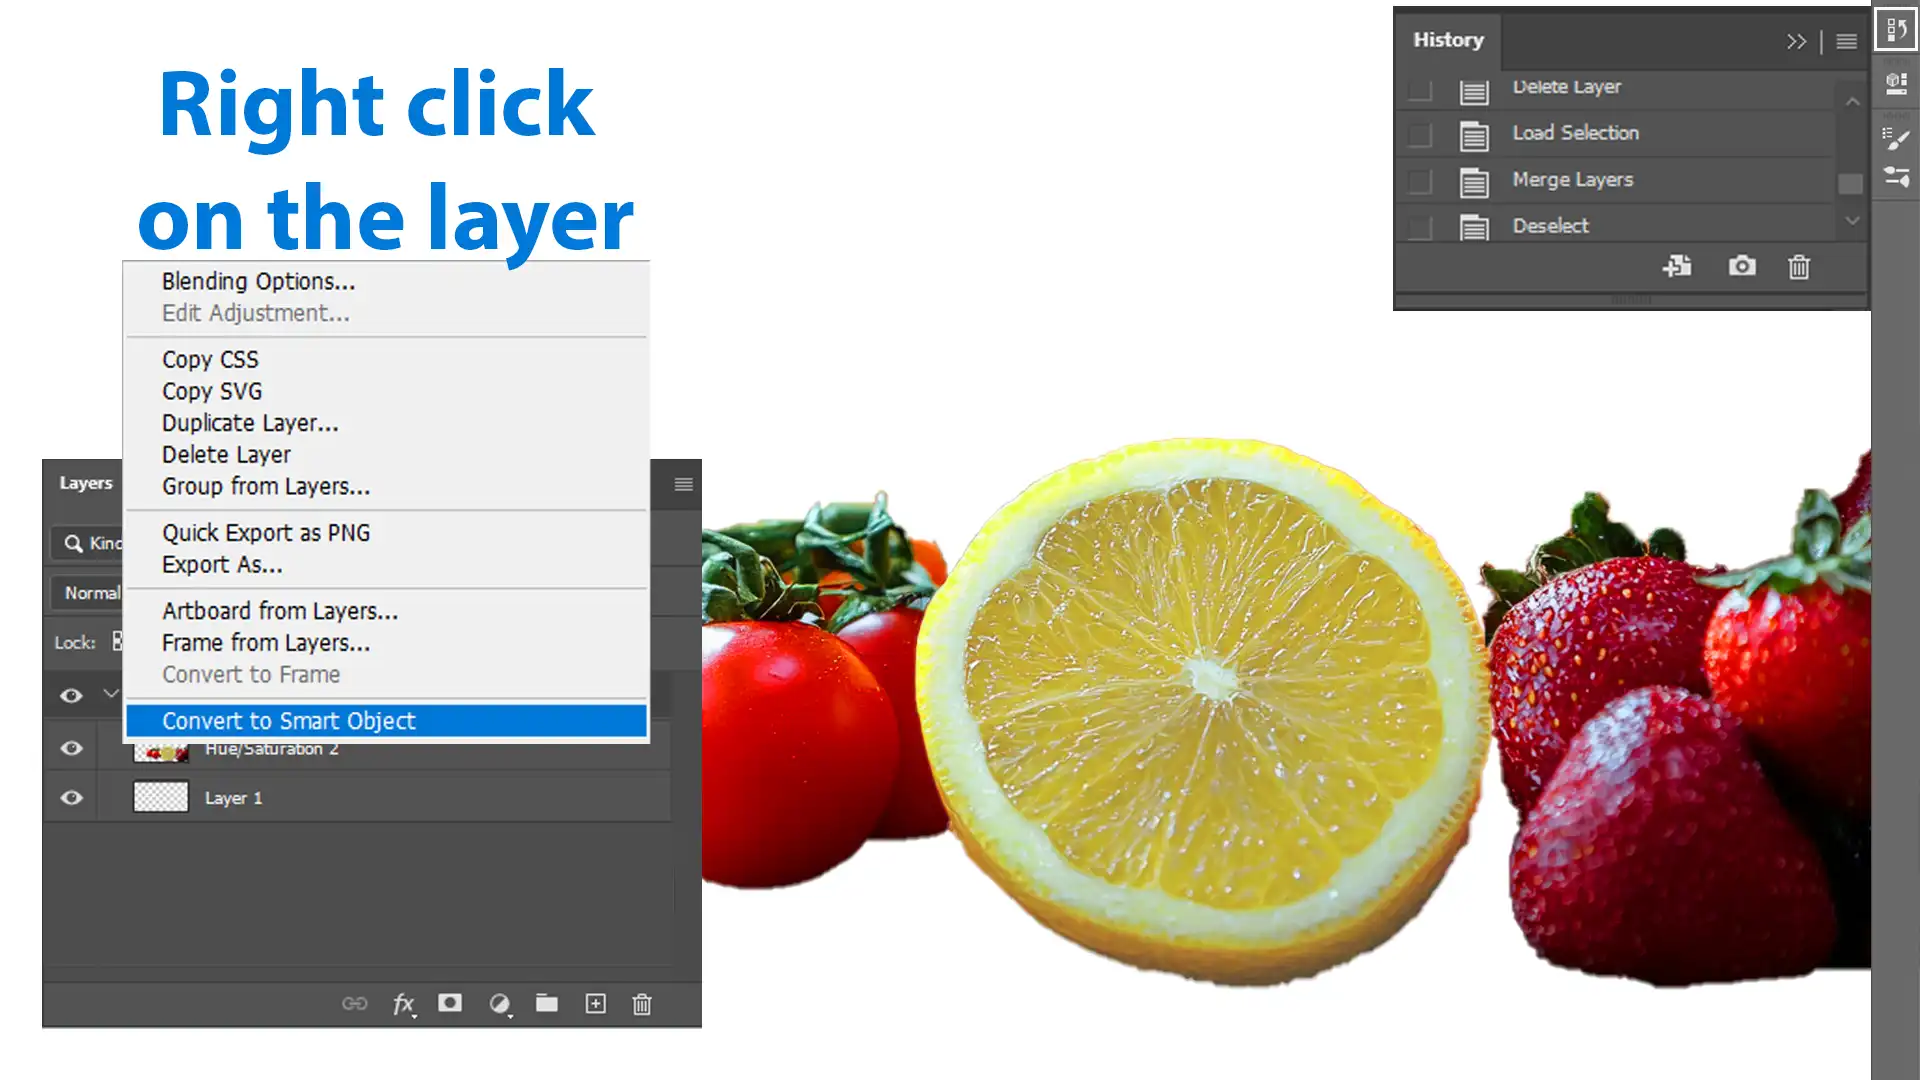
Consider Using a Smart Object: If you frequently face merging dilemmas, utilize this feature. Smart objects allow more flexibility, shielding layers from permanent merges.
Common Mistakes and How to Avoid Them
Let’s face it, we’ve all made mistakes while learning how to unmerge layers in Photoshop.
Here are a few common slip-ups and simple ways to steer clear:
Over-reliance on Merging: Always consider the why. Do you genuinely need all the layers merged, or can grouping them suffice?
Forgetting To Save: Regularly save versions of your work. This extra step can prevent potential heartaches.
Now, let’s talk about some common issues that might occur.
Dealing with Lost Layers
Losing layers is like misplacing keys. Luckily, the history panel helps recover these lost elements without much fuss.
Check the History Panel: Immediately hop into the history tab. This action often shows your last unmerged state.
Restoring Merged Layer Effects
Restoring effects post-merge feels tedious. Here’s a nugget of wisdom: Plan ahead.
Save Layer Styles: Before merging, save your layer styles separately. Doing this ensures you can reapply them quickly, should you need to unravel a merged layer.
Pro tip: Think twice before squishing those layers into a smart object. Sometimes, a smart object layer retains more flexibility than you’d expect.
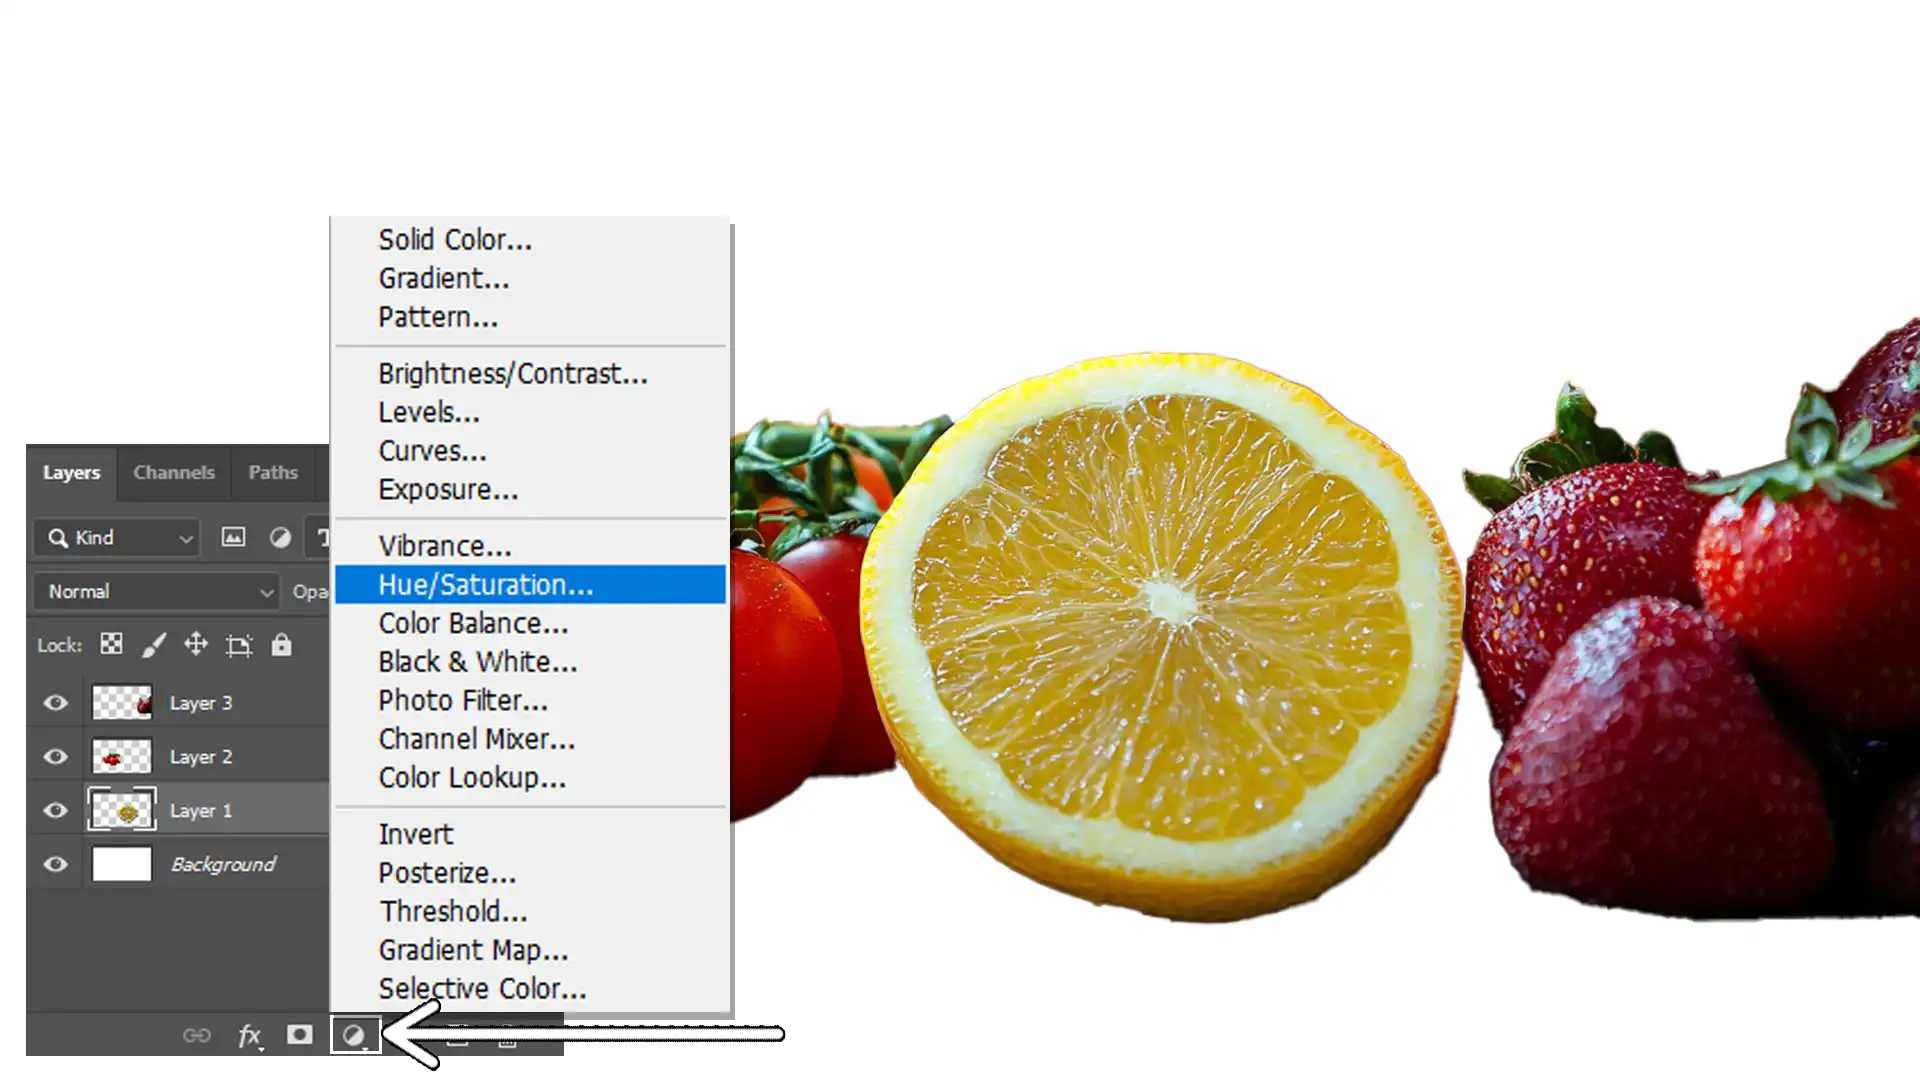
This tool lets you modify colors, make something brighter or darker, without changing the actual content of the layer. It’s like putting sunglasses on your photo–you can see the effect without changing the real thing.
Adjustment layers sit on top of all the layers and affect them as group layers. They’re flexible because you can always tweak them later.
Adjustment layers act as chefs of Photoshop, giving you the power to edit your images precisely.
Smart Objects and Linked Layers
Using a Smart Object are the superheroes of the layers panel. They protect your layer's quality even when resizing. You're free to tweak that smart object layer or switch it around without affecting the original's quality. It's like getting endless refills at your favorite diner with bonus non-spill magic.
Having Linked Layers are like having multiple scenes from one movie. Edit your smart object layer, and it automatically updates throughout the project. It's the convenience of group calls; say it once, and everyone hears it. Both tactics save you from dealing with messy edits, making design life easier.
For those looking to refine their skills further, understanding the difference between Photoshop and Lightroom can be important. While both tools offer powerful editing capabilities, they serve different purposes, with Lightroom excelling in batch processing and organization, and Photoshop providing more detailed editing options.
Pro Tip: Photoshop shortcuts, as well as Lightroom shortcuts, can significantly speed up your workflow, allowing you to navigate and edit with greater efficiency.
Practical Tips for Managing Layers Photoshop
Now, let’s hed on to some practical tips you might find useful.
Organizing Your Layers Panel
This is where the magic in Adobe Photoshop begins.
Keeping it tidy can save you hours. Pay attention to each layer thumbnail, which provides a visual representation of your layers, helping you quickly identify and select them.
The secret to starting strong is arranging your layers in a way that makes sense. To organize, simply drag the layers up and down.
Every layer has a purpose, so put the background on the bottom.
It’s always a good idea to keep all elements easily accessible and properly aligned, so when you need to use the content-aware fill in Photoshop, you won’t feel like you’re unraveling a tangled yarn ball.
Naming and Grouping Layers Photoshop
Let’s talk naming. Two layers titled “untitled-yoga-pose.png” can confuse anyone. Name each layer clearly.
Group layers to keep similar things together. The goals here are simple: easier editing, peace of mind, happy layers.
Using Layer Comps for Efficient Workflow
Okay, you’re probably wondering what’s a layer comp. In essence, it’s a snapshot of visibility, position, and appearance.
Imagine taking a picture of how everything looks now, so you can return to it later. I mean, how cool is that?
Layer comps let you preview different design versions without touching your setup. If you’re juggling between ideas or presenting options, it’s a lifesaver.
Need an efficient workflow in Adobe Photoshop? Use layer comps and keep that creativity flowing without chaos.
Pro Tip: When you rush to unmerge layers in Photoshop because of an oops moment, head straight to the history panel. It’s not just a trip back in time; it’s a know-it-all assistant ready to undo any headache.
Frequently Asked Questions (FAQs)
How do you Unmerge merged layers in Photoshop?
Open your Adobe Photoshop project.
Locate the layer that has been merged that you want to unmerge. Unfortunately, once layers are merged, they cannot be separated back into their initial layers if the project has been closed or the action history has been cleared.
If your project is still open and the merge action is still in the history panel, you can undo the merge by stepping back through the history until before the merge occurred.
Always consider duplicating layers before merging, so you maintain a copy of the original layers.
Is there a way to separate layers in Photoshop?
If the layers are still unmerged in your project, simply select and move them independently in the layers panel.
If layers have been merged, you can't separate them back into original layers unless it's still possible to undo the merge action via the history panel.
Use layer duplication to keep original layers safe before merging.
To 'unlayer' or separate merged layers, you must have the capacity to undo the merge action immediately after it happens, provided you haven't closed the project or cleared your history panel.
If the undo command is not an option, consider using selection tools to manually select and copy parts of the merged layers individually to new layers as a workaround.
How do I Unmerge a file in Photoshop?
Directly unmerging a file isn't possible if the file has been saved and closed after merging the layers.
For future edits, consider working with non-destructive techniques like using adjustment layers or a smart object to preserve the original data of your layers.
Learning how to unmerge layers in Photoshop, whether individuall or all visible layers, has been a game-changer in my design process. It has allowed me to revisit previous edits, refine my work, and maintain the flexibility needed to produce high-quality images.
Before mastering this technique, I often found myself frustrated with irreversible changes. Learning how to unmerge layers in Photoshop has given me more control and precision in my projects.
If you’re looking to enhance your editing skills, I highly recommend checking out my Photoshop course and Lightroom course. These courses provide comprehensive guidance and practical tips that will elevate your editing capabilities and streamline your workflow.
Understanding how to efficiently manage layers, including the significant ability to unmerge layers, is an important skill for any Photoshop user.
If this article has helped you, then Like and Share it with your friends
$2,061.00Original price was: $2,061.00.$1,061.00Current price is: $1,061.00. 27584
Download Your Free Guide Now!
Discover the secrets of photography with our printable guide! Master essential techniques like aperture, shutter speed, and ISO to create stunning images. Get your free printable PDF now and start turning your snapshots into masterpieces!