How to Darken an Image in Photoshop: A Simple Guide
How to Darken an Image in Photoshop: A Simple Guide
Are you struggling with how to darken an image in Photoshop?
You’re not alone!
Many people find this task a bit tricky, but with the right guidance, it’s easier than you think. In this article, I will take you through simple, step-by-step instructions that will help you achieve that perfect darkened effect.
Whether you’re working on a moody landscape or trying to add depth to a portrait, mastering this technique can make a world of difference.
Stay with me, and soon you’ll be enhancing your images like a pro.
Let’s dive in!
Table of Contents
How to Darken an Image in Photoshop
Darkening an image in Photoshop can seem daunting, but it’s really not.
It’s quite easy once you know the right tools and techniques.
Using the Burn Tool
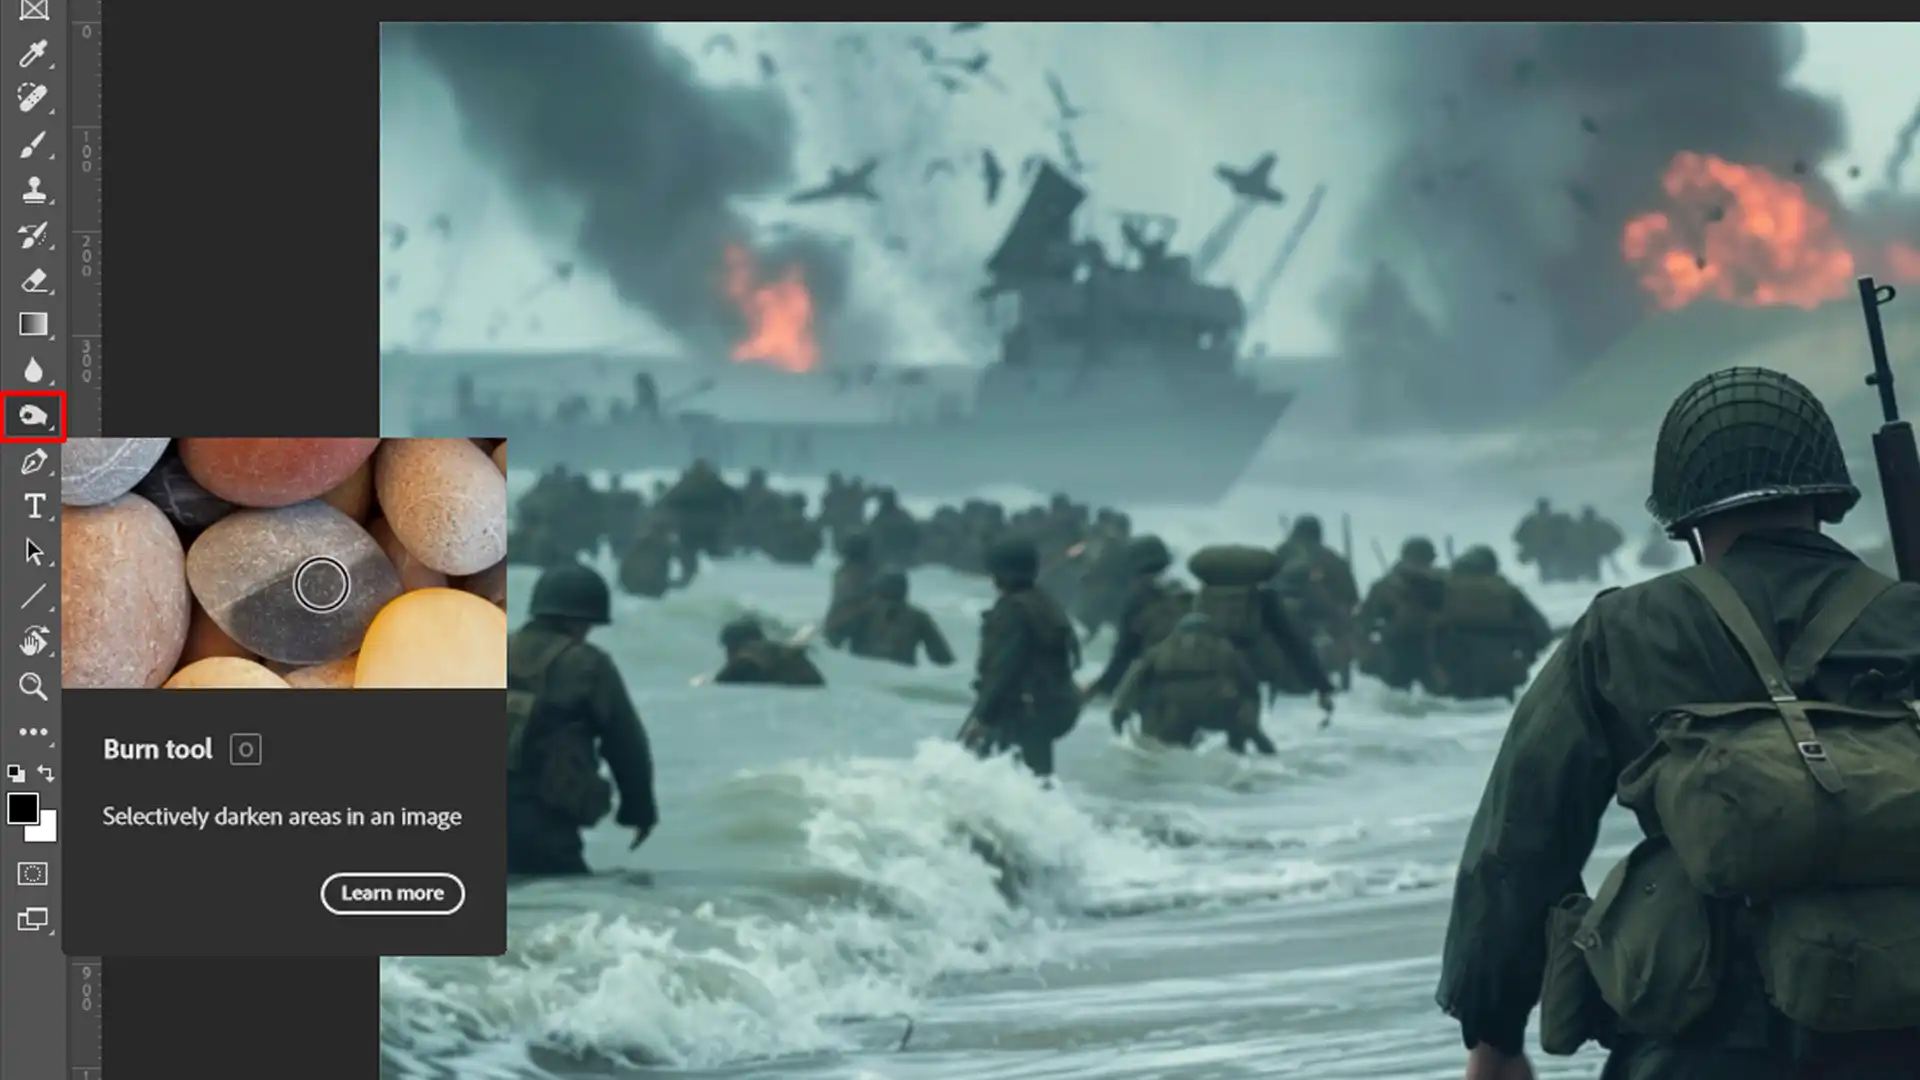
The burn tool is great for darkening specific areas of your photo without changing the whole image.
Follow these steps:
Select the burn tool from the toolbar.
Choose a brush size that suits your needs.
Gently paint over the area you want to darken.
Adjust the exposure setting to control how dark the area becomes.
Remember, it’s better to build up slowly rather than overdo it at once.
To effectively use the burn tool in Photoshop, understanding essential tools in Photoshop is important. These tools help you refine your editing techniques, making the Burn Tool more powerful.
Press Ctrl + L (Cmd + L on Mac) to quickly access the Levels adjustment.
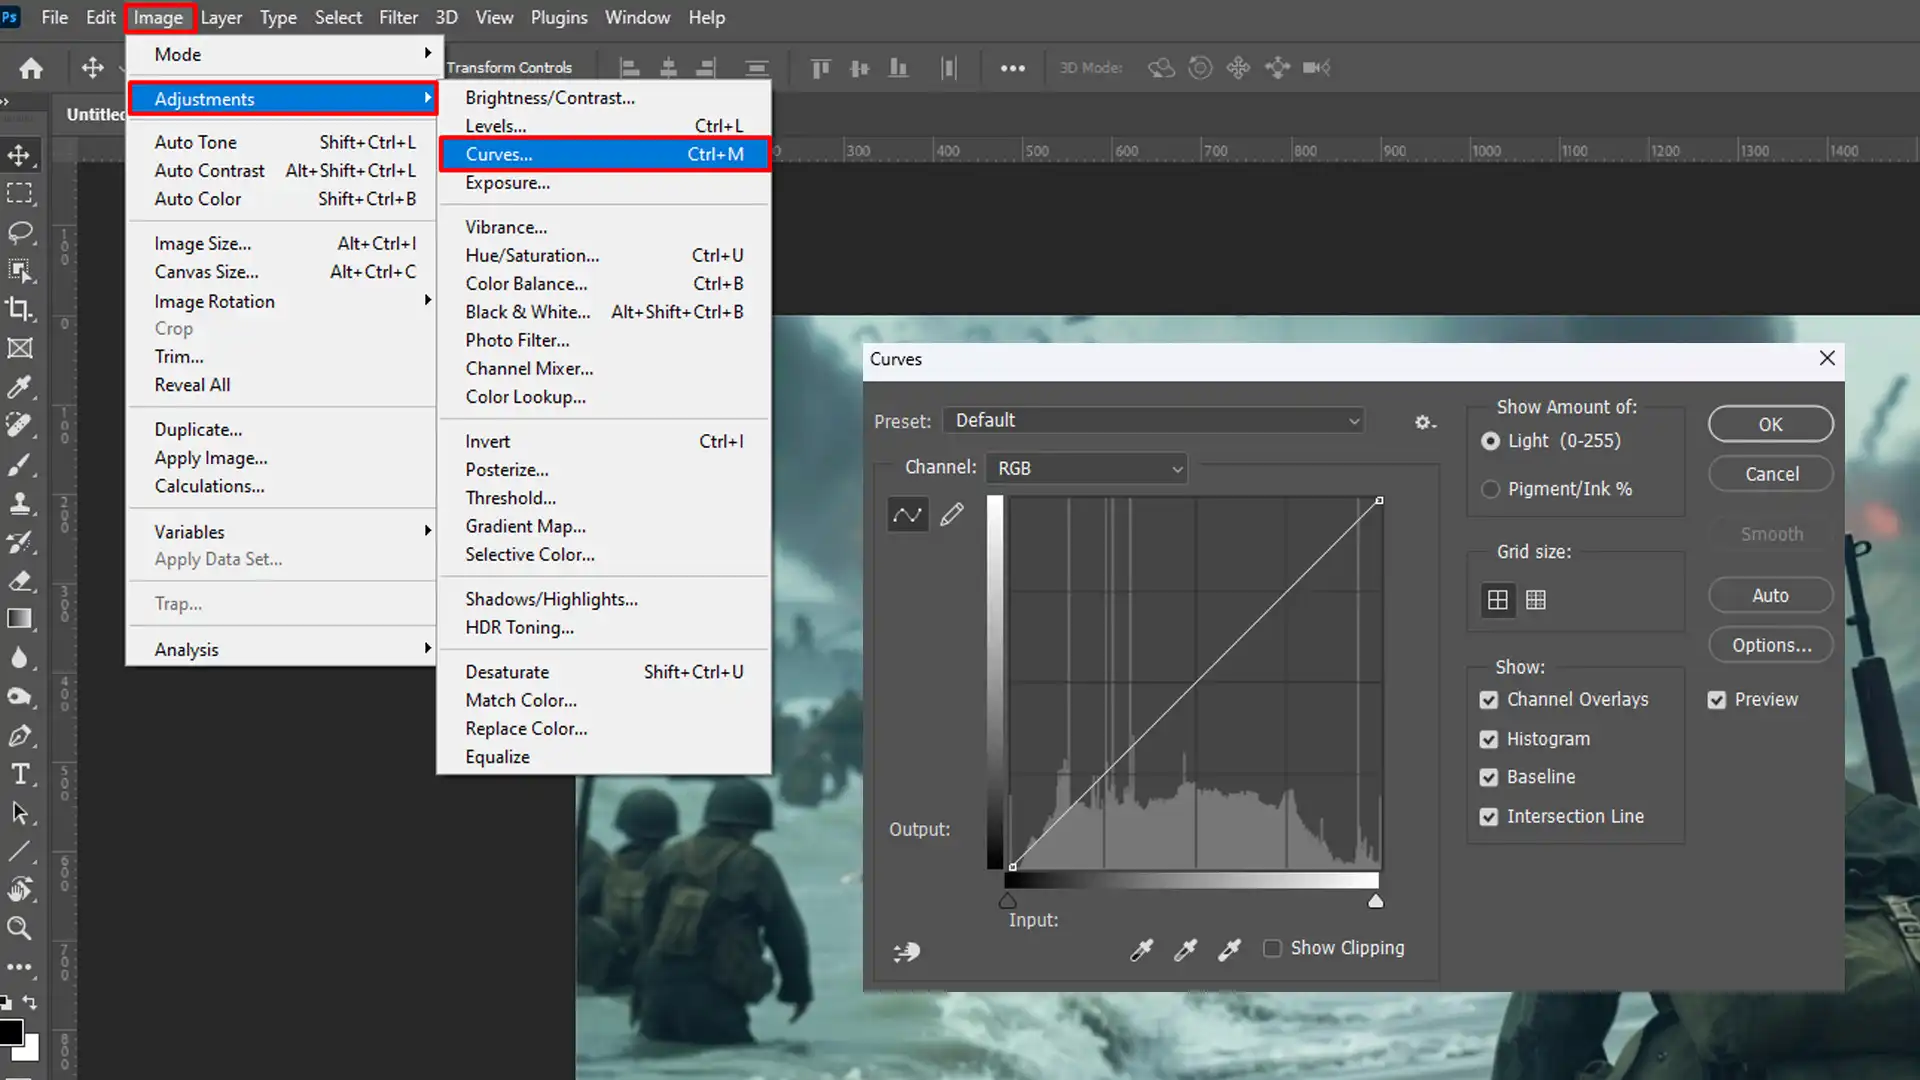
Use Ctrl + M (Cmd + M on Mac) to open the Curves adjustment dialog box.
These shortcuts can make the process of darkening an image much faster and more efficient.
Pro Tip: Always work on a duplicate layer or background copy to avoid losing your original image details.
Advanced Techniques for Darkening Images
When working to darken images in Photoshop, there are several advanced techniques you can use to achieve the desired effect.
Technique
Description
Pros
Cons
Vignette Effect
Darkens the edges of your photo, focusing attention on the center.
Adds a professional look; enhances focus.
Can make the edges too dark if overdone.
Gradient Maps
Uses gradients from dark to light shades to adjust the image darkness.
Flexible and precise; good for creative effects.
Requires some experimentation for best results.
Combination Method
Combines black layers with Burn Tool and Curves adjustment for a richer effect.
Offers comprehensive control over darkening.
Can be complex to manage multiple layers.
Each method has its own strengths and limitations, so choosing the right one depends on your specific needs and the look you want to create.
Creating a Vignette Effect
A vignette effect subtly darkens the edges of your photo, drawing focus to the center. Open your image in Photoshop and follow these steps:
Select the Ellipse Tool.
Create an oval shape over the area you want to keep bright.
Right-click and choose ‘Feather’ to soften the edges.
Go to Photo Adjustments Levels and lower the levels until you achieve the desired effect.
And just like that, your photo now has a professional-looking vignette effect.
When exploring a color filter for darken image techniques, the vignette effect stands out. This method darkens the edges, enhancing focus on the center while adding depth.
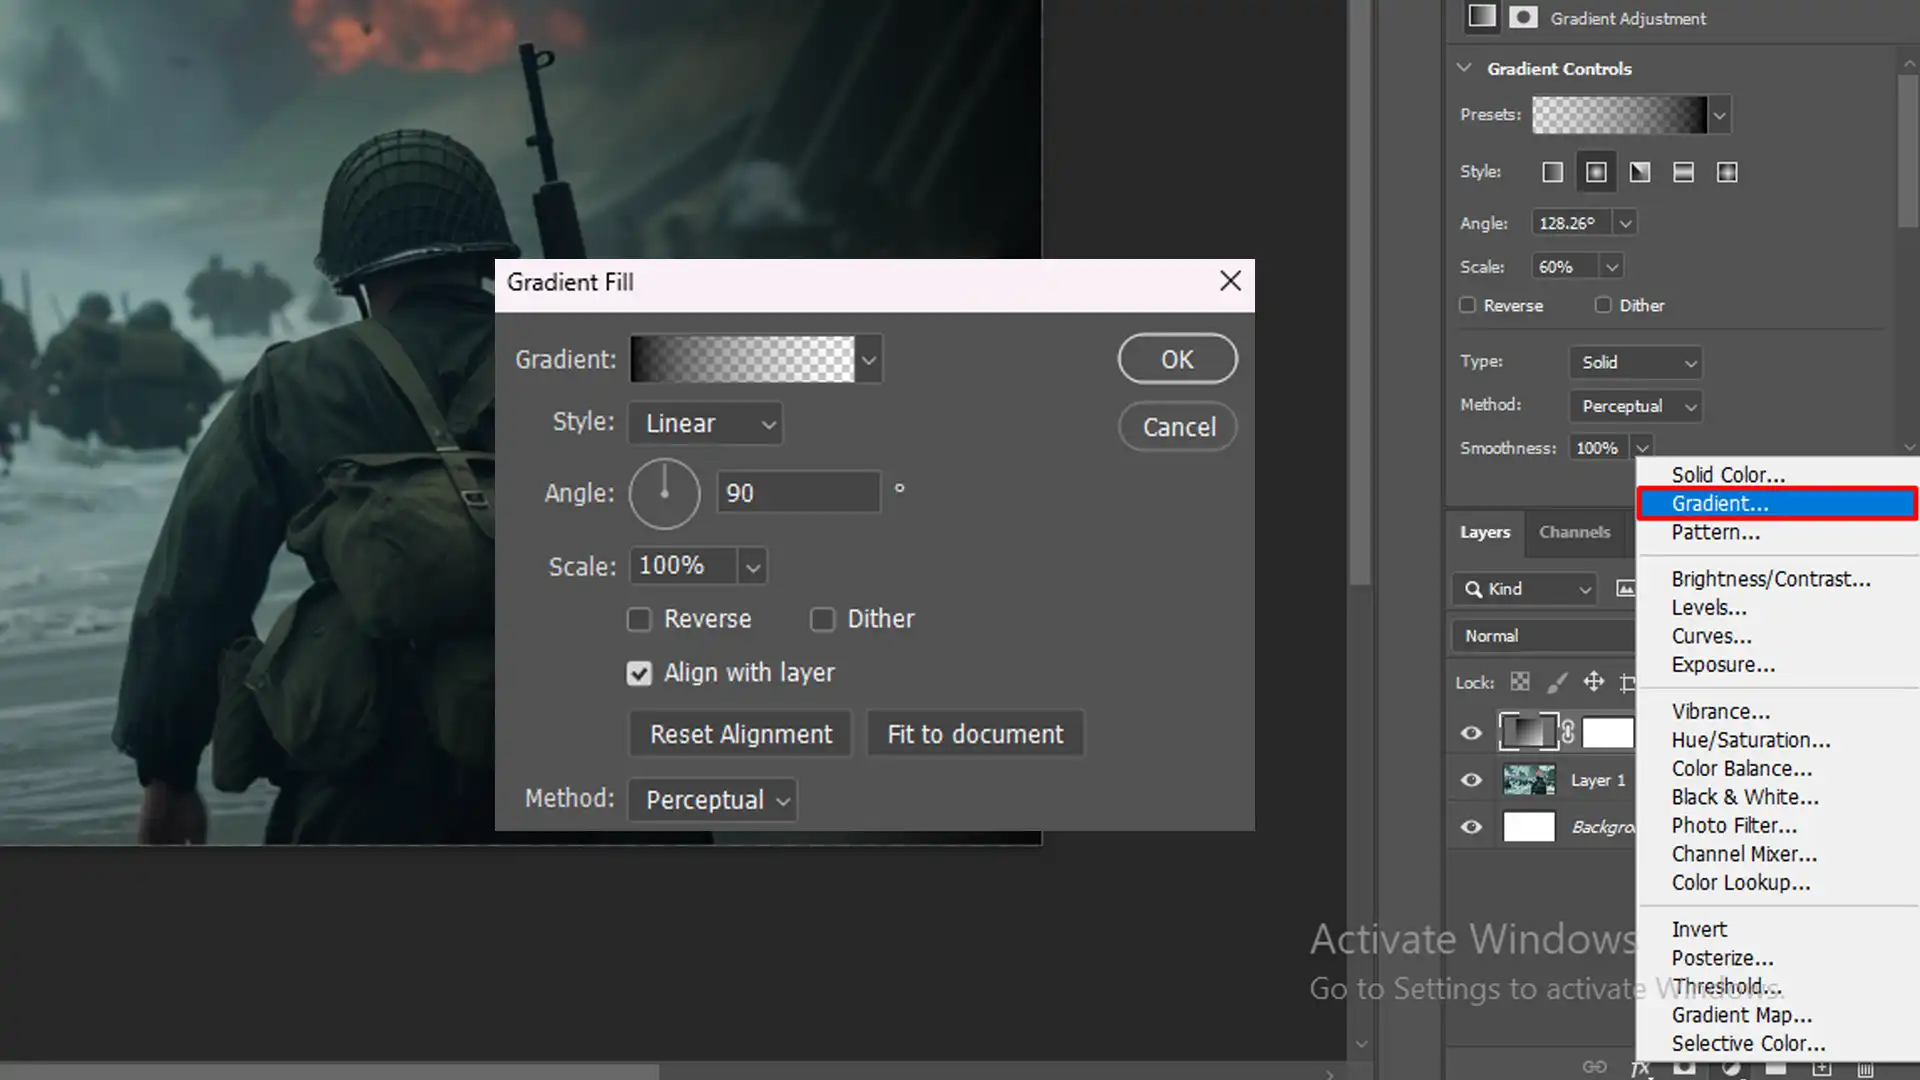
Open your image and create a new adjustment layer from the Layers Palette.
Select ‘Gradient Map’.
Choose a gradient that goes from black to white or any dark shade to light shade.
Adjust the Opacity to fine-tune how dark your image looks.
Gradient maps give you control and flexibility, making them a favorite tool for many photographers.
Combining Multiple Methods
Sometimes, one method isn’t enough. Here’s how to combine multiple methods for a richer darkening effect:
Create a new background layer and fill it with black.
Set this layer’s blend mode to ‘Multiply’ and adjust the Opacity.
Use the Burn Tool to darken specific areas.
Go to the Layers Palette and add a Curves adjustment layer to fine-tune the overall look.
Combining techniques offers more control and helps achieve your desired effect.
Tips and Tricks for Better Results
Mastering Adobe Photoshop requires a mix of patience, curiosity, and a bit of playfulness. You know, like a cat with a laser pointer, only with a computer.
Let’s delve into some key tips.
To darken an image effectively, mastering how to blur background can enhance your results.
By applying a subtle blur, you can draw attention to your subject while deepening the overall tone of your photo.
This technique not only highlights the focus but also enriches the image’s mood.
Fine-Tuning with the Dialog Box
Ever wonder why your photo looks off?
Fine-tuning with the dialog box makes all the difference. First, ensure that you are working on a duplicate background layer.
This preserves the original image. Start by going to Image > Adjustments and selecting Brightness/Contrast.
To effectively darken an image, start by adjusting the color image settings. This technique helps in achieving the perfect balance between contrast and exposure.
Avoiding Photoshop Common Mistakes
Some common mistakes can occur, especially when you’re new to Photoshop. One such mistakeis overusing the burn and dodge tool. Less is more here:
Select a soft brush tool and keep the exposure low.
Choose a brush size that suits your needs.
Another pitfall is forgetting to work on a new layer. This limits your options later.
Make sure to rename your layers descriptively to stay organized.
Right-clicking often provides shortcuts to essential menu actions. It saves time.
Saving and Exporting Your Darken Image
So, you’ve made your image look awesome. Now, let’s save it properly:
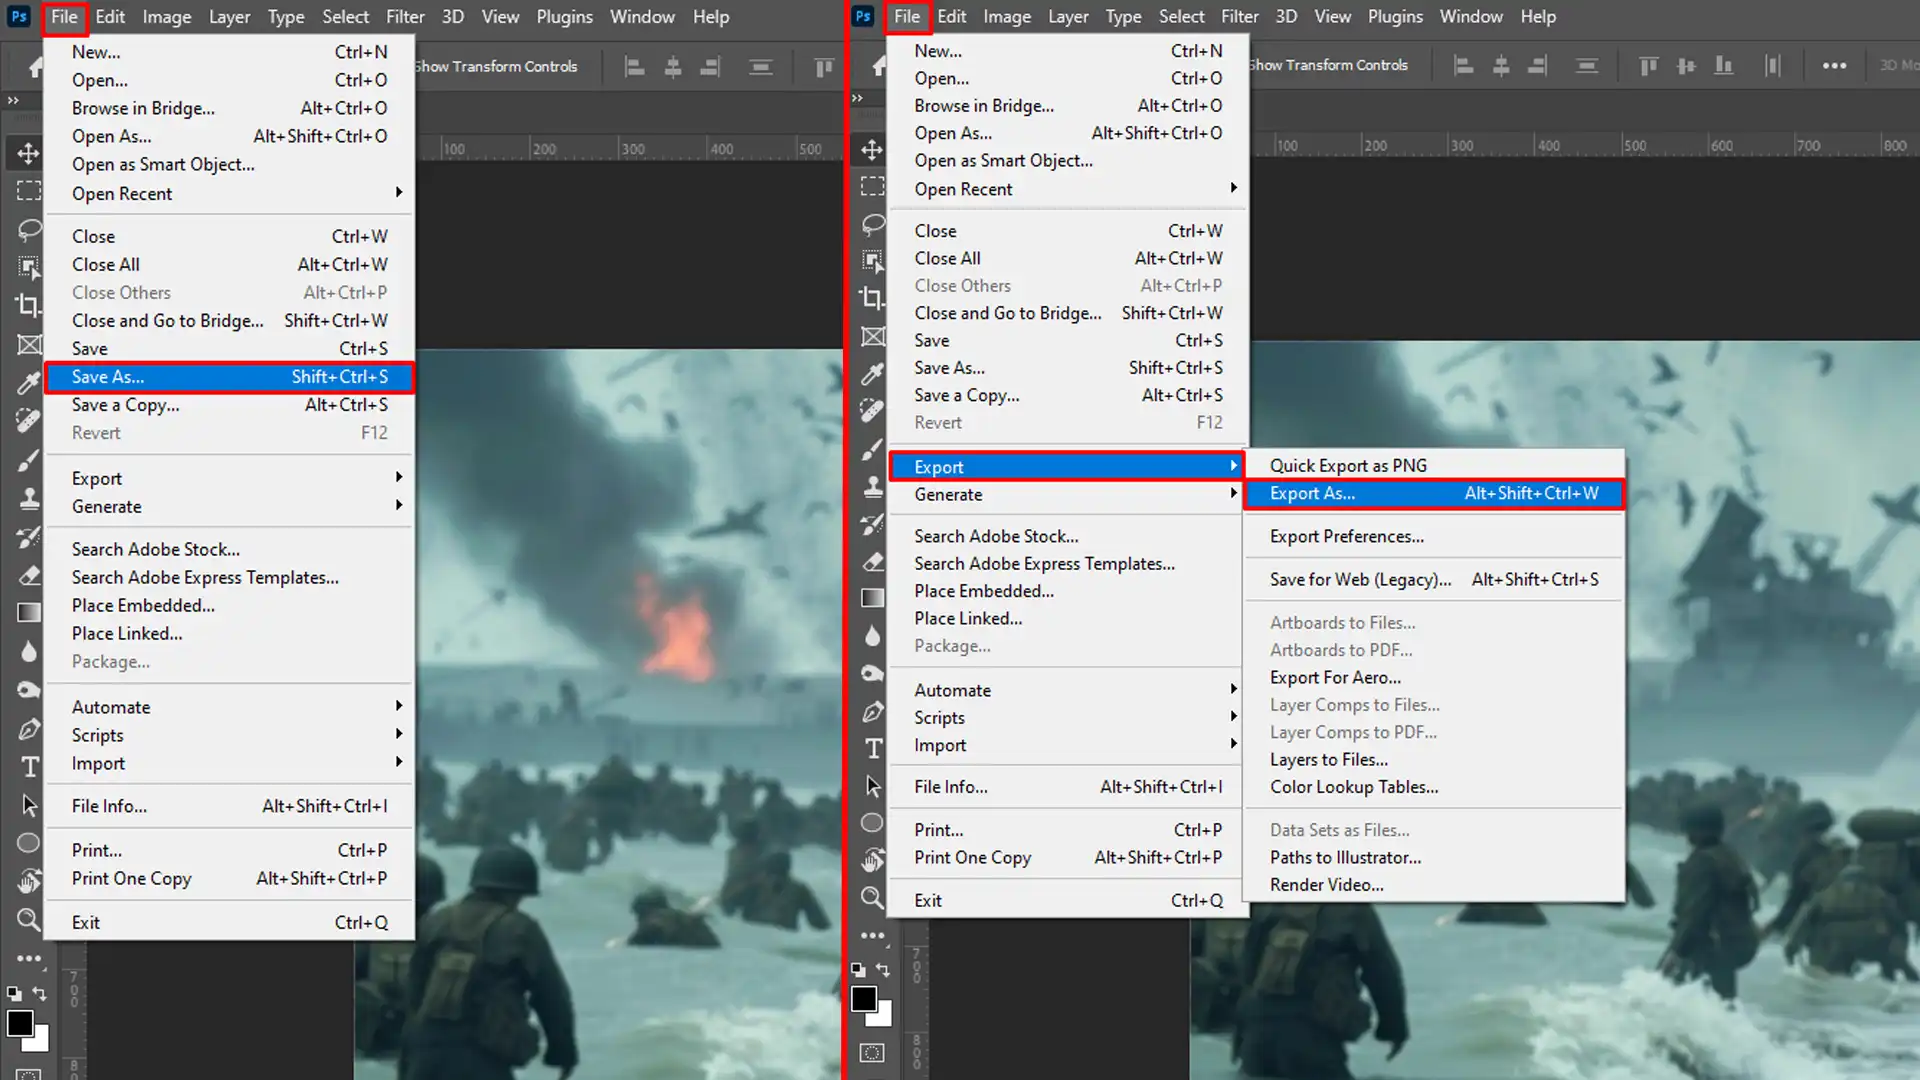
Go to File and choose Save As. Always keep a .PSD version. This retains all layers and adjustments.
For sharing purposes, go to File and Export As and select JPEG or PNG. Opt for maximum quality if you don't mind larger file sizes. Lower quality can degrade your hard work.
Remember to watch the file format and size. Make sure everything fits your needs before exporting.
Frequently Asked Questions
How do I darken the image in Photoshop?
Open your image in Photoshop.
Select the 'Image' menu, then click on 'Adjustments' and choose 'Brightness/Contrast...'. Lower the brightness to make your image darker.
Alternatively, you can use the 'Burn Tool' from the toolbar to darken specific areas of your image. This tool is especially useful for darkening the subject or specific parts.
How do I make an image darker?
Launch Photoshop and load the image you want to edit.
Go to 'Image' in the top menu, then 'Adjustments', and select 'Exposure...'. Decrease the exposure level to darken the image.
You can also use the 'Curves' tool under 'Image' > 'Adjustments' to manually adjust the darkness by pulling the curve downwards.
What tool darkens an image in Photoshop?
The 'Burn Tool' is specifically designed for darkening areas of an image. Find it in the left-hand toolbar (it looks like a hand).
'Levels' and 'Curves', found under 'Image' > 'Adjustments', also allow precise control over the image's darkness and contrast.
How do I darken the subject of a picture?
Open the image and select the subject using any selection tool such as the 'Lasso' or 'Quick Selection Tool'.
Once selected, right-click on the selection and choose 'Layer via Copy' to edit without affecting the rest of the image.
With the new layer selected, go to 'Image' > 'Adjustments' and choose 'Brightness/Contrast...' or 'Exposure...' to darken the subject.
At the end, learning how to darken an image in Photoshop has been a game changer for me. It’s amazing how adjusting the brightness and contrast can give photos a whole new mood and depth.
Whether you’re working on a dramatic portrait or a scenic landscape, this technique makes a big difference.
I’ve found that experimenting with tools like the burn tool, levels, and drawing curves can really help achieve the perfect look.
$2,061.00Original price was: $2,061.00.$1,061.00Current price is: $1,061.00. 27584
Download Your Free Guide Now!
Discover the secrets of photography with our printable guide! Master essential techniques like aperture, shutter speed, and ISO to create stunning images. Get your free printable PDF now and start turning your snapshots into masterpieces!