Learning how to crop in Photoshop is an essential skill, acting as your gateway to the vast world of possibilities Adobe Photoshop offers. Mastering the crop image Photoshop tool stands as a fundamental technique for graphic designers, photographers, and creative enthusiasts alike, opening up a plethora of creative avenues and enhancing the composition and focus of your work.
Are you ready to reshape your visual creations with precision and creativity?
This guide isn’t merely a set of instructions; it’s your first step toward harnessing the full capabilities of Photoshop’s cropping tools.
Table of Contents
Guidelines for Cutting Images in Photoshop
Understanding the crop tool in Photoshop is pivotal for anyone venturing into the world of digital editing with Adobe Photoshop.
Therefore, this selection tool isn’t just about trimming the edges of a photo; it’s a gateway to enhancing visual storytelling, emphasizing subjects, and refining composition.
Let’s explore its capabilities, how to access it, and delve into its key features with real-world applications and examples.
Accessing the Crop Tool
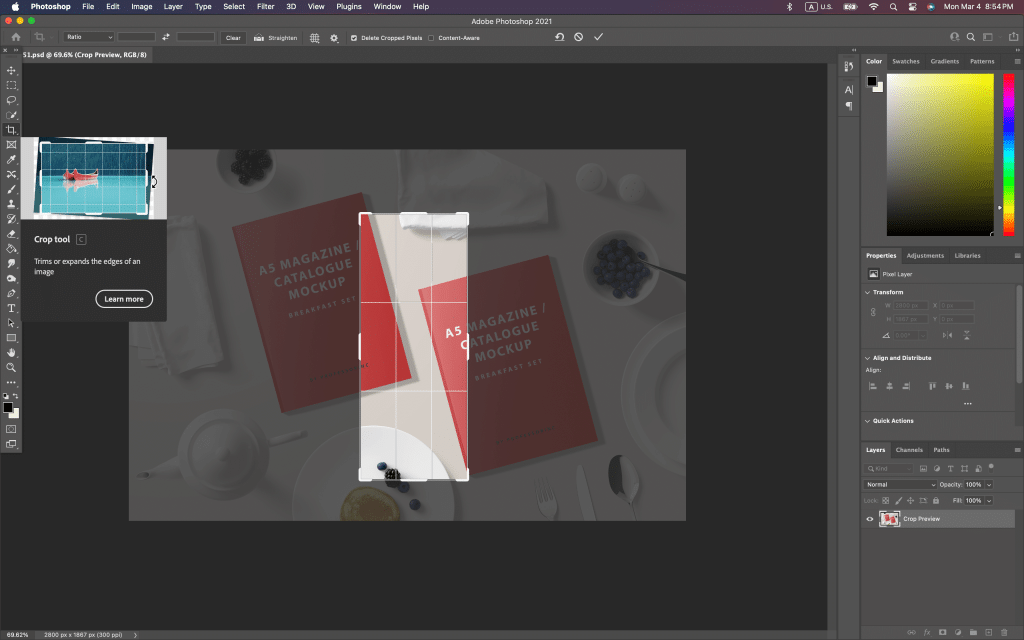
This tool is readily accessible in Adobe Photoshop, a staple in the Tools palette identifiable by its distinctive crop symbol.
For efficiency, hitting the ‘C’ key on your keyboard instantly selects it, streamlining your workflow.
Upon activation, a bounding box encases your image, signaling the start of your cropping journey.
This visual cue is your canvas for creativity, where the boundaries of your photo are no longer fixed but fluid, ready to be adjusted to your vision.
Key Features of the Crop Tool

Aspect Ratio Options
Photoshop’s Crop Tool shines with its versatility in aspect ratio adjustments.
Whether you’re aiming for the classic 4:3, the widescreen 16:9, or any custom dimensions to fit specific platforms like Instagram’s square or YouTube’s video thumbnail, the tool adapts to your needs.
Therefore, for instance, a photographer looking to submit work to an online gallery that requires uniform image sizes or a resize will easily conform to these specifications, ensuring their work is displayed as intended.
While mastering the crop tool, it’s also vital to understand the concept of crop factor and its impact on your images. Crop factor affects the effective focal length of lenses and consequently your field of view, which is especially crucial when considering aspect ratios.
For a detailed exploration of this concept, read our comprehensive guide on what is crop factor and how this feature can solve a lot of my problems.
Example of Aspect Ratio Adjustment
Imagine you’ve taken a breathtaking landscape photo, but to share it on Instagram, you need a 1:1 square format.
Therefore, the Crop Tool allows you to select this ratio, visually adjust the crop box to encompass the photo’s most compelling elements, and execute the crop, transforming your widescreen vista into a square masterpiece without compromising its allure.
If you’re navigating between Photoshop and Lightroom in your editing workflow, understanding how to manipulate aspect ratios in Lightroom can greatly enhance your efficiency and creativity.
For those interested in expanding their editing capabilities beyond Photoshop, we highly recommend our guide on how to change aspect ratio in Lightroom..
Straighten Tool
A slightly tilted horizon can detract from an otherwise perfect shot, but the Straighten Tool within the Crop Tool’s arsenal rectifies this with ease.
Moreover, by simply drawing a line along a horizon or any supposed-to-be horizontal edge, Photoshop does the heavy lifting, realigning your image crop to perfection.
Real-World Straightening
Consider a beach sunset photo where the horizon isn’t level, therefore giving the unsettling feeling that the ocean might spill out of the frame.
Using the Straighten Tool, you draw a line along the horizon, and like magic, the sea levels out, restoring balance and harmony to your image.
Content-Aware Fill
Expanding an image beyond its original borders typically introduces blank areas that disrupt the composition.
However, using the content aware feature seamlessly integrates new, contextually appropriate content into these spaces.
This is particularly useful when adjusting the aspect ratio necessitates adding a background to maintain the subject’s position without awkwardly placing it at the
Step-by-Step Guide to Crop Image In Photoshop

Cropping images in Photoshop is a straightforward process that can drastically improve the composition and focus of your photos.
Here’s a simple guide to help you master the basics:
- Open your image
- Select The Crop Tool
Access the Crop Tool from the Tools palette or press the shortcut ‘C.’
- Choose Your Aspect Ratio
Fixed Ratios: Select from preset ratios for specific platforms or outputs.
Custom Dimensions: Enter custom values for unique requirements.
- Adjust the Crop Box
Click and drag the corners or sides of the crop box to include the parts of the image you want to keep.
Tip: Press and hold the ‘Alt’ key (or ‘Option’ on Mac) while dragging to adjust the crop box symmetrically.
- Refine Your Crop
Reposition: Click inside the crop box and drag to reposition your image.
Straighten: Use the Straighten Tool for precise alignment.
- Apply the Crop
Press ‘Enter’ or click the checkmark in the options bar to apply your crop.
Example: Cropping Wildlife Pictures for Social Media
Editing wildlife photos presents unique challenges, from capturing the essence of the selected subject to adjusting the composition through cropping.
Update your wildlife photography editing skills with our specialized guide. Learn valuable insights and techniques by reading how to edit wildlife photos.
Cropping Objects and Irregular Shapes

Cropping objects and irregular shapes in Photoshop can transform a good image into a great one by focusing on the subject more precisely.
This technique requires a bit more finesse and understanding of Photoshop’s more advanced tools.
Using the Pen Tool for Precise Selection
- Step 1 Select the Pen Tool from the toolbox
- Step 2 Carefully draw around the edge of your object or shape.
- Step 3 Right-click the path and select 'Make Selection' to convert your path into a selection.
Pro Tip: This tool, along with other useful features such as the text box, can be found in the dropdown menu on Photoshop’s interface.
Lasso Tools for Freehand Selection
- Quick Selection: Ideal for objects with relatively simple shapes.
- Polygonal Lasso Tool: Best for geometric shapes with straight edges.
- Magnetic Lasso Tool: Great for objects with high-contrast edges.
Tip: Zoom in for more accuracy while making your selection.
Refining Edges for a Cleaner Crop
- Once your object is selected, go to 'Select and Mask' to refine the edges.
- Use the sliders to adjust the smoothness, feathering, and contrast for a natural-looking edge.
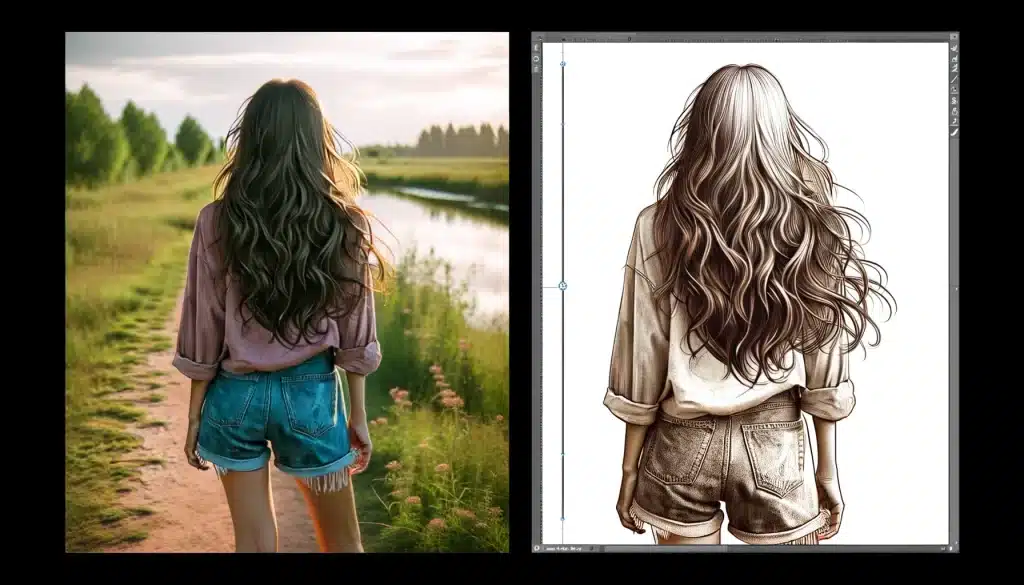
Achieving a clean and precise crop around complex shapes, such as curly hair, demands a thorough understanding of Photoshop’s ‘Refine Edge’ feature.
To perfect your cropping and selection skills, ensuring every detail is captured flawlessly, we’ve prepared a guide that walks you through the process.
Check out refining edges in Photoshop sotware tool guide for an in-depth look.
Example: Cropping a Curly-haired Model from a Busy Background
Imagine you need to crop a model with curly hair from a busy background for a fashion website.
Therefore, using the quick selection tool, you can select the model in the picture.
Due to the intricate hair details, you refine the selection with the Select and Mask feature, adjusting the radius to capture every curl without the background noise.
Best Techniques for Cropping Images in Photoshop

This table outlines the key principles behind effective image cropping, emphasizing not just the technical aspects but also the artistic considerations that go into creating visually compelling and meaningful photographs.
| Best Practices for Cropping Images | Description | Example |
|---|---|---|
| Understand Your Composition | Effective cropping enhances the photo’s message by focusing on composition techniques. | |
| Rule of Thirds | Place the subject along the lines or at the intersections for a more dynamic composition. | Cropping a landscape so that the horizon sits on the lower third line, making the sky dominant. |
| Leading Lines | Use natural lines within the image to guide the viewer’s eye toward the main subject. | Cropping to emphasize a path leading to a person in the distance. |
| Look for Distractions | Identify and remove elements that detract from the main story or subject of the photo. | Removing a stray branch from the side of a nature shot to focus more on the subject. |
| Maintain Aspect Ratio | Keeping a consistent aspect ratio is crucial for the visual coherence of a series or within specific platforms. | |
| Consistency | Use a consistent aspect ratio for a series of images to maintain a cohesive look. | Ensuring all images in a gallery are cropped to the same 4:3 ratio for uniformity. |
| Platform Requirements | Different social platforms have preferred aspect ratios; ensure your images are cropped accordingly. | Cropping an image to a 1:1 square for Instagram while opting for a 16:9 for Twitter banners. |
| Leave Breathing Room | Proper cropping ensures the subject isn’t overwhelmed by its surroundings. | |
| Avoid Tight Crops: | Ensure there’s ample space around the subject to avoid a cramped appearance. | Leaving space around a person’s portrait to prevent it from feeling too tight or cut off. |
Frequently Asked Questions
How do I Crop a Clip in Photoshop?
- Open the Video: Import your video clip into Photoshop. You can do this by dragging the video file onto Photoshop's workspace or using the menu (File > Open) and selecting your video clip.
- Convert to Smart Object: Right-click on the video layer in the Layers panel and choose "Convert to Smart Object." This action allows you to apply transformations non-destructively.
- Select the Crop Tool: From the Tools palette, select the Crop Tool (C). You'll see the crop handles appear around your video frame.
- Adjust Your Crop: Click and drag the handles to adjust your crop area. You can also manually enter dimensions in the options bar for precise control.
- Apply the Crop: Press Enter or click the checkmark in the options bar to apply your crop. Since the video is a Smart Object, the crop is non-destructive, and you can adjust it later if needed.
How do I Crop an Image?
- Open Your Image: Load the image you wish to crop into Photoshop.
- Select the Crop Tool: Press C or select the Crop Tool from the Toolbar.
- Choose Aspect Ratio (Optional): In the options bar, you can select and change an aspect ratio or leave it as "Original Ratio" for freeform cropping.
- Adjust the Crop Box: Click and drag the edges or corners of the crop box to define the area you want to keep in the channel. You can also click inside the box and drag to reposition the image within the crop area.
- Apply the Crop: Hit Enter or click the checkmark in the options bar to crop the image. If you need to adjust the crop later, simply select the Crop Toolbar again and modify it as needed.
How do I Crop an Object Only in Photoshop?
- Open Your Image: Begin by opening the image containing the object you wish to isolate.
- Select the Object: Use one of Photoshop's selection tools (e.g., Quick Selection Tool, Object Selection Tool, or the Pen Toolbar for precise selections) to outline the object you want to crop.
- Refine Edge: Once selected, click on Select and Mask in the options bar to refine the selection's edges, ensuring a clean cutout of the object.
- Create a Mask: While the object is still selected, click the Add Layer Mask icon at the bottom of the Layers panel. This action removes the background, leaving only the selected object visible.
- Export or Save: If you want to use the cropped object separately in the icon, you can right-click on the layer and choose Export As to save the object as a new file on the channel.
Final Thoughts
In mastering the of cropping in Photoshop, I’ve discovered the power of transforming the ordinary into the extraordinary.
So that is exactly why you should try our Photoshop and Lightroom courses that are designed to guide you through each facet of these powerful tools, ensuring that with each click, you’re not just editing photos but you’re crafting stories. Join us, and let’s transform your visions into stunning realities together.
Read more about Photoshop:


