Best Resolution for Photoshop: Tips for High-Quality Images
Best Resolution for Photoshop: Tips for High-Quality Images
When working with Photoshop, one of the most common questions is, “What’s the best resolution for Photoshop?”
As someone who has spent countless hours perfecting an image, I understand the frustration of blurry prints and pixelated photos.
Imagine having the power to create stunning visuals that captivate anyone who sees them.
That’s exactly what choosing the right resolution can do for you. It’s not just about making your photos look good on screen, it’s about ensuring they’re print-ready and high-quality.
Let’s dive deeper into what makes a resolution perfect for your projects and how you can master this crucial aspect of Photoshop.
Table of Contents
Understanding Image Resolution
Resolution describes the detail an image holds. When we talk about image resolution, we often refer to pixels per inch (PPI).
Pixels are tiny dots that make up digital images. More pixels, the higher the image’s resolution.
PPI indicates how many pixels fit into one inch. More PPI mean more details in the image.
Why Resolution Matters in Photoshop
Using Adobe Photoshop, images resolution plays a crucial role. Let’s break it down:
Print Quality: A higher pixels per inch ensures better print quality. If your PPI is low, your printed image will appear blurry. A PPI of 300 is ideal for high-quality print.
Images Size: Adjusting the resolution without changing the physical size can affect how crisp your image looks on screen. In Photoshop, tweak the resolution in the images size dialog box without altering the physical size.
File Size: High images resolution means larger file size. Keep this in mind when saving your Photoshop file, to avoid it taking up too much space.
Final Output: The resolution value you choose impacts your final output. If working with digital image, the dimension matters more than resolution.
Maintaining the balance between high resolution and manageable file sizes will ensure your Photoshop projects shine.
Pro Tip: Always double-check the resolution before printing images. Make sure the document size and print size match for best results.
When working with Adobe Photoshop, picking the right resolution is paramount. It’s like choosing the size of a paintbrush, each setting determines your final artwork’s clarity and detail.
Here’s the lowdown: resolution is measured in pixels per inch (PPI).
The more pixels per inch, the crisper your image will be. For instance, 300 PPI is typically ideal for high-quality print. Anything lower could make your prints look fuzzy.
You might wonder, how many pixels do I really need? Well, it all depends on your project. For web images, a lower resolution might work fine to save on loading time.
But if you’re going for large prints, higher resolution is a non-negotiable.
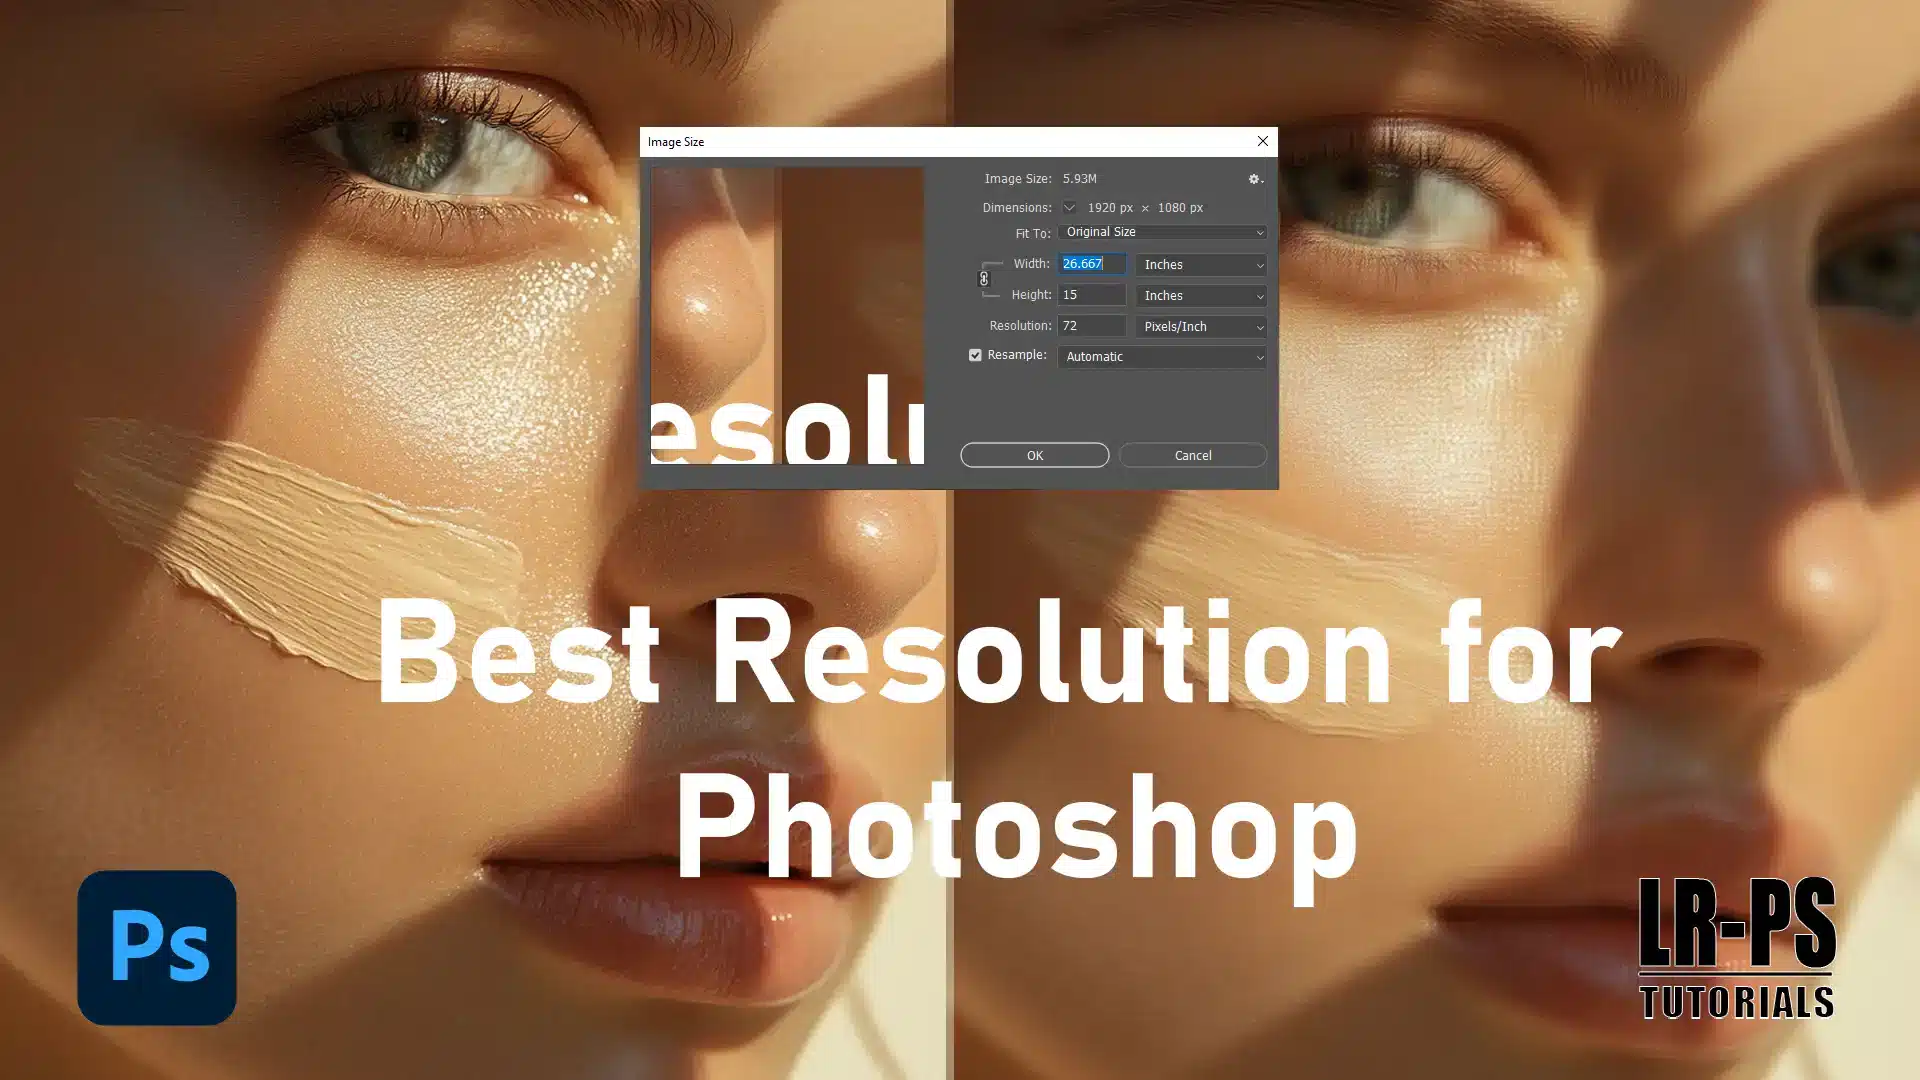
Don’t overlook the “image size dialog box”. It helps you toggle the relevant settings and fine-tune your document size without messing up the pixel dimensions.
Common Resolution Settings in the Image Size Dialog Box
Alright, let’s get into the nitty-gritty of common resolutions:
72 PPI: Good for web image and screen displays. Not suitable for print.
150 PPI: Better for small print projects but still not perfect for pro-level printing.
300 PPI: The gold standard for print. Offers crisp, high-quality print without showing individual pixels.
Adjusting these resolutions is straightforward within the images size dialog box. Importantly, altering images size without upping the resolution can leave you with blurred or pixelated results.
And let’s not forget the impact on file size. Higher resolution increases the filesize, affecting storage and processing speed. A balance between adequate detail and manageable file size is key.
Pro Tip: Always double-check your document size and print requirements before hitting ‘print’. It ensures your digital artwork translates effectively to paper, especially on an inkjet printer.
And remember, fiddling with only the resolution might not give you the best results; you need to consider the whole images size for the final outputs.
If you’re looking to enhance your workflow further, familiarize yourself with essential tools in Photoshop, such as the patch tool in Photoshop, which can help refine your image.
Additionally, learning Photoshop shortcuts can significantly speed up your editing process.
Pixel Dimensions and Images Size
Pixel dimensions refer to the total number of pixels along the width and height of an image. For example, a photo with 1920×1080 pixel dimensions contains 1920 pixels in width and 1080 pixels in height.
This measurement defines how much detail the image holds, essential for both on-screen and print quality.
How Pixel Dimensions Affect Image Quality
The quality of an image depends heavily on its pixel dimensions. Larger pixel dimensions generally result in sharper and more detailed images.
When you increase the number of pixels per inch (PPI), you get better-quality images, especially important for high-quality prints. On the other hand, smaller pixel dimensions can make images appear blurry when enlarged.
Understanding how pixel dimensions affect image quality is key to getting the best results. Higher pixel dimensions generally improve image quality, ensuring sharper and more detailed visuals.
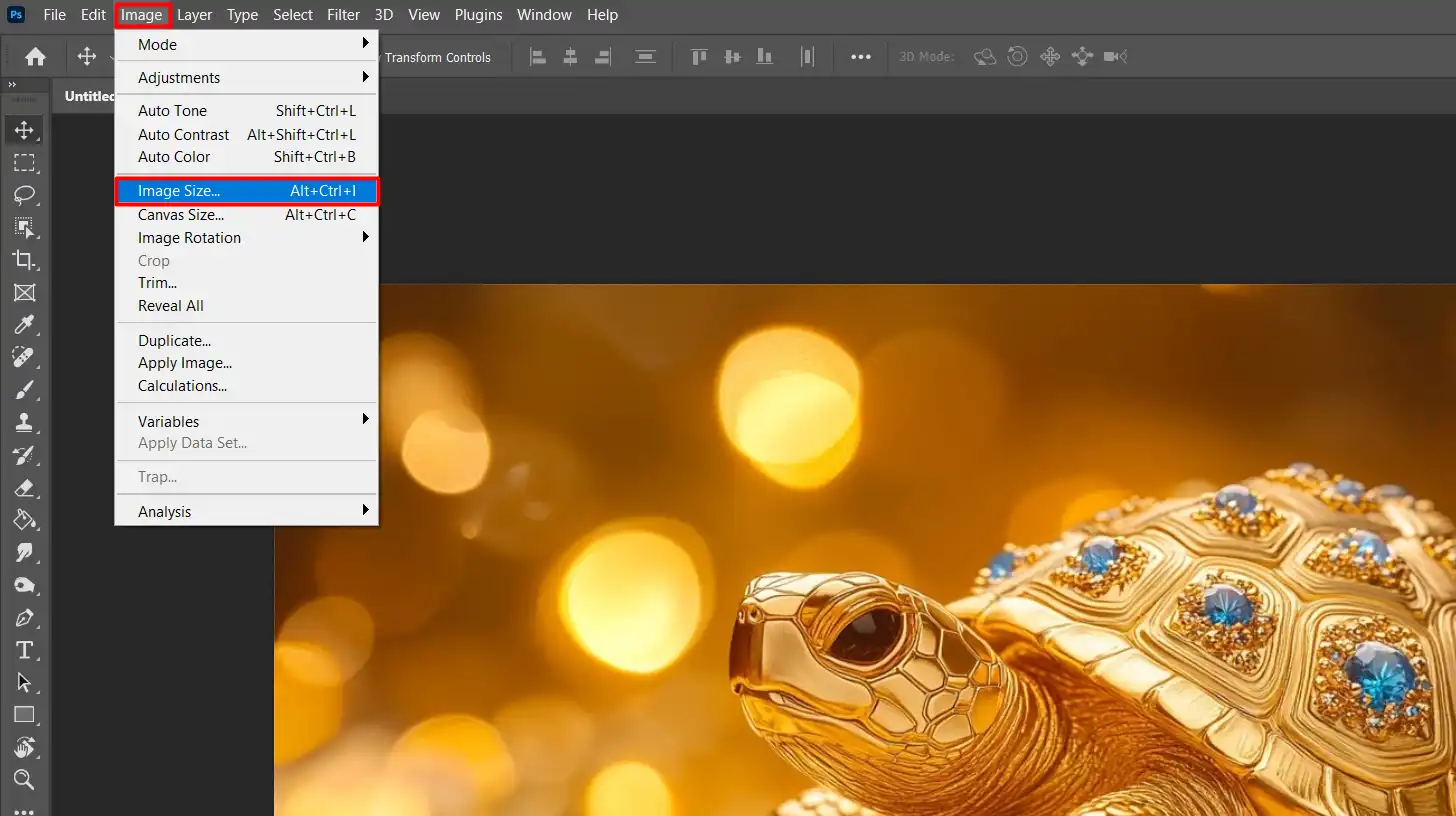
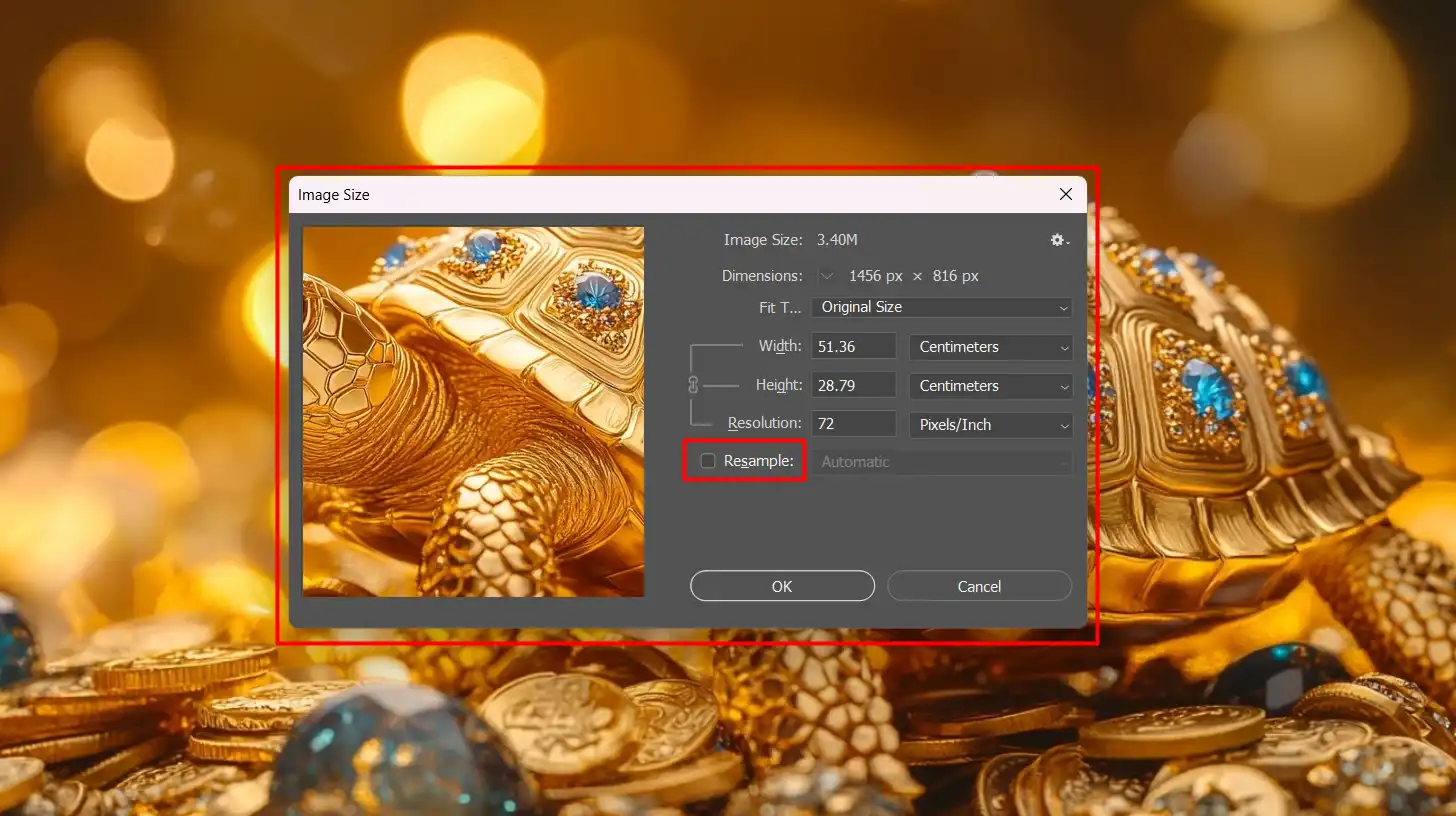
Adjusting Images Size in Photoshop
Adjusting your images size in Photoshop is straightforward:
Open the image.
Navigate to 'Image' -> 'Image Size'.
A dialog box will appear where you can tweak the pixel dimensions and PPI.
If you want to resize without altering the image's pixel count, make sure to uncheck the 'Resample' option.
This helps keep file sizes manageable while maintaining the same size.
Pro Tip: When adjusting image size, learning how to upscale images can be crucial for maintaining quality. Proper techniques ensure that resizing enhances your visuals without losing detail.
Always check the specific resolution requirements for your project before you start editing. This ensures your images are fit for both screen and print.
Common Photo Editing Mistakes to Avoid
When adjusting pixel dimensions and image size, it’s crucial to avoid editing mistakes. Over-resampling can lead to loss of detail, while under-resampling can make your images look pixelated.
Always preview changes before finalizing them.
Photoshop vs. Lightroom: Which One to Use?
Both Photoshop and Lightroom offer robust tools for adjusting pixel dimensions and image size. Photoshop provides more granular control, making it ideal for detailed edits.
Lightroom, on the other hand, excels in batch processing and is perfect for photographers who need to edit multiple images quickly.
Accessing the Images Size dialog box in Photoshop is pretty simple. First, you need to open your image file.
Then, go to the top menu and click on ‘Image’. From the dropdown, select ‘Image Size’. This opens a new dialog box where you can adjust various settings.
Familiarize yourself with this box because it offers several vital features you’ll need for resizing.
Dimensions Section
The first thing you’ll notice is the ‘Dimensions’ section. Here, you can see the current width and height of your image in pixels.
If you want to change these, simply click on the numbers and type in new values.
Be aware that altering these numbers affects the total number of pixels in your image. It’s like changing the dimensions of a physical photo.
Resolution
Next, look at ‘Resolution’. This is where you set the pixels per inch (PPI). Higher PPI means better quality, especially for prints. But be cautious ,make it too high, and it could slow down your computer.
Resample Option
Unchecking the ‘Resample’ box lets you change the dimensions without affecting the pixel count. This can be useful when you merely want to change the size for screen display without altering how the image looks.
Tips for Resizing Images
Balance: When resizing, aim for balance. The goal is to maintain the image's integrity while fitting your specific needs.
Pixels per Inch (PPI): Always keep an eye on the 'Pixels per Inch' (PPI) setting. For screen displays, a PPI of 72 is usually enough. For prints, you might need anywhere from 150 to 300 PPI.
Printer Resolution: Always check the printer resolution if you plan to print your photos. Knowing your printer’s capabilities helps you decide the right resolution for high-quality prints.
Save Your Work: Don’t forget to save your work. After making changes, do a 'Save As' rather than just 'Save' to keep the original image file untouched. It’s a lifesaver if you ever need to go back to the original dimensions.
Preview Option: Use the 'Preview' option in the Image Size dialog box. It allows you to see real-time changes. This helps you make better decisions, ensuring the resized image looks exactly as you want before you commit to the changes.
Resizing images effectively is crucial for achieving the right look. Proper resizing images ensures that your visuals maintain quality and fit perfectly for their intended use.
Additional Tips for Using Photoshop
While resizing images, you might also find it helpful to learn some essential tools in Photoshop.
Now, go ahead and try resizing some images. The more you practice, the better you’ll get!
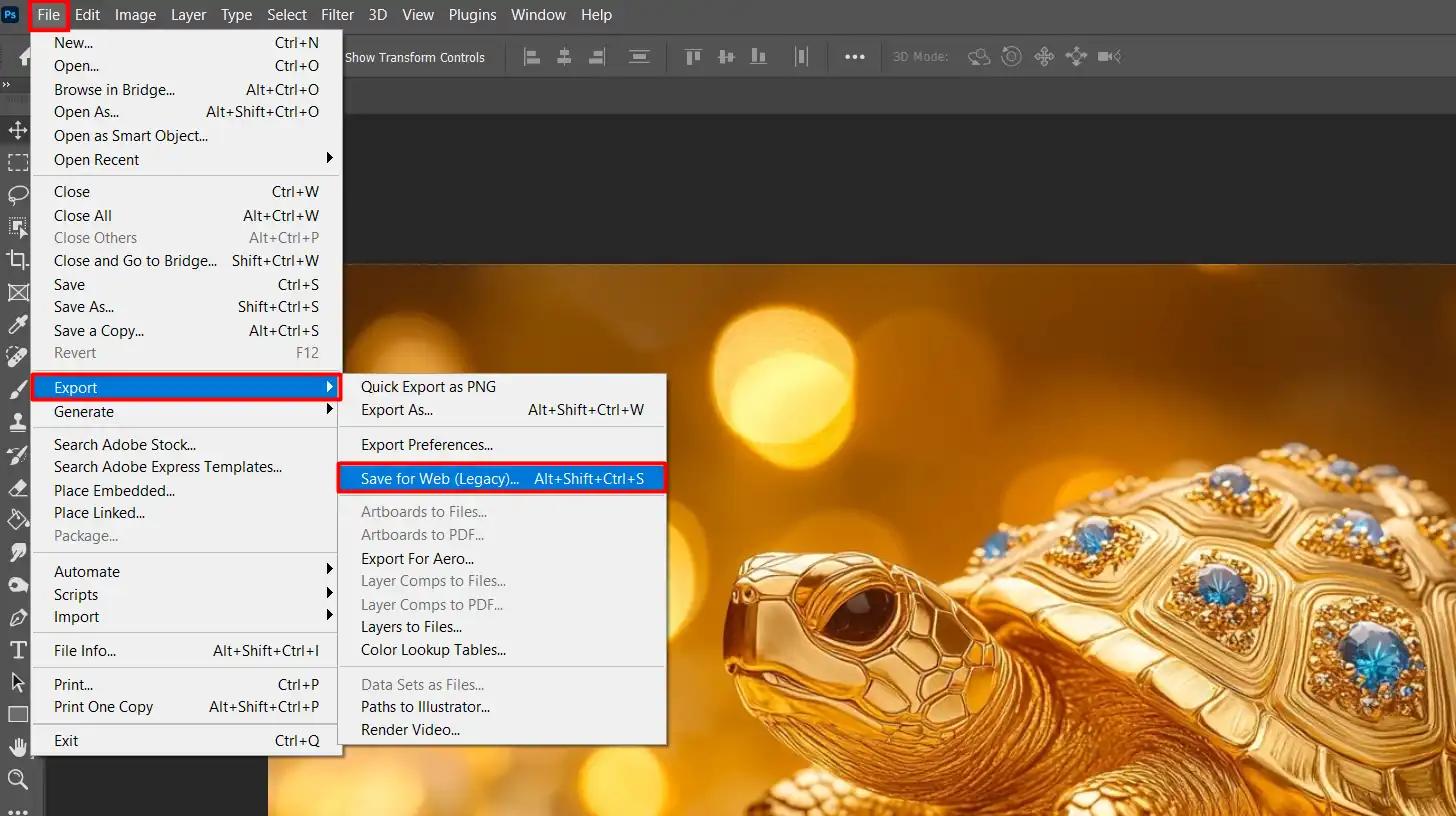
Which Best Resolution in Photoshop for Exporting?
Exporting images can be tricky, especially if you’re aiming for specific uses. Different resolutions work better for different mediums.
Let’s break it down.
Resolution
Use Case
PPI
Description
72 PPI
Web and Digital
72
Ideal for online images, faster loading.
150 PPI
Medium Quality Print
150
Good for standard quality prints.
300 PPI
High-Quality Print
300
Best for high-resolution prints, sharp details.
600 PPI
Professional Print
600
For high-end prints requiring fine detail.
Understanding Image Resolution
Resolution dictates how clear and detailed an image will be. It’s measured in pixels per inch (PPI). The higher the PPI, the more detail your image will contain.
Web Use: 72 PPI
If you’re exporting for web use, 72 PPI works best. It keeps the file size small but maintains clarity on screens.
Print Use: 150-300 PPI
For prints, aim for 150-300 PPI. This ensures high quality print. Higher PPI means crisper results. Check your printer’s specs to fine-tune.
Keeping the Same Size
You might want to keep the same size without altering pixels. Uncheck the ‘Resample’ option in Photoshop. This adjusts dimensions but retains pixel count.
Practical Tips
Preview Changes: Always use the preview option to see adjustments in real-time.
Save As: Use 'Save As' to keep the original image untouched.
Pro Tip: To optimize web images, using Photoshop for exporting is essential. Proper export settings ensure your images look great online and load quickly.
Now, go ahead and try these tips to enhance your work.
Don’t forget to adjust resolution based on where you plan to use your images!
Frequently Asked Questions
What is the best resolution for an image in Photoshop?
The ideal resolution for an image in Photoshop depends on its intended use. For printing, a resolution of 300 dpi (dots per inch) is recommended for high-quality results. For web graphics, 72 dpi is typically sufficient.
What is the best quality setting for Photoshop?
When saving images, the best quality setting in Photoshop is often the maximum quality option available in the format you are using. For JPEGs, a setting of 10-12 ensures high quality without excessive file size. For other formats like PNG, simply save at the highest quality.
What is the best quality format for Photoshop?
The best format for maintaining high quality in Photoshop is TIFF or PSD, as these formats support lossless compression. JPEG can be used for images where file size is a concern, although it uses lossy compression.
What is a good resolution for Photoshop drawing?
For drawing in Photoshop, starting with a canvas of at least 300 dpi is recommended. This higher resolution allows for more detail and smoother lines, which is especially important for high-quality print or digital artwork.
Choosing the best resolution for Photoshop can make a huge difference in the quality of your images. From my experience, working with the right PPI setting ensures that your photos look sharp, whether they’re displayed on a screen or printed.
If you’re aiming for high-quality prints, sticking to 300 PPI is usually the way to go. For digital use, 72 PPI is often sufficient.
If you want to learn more about perfecting your images, check out my Photoshop course and Lightroom course. They cover everything you need to know to master these tools.
$2,061.00Original price was: $2,061.00.$1,061.00Current price is: $1,061.00. 27584
Download Your Free Guide Now!
Discover the secrets of photography with our printable guide! Master essential techniques like aperture, shutter speed, and ISO to create stunning images. Get your free printable PDF now and start turning your snapshots into masterpieces!