Master the Magnetic Lasso Tool: A Comprehensive Guide for You
Master the Magnetic Lasso Tool: A Comprehensive Guide for You
The Magnetic Lasso Tool simplifies the task of selecting objects, even for beginners.
It automatically snaps to the edges you’re trying to trace, making it easier to outline objects with precision.
Whether you’re editing photos, creating digital artwork, or designing graphics, mastering this tool saves time and improves the accuracy of your selections.
Let’s explore how this tool can streamline your workflow and help you achieve cleaner, more polished results in your creative projects.
Table of Contents
Edge Detection with the Magnetic Lasso Tool
The Magnetic Lasso Tool is indispensable for users looking to refine their object selection tool in Adobe Photoshop.
It excels in tracing and selecting contours and edges by automatically clinging to the defined boundaries of your image.
Optimizing Frequency and Width for Better Edges
When using the Magnetic Lasso Tool, adjusting the frequency and width can greatly enhance its precision.
The frequency controls how often anchor points are set as you move your mouse button along the edge of an object.
A higher frequency works well for complex edges set against high contrast backgrounds, enabling finer control over the selection mode.
On the other hand, the width affects how far from the mouse button Photoshop searches for an edge: narrower values lead to tighter adherence along sharp edges.
Experimenting with these settings allows you to tailor your tool behavior to different types of images, ensuring cleaner, more accurate selections.
Here are some important settings:
Frequency: Ideal range generally between 50 and 100.
Width: Adjust depending on clarity and contrast of the edge; lower color values for sharper edges.
Utilizing Contrast for More Accuracy
Utilizing contrast effectively can magnify accuracy when working with this tool.
Edges where there is clear differentiation between colors or light levels help establish a stronger base for magnetic attraction in selections.
Correctly setting up contrast can be handled under two scenarios:
Higher Edge Contrast: This setting enables you to quickly snap onto stark differences.
Lower Edge Contrast: Useful when dealing with subtler transitions; requires finer tuning of frequency and width.
Optimally adjusting contrast before beginning your path with this tool ensures that each point clings robustly at every twist and turn while minimizing deviations from accidental jags in less defined areas.
By understanding and manipulating these fundamental aspects, users can unlock powerful capabilities within their Digital Image Editing Suite wielding tools like the Magnetic Lasso for professional-standard accuracy in graphic projects.
Remember, slight adjustments could have significant impacts, allowing both new users and seasoned professionals to transform complex photo-editing tasks into simpler, executable actions.
How to Resize Images in Photoshop Using the Magnetic Lasso Tool
Resizing images with precision in Adobe Photoshop can be achieved effectively using the Magnetic Lasso Tool.
This tool is particularly adept at quickly selecting and isolating parts of your image with complex edges, allowing targeted resizing that maintains the integrity of the original picture.
Selecting the Area to Resize (with the Caps Lock key)
Begin by opening your document in Photoshop and select the Magnetic Lasso Tool from the tools panel.
Start at a starting point along the edge of the object you wish to resize. Click once to set your initial anchor point, then simply move your mouse button along the edges.
The tool automatically clings to edges of contrast, which makes it perfect for detailed work.
Significant Tip: Use the Caps Lock key as a precision mouse button for better visibility when creating anchor points.
Remember: To add to your selection, just press and hold the Shift or ESC key, clicking on additional areas you wish to include.
Adjusting the Selection Edge
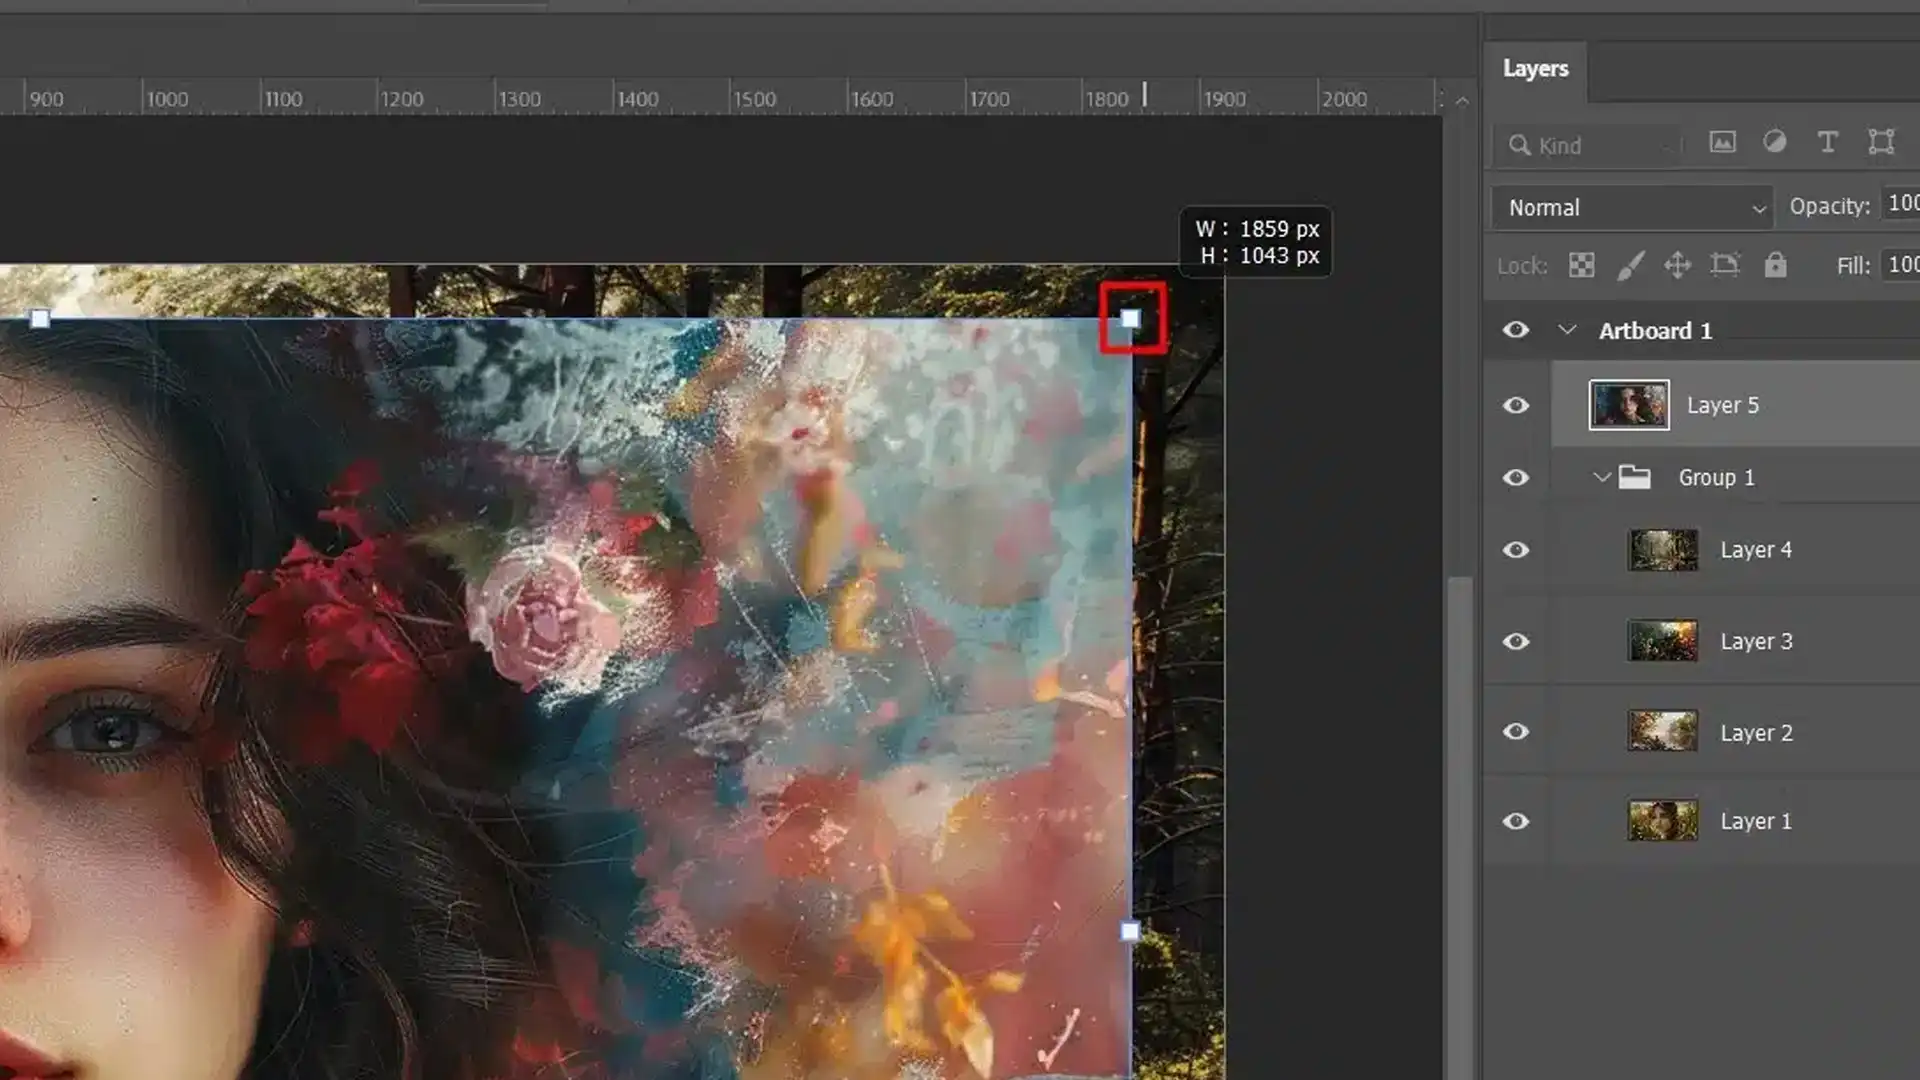
Once you have circled back to your starting point or closed your selection by double–clicking (a small circle should appear), it’s time to refine the edges.
The precision of your selection will depend on how accurately the circle determines the boundary of the area you wish to refine.
Go to Select and Mask… in the tool options bar to refine further. Here you can adjust for a straight line or feathering for softer transitions around selected areas.
Advanced usersshould modify their selection mode in this stage if combining multiple selections.
You may also toggle between modes with shortcutkeys if you need sharp or more feathered edges.
Applying Transformation to Resize
With your area properly selected and refined, press Ctrl + T (Cmd + T on Mac) to activate transform mode.
At this point, corners will show draggable handles. Hold down Shift while dragging any of these handles to subtract from selection proportionally.
For precision adjustments:
Hold Alt (Option on macOS) simultaneously with Shift; this allows resizing from center.
If precise scaling is needed, you can adjust the width manuallyvia the tool options bar dimensions (left and right bracket).
After adjusting size, hit Enter or double click inside transform box complete changes.
With your area properly selected and refined, press Ctrl + T (Cmd + T on Mac) to enter transform mode.
Use the options bar for precision adjustments, holding Shift to adjust proportionally and Alt (Option on macOS) to resize from the center.
Make further adjustments to the width and height in the options bar, and then hit Enter or double-click inside the transform box to finalize the changes using the options bar.
Smart Selection in Photoshop offers a powerful way to quickly isolate complex areas, enhancing workflows.
Mastering this can elevate your skills, especially when exploring smart selection in Photoshop to streamline advanced techniques for seamless editing.
Optimizing Settings for Different Types of Images
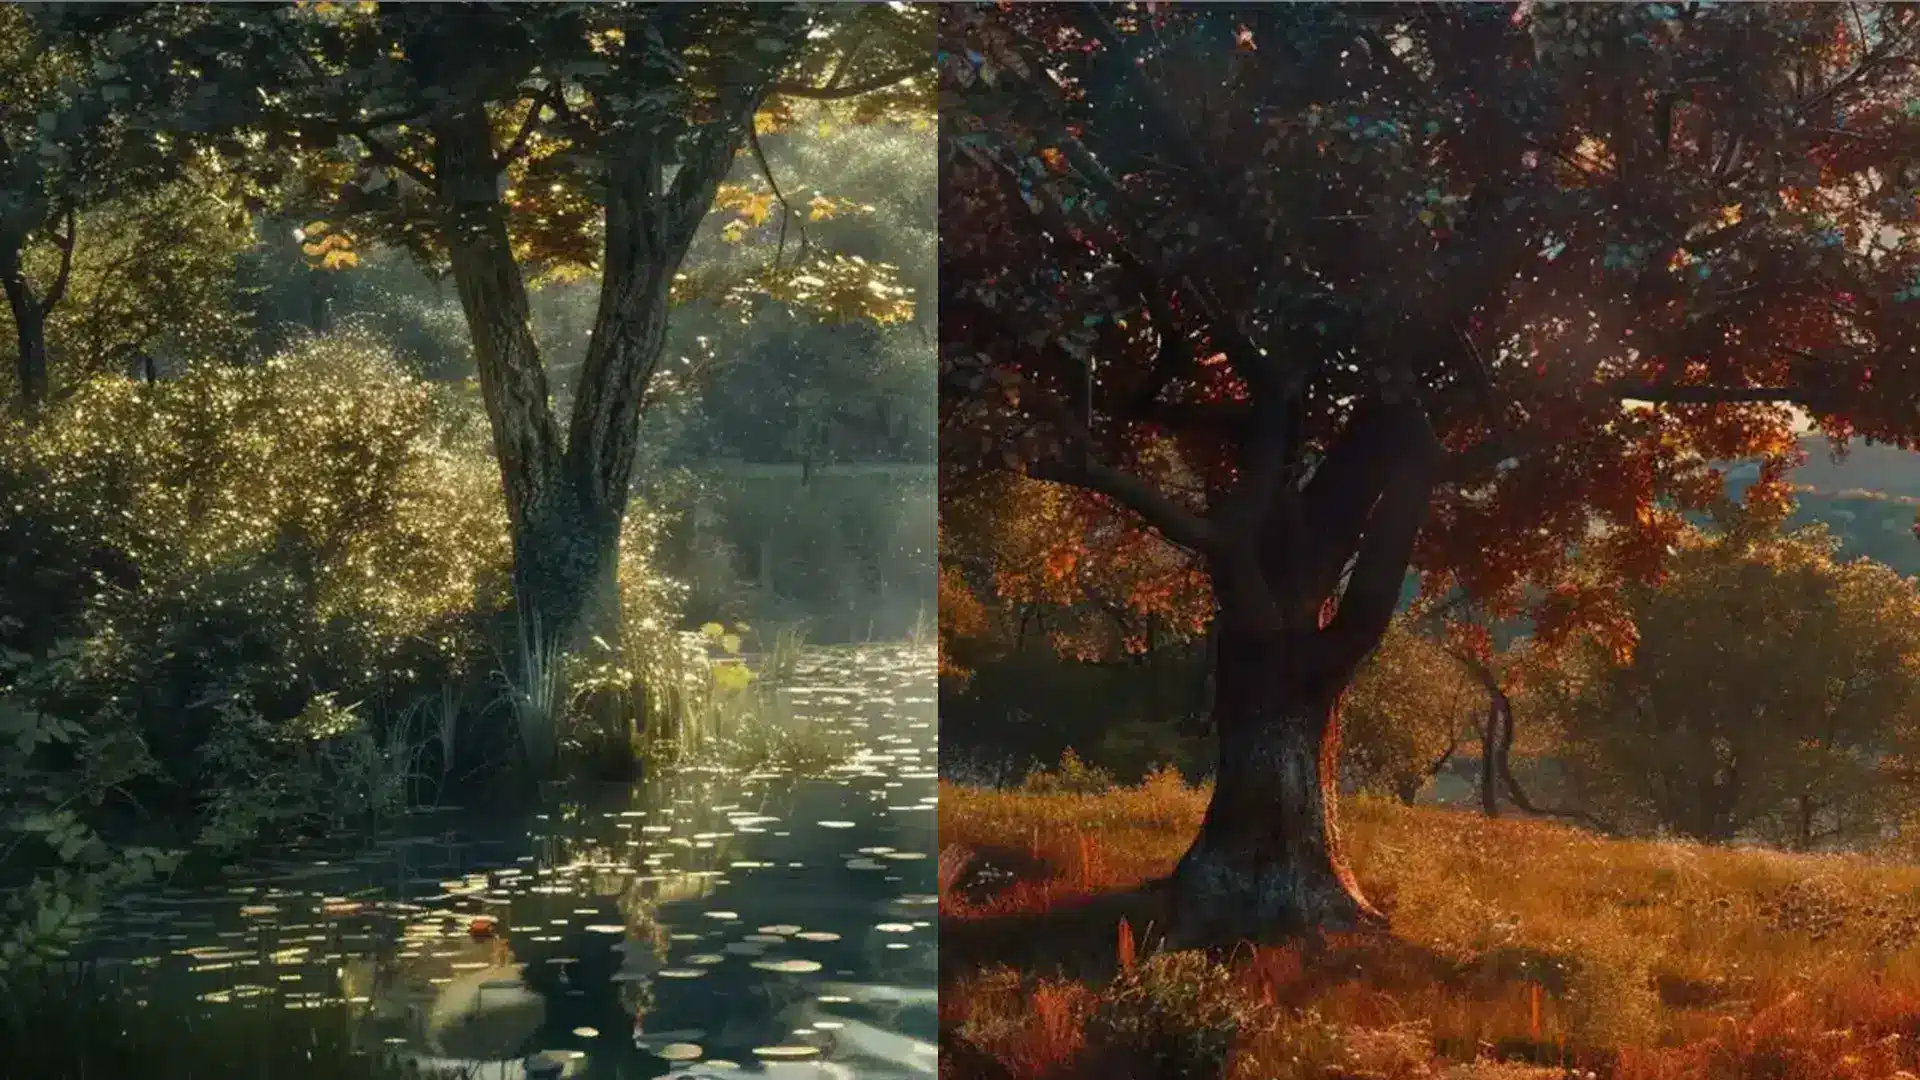
When it comes to professional photography, understanding how to adjust your settings for different types of images is signficant.
Whether you’re capturing vast landscapes or intimate portraits, each demands a unique approach to bring out the full beauty and detail in your subjects.
Mastering the art of perspective in Photoshop can significantly elevate your photography. By adjusting angles and depth, you create more dynamic images that capture attention and tell a story.
Settings for Landscapes vs. Portraits
Aspect
Landscapes
Portraits
Aperture
Smaller aperture (higher f-stop number)
Larger aperture (lower f-stop number)
Lens Recommendation
Wide-angle lens to broaden field of view
Any lens to achieve shallow depth of field
Focus Effect
Everything from the foreground to the background is in sharp focus
Isolates the subject from the background, creating a soft, blurred background (bokeh)
Adjusting settings between landscape and portrait photography involves significant changes mainly in aperture, focal length, and even ISO settings.
Aparture settings:
Landscapes: f/8 to f/16
Portraits: f/1.4 to f/5.6
For optimal results, select a focallength:
Landscapes: 16mm - 35mm
Portraits: 50mm - 85mm
Optimal ISO settings also vary; landscape shots generally succeed with lower ISOs to reduce noise, whereas portraits done in lower light might require higher ISO values.
Understanding wildlife photography equipment is essential when considering the settings for landscapes vs. portraits. The right gear allows you to capture both wide vistas and intimate animal portraits with clarity.
Handling Low Light Images
Low light photography presents its own set of challenges, particularly regarding maintaining image sharpness while avoiding excessive noise.
Fundamental adjustmentsinclude stabilizing your camera, possibly using a tripod, increasing ISO settings judiciously, and exploring longer exposure times if movement isn’t an issue.
Additionally, ISO sensitivity unveiled by increasing ISO settings judiciously can help you manage noise levels effectively
Using tools like Adobe Photoshop’s ‘Noise Reduction’ function can help clean up some of the inevitable grain that comes with higher ISO levels without sacrificing too much detail.
Here are some tips for menaging lowlightsettings:
Use a tripod to stabilize your shot and enable lower shutter speeds without blur.
Increase ISO but keep it as low as possible to minimize noise.
Explore longer exposures for static subjects or creative blur effects.
By tweaking these fundamental parameters according to your shooting environment and the subject matter’s needs, you can drastically improve both the aesthetic appeal and technical quality of your photos.
The Magnetic Lasso Tool is a powerful feature in Photoshop Lightroom designed for making precise selections based on the edges of objects within an image.
While incredibly useful, users can encounter specific issues that may affect their workflow. Here are common problems and their solutions.
Advanced Techniques
The Magnetic Lasso Tool is a powerful feature in Photoshop, ideal for those looking to enhance their selection accuracy and efficiency.
Mastering its use can significantly streamline your workflow, particularly when dealing with complex images.
Combining with the Magnetic Lasso Tool
Combining the Magnetic Lasso Tool with other selection tools, like the Polygonal Lasso Tool, can greatly improve your control and results in Photoshop.
For instance, integrating it with the polygonal lasso tool allows for a more nuanced selection around objects that have both straight and curved edges.
Begin to use the Magnetic Lasso to trace the irregular contours of an object.
When you reach a segment that requires straight lines, switch effortlessly to the Polygonal Lasso Tool without losing your existing selection.
Additionally, using keyboard shortcuts can optimize this process for the lasso tools.
Pressing the ‘L’ key quickly toggles between lasso tools, enhancing flexibility in switching tools mid-selection.
You might also hold down the Alt (Option)key to temporarily change to another lasso tool without permanently switching from your current tool.
Mastering the Magnetic Lasso Tool for Precision in Image Editing
In composite imagery, the magnetic lasso toolprovides creativity and precision when blending multiple images into a single composition.
Its ability to adaptively cling to contrasting edges makes it ideal for extracting detailed elements like foliage or intricate structures which can be transplanted into new settings.
For example, you might want to isolate a figure from one background and incorporate it into a fantasy landscape.
By using the Magnetic Lasso Tool, you start at a well-defined edge of your subject by simply clicking once on an appropriate starting point then dragging around the subject.
The anchor points autonomously set based on contrasts detected by Photoshop’s sophisticated algorithm.
By mastering these techniques to use the magnetic lasso tool, artists and designers alike unlock new potentials within their creative endeavors.
This allows them not just greater control but also a means to express their vision more vividly through digital imagery.
When mastering advanced techniques using the Magnetic Lasso Tool, it’s important to understand similar tools like the Lightroom lasso tool. It can help refine your selection skills, offering a foundation that enhances precision with the Magnetic Lasso Tool.
Common Issues and Solutions with the Magnetic Lasso Tools
The MagneticLassoTool can sometimes struggle with complexedges or similarbackgroundcolors, but adjusting the settings for edgedetection and frequency can improve selection accuracy. Also there are several ways to select background in Photoshop, like magic wand tool, rectangular marquee tool etc.
Dealing with Complex Backgrounds
When using the Magnetic Lasso Tool or smooth skin in Photoshop against complex backgrounds, the tool may struggle to correctly identify edges due to contrasting colors or intricate patterns.
This issue primarily arises because the tool uses edgecontrast to make decisions about where to place the anchor point.
Solution:
Increase the 'Frequency' setting in the tool options bar, which controls how often anchor points are set. A higher frequency can improve edge detection in detailed areas.
Temporarily enhance your image's contrast value (by pressing the Period key) to make edges more distinct. You can adjust it back once you subtract from selection.
Utilize a combination of the three tools; for instance, switch between the Magnetic Lasso and the Polygonal Lasso Tool, which is preferable for manually selecting straight line segments.
By addressing these adjustments, you can significantly improve your control and precision when working against complicated backgrounds with the magnetic lasso tool.
The background eraser tool in Photoshop is essential for achieving clean, professional results in your designs. It helps remove unwanted backgrounds, allowing your subject to shine through effectively.
Frequently Asked Questions
What is a Magnetic Lasso Tool?
The magnetic lasso tool is a smart, versatile feature in Photoshop designed to make complex selections around objects in an image easier.
It automatically snaps to the edge of the object as you draw, simplifying the process of isolating items with precision.
How do you cut with a Magnetic Lasso Tool?
To cut with the magnetic lasso tool, first, select the magnetic lasso icon from the Photoshop tool options bar.
Click on the starting anchor point of the object you wish to cut, trace around it, and complete the loop. Then, press Ctrl+X (Cmd+X on a Mac) to cut.
What is the use of a magnetic tool?
The Lasso Tool in Photoshop is used to make freehand selections by clicking and dragging around the desired area.
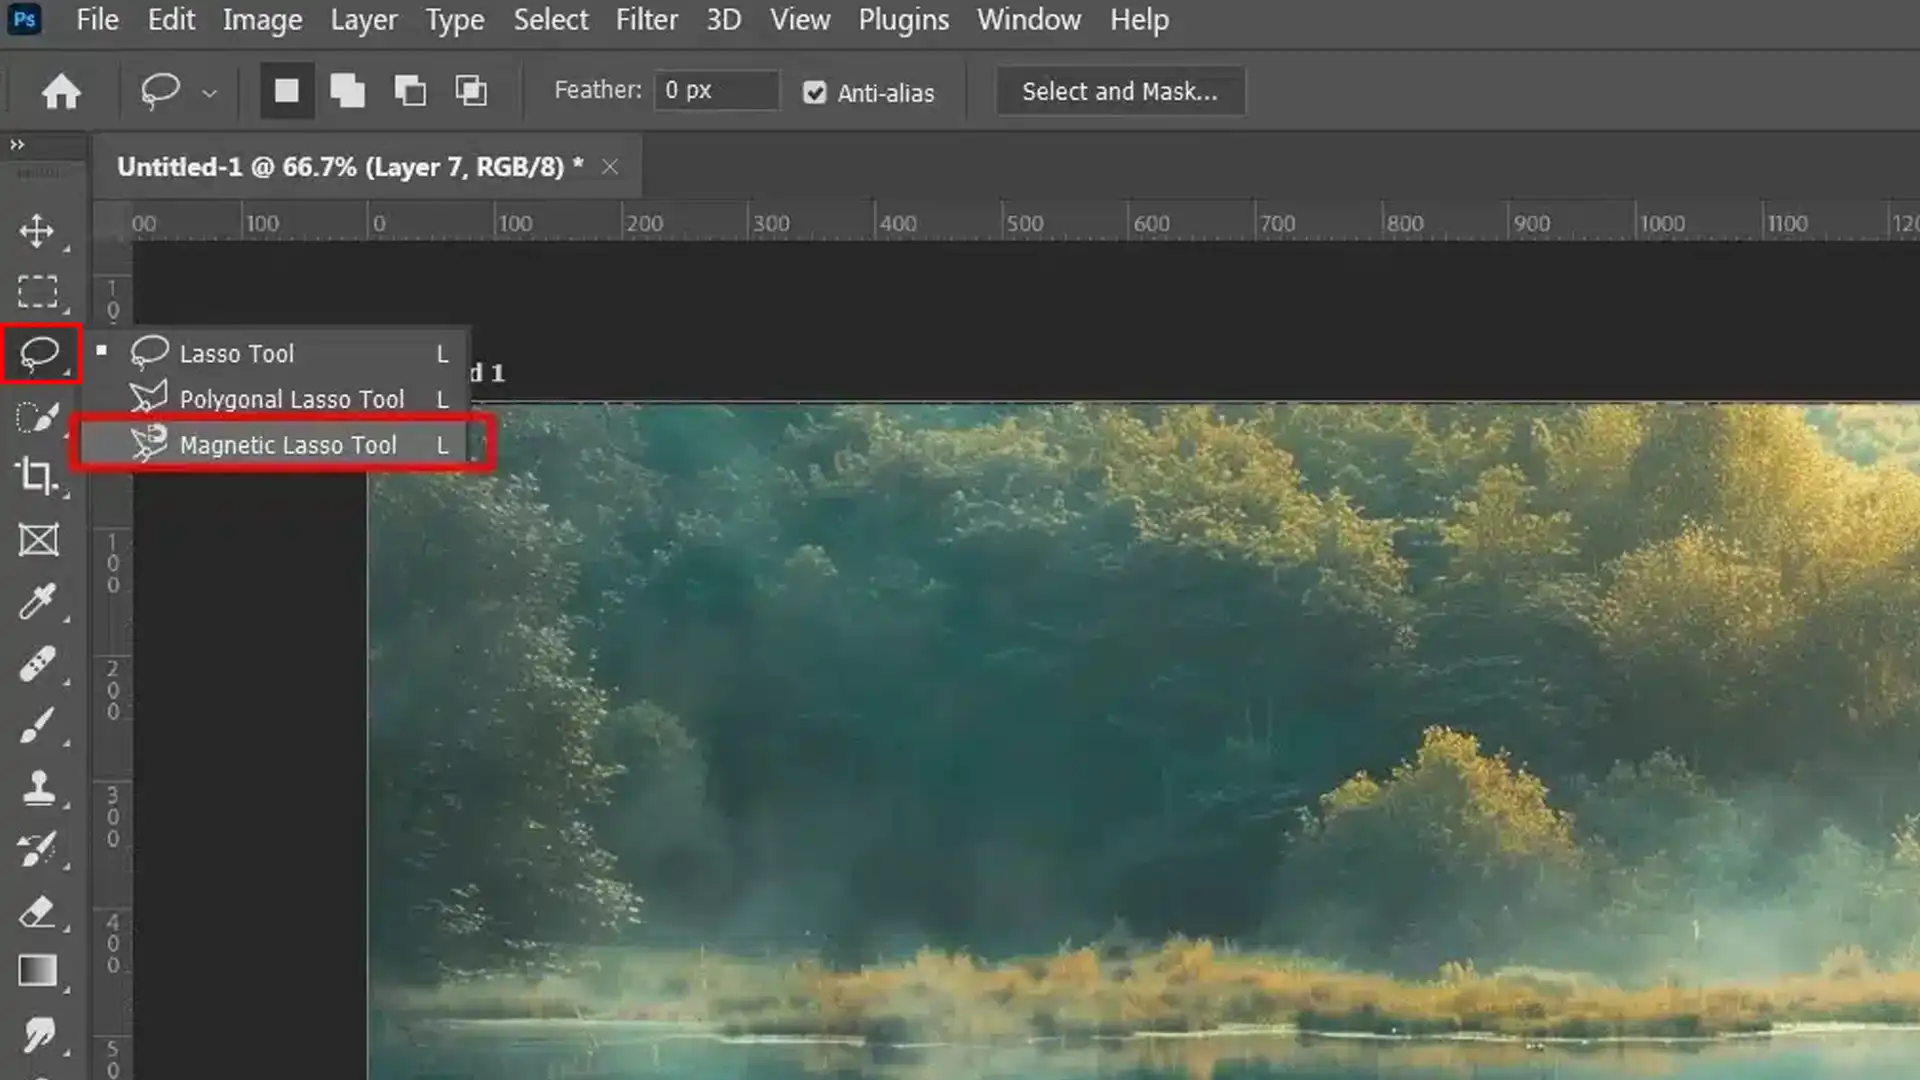
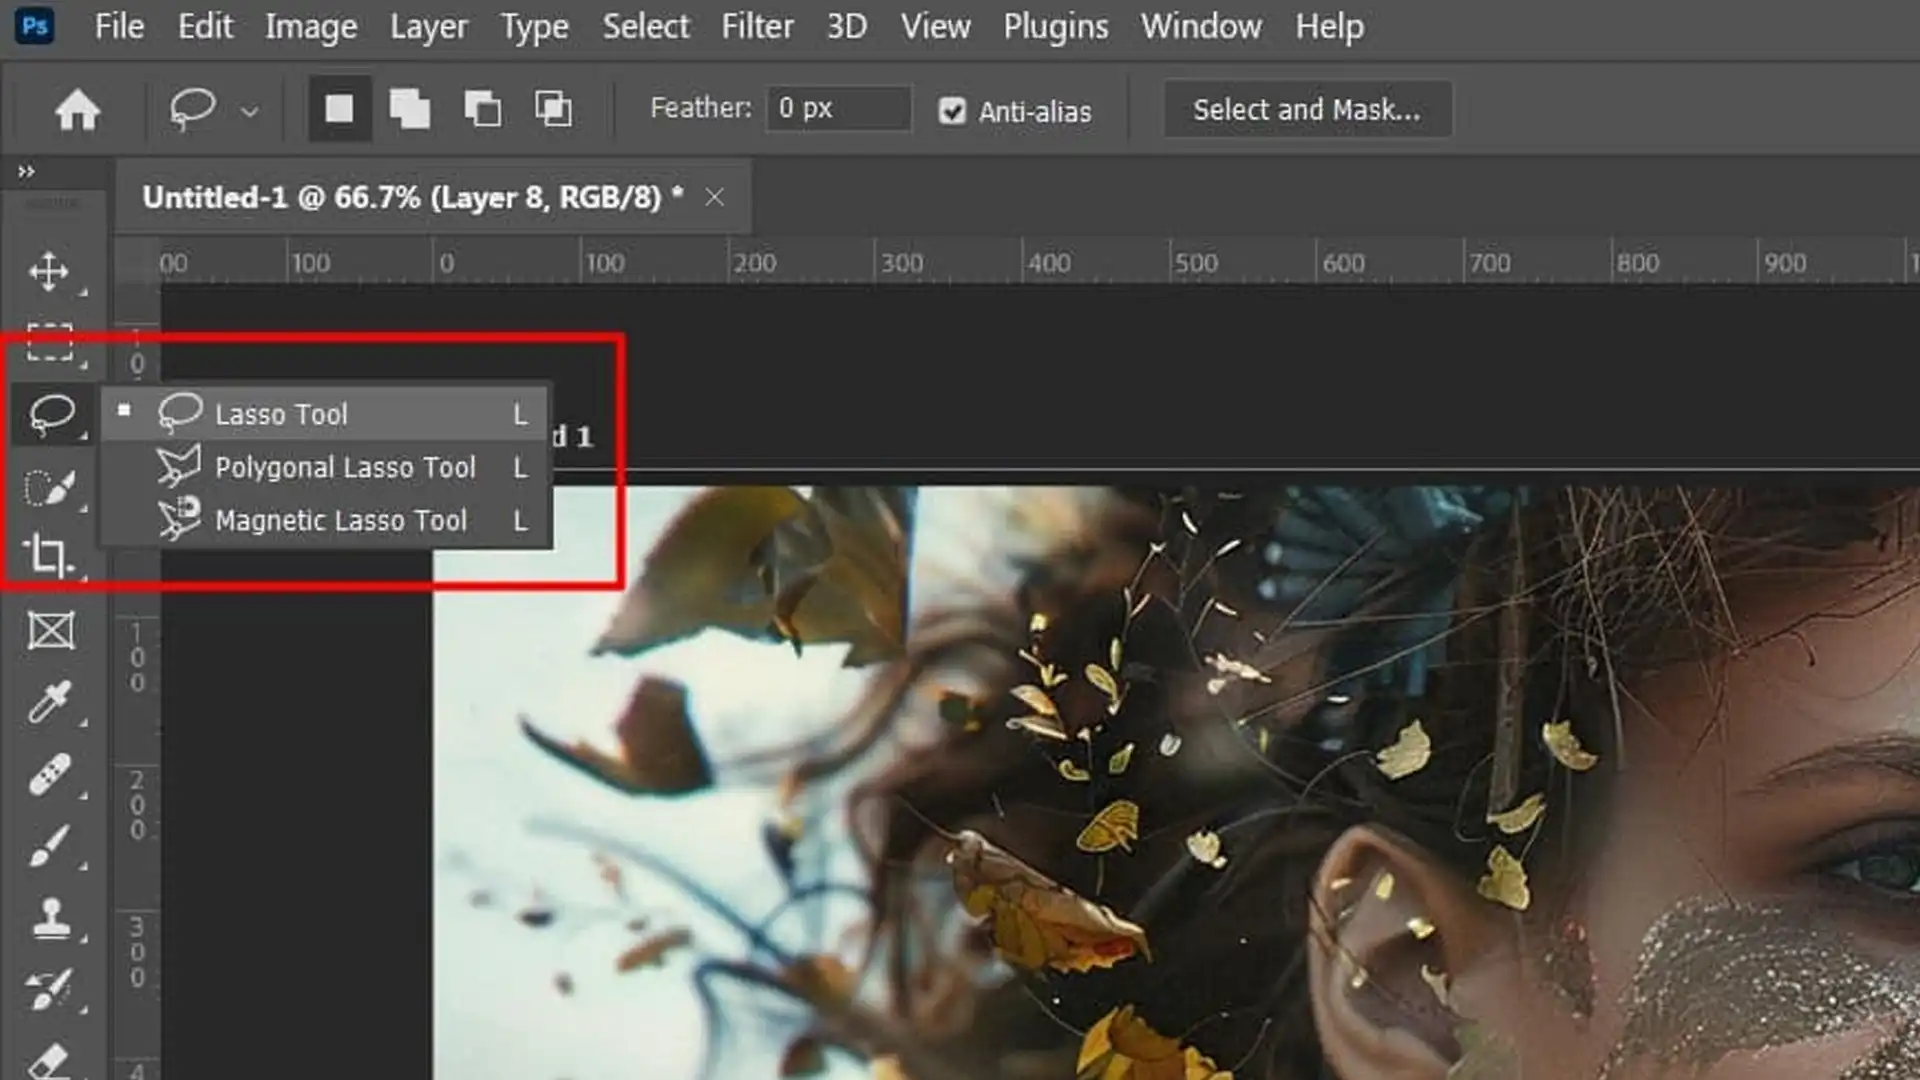
How to Find the Magnetic Lasso Tool in Photoshop?
To find the MagneticLassoTool, click and hold the Lasso Tool icon in the toolbar, then select the Magnetic Lasso Tool from the submenu.
Using the Magnetic Lasso Tool transformed my Photoshop editing.
I once needed to isolate a model from a busy background. Manually selecting every edge seemed daunting, but the MagneticLasso Tool made it easy.
Its precision allowed me to quickly select the model, resize, and refine edges, resulting in a stunning final image.
Elevate your photo editing skills and master lasso tools like the Magnetic Lasso or SmoothSkinTool with our comprehensive Photoshop course and Lightroom course.
Enroll today and start creating with confidence.
If this article has helped you, then Like and Share it with your friends
$2,061.00Original price was: $2,061.00.$1,061.00Current price is: $1,061.00. 27582
Download Your Free Guide Now!
Discover the secrets of photography with our printable guide! Master essential techniques like aperture, shutter speed, and ISO to create stunning images. Get your free printable PDF now and start turning your snapshots into masterpieces!