| Ignoring White Balance |
Colors may look unnatural. |
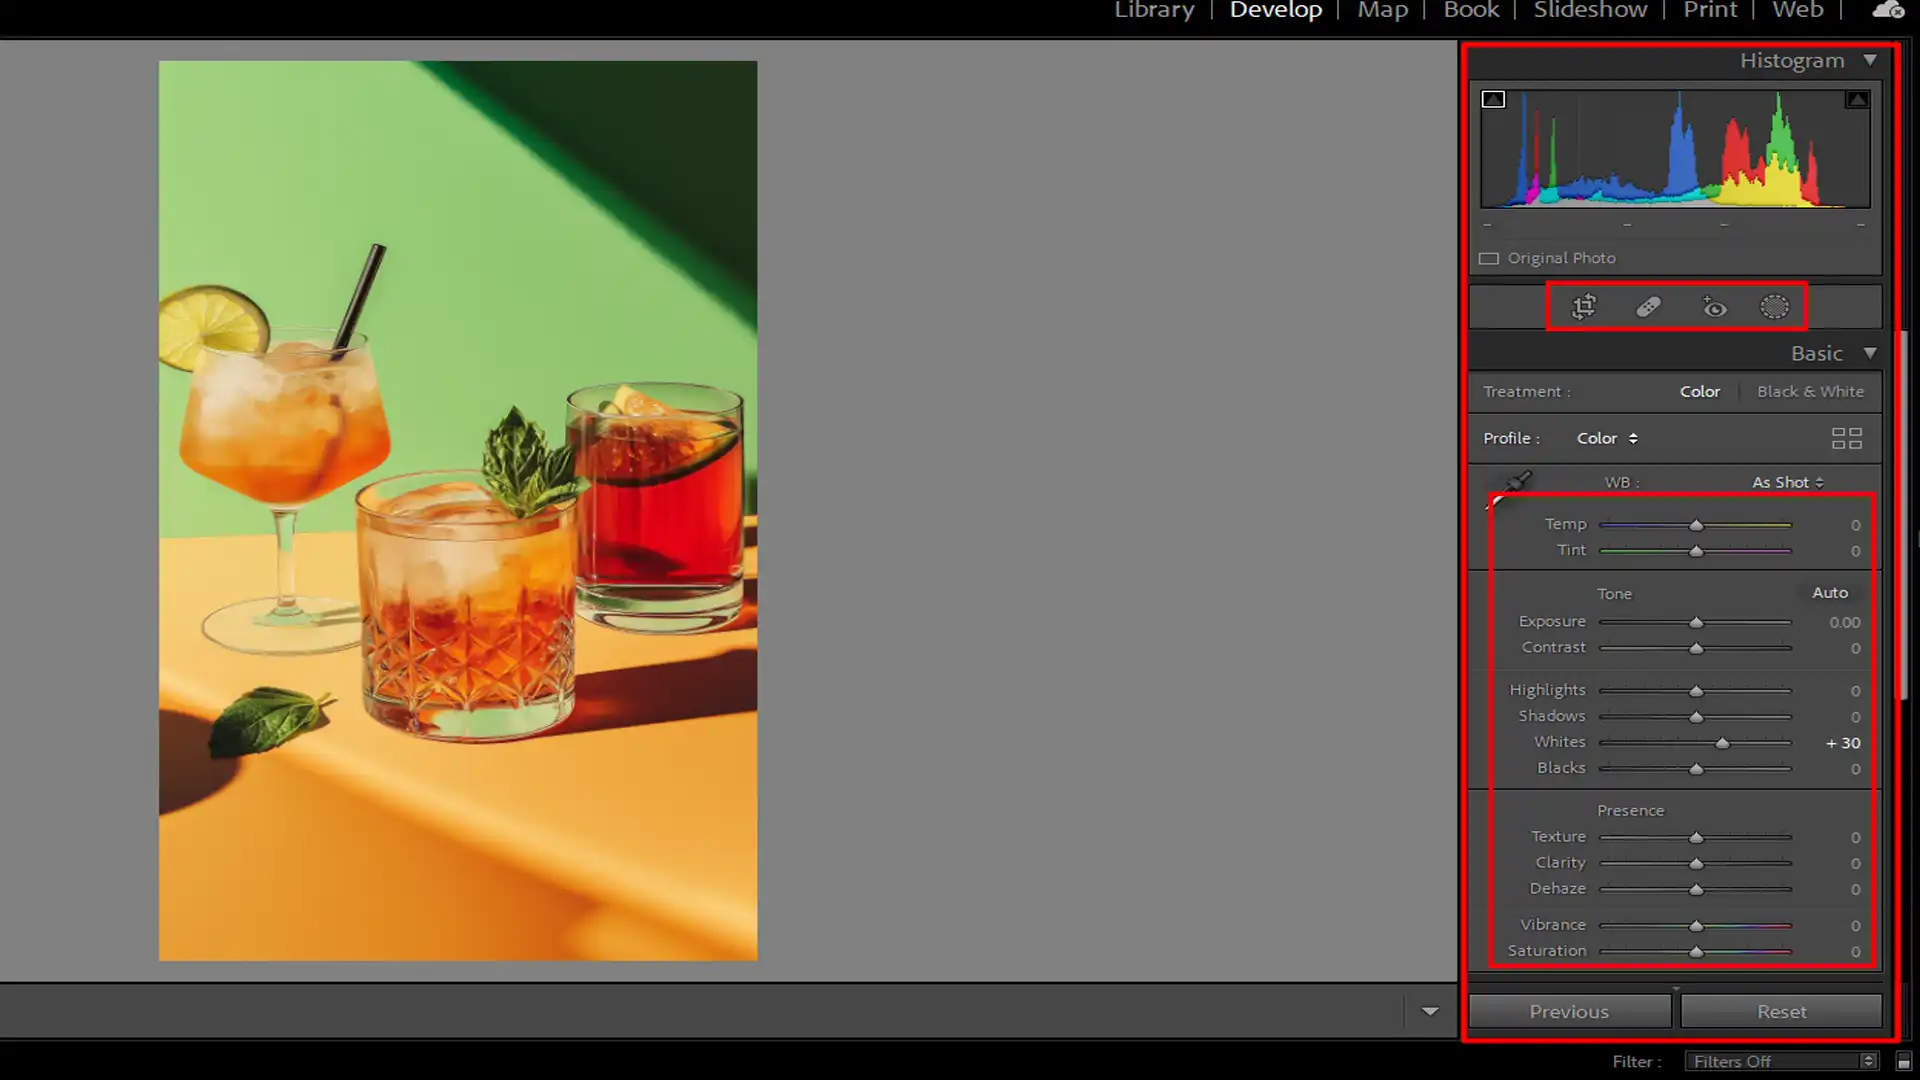
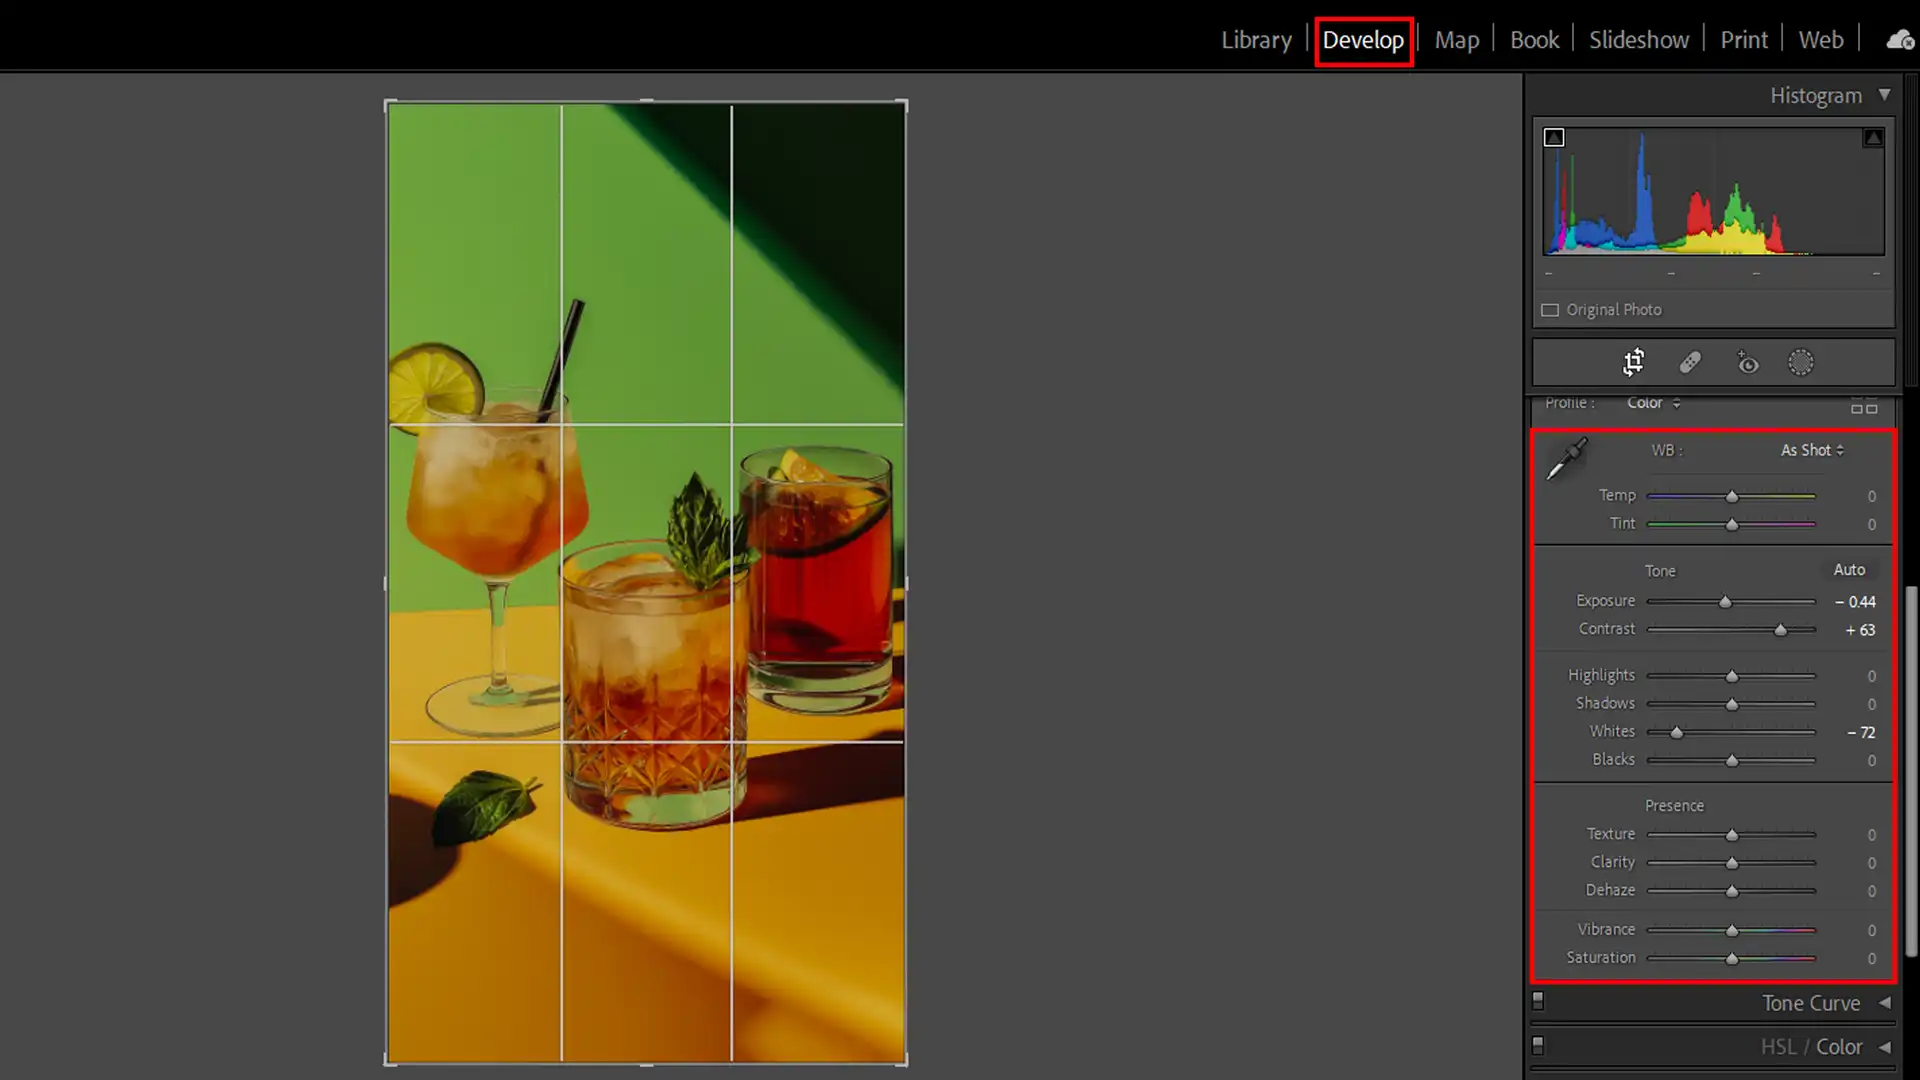
Adjust white balance using the eyedropper tool in the Basic panel. |
| Incorrect Exposure Settings |
Image may be too bright or dark. |
Use the Exposure slider to correct lighting. |
| Avoiding Contrast |
Details may blend together. |
Enhance contrast with the Contrast slider. |
| Over-Saturating Photos |
Colors can become distorted. |
Increase vibrance to boost color without over-saturation. |
| Not Zooming In |
Small errors may be missed. |
Zoom in to correct details and sharpen edges. |
| Misusing Clarity |
Can make photos look unnatural. |
Use Clarity slider moderately to add depth. |
| Overlooking Specific Details |
Important areas might be ignored. |
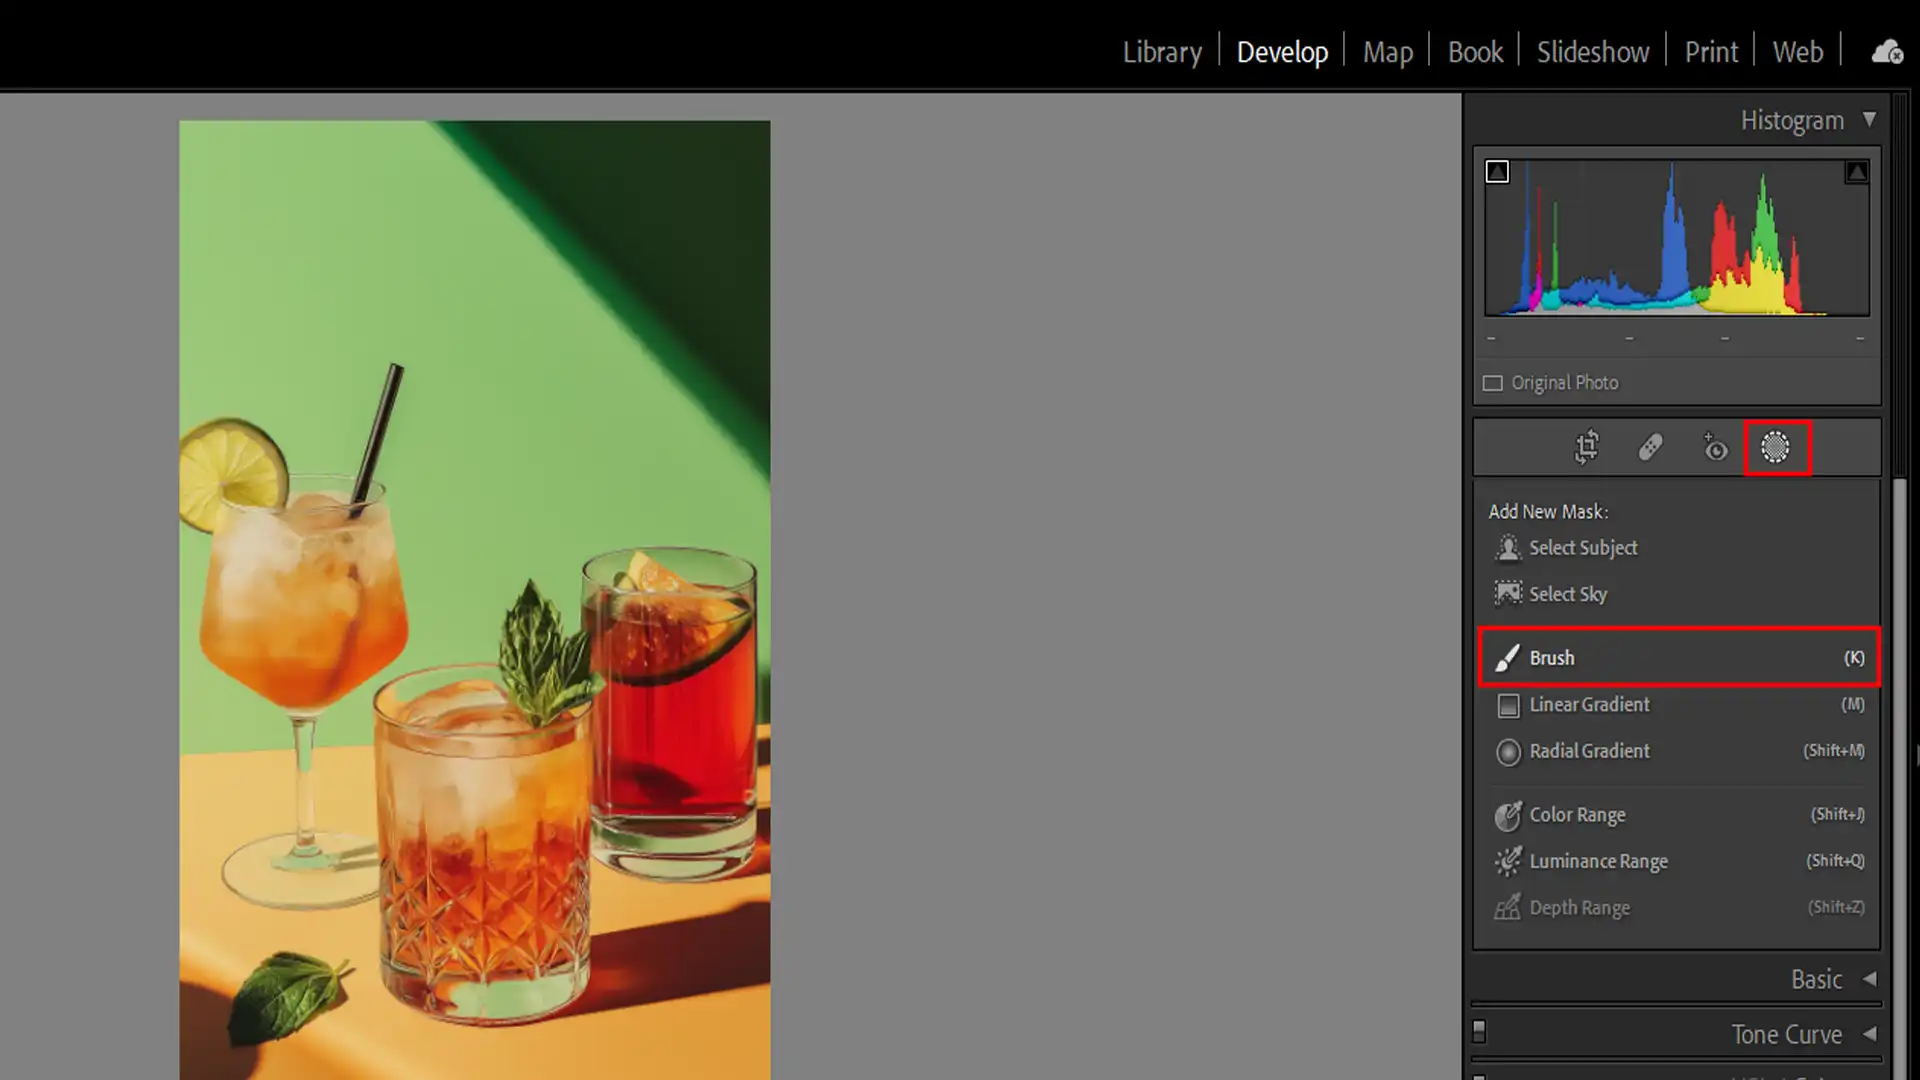
Apply the radial filter for targeted adjustments. |
| Not Working in Layers |
Difficult to undo mistakes. |
Edit in layers for non-destructive changes. |
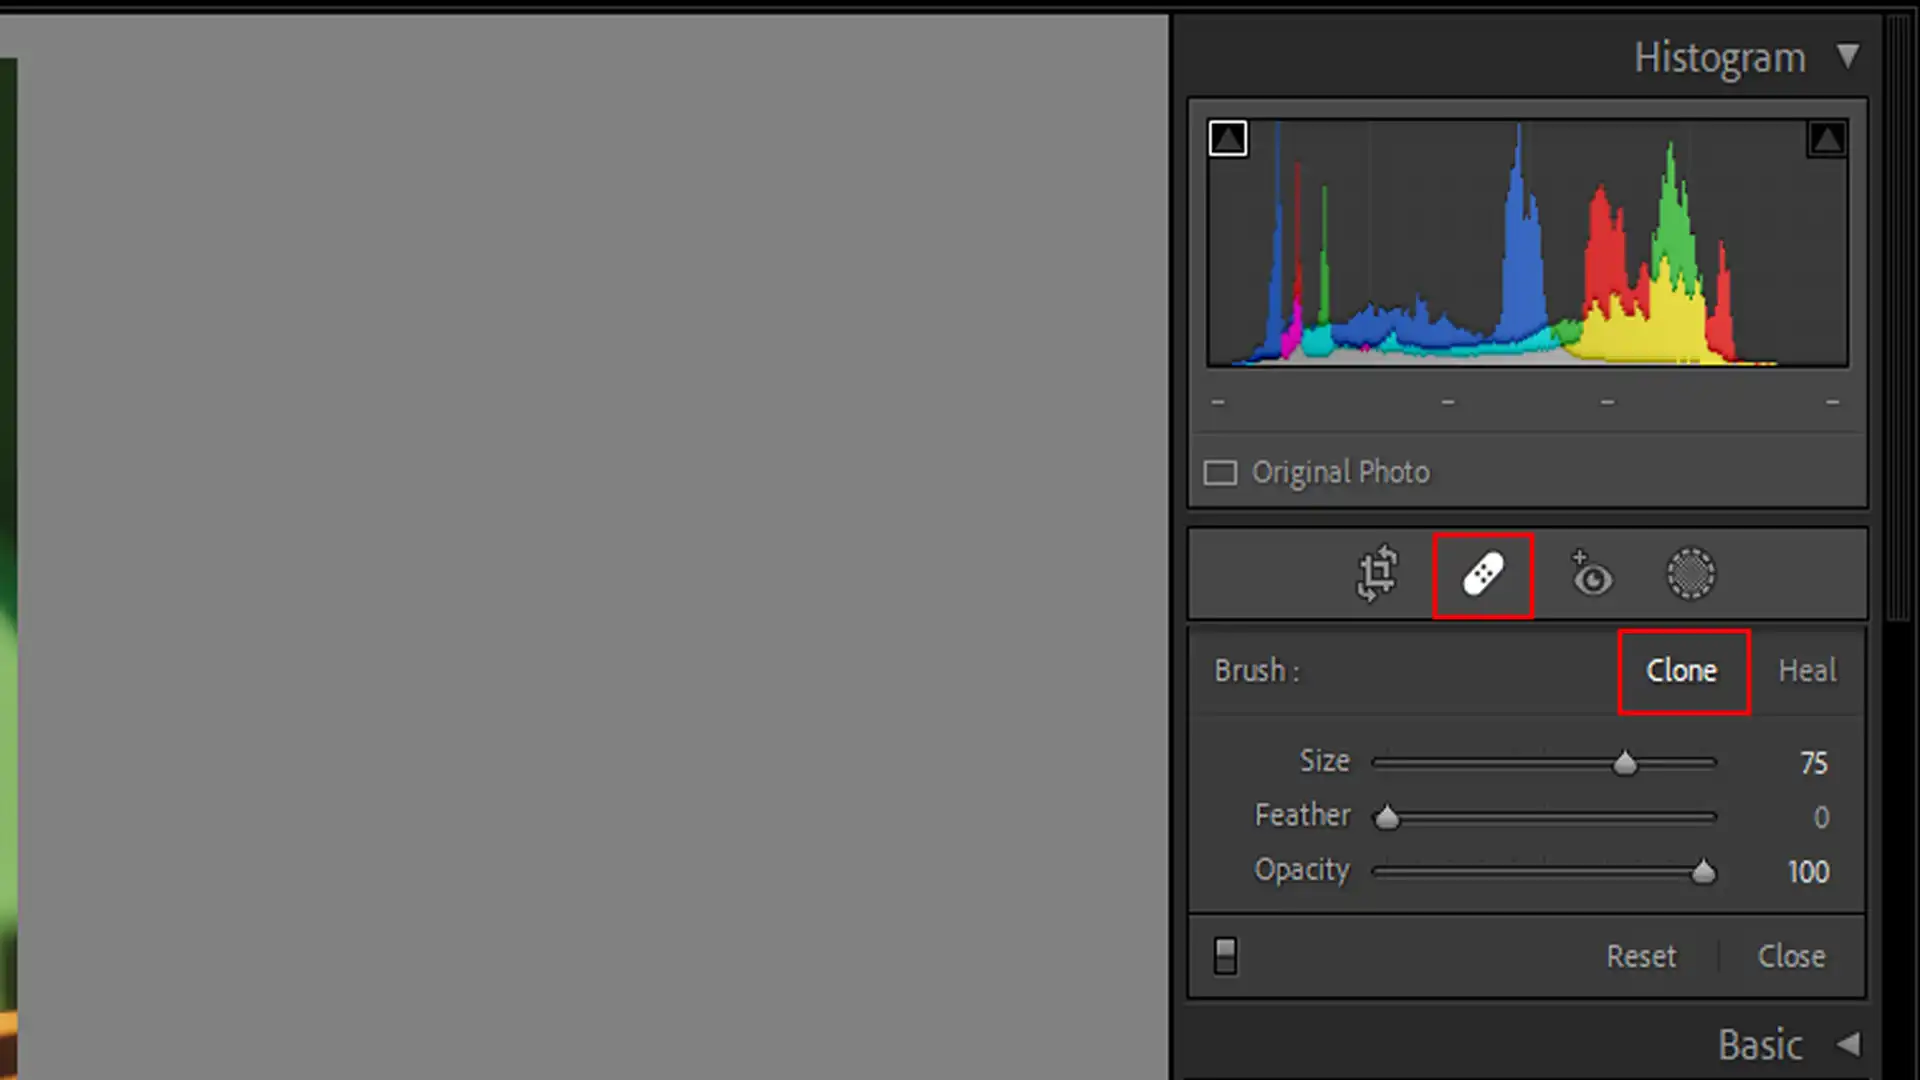
| Removing Unwanted Objects |
Objects can disrupt the composition. |
Use Content-Aware Fill in Photoshop to remove unwanted items. |