Creating a logo is a paramount step for establishing a brand identity, and knowing how to make a logo in Photoshop can give you an edge.
If you’ve ever felt overwhelmed by the endless possibilities in graphic design, you’re not alone. Imagine having the power to bring your vision to life with just a few clicks.
In this guide, I’m going to walk you through the process, making it simple and enjoyable. By the end of this article, you’ll have the skills to create a professional logo that stands out.
Curious to see how easy it can be?
Let’s dive in and unlock your creativity!
Table of Contents
What is Logo Design?
Logo design is the art of creating a visual representation of a brand. Logos communicate a company’s identity through shapes, colors, and typography.
Why Use Photoshop for Logo Creation?

Photoshop offers versatility in editing tools, making it suitable for logo design. Its tools panel includes everything needed for precise adjustments, such as the shape tools and the Pen Tool.
Steps to Make a Logo in Photoshop:
- Create a New Photoshop Document: Open Photoshop and go to the menu bar. Select File, then New. Set your canvas size and background layer.
- Select the Shape Tools: In the tools panel, choose the shape tools. The shape tools like rectangle tool and ellipse tool help define the basic shape of your logo.
- Design with Vector Scalable Graphics: Use the pen tool to draw custom shapes. This ensures scalability without losing quality.
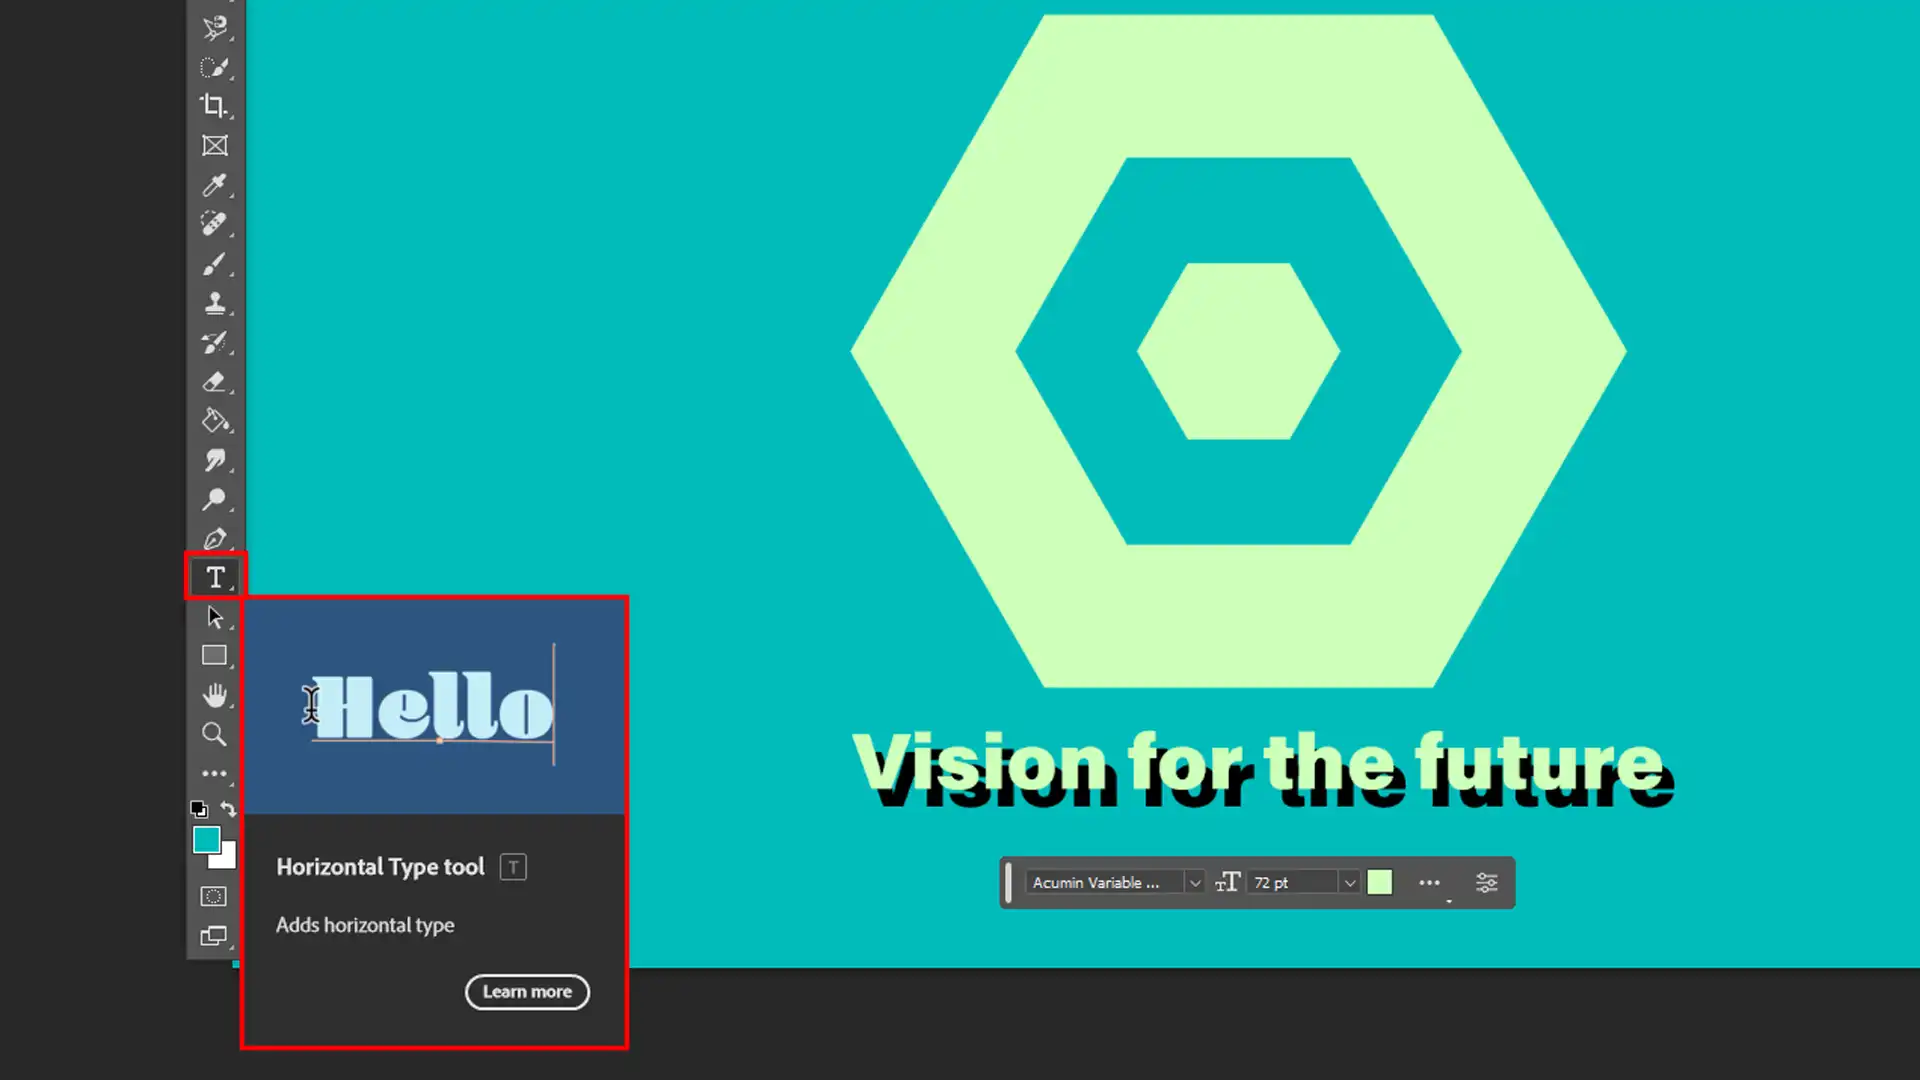
- Add Text: Click on the text tool, then choose a font style that matches your brand identity. Align the text with align tools available in the options bar.
- Render Effects: Right-click on the layer and select Blending Options. Add shadows, glows, or strokes to enhance your design.
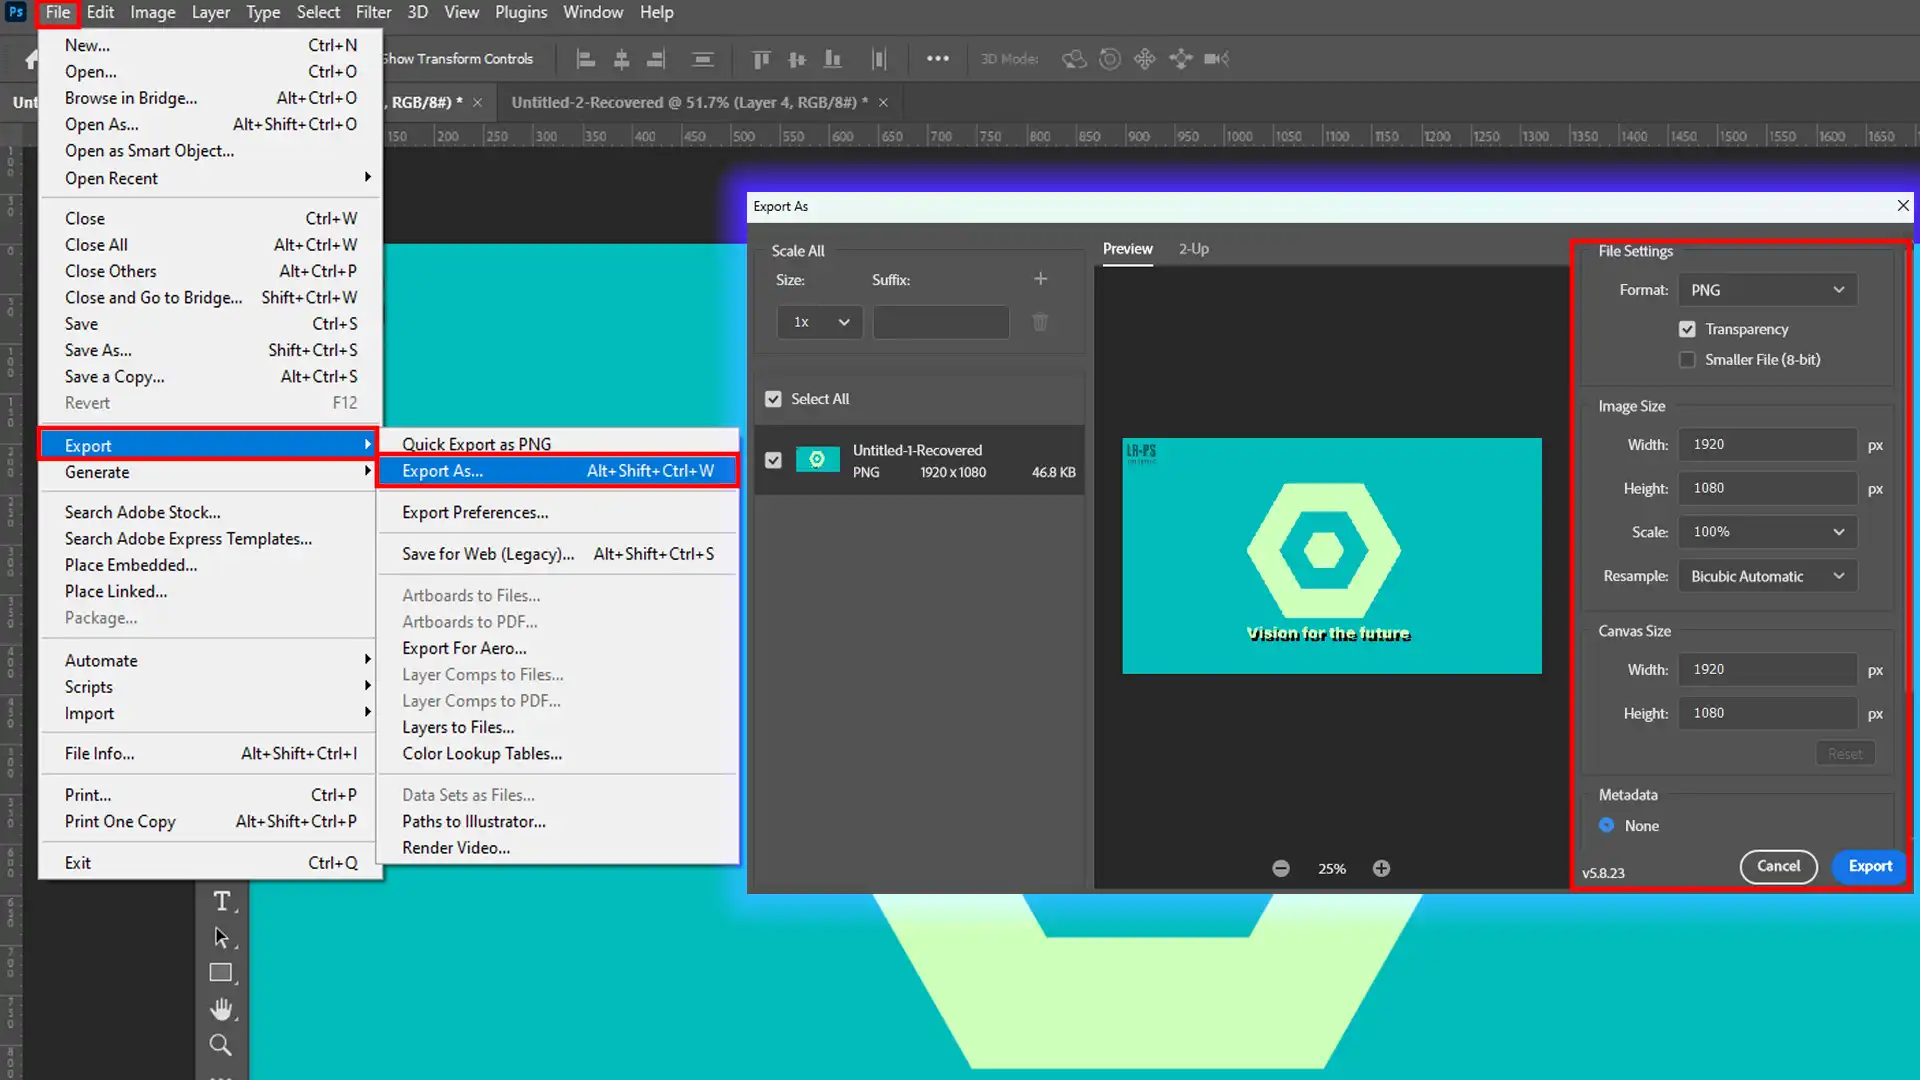
- Save Your Logo: Go to File, then Export. Save your file in formats like PNG or SVG for lossless quality.
Here are some good tips to consider:
- Use multiple layers in the layers panel to organize elements.
- Group-related layers for cleaner editing.
Remember, the logo design process in Photoshop is intuitive and offers flexibility.
Unlock your creativity and elevate your design skills with Adobe Photoshop! Get started today and transform your ideas into stunning visuals!
How to Make a Logo in Photoshop
First things first, it’s necessary to set up your Photoshop workspace properly before you know how to make a logo in Photoshop.
Open Photoshop and create a new document by clicking ‘File’ and then ‘New.’ Set your canvas size according to your logo design requirements.
Ensure your background layer is unlocked by double-clicking it. This allows more flexibility as you move forward.
Organize your tools for easy access on the menu bar. Having the move tool, geometry tools, and text tools readily available speeds up the process.
Using the Shape Tool for Logo Shape

The geometry tools are fundamental in crafting your logo shape. Select the Rectangle, Ellipse, or Custom Shape tool from the toolbar.
Shapes help to form the basic structure of your logo in Photoshop.
Holding down the Shift key while drawing shapes keeps proportions intact. For example, a perfect circle or square will make your design symmetrical and balanced.
If you need to adjust the shapes further, use the direct selection tool. This tool helps refine the edges and angles of your shapes.
When you want to add shapes in Photoshop, the Shape Tool is your best friend. It helps create clean, professional designs that define your brand’s identity.
Adding Text and Effects to Your Logo

Now we get to the fun part-text and effects! Select the Text tool from the toolbar and click on your canvas to begin typing.
Choose a font that reflects your brand’s identity.Then, use the Photoshop options bar to adjust the font color and size.
For added flair, employ layer styles by double-clicking your text layer. Adding shadows, gradients, or strokes can elevate your logo design.
Don’t forget to use multiple layers for different elements of your logo. It helps keep things organized and makes adjustments easier.
Creating a text portrait in Photoshop can enhance your skills in adding text and effects to your logo. This technique allows for creative lettering that makes your logo stand out.
Finalizing Your Logo Design

Once your design is complete, you may want to make final tweaks. Use free transform (Ctrl+T) to resize or rotate any elements as needed.
Check your photoshop logo on different backgrounds to ensure it looks good everywhere-white, black, and transparent.
Do any needed adjustments now. Save your photoshop document in both high-res PNG and SVG formats for versatility.
Using Photoshop background eraser tools is elementary for making your logo background transparent. These tools allow you to easily remove unwanted backgrounds, ensuring your logo stands out on any surface.
Pro Tip: Always explore multiple logo ideas and test them in various scenarios before finalizing. It ensures your logo stands out in any situation.
For those interested in enhancing their skills further, learning about Photoshop shortcuts and essential tools in Photoshop can significantly speed up your workflow and improve your design quality.
Tips for Effective Logo Design
When designing an effective logo, remember to double click on the text box to customize your font, and use the align buttons to position your elements perfectly, ensuring you work with two layers for better organization and flexibility.
Incorporating Photoshop text effects gives a unique touch to your logo. These effects can elevate your logo’s impact, making it more memorable and visually appealing.
| Design Element | Tip | Description |
|---|---|---|
| Text Customization | Double Click on Text Box | Customize your font for better branding representation. |
| Alignment | Use Align Buttons | Position elements accurately for a polished look. |
| Color Selection | Choose 2-3 Colors | Simplify your palette to enhance recognition. |
| Brand Identity | Reflect Unique Traits | Use shapes/fonts that convey your brand’s personality. |
| Testing | Check Across Platforms | Ensure visibility and readability on different media. |
| Simplicity | Keep It Simple | Avoid complexity for better recognition and reproduction. |
Choosing the Right Color Palette
Selecting the right colors is pivotal. It affects how people perceive your brand. Think of colors that represent the emotions and ideas you want your brand to convey.
- Stick with two to three colors to keep things simple.
- You can find inspiration from existing brands or nature.
- Use Adobe Color Wheel for a balanced color scheme.
- Keep in mind what looks good on a screen might differ in print.
Understanding the color profile in Photoshop is crucial when choosing the right color palette for your logo. It ensures your colors appear consistently across different devices, enhancing your brand’s identity
Incorporating Brand Identity
Your logo should reflect your brand’s personality and values. Consider what makes your brand unique. Is it modern or Traditional?
- Use shapes and fonts that communicate your brand's character.
- Straight lines and bold fonts can convey strength, while soft curves and light fonts can show friendliness.
- Remember, simplicity is key. A complex design may look impressive but can be difficult to recognize or reproduce.
Testing Your Logo Across Platforms
After creating your logo in Photoshop, test how it appears on various platforms. Mobile devices, social media, and printed materials can all show your logo differently.
- Check its visibility and readability in different sizes. Ask yourself if it’s still recognizable when it’s small.
- Ensure the colors and shapes remain distinct across different backgrounds.
- This step helps in identifying any final tweaks needed.
Learning how to add a watermark in Photoshop is necessary to protect your logo from unauthorized use. A well-placed watermark ensures your brand remains visible and secure.
Knowing the best resolution for Photoshop is fundamental for web use or prints. This knowledge helps ensure your images are crisp and clear, maintaining quality whether displayed online or in physical formats.
Creating Custom Shapes and Brushes
Creating a unique logo idea in Photoshop often involves custom shapes and brushes.
To do this:
- Start by making a new layer.
- Choose the geometry tools and draw your shape.
- Customize it using the direct selection tool.
- Create custom brushes by selecting part of your design and going to Edit > Define Brush Preset.
- Save your custom shapes and brushes for future use. They can speed up your workflow and maintain consistency.
Pro Tip: When you think you’re done, take a break. Come back with fresh eyes. This can help you spot any imperfections you missed before.
Common Mistakes in Logo Design
One common mistake in logo design is forgetting to double click on the white box of the background layer to unlock it, which limits your ability to edit and enhance your logo effectively.
Overcomplicating the Design
It’s easy to get caught up in trying to make your logo stand out, but overcomplicating the design can do more harm than good.
A simple, clean logo is often more memorable and versatile. When you design logos, stick to basic shapes and minimal colors.
This approach not only makes the logo in Photoshop easier to recreate but also ensures it looks good on various platforms.
To avoid overcomplicating:
- Focus on a single concept or idea.
- Limit the number of colors and fonts.
- Keep elements balanced and spaced out.
Remember that a great logo doesn’t need to be intricate; it needs to be clear and impactful. If you find yourself adding too many elements, take a step back and consider whether each part is necessary.
Simplify wherever possible.
Ignoring Scalability
Another common mistake is not considering how your logo will look at different sizes. Scalability ensures your logo retains its integrity whether it’s on a business card or a billboard.
When creating a logo in Photoshop, always test it in various sizes to see if it remains legible and visually appealing.
To ensure scalability:
- Create your logo using vector shapes.
- Avoid intricate details that may not scale well.
- Test the logo's readability at both small and large sizes.
Think about all the places your logo might appear-from a website favicon to a large storefront sign. Make sure it works well in all these scenarios.
By ignoring scalability, you risk ending up with a logo that doesn’t represent your brand consistently.
Pro Tip: Always create a new layer for each element when crafting your logo in Photoshop. This gives you greater control and flexibility during the design process.
Additionally, familiarize yourself with fundamental tools in Photoshop to streamline your workflow and enhance your design efficiency.
Exploring layer styles in Photoshop can significantly enhance your logo and brand identity. These styles allow you to add depth and dimension, making your logo more visually appealing and memorable.
Frequently Asked Questions (FAQs)

How do I create a logo in Photoshop?
- Open Adobe Photoshop and create a new document with your desired dimensions.
- Select the 'Tools' panel to access different shapes, brushes, and text options to start designing your logo.
- Experiment with layers and colors to add depth and visual interest to your logo.
- Use the 'Save As' feature to save your logo in a format suitable for your needs, like PNG or JPG.
Does Photoshop have logo templates?
- Yes, Adobe Photoshop offers a variety of pre-designed templates, which can be a great starting point for creating logos.
- To find these templates, go to the 'File' menu, select 'New', and then browse the available templates under the 'Logo' category.
- These templates are customizable, allowing you to adjust elements to suit your branding requirements.
How to design a logo for beginners?
- Start with a clear idea of your brand identity-think about your brand colors, fonts, and symbols that represent your business.
- Use simple shapes and limited colors to keep your logo versatile and easy to recognize.
- Tools like Adobe Photoshop can help you experiment with different designs. Consider watching tutorials or taking short courses to understand the basics.
Is it okay to make a logo in Photoshop?
- Yes, creating a logo in Photoshop is perfectly acceptable, especially for beginners or those needing a quick solution.
- However, for more scalable vector graphics, professional designers often recommend software like Adobe Illustrator.
- Photoshop logos can work well for web use or smaller prints where high scalability is not a priority.
Conclusion
learning how to make a logo in Photoshop can be an exciting journey. I remember when I first started, I felt a bit lost with all the tools available.
However, by taking it step by step, I was able to create logos that I was proud of. Using the shape geometry tools, adding text, and applying effects helped me bring my ideas to life.
If you want to enhance your skills further, I recommend checking out my Photoshop Course and Lightroom Course. These courses will provide you with more tips and techniques to improve your designs.
Remember, Adobe offers powerful tools that can help you grow as a designer. You can find more about Adobe Photoshop Lightroom.
Enjoy your design journey!
Read more about Photoshop:


