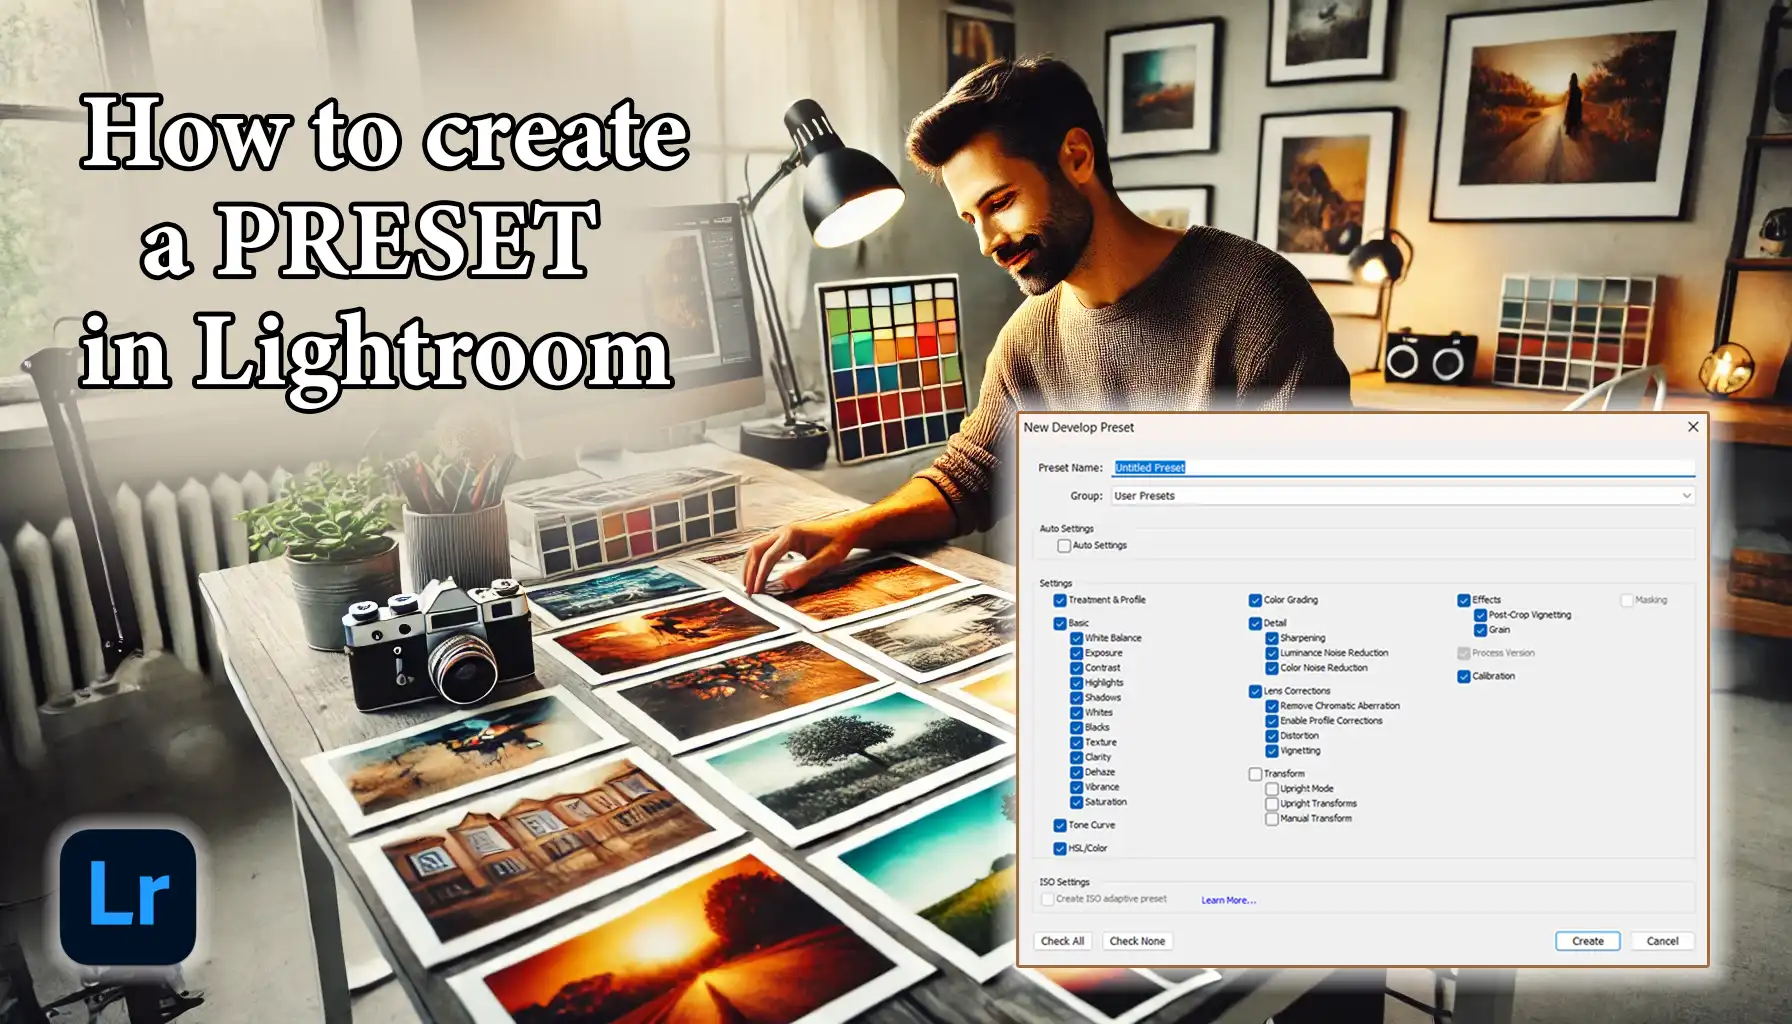
Are you curious about how to create a preset in Lightroom? Imagine transforming your photos with just one click, making them look stunning and professional.
In this guide, I’ll walk you through the simple steps to craft your very own preset, tailored to your unique style.
Whether you’re a beginner or a seasoned photographer, mastering Lightroom presets can save you time and elevate your editing game. Ready to dive in and unleash your creativity?
Keep reading, and let’s get started on revolutionizing your photo refining process!
Table of Contents
How to Create a Preset in Lightroom
Creating your own Lightroom preset can save you time and ensure consistency in your photo edits.
Let’s walk through the process step-by-step to help you create your own Lightroom preset easily and efficiently.
Step-by-Step Guide to Creating Lightroom Presets
Creating Lightroom presets is a quick and efficient way to streamline your editing process. Let’s go through the steps to get started.
Open your Image
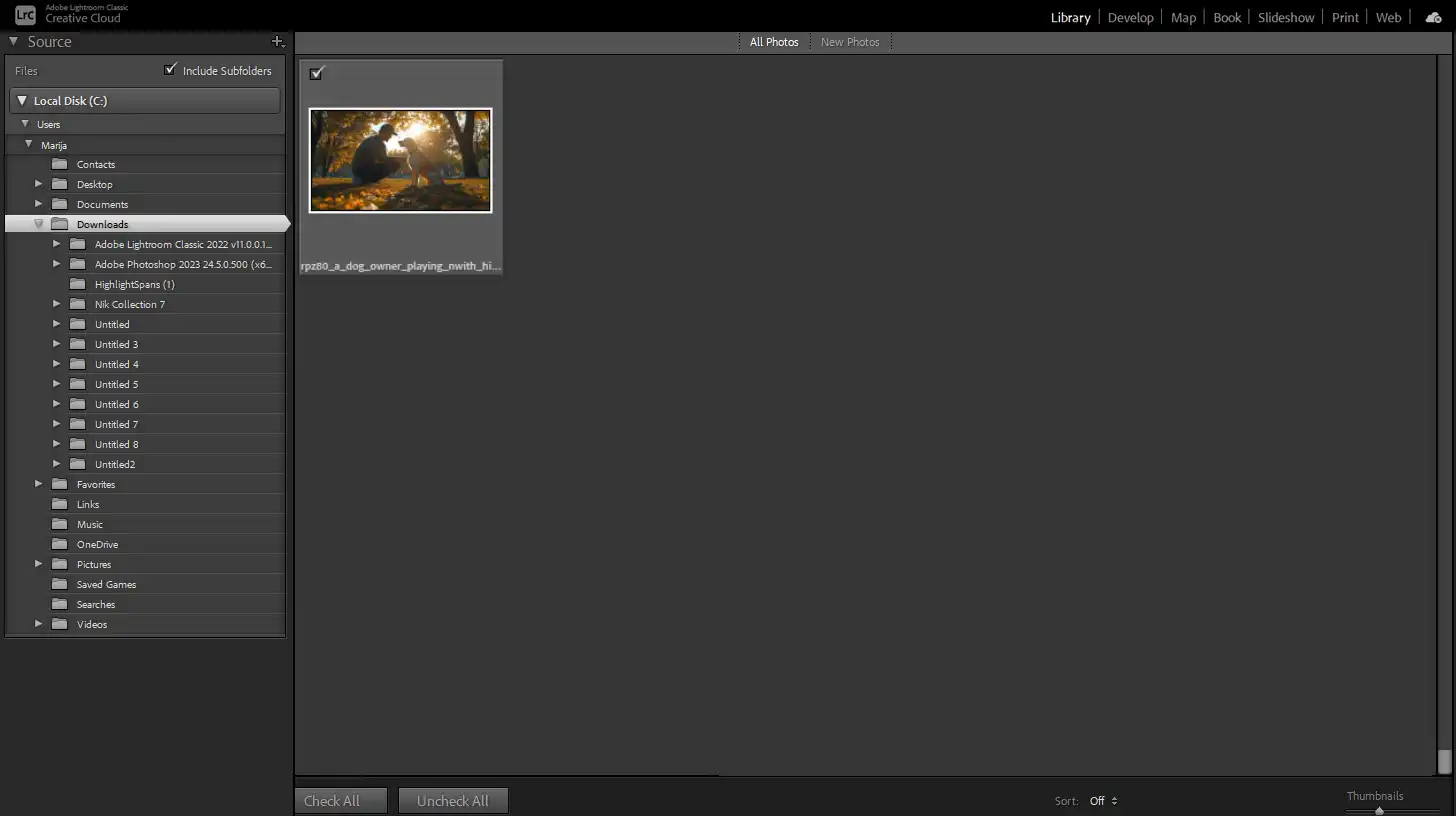
Creating a preset is simple. First, open your image in Lightroom.
Making Adjustments in the Develop Module
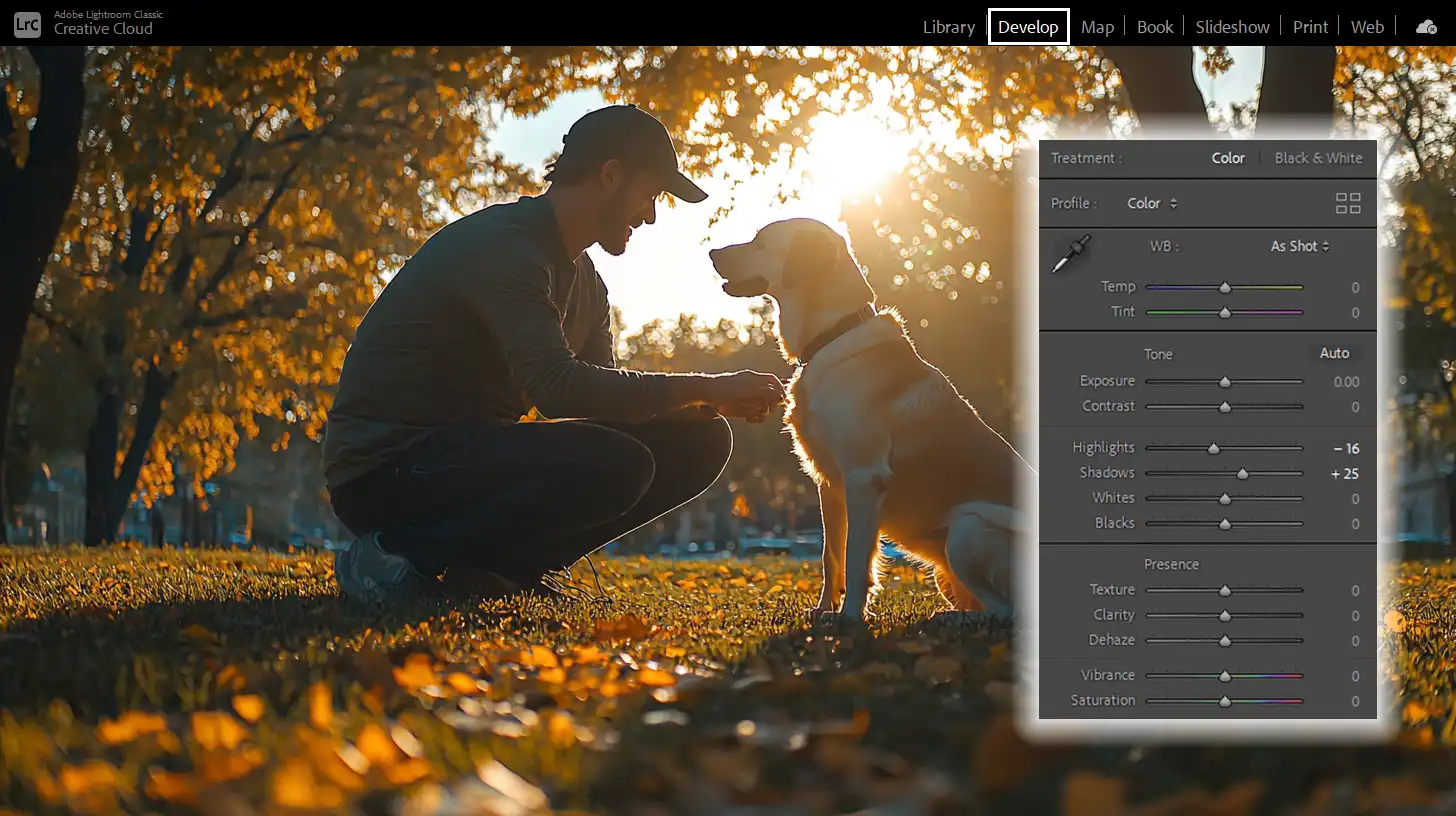
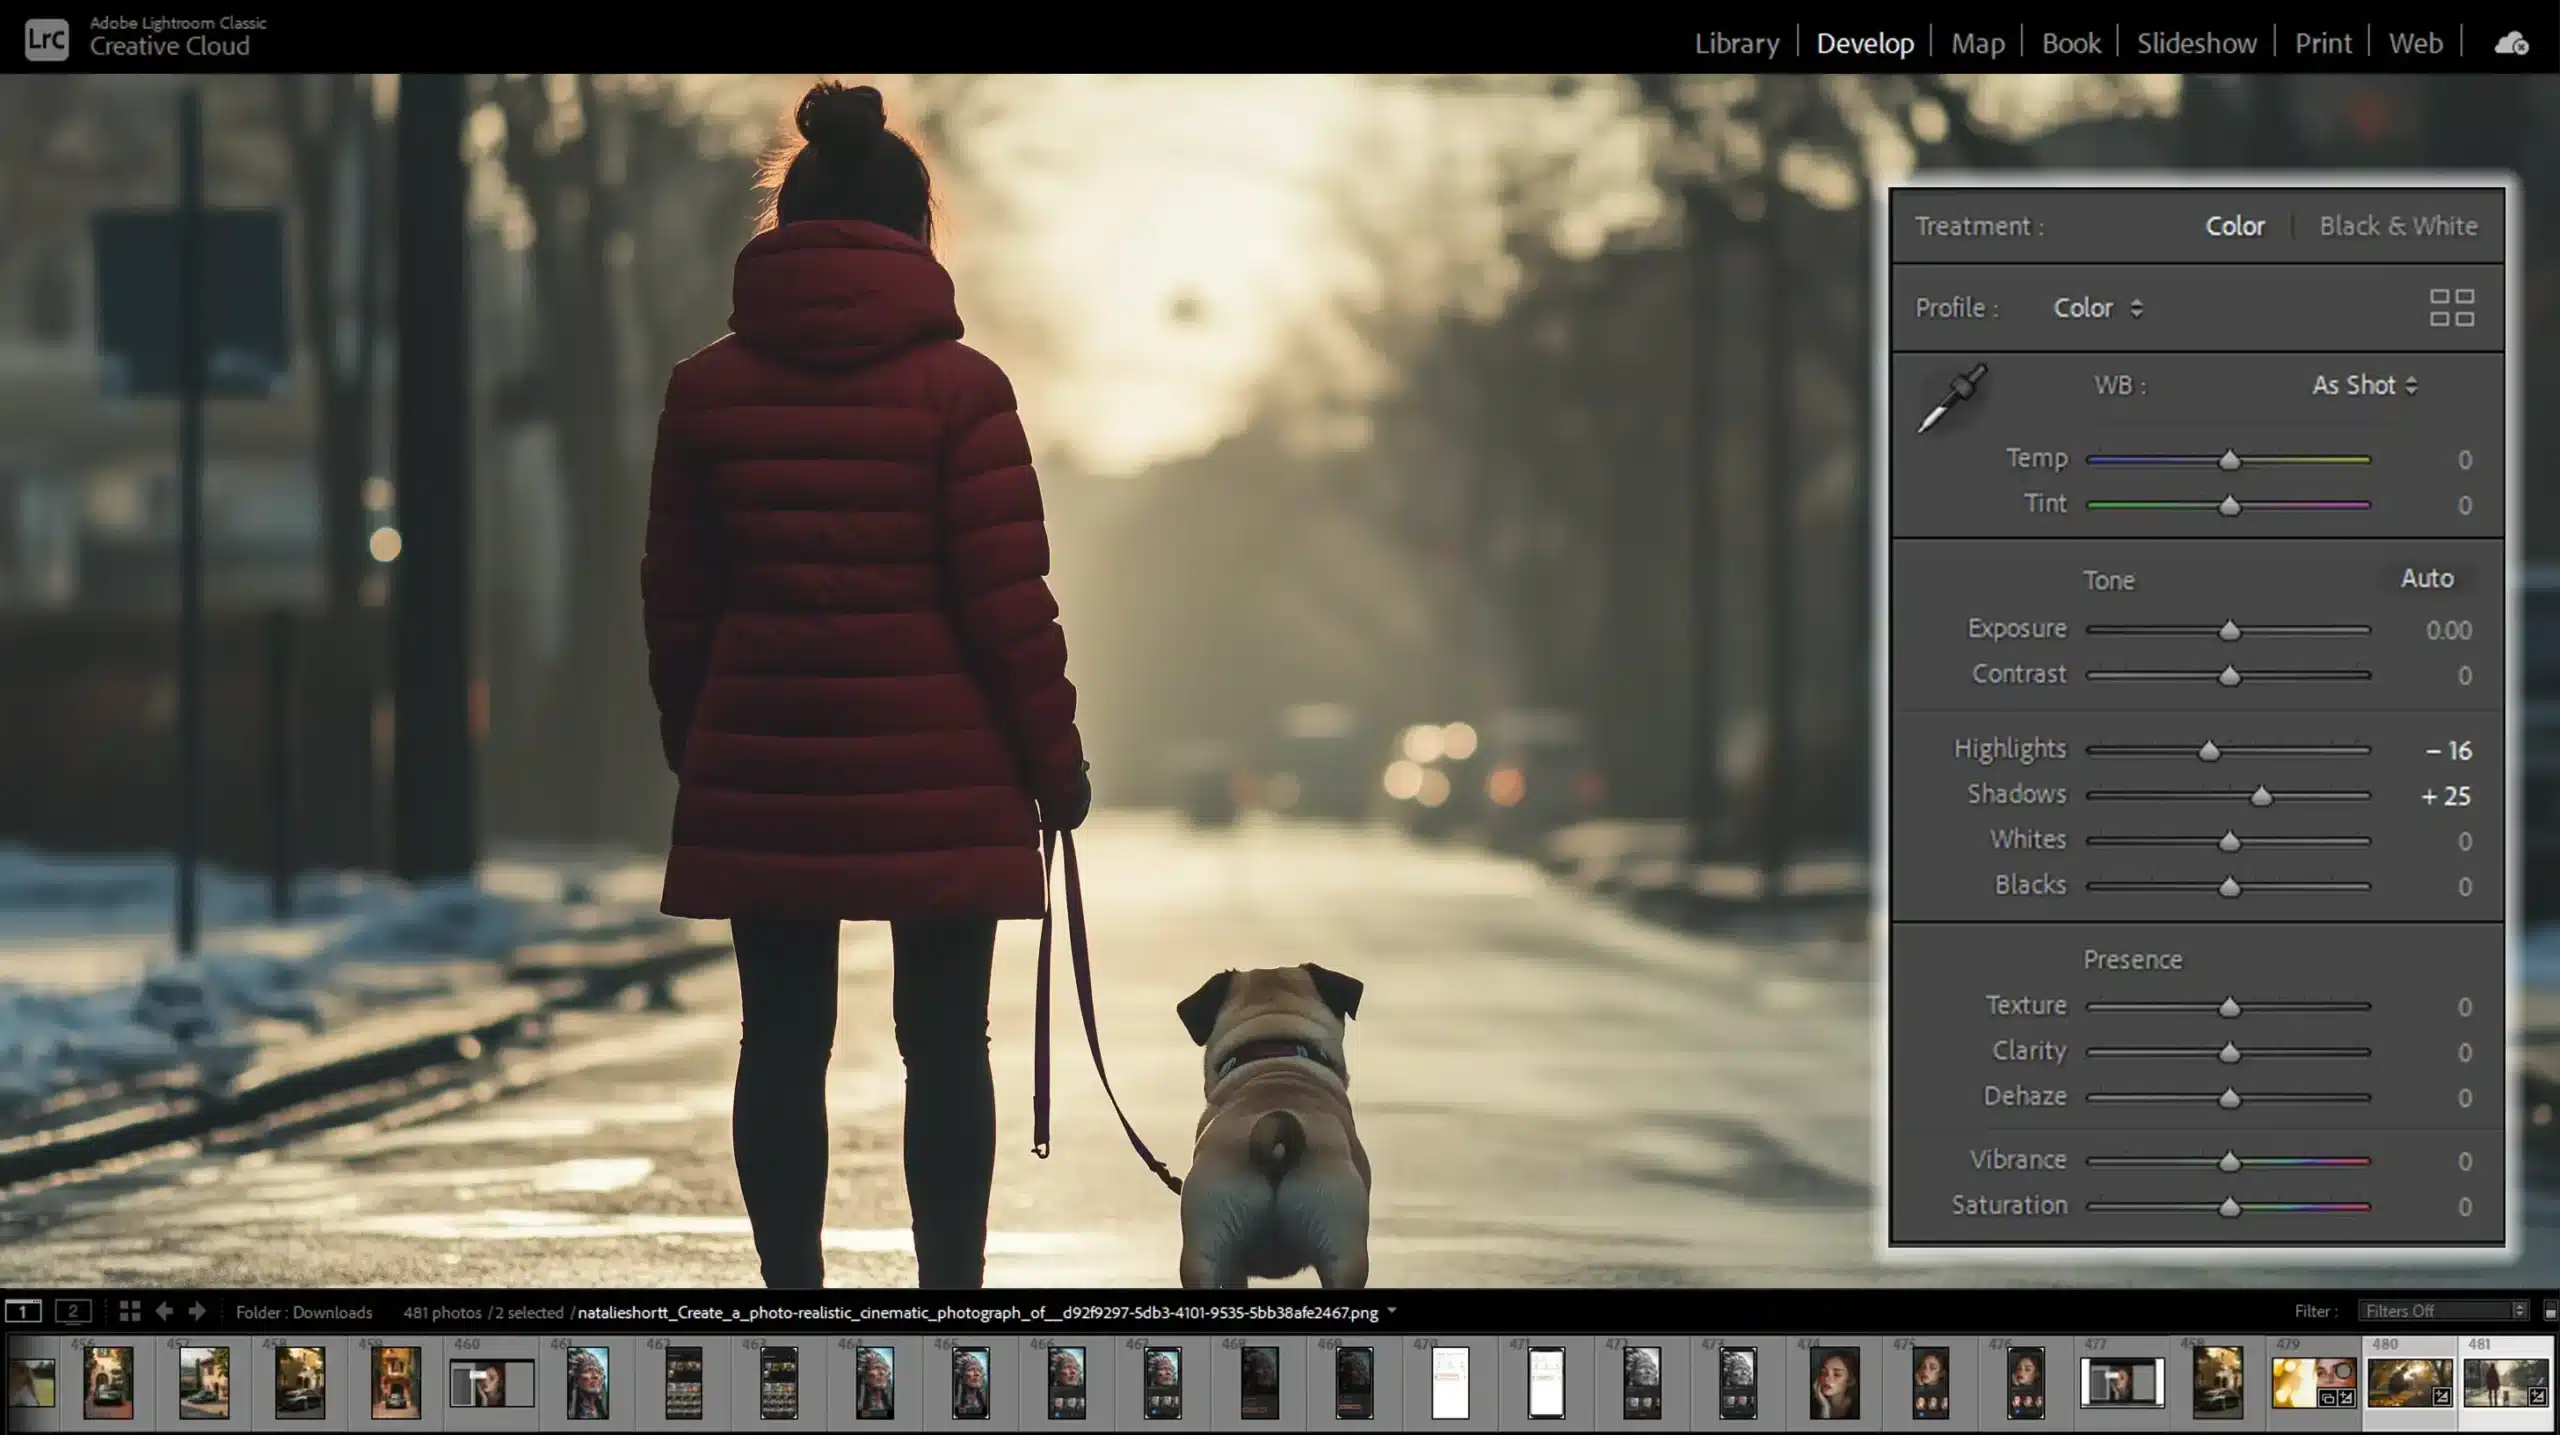
Ensure you are in the Develop module. Make all your desired adjustments. Tweak the exposure, contrast, highlights, shadows, split toning, and other settings. These adjustments reflect your editing style.
Saving Your Custom Preset in Lightroom
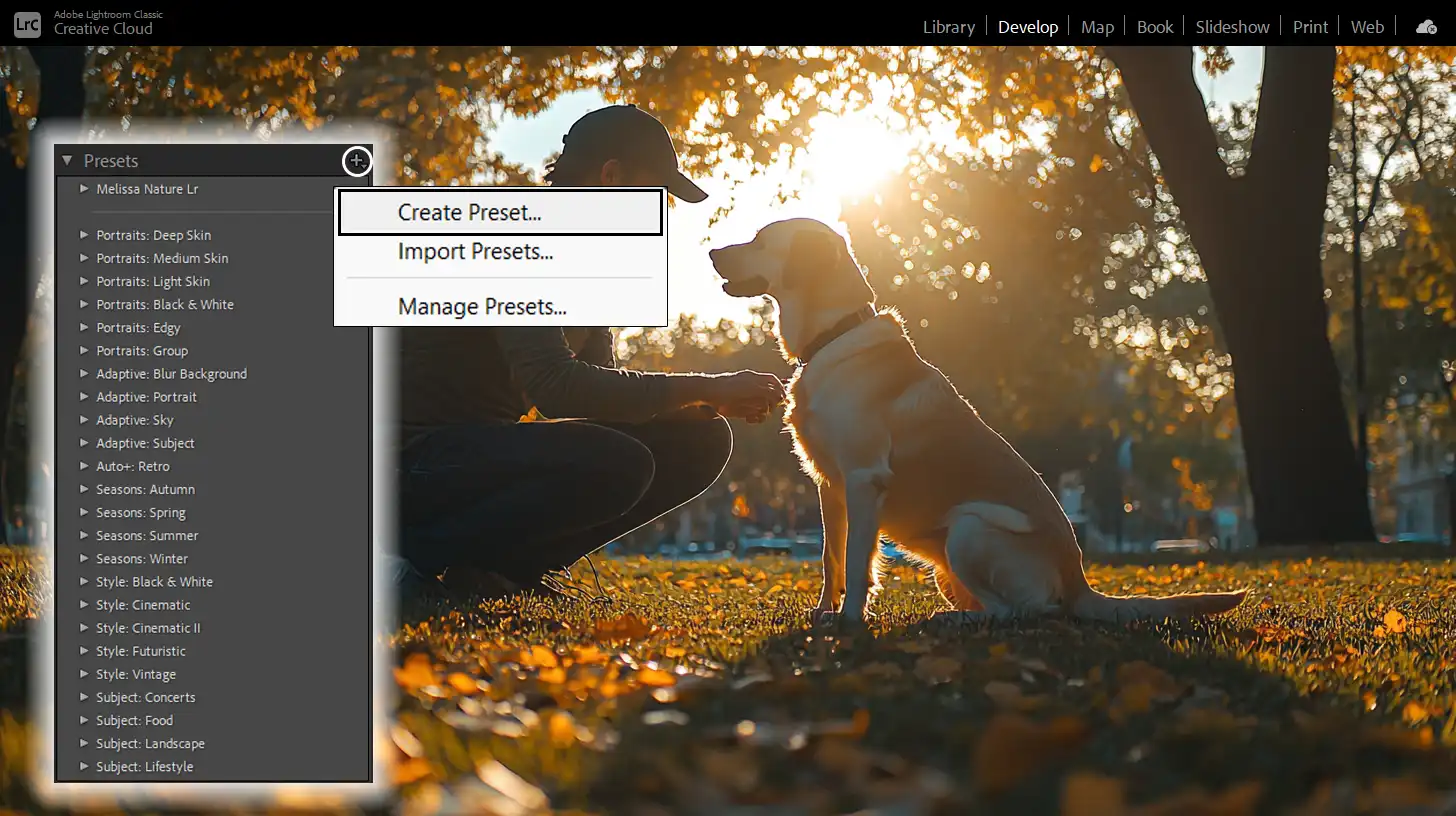
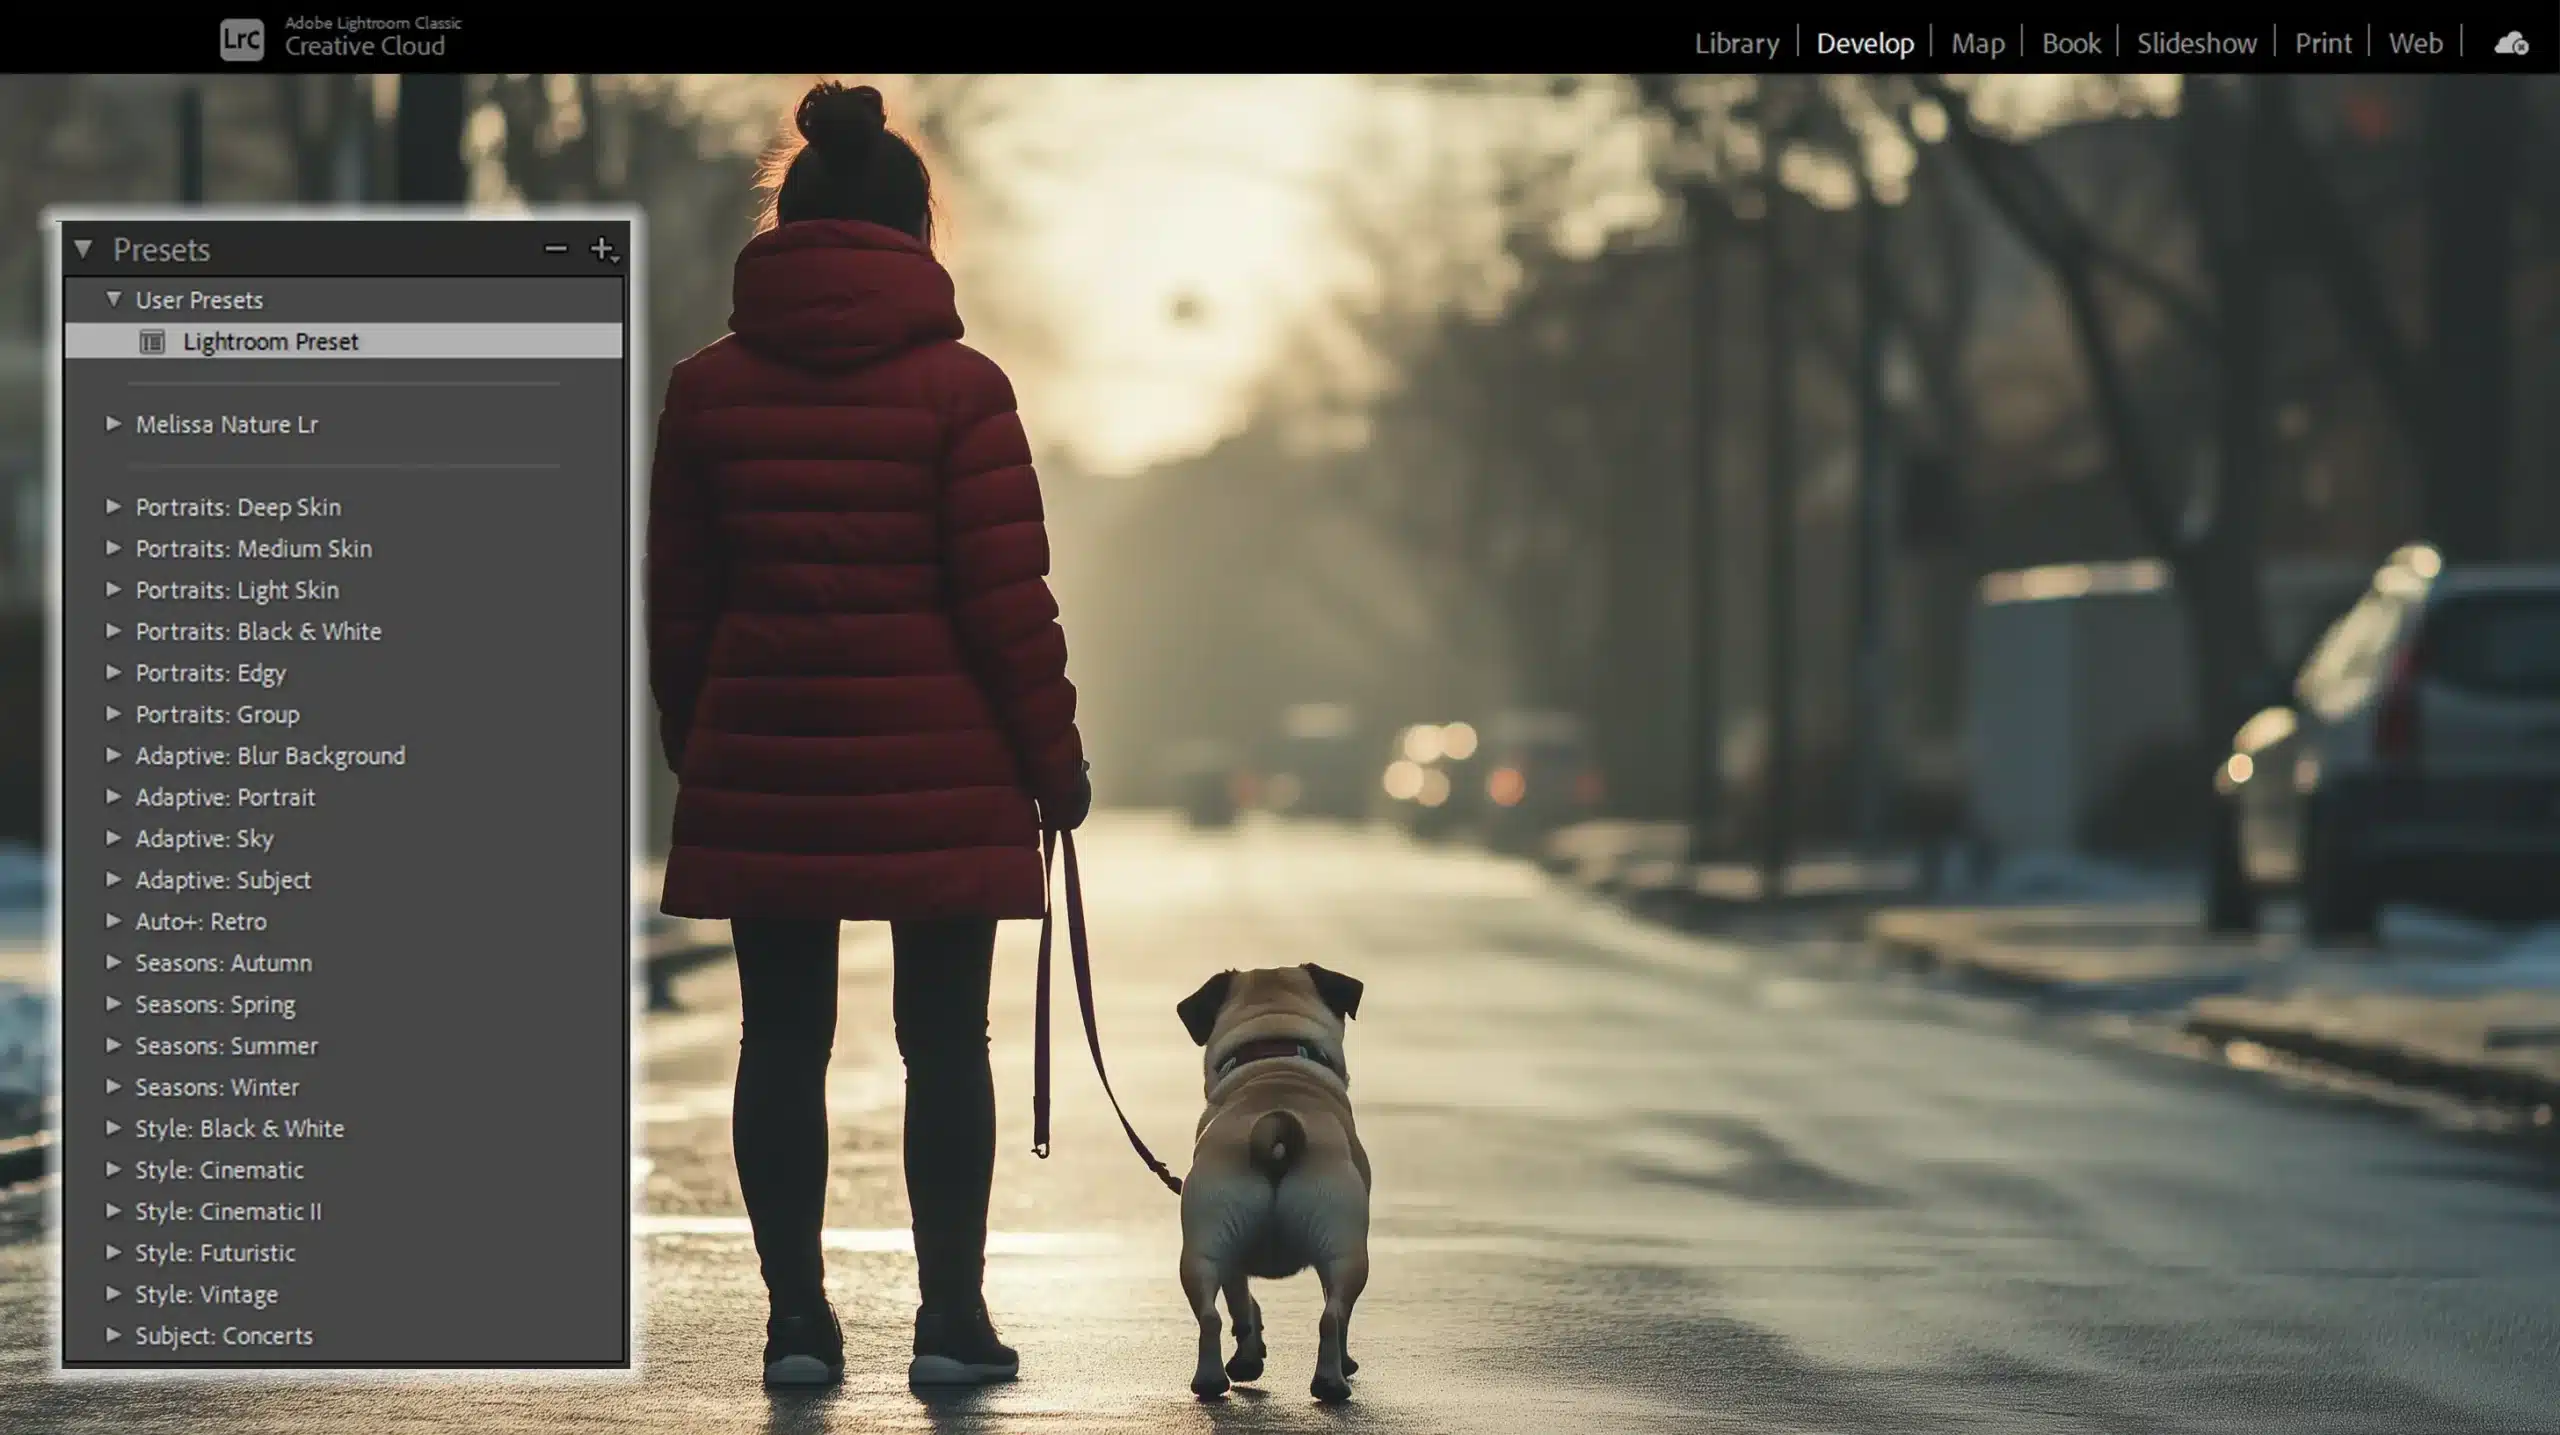
Once satisfied with the edits, head to the left panel and find the Presets section. Click on the plus icon next to the Presets title, then choose Create Preset.
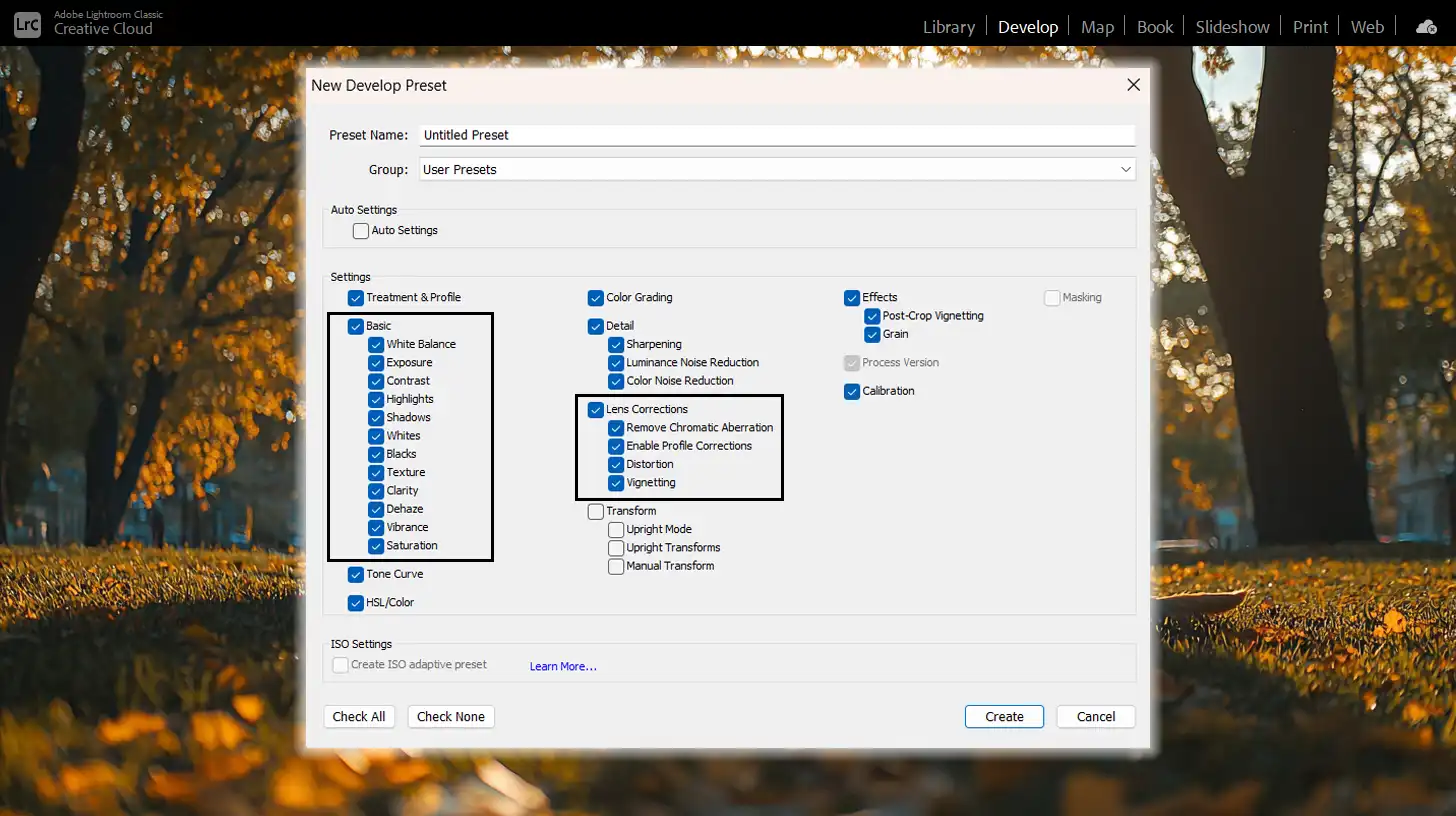
A new window pops up for you to name your preset. Give it a relevant name that describes its adjustments.
Select the settings you want to include in your preset. Options cover nearly everything from the Basic panel to the Lens Corrections in Lightroom.
Ensure to check “Enable Profile Corrections” and “Remove Chromatic Aberration” if you used them. Click Create to save the preset.
Applying your Custom Preset
You now have your preset saved in the Presets menu. To use it, simply apply the preset to another photo by clicking on it. This speeds up your photo editing workflow.
Common Mistakes to Avoid
Avoid over-editing before saving your preset. Balance your adjustments to ensure the preset works on different images.
Make sure not to forget to check profile corrections and chromatic aberrations. These corrections often make a big difference.
Another mistake is not organizing presets well. Categorize them properly so you know which ones to use quickly.
Often, people forget to name them in a way they can recognize. Unnamed or unclear presets lead to confusion.
Pro Tip: Use custom names for your presets to keep them easily identifiable and to prevent common photo editing mistakes you should avoid. This helps in staying organized and ensures you can quickly find the right preset when needed.
Editing Process and Workflow
In Lightroom Classic, understanding the editing process can greatly improve your workflow. Whether you’re refining images or looking to create your own Lightroom preset, following a consistent process makes editing more efficient and effective.
Understanding the Editing Process
The refining process in Lightroom Classic begins with selecting photos in the Library module.
This selection is critical to ensure that only the best shots are chosen. Next, switch to the Develop module.
Here, you can make adjustments such as exposure, contrast, highlights, and shadows. This initial stage sets the foundation for more detailed edits.
In the Develop module, you will encounter various tools and sliders. The Basic panel allows you to manage overall lighting and color balance. Here, you can refine white balance and tone.
For more targeted edits, use the HSL/Color panel or engage in color grading. Both offer precise control over specific colors in your images.
When editing, keep an eye on the Histogram located at the top right. This visual aid helps you understand the exposure levels in your photo.
The goal is to avoid clipping, which occurs when parts of the image are too bright or too dark.
Optimizing Your Workflow
To optimize your workflow:
- Import the images efficiently: Use the Import dialog to add metadata, keywords, and organize photos into folders. This initial setup saves time later on.
- Group photos into collections: Collections help you stay organized and allow for easier batch processing.
- Create Lightroom presets: Navigate to the Presets menu and choose Create Presets. This step saves your adjustments for future use. Presets in Lightroom can be applied to multiple photos, ensuring a consistent look across your portfolio.
- Use preset packs: These packs offer a variety of looks you can apply instantly.
- Import presets: Go to the Presets menu, click the plus icon, and choose Import. This imports the selected preset into your workspace. Once imported, you can apply presets to other photos by selecting them from the panel.
- Create custom presets: Tailored to your style, custom presets provide incredible flexibility and enhance productivity. Custom presets can include adjustments from various panels, ensuring that your unique vision is readily available.
Pro Tip: In Lightroom, whether you’re creating presets, learning how to install Lightroom presets or mastering how to batch edit in Lightroom, avoid over-editing.
Subtle adjustments go a long way in maintaining versatility and quality, ensuring your presets work well across different images.
Creating Your Own Lightroom Presets
Creating your own Lightroom presets can significantly enhance your editing workflow, allowing you to achieve consistent results with ease. As you experiment with your unique style, you’ll find that personalized presets become invaluable tools.
Personalizing Your Presets
When creating your own presets, start by adjusting the basic elements in the Develop module:
- Exposure
- Contrast
- Highlights
- Shadows
- Whites
- Blacks
These adjustments form the base of your preset.
Next, move to color adjustments:
- Utilize the HSL/Color panel to refine hues, saturations, and luminance for each color channel.
- Experiment with split toning to add character.
Once satisfied, press create to save these settings as a newly created preset. Name it something descriptive to remember its purpose.
Testing and Refining Your Presets
After creating a preset, test it on various photos to ensure it works well under different lighting conditions. Make necessary tweaks to refine the preset.
For testing:
- Apply the preset to both underexposed and overexposed images to see how it performs.
- If it needs adjustments, edit the settings and update the preset accordingly.
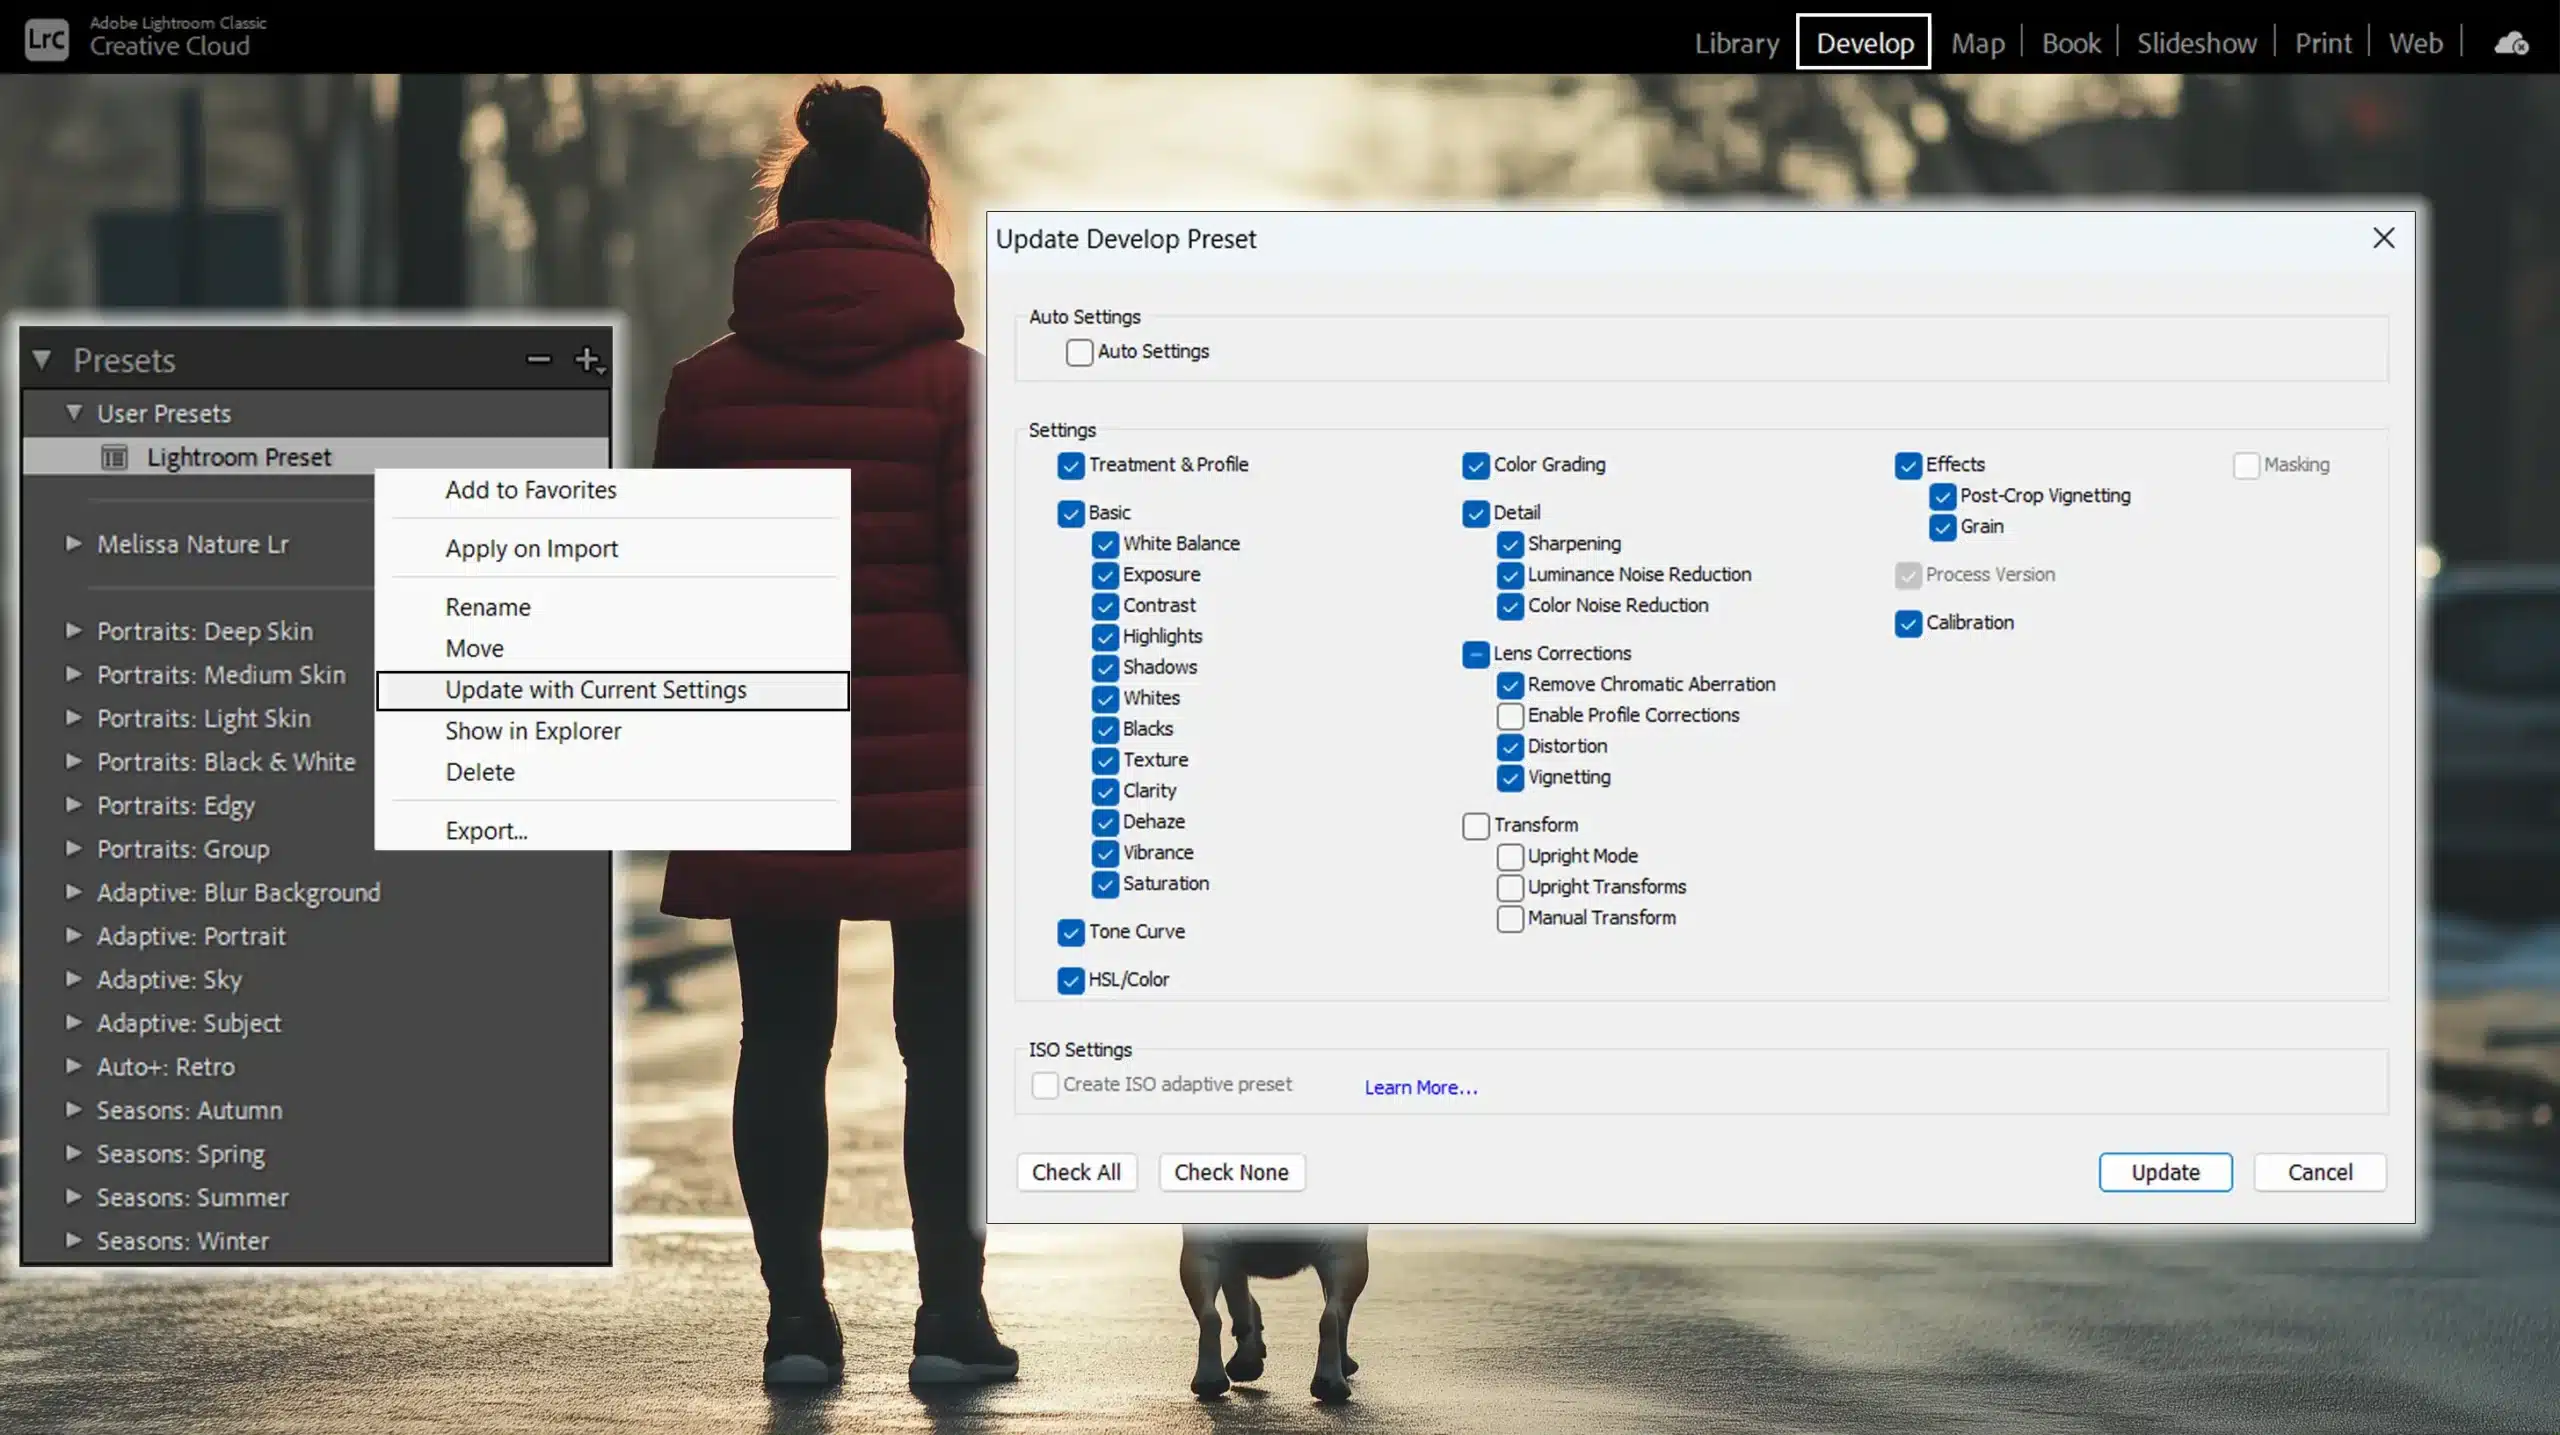
To update a preset:
- Right-click on the preset in the Develop module.
- Select 'Update with Current Settings.' This ensures that any refinement is always applied the next time you use the preset.
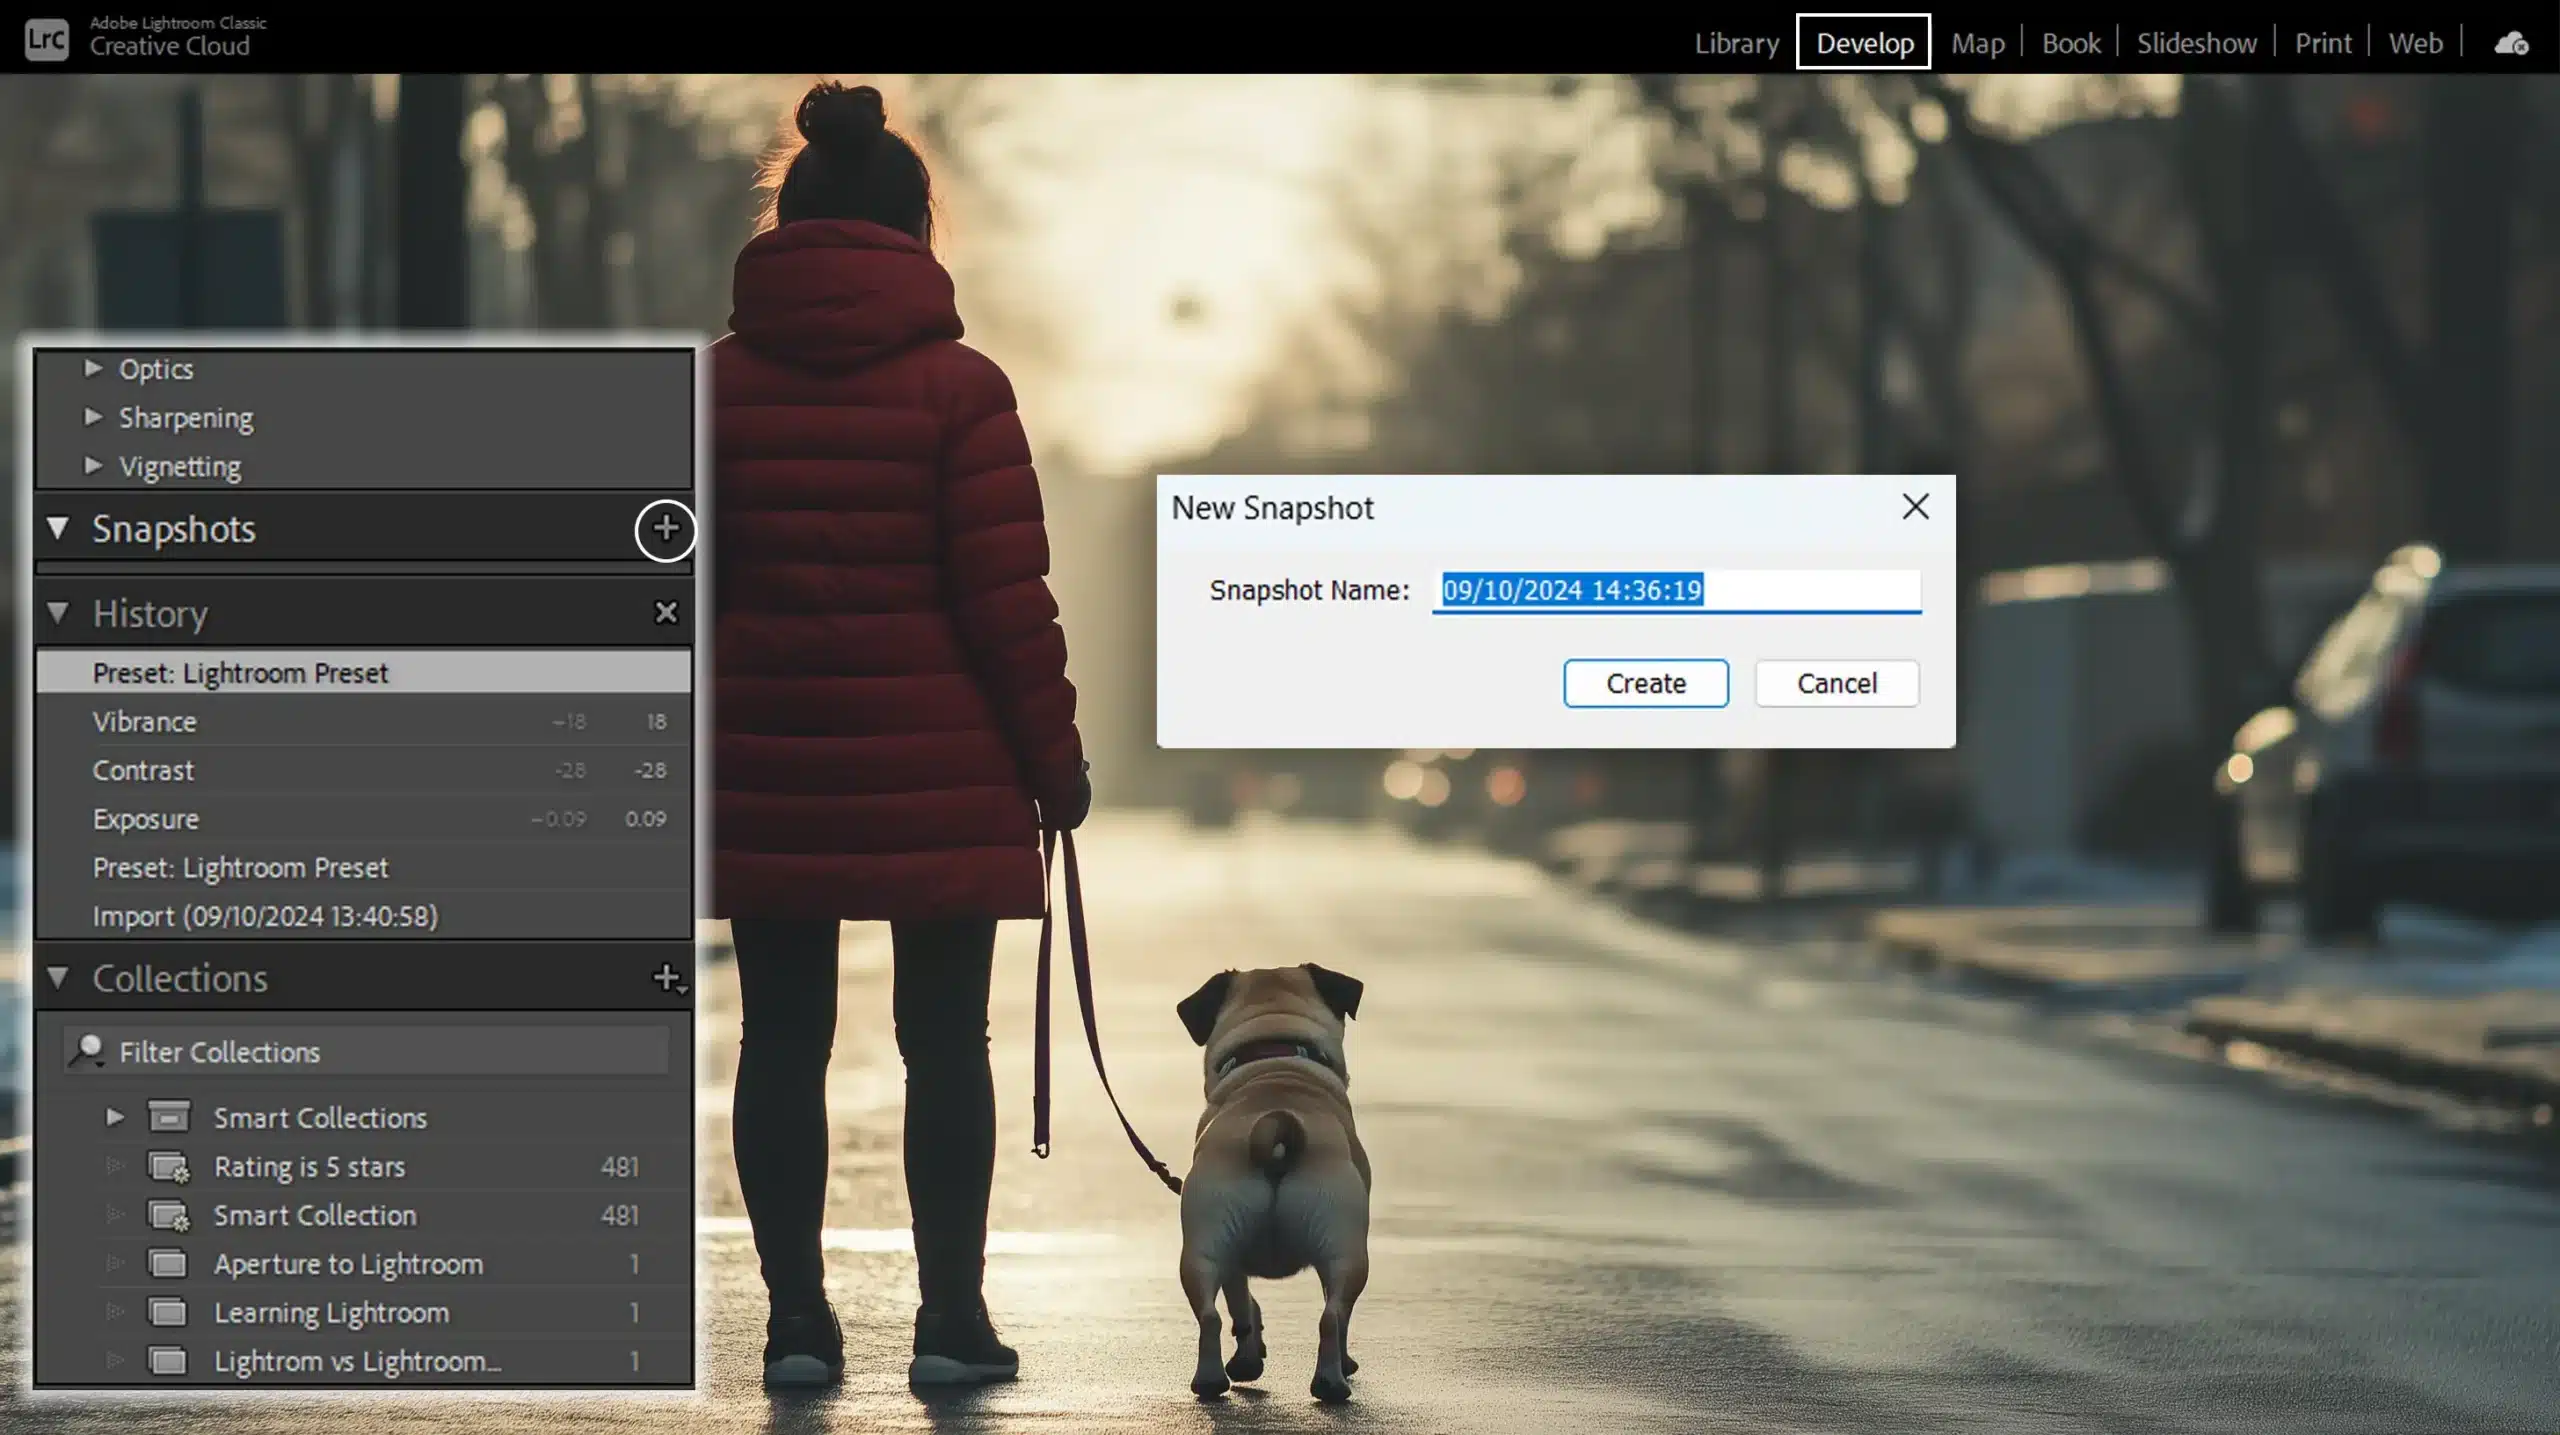
Lastly, save time by organizing your presets into folders. This helps you manage and locate them easily when editing.
Leverage Lightroom Classic’s ‘Snapshots‘ feature. Snapshots let you save different versions of your edits within a single photo. It’s a great way to compare before deciding which preset works best for your image.
Pro Tip: Additionally, consider learning some significant Lightroom shortcuts to speed up your workflow even further.
Explore how to make a brush in Photoshop for more detailed edits, and learn how to export from Photoshop to Lightroom to integrate your work seamlessly.
These shortcuts can make navigating through the software more efficient, allowing you to focus more on your creative process.
For those looking to expand their editing capabilities, understanding the difference between Photoshop and Lightroom can be beneficial.
While Lightroom excels in batch processing and organization, Photoshop offers advanced editing tools for more detailed adjustments.
Sharing and Selling Your Own Presets
In Lightroom Classic, you can easily add presets to your collection, but sharing or even selling your own presets can open up new opportunities.
Here’s a quick comparison of different ways you can share and sell your Lightroom presets, from using cloud platforms to building a social media presence.
Let’s explore the different ways to share your custom creations.
| Aspect | Overview |
|---|---|
| Using Cloud Platforms | Upload presets to platforms like Dropbox or Google Drive and share the links with others. Provide a detailed description to help users understand the preset’s purpose. |
| Leveraging Social Media | Promote presets on Instagram or photography groups on Facebook, showing before-and-after images to attract users. |
| Creating Your Own Website or Blog | Build a website or blog to share your presets. Include installation guides and download links to make it easy for users to access them. |
| Bundling and Selling Presets | Combine your best presets into a pack and sell them. Offering variety appeals to users with different needs and styles. |
| Using Online Marketplaces | Sell your presets on platforms like Etsy or Gumroad. These marketplaces handle payments and deliveries, making it easier for you to focus on promotion. |
| Partnering with Influencers | Collaborate with influencers or photographers with large followings. Offer them a commission for each sale they drive from promoting your presets. |
| Building a Social Media Presence | Create dedicated social media profiles on platforms like Instagram or TikTok to display your presets, showcasing their effects through before-and-after examples. |
Ways to Share Your Presets
Every photographer reaches a point where they want to share their work. Sharing Lightroom presets is no different. You might want to help others or just showcase your style.
Using Cloud Platforms
First, use platforms like Dropbox or Google Drive. Upload the preset files there and share the link with friends or followers.
Make sure to create a clear and detailed description of what your preset does. This helps users pick the right one for their photos.
Leveraging Social Media
Social media can also be your friend. Share your presets on Instagram or Facebook groups dedicated to photography.
You might be surprised by how many people are looking for new and exciting presets to try. Don’t forget to include before-and-after shots to show off the preset applied.
Creating Your Own Website or Blog
Your own website or blog is another great place to offer your custom preset. Write a blog post or page detailing each preset in your preset pack.
Include download links and installation guides to make it easy for users, new or experienced, to import presets into their Lightroom Classic.
Monetizing Your Presets
If you want to take it a step further, monetizing your presets can be a great way to earn extra income. Here’s how you can turn your create presets skill into dollars.
Bundling and Selling Presets
First, bundle your best presets into a preset pack and sell it as a set. This approach is effective because people love having options. A well-curated pack can cater to various styles and needs.
Using Online Marketplaces
Use platforms like Etsy or Gumroad to sell your presets. These platforms handle the tricky bits like payment processing and digital delivery, so you can focus on promoting your preset pack.
Just make sure to price your products fairly; research competitors to find a sweet spot.
Partnering with Influencers
Another option is to partner with influencers or popular photographers who already have a large following.
Offer them a commission for every sale they generate from promoting your presets. This strategy can quickly expand your reach without much effort on your part.
Building a Social Media Presence
Lastly, consider creating a dedicated social media presence to promote and sell your presets. Instagram and TikTok are particularly good for this because of their visual nature.
Use these platforms to display striking before-and-after photos or videos demonstrating the effects of your developed preset.
Pro Tip: Always stay updated on trends and ever-evolving techniques in Lightroom. The more you stay ahead of the curve, the more valuable your presets will be.
Frequently Asked Questions (FAQs)

What steps do you take to make your own presets in Lightroom?
- Open Lightroom and select a photo you have worked on.
- Adjust the photo settings to your liking.
- Click on the 'Presets' panel on the left side of the develop module.
- Click the '+' icon and select 'Create Preset'.
- Choose a name for your preset and select the settings you want to include.
- Click 'Create' to save your newly created preset.
How do I create a preset from a photo in Lightroom mobile?
- Open the Lightroom mobile app and choose a photo you have edited.
- Tap on the 'Presets' icon at the bottom of the screen.
- Tap the three dots in the top right corner and select 'Create Preset'.
- Name your preset and select the settings to include.
- Tap the check mark to save your preset.
What is the process for creating a preset from the current settings in Lightroom?
- In Lightroom, ensure you are in the 'Develop' module with your edited photo open.
- Right-click on any of your existing presets in the 'Presets' panel and select 'New Preset'.
- Name your preset and check the settings you wish to save.
- Click 'Create' to save these settings as a new preset.
How do I create an import preset in Lightroom?
- Open Lightroom and go to the 'Import' dialog box.
- Adjust your import settings on the right panel as desired.
- At the bottom of the panel, click 'Add' next to 'Import Presets'.
- Name your new import preset and click 'Create'.

Conclusion
Learning how to create a preset in Lightroom has been a game-changer for me. It has not only streamlined my refining process but also allowed me to maintain a consistent style across my photography projects.
By saving my favorite adjustments as presets, I can quickly apply them to new photos, making my workflow more efficient and enjoyable.
If you’re interested in delving deeper into photo editing, I highly recommend checking out these courses: the Photoshop course and the Lightroom course. These resources have greatly enhanced my skills and could do the same for you.
Read more about Photoshop:


