Have you ever wondered how to add bleed in Photoshop to ensure your designs print perfectly? You’re not alone.
As someone who loves crafting stunning visuals, I understand the frustration when your final printed piece doesn’t look quite right.
That’s why understanding bleed is important. It can be the difference between a professional-looking design and one that seems amateurish.
Imagine your projects being admired for their flawless finish, creating a lasting impression every time.
In this article, I’ll guide you through the simple steps to add bleed in Photoshop, making sure your work looks as impeccable in print as it does on screen.
Whether you’re preparing a flyer, brochure, or any print-ready design, this guide will ensure your work stands out. Let’s dive in and transform your printing experience!
Table of Contents
How to add Bleed in Photoshop: Understanding Bleed in Photoshop
Bleed in Photoshop ensures your design extends beyond the final trim size, preventing any unwanted white edges after printing. Let’s explore what bleed is and why it’s important.
What is Bleed?
Bleed is the part of your image or document that extends past the document bounds before it’s trimmed to the final product size.
Imagine pressing print on a Photoshop document, only to find white lines on the edges because not everything fits as planned. That’s where bleed comes in.
It ensures your final product looks just right without unintentional white space along the edges.
Importance of Adding Bleed
Why add bleed? Imagine you’ve worked hard on designing a printed piece using Adobe Photoshop. You don’t want the important stuff near the edge cut off, do you?
By adding bleeds, you ensure that none of your design’s image elements suffer from such issues.
A bleed area covers potential measurement errors, like if the edge marks aren’t aligned perfectly.
Steps to Add Bleed in Photoshop
Before adding bleed in Photoshop, follow these steps to set up your design properly and keep it looking sharp.
Set your document size a bit bigger than your intended final product. Think of your canvas size and adjust it to accommodate the bleed area. This helps to extend past the edge and may prevent future headaches.
Align your design elements within the printable area. Ensure they’re not too close to the top edge, left edge, or any side boundaries.
Use bleed marks, indicated by guides, often described as bleed guides. They guide you to avoid having your image vanish at the top edge.
Working with PDF Files
Do you have a PDF file that needs these specifications? Are your perfect dimensions just an inch away from alignment?
The document setup allows you to create without stress, just remember to tweak those width and height values according to your project’s prospectus.
Creating a new layer for bleed areas in your PDF can also help ensure a smooth and stress-free print process.
Pro Tip: When you’re focusing on that new layer, make sure it includes bleed by aligning closely with the edge lines.
As you create, it becomes easier with the same techniques, whether you’re working in Photoshop or Adobe Illustrator.
Setting up in Photoshop is a simple process that helps ensure your design prints correctly without any cut-off edges. Here’s a quick guide to walk you through the steps.
Step-by-Step Guide on Adding Bleed in Photoshop
Adding bleed in Photoshop ensures your designs reach the printed edge perfectly. Let’s dive into the fundamental steps:
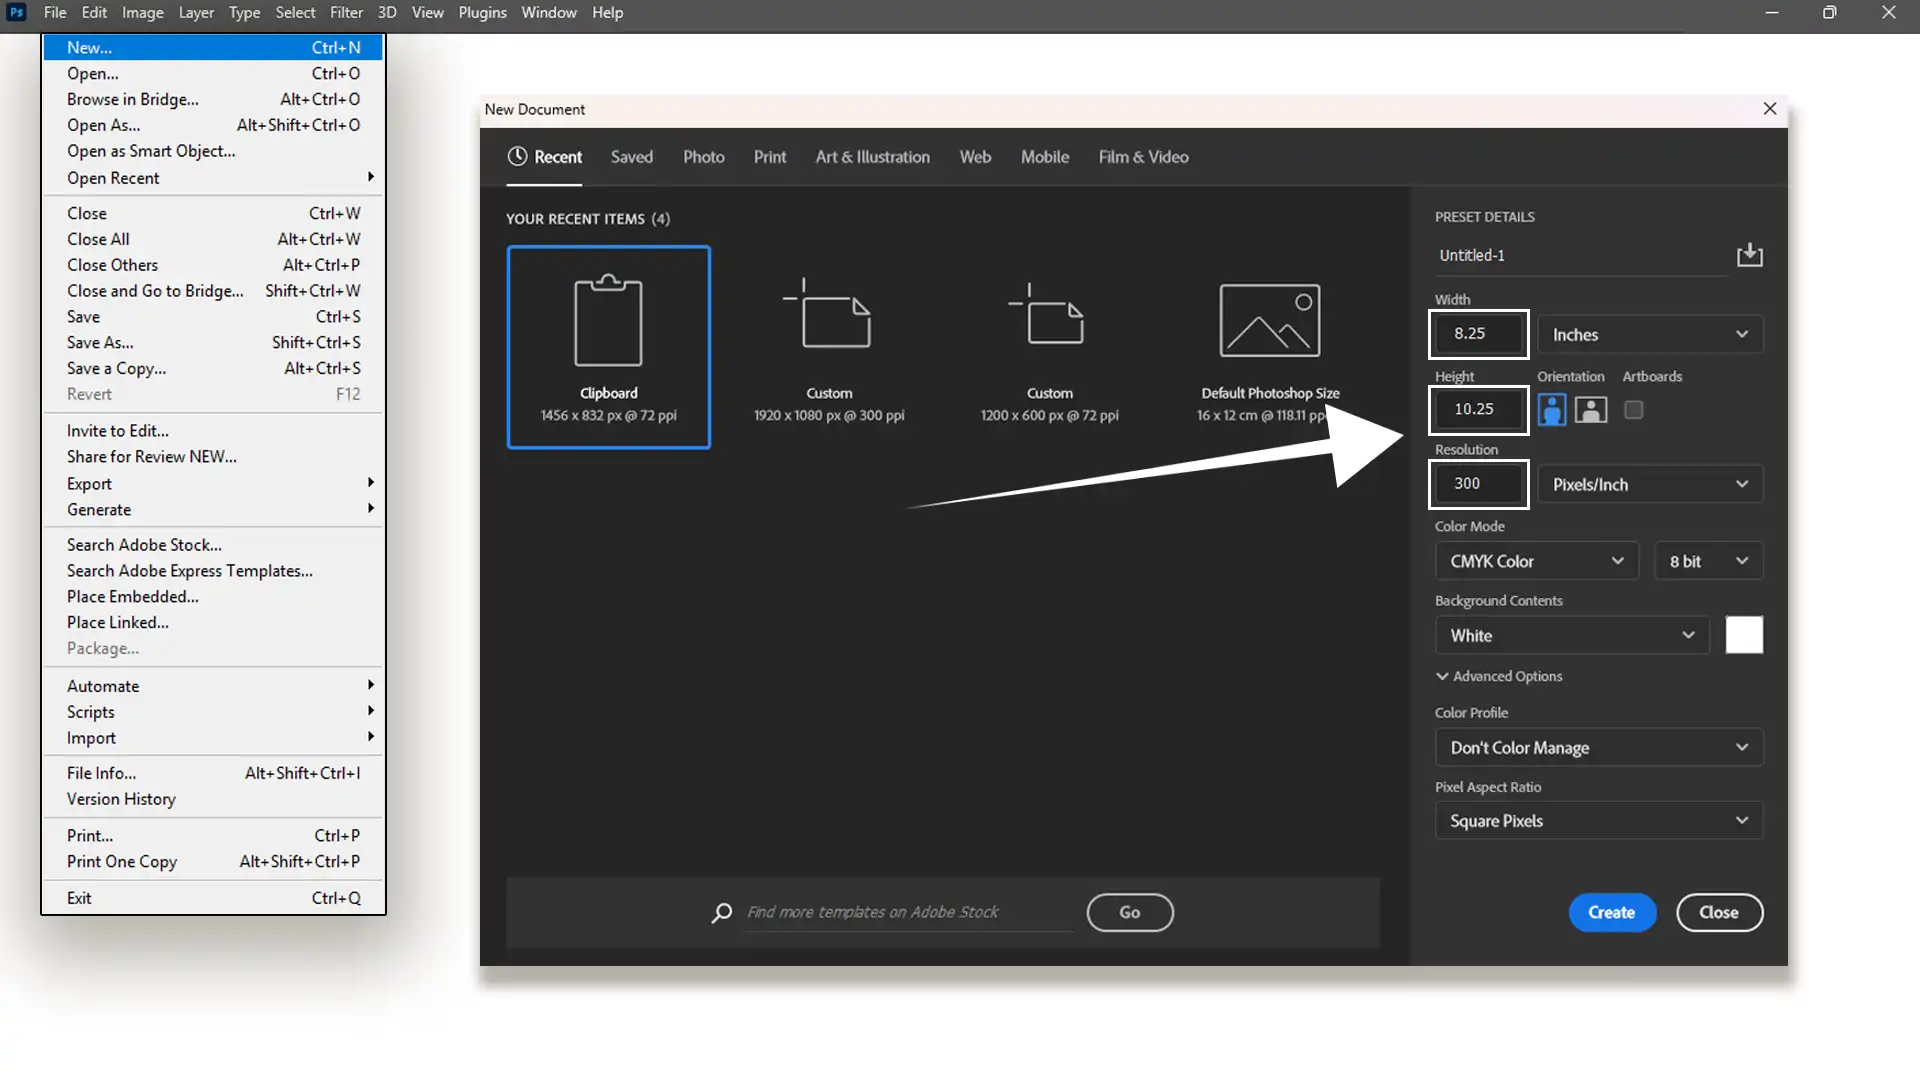
Open your Document and Adjust Canvas Size for Bleed
Open a new document in Photoshop and adjust the canvas size. Add extra space beyond your original design to create the bleed area. For instance, if your image is 8×10 inches, you might need to extend it to 8.25×10.25 inches.
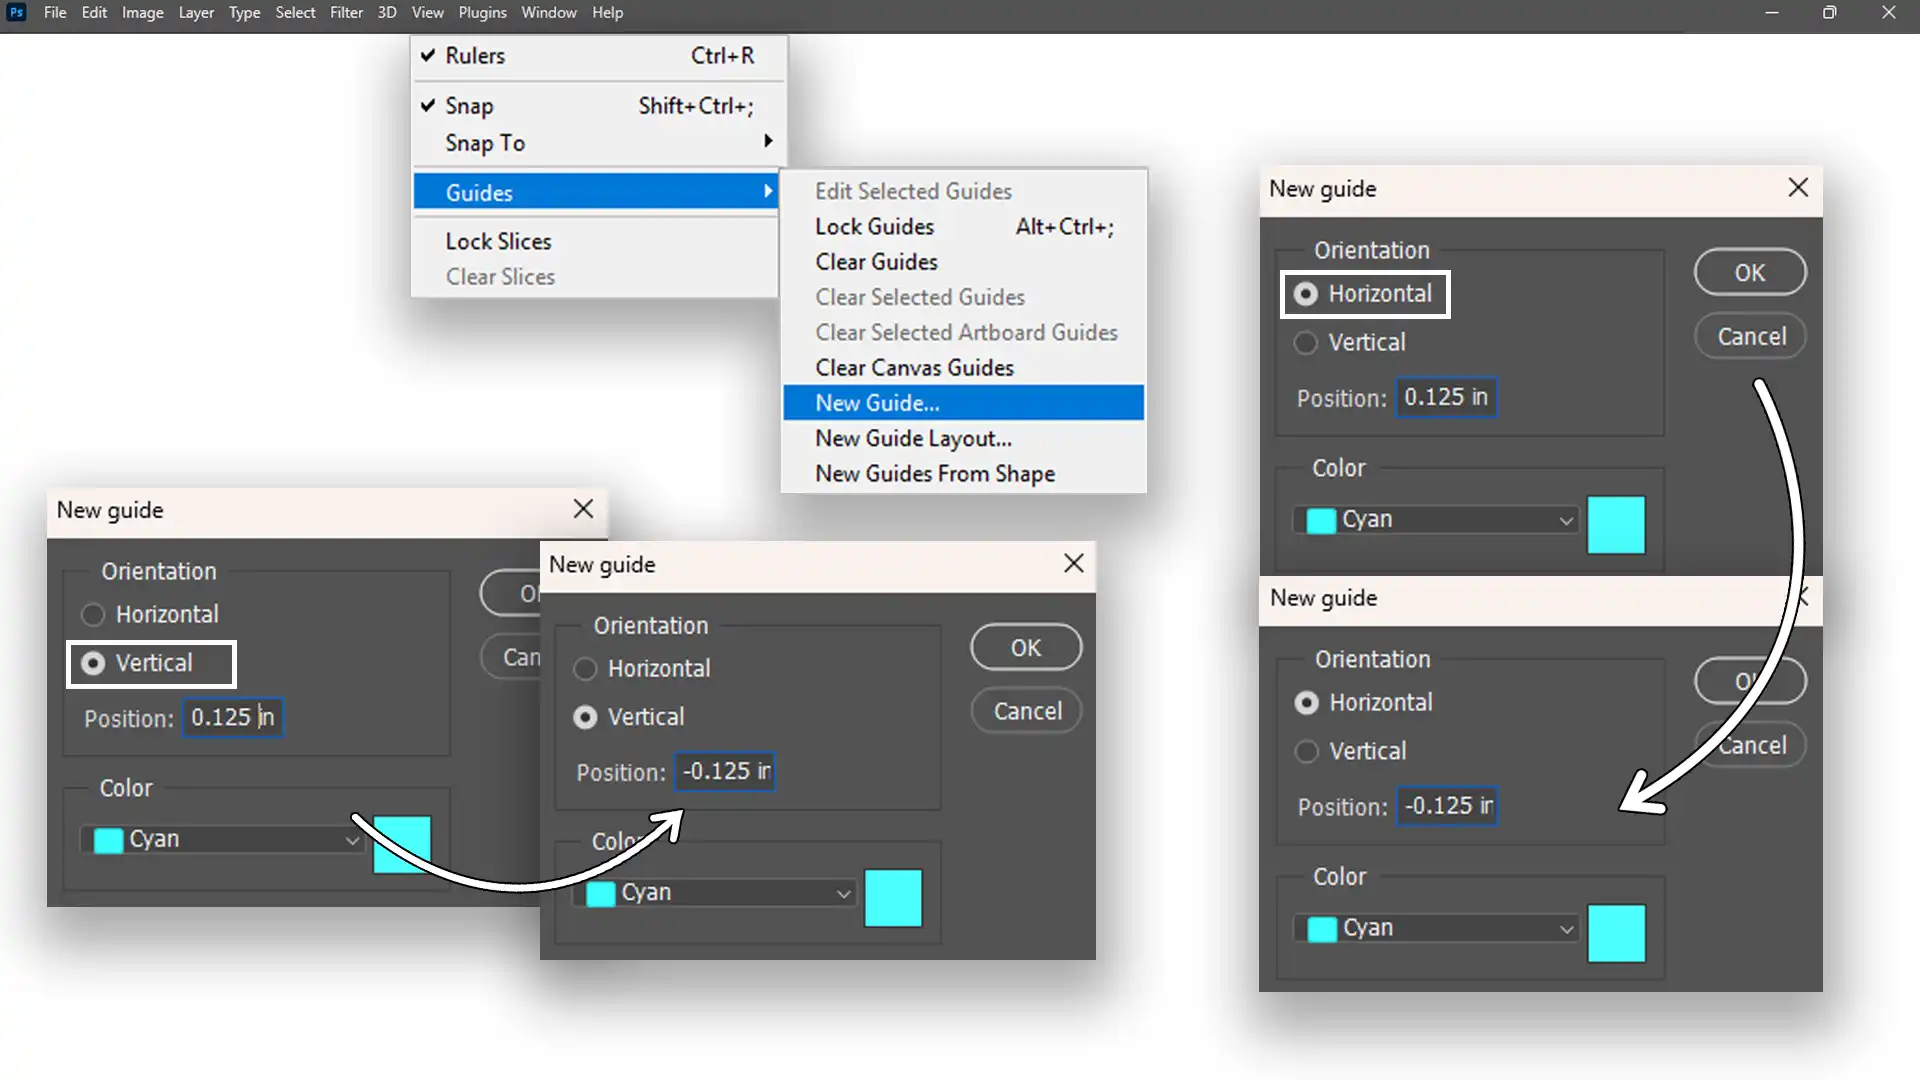
Mark Bleed Area with Rulers
Open the View menu and select Rulers if they’re not already displayed. Use these rulers to guide your layout.
From the left ruler and top ruler, pull guides to mark the bleed area, usually around 0.125 inches from the document’s existing width and height. This ensures that your design isn’t cut off after printing.
Keep Important Elements Inside the Safe Zone
Leave enough margin within your document where no text or important elements should stay in. This area outside your safe zone is called the bleed area, so you’re clear on where the final crop will occur.
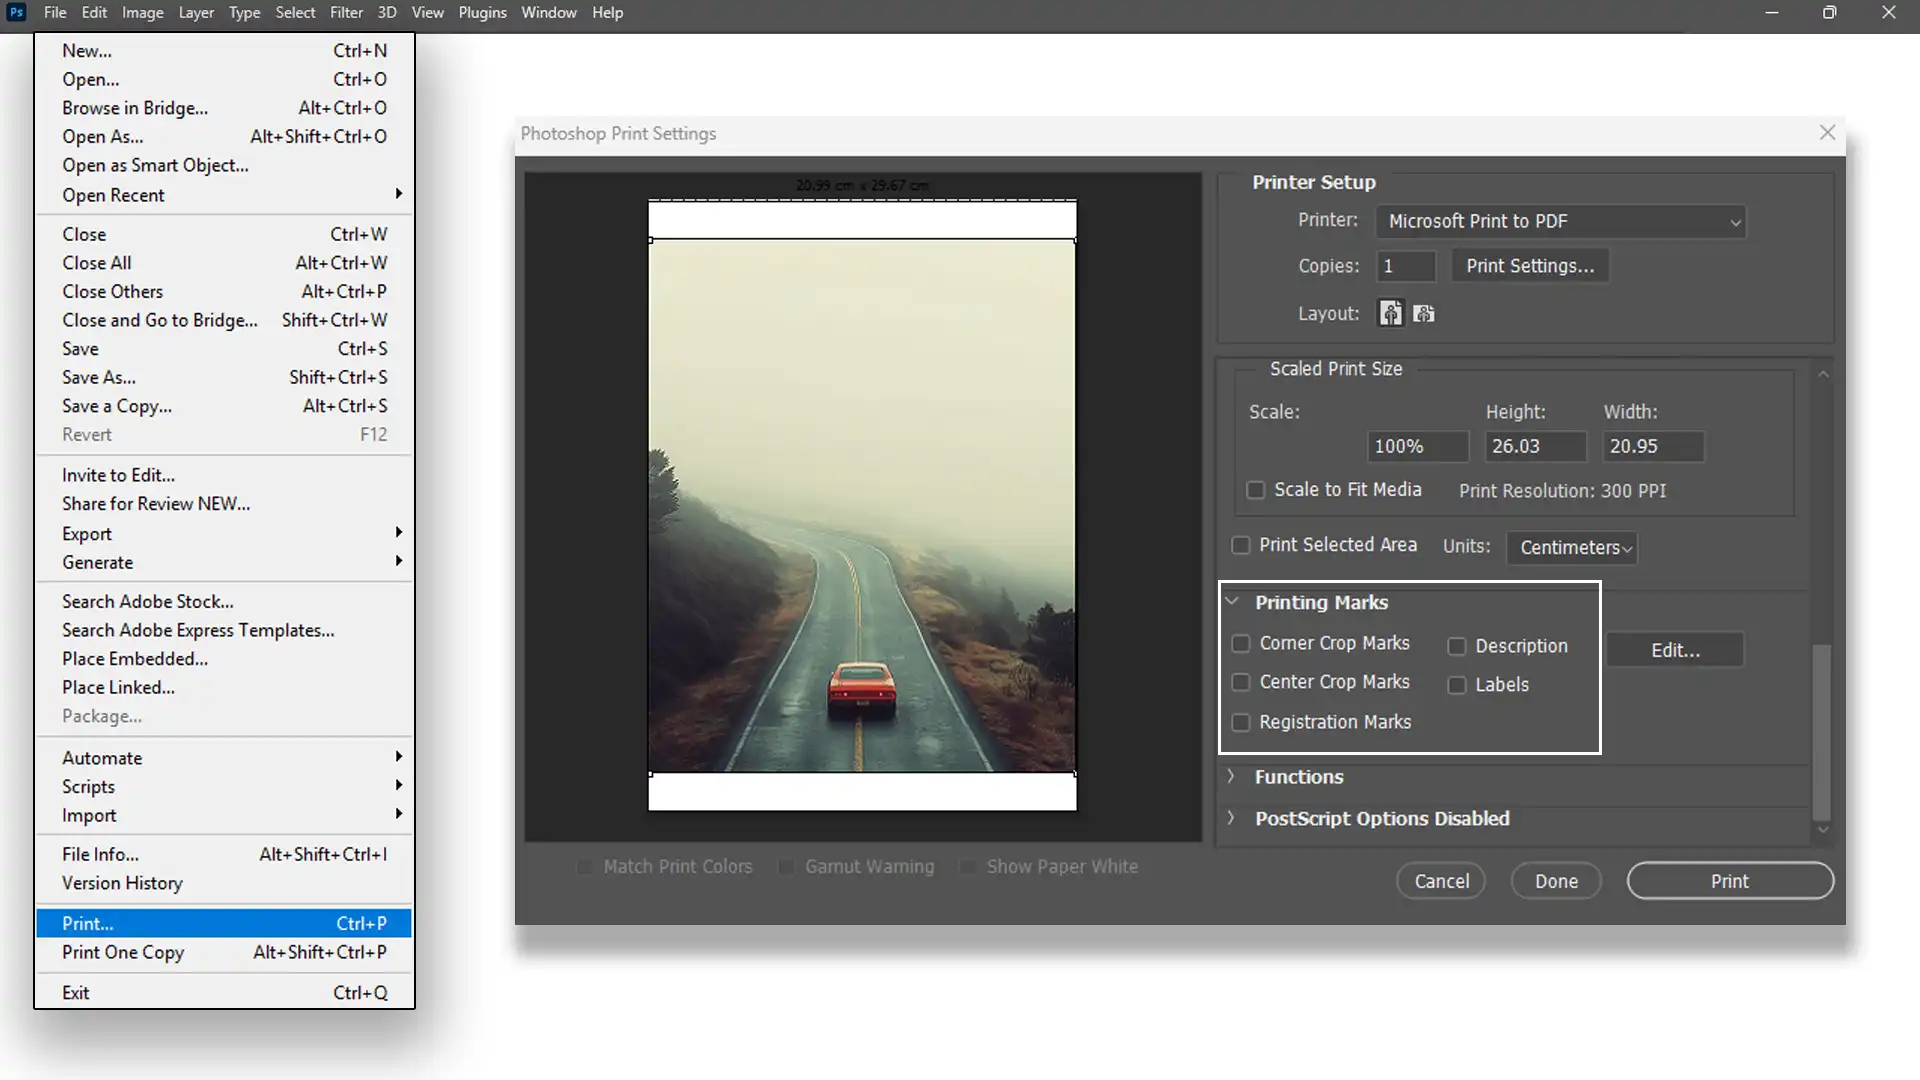
Add Crop Marks for Trimming
To add crop marks or trim guides, go to the File menu, choose Print, then find the Printing Marks section. Here, find and select the crop marks option. These marks serve as guides when physically trimming your printed product.
Export Your File with Crop Marks
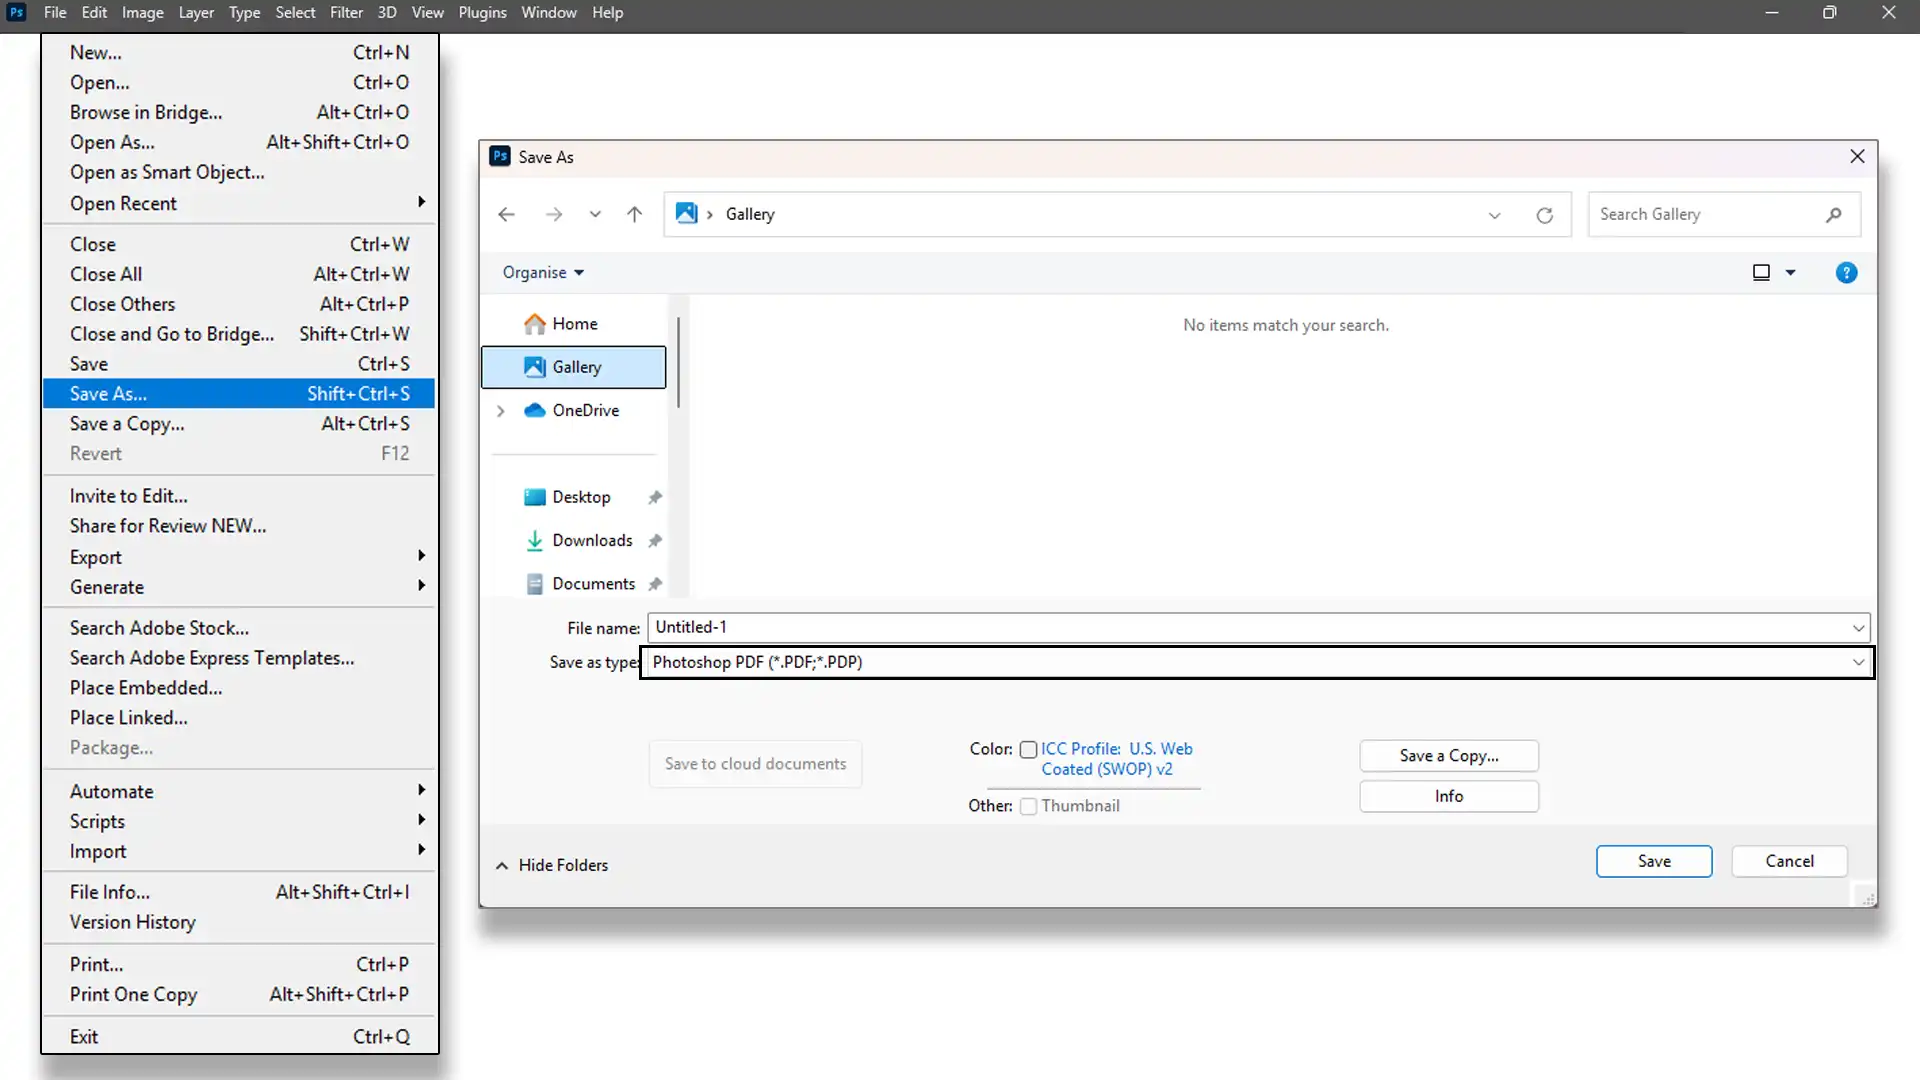
Once everything is ready, export your file. Go to File, Save as, and choose the PDF format, ensuring your crop marks are correctly set up.
Common Mistakes to Avoid when Adding Bleed in Photoshop
Messing up bleed might ruin your printed designs. Here are some common mistakes to avoid:
Not adding enough bleed space.
Misaligning trim guides and forgetting to add crop marks.
Misjudging safe zones can lead to an unattractive final product. Ensure your printed area is within the safe boundary.
Ignoring the roles of the file or using the wrong dimensions in your canvas size setup. That mistake can lead to disappointing results, especially when using Adobe products like Photoshop.
Rushing the process by neglecting to save drafts can also be disastrous. Regularly save your document to prevent loss, which might come from accidental crashes or unexpected outcomes from Photoshop edits.
Pro Tip: Consistently check your print preview settings before finalizing any document, and never ignore the valuable guidance from bleed marks.
Crop marks help ensure accurate trimming in the printing process. Knowing how to add bleed in Photoshop also prevents white edges by extending the design beyond the trim lines.
What are Crop Marks?
Crop marks are small lines placed at the corners of your design to show where the final print should be trimmed. They help ensure that everything is aligned perfectly during the cutting process. Now, let’s go over how to add crop marks in Photoshop.
How to Add Crop Marks in Photoshop
Before you add crop marks in Photoshop, follow these steps to ensure your design is set up correctly for printing.
Open your Photoshop document.
Go to 'View' and decide your bleed margins. Ensure these are wide enough. Remember, the more space you have, the easier it is to trim later.
Use the 'Print' menu. Look for output options and select to add crop marks.
Pro Tip: Always save your file in a format that retains crop mark details. This ensures consistency and accuracy in your final prints, making you look like a seasoned professional.
If you’re using Photoshop, consider exploring the content-aware fill feature for other editing needs or delve into Photoshop shortcuts to streamline your workflow even further.
Trim Marks: Ensuring Precision
These can help guide where to cut your design to achieve the exact final size after printing. They ensure that your project is trimmed accurately and cleanly. Let’s now dive into understanding how trim marks work in Photoshop.
Understanding Trim Marks in Photoshop
Trim marks in Photoshop are used to show where your design should be trimmed after printing. They help ensure your final product has clean, accurate edges. Let’s look at how you can add them.
Steps to Add Trim Marks
Follow these steps to quickly add trim guides in Photoshop for a clean, print-ready design.
Fire up Photoshop and set up your document; remember, every detail counts.
Look at the layout, and decide where those trim guides should sit.
Navigate to 'Print', select 'Output Options', and you'll see your choice for adding crop marks.
These steps feel repetitive but are important for avoiding print issues.
Bleed Marks: Completion Steps
Bleed marks are important in the printing process. They ensure that your design extends beyond the trim lines, preventing any unwanted white edges after cutting. Let’s explore what bleed marks are and why they matter.
The following table highlights significant information about bleed marks, including their significance, how to add them, and common mistakes to avoid. This will guide you in achieving the best results for your printed projects.
Aspect
Overview
Understanding Bleed Marks
Bleed marks ensure your design extends beyond the trim line to prevent white edges after cutting.
Importance of Bleed Marks
They help achieve a clean, professional look by avoiding unintentional cuts to important design elements.
Steps to Add Bleed Marks
Follow specific steps in Photoshop to ensure bleed is added correctly for optimal printing results.
Common Mistakes to Avoid
Be aware of frequent errors like insufficient bleed space and misaligned trim guides that can affect print quality.
Final Checks Before Printing
Preview your document thoroughly to ensure everything aligns and no crucial elements are too close to the edges.
What are Bleed Marks?
Bleed marks ensure that your design extends beyond the trim line, preventing any unwanted white edges after cutting. Let’s first explore what bleed marks are and why they’re used.
Bleed marks help make sure everything prints cleanly and fits perfectly on the page, giving your design a professional finish with ease.
Tips for Perfect Bleed Marks in Photoshop
Getting your bleed marks right is important for a clean, professional print. Let’s go over the steps to add bleed marks in Photoshop.
Steps to Add Bleed Marks
Follow these simple steps to add bleed marks in Photoshop and ensure your design prints perfectly:
First, open your document in Photoshop.
Ensure you add bleed around your image. The commonly used bleed size is 0.125 inches, but keep in mind your printer’s requirements.
Head to 'File' > 'Document Setup'. Watch out for the 'Bleed' sections. Enter your values to ensure the design extends beyond the edges.
Don't skip previewing the document before printing. Check if the bleed aligns well, ensuring nothing critical is too close to the edge.
Pro Tip: Before hitting print, always have a digital copy saved with bleed marks intact. Also, remember toresize the image for printing to maintain quality.
If you’re working with different image file types, make sure your bleed settings are compatible with formats likeNEF or JPEG format to maintain quality.
Frequently Asked Questions
What’s the process for creating a bleed effect in Photoshop?
Open your project and navigate to the 'File' menu, then select 'New'.
In the dialog box, add the dimensions needed for your project and include extra space for the bleed. Typically, an additional 0.125 inches on each side is standard.
Click 'OK' to create your new document with bleed.
How Do You Add Bleed Lines?
Go to the 'View' menu and make sure that 'Rulers' is on.
Click on the ruler and drag it to the edge of where you want the bleed line to be.
These lines will serve as guides for placing elements that extend to the edge of your printed material.
What’s the way to add bleed marks in Adobe?
When you're ready to print your design, click on 'File' and select 'Print'.
In the print settings dialog, locate the 'Marks and Bleeds' section.
Select 'Crop Marks' and adjust the bleed settings to match your document's bleed dimensions.
Click 'Print' to output your design with bleed marks.
How Do You Add Blood Effects in Photoshop?
Open your image in Photoshop.
Select the 'Brush Tool' from the tool menu, and find a splatter brush suitable for creating a blood effect.
Choose a deep red color for the brush and apply the splatter effect on your image where desired.
You can adjust the layer's opacity or blending mode for a more realistic effect.
Learning how to add bleed in Photoshop was a game-changer for me, especially when I started working on print projects. Initially, I struggled with ensuring that my designs looked professional and without any unwanted white borders.
If you’re working on print designs, mastering this simple skill will make your life a lot easier. It has helped me streamline my workflow and consistently deliver high-quality prints. I recommend checking out this Photoshop Course and Lightroom Course to improve your skills.
In addition to these courses, if you’re interested in exploring the full potential of Adobe tools, check out Adobe Photoshop and Adobe Lightroom, which I’ve used for years.
Adding bleed may seem like a small step, but it makes a huge difference in print quality. It’s definitely a skill every designer should have.
If this article has helped you, then Like and Share it with your friends
$2,061.00Original price was: $2,061.00.$1,061.00Current price is: $1,061.00. 27582
Download Your Free Guide Now!
Discover the secrets of photography with our printable guide! Master essential techniques like aperture, shutter speed, and ISO to create stunning images. Get your free printable PDF now and start turning your snapshots into masterpieces!