Photoshop Clipping Paths Tips for Background Removal

Photoshop Clipping Paths help create clean and precise cutouts of objects in photos. They are a simple way to separate an object from its background. This technique is perfect for making images look professional and polished.

In this article, we will explore everything about Photoshop Clipping Paths. You will learn how they work, their benefits, and step-by-step methods to use them. By mastering clipping paths, you’ll unlock the ability to enhance your photo editing skills to a new level.

Table of Contents

Benefits of Using Photoshop Clipping Paths in Image Editing

A digital graphic featuring a woman holding a dog, with a background partially removed using Photoshop Clipping Paths.

Photoshop Clipping Paths are a great way to make images look professional. They allow you to cut out objects precisely and improve the overall quality of your photos. This technique is popular for product photography, graphic design, and marketing materials.

Cleaner and More Polished Images

A clipping path in Photoshop helps separate objects from unwanted elements. This results in cleaner images with sharper edges. For example, e-commerce websites often use it to display products on a transparent background that looks appealing to customers.

High Precision with the Pen Tool

The Photoshop Pen Tool allows accurate tracing of any object. By placing anchor points and adjusting curves, you can create smooth outlines. This precision ensures every detail is captured correctly.

Easy to Save and Reuse Paths

Once you save a path in the paths panel, it can be reused for similar objects or designs. This saves time and keeps your workflow efficient, especially when working with multiple paths in large projects.

Versatile for Various Creative Needs

Clipping paths work well across industries. Designers use them in image editing for brochures, marketing campaigns, and print media. Photographers rely on them to adjust and isolate objects without losing quality.

Non-Destructive Editing for Flexibility

With clipping paths, the original image remains unchanged. Using a layer mask alongside paths provides flexibility to modify or refine the design without affecting the base photo.

Improved Workflow Efficiency

When you create a clipping path in Adobe Photoshop, it helps streamline tasks by providing precise cutouts. Saved paths can be applied to similar designs, while tools like the convert point tool and panel menu make adjustments simple and effective.

Mastering Photoshop Clipping Paths is essential for creating clean, professional images that stand out in any creative project!

How to Create a Clipping Path in Photoshop

Creating a clipping path in Adobe Photoshop is a straightforward process. It helps isolate objects, making them look clean and professional. Follow the steps below to create a clipping path and enhance your image editing skills.

1. Open the Image and Set Up the Workspace

A screenshot of the Photoshop Paths panel with a selected path named "Path 1" highlighted for background removal.

Begin by opening your image in Adobe Photoshop. Ensure your layers panel is visible for easy navigation. Create a new path in the paths panel to start the process.

2. Select the Pen Tool

A screenshot of Photoshop with the Pen Tool selected, outlining an object with anchor points for creating a clipping path.

Choose the pen tool from the toolbar. This tool is essential for outlining objects. Start drawing clipping paths by clicking along the edges of the object to place anchor points.

3. Adjust and Refine the Path

A screenshot of a Photoshop clipping path around an object, with anchor points adjusted for smooth and accurate selection.

After placing anchor points, refine your path for smooth edges. Use the toolbar to adjust curves or reposition points for a natural look. This step ensures a perfect outline of the object.

4. Save the Path

A screenshot of Photoshop’s Paths panel showing a newly saved path named "new outline" for background removal.

Once you’ve outlined the object, go to the panel menu and select save the path. Name your path to make it easy to identify for future use.

5. Apply the Clipping Path

A screenshot of Photoshop showing the "Clipping Path" option selected in the right-click menu to isolate an object.

To finalize, select the path and convert it to a clipping mask. This step isolates the object, removing unnecessary elements. You can also save your file as a Photoshop EPS for printing purposes.

Using a clipping path allows precise image manipulation. It’s ideal for e-commerce, print media, and professional design projects. By following these steps, you can ensure clean visuals and transparent backgrounds for any project. Master these steps, and you’ll create high-quality paths that enhance your photo editing work! Learn how to remove background in Lightroom for even more precise editing.

Common Mistakes to Avoid When Using Clipping Paths

Creating a clipping path in Adobe Photoshop requires careful steps. However, mistakes can lead to poor results. By understanding common errors, you can improve your work and achieve better visuals.

1. Using the Wrong Tool

Choosing the correct tool in Photoshop is vital for creating a precise clipping path. The pen tool is the best choice for detailed and accurate edges.

2. Overlooking Path Refinement

Refining a clipping path in Photoshop is crucial for achieving smooth edges. The paths panel lets you review and adjust your work effectively.

3. Skipping the Save Path Step

Saving your path is essential to avoid losing your work. A properly named save path helps keep your workflow organized.

4. Poor Layer Management

Proper layer management helps keep your edits clean. Using a layer mask and a new path can ensure non-destructive editing.

5. Ignoring Transparent Background Needs

A polished clipping path ensures that objects look natural on a transparent background. This is critical for e-commerce and design projects.

6. Rushing Through Path Creation

A well-made clipping path requires patience and attention to detail. Rushing can lead to errors and unprofessional results.

By avoiding these mistakes, you can master the art of creating clipping paths and achieve high-quality, professional results in your designs. Want to enhance your designs further? Learn how to add texture to text in Photoshop for creative and visually striking typography.

Advanced Techniques for Perfect Photoshop Clipping Paths

Mastering a clipping path in Photoshop requires advanced techniques for precision and efficiency. These methods help create clean, professional images suitable for any design project.

1. Using the Curvature Pen Tool for Smooth Paths

This pen tool simplifies creating a curved path for complex shapes in Photoshop. It allows for smoother adjustments without manual effort.

This tool is ideal for objects with rounded edges, ensuring a natural finish.

2. Combining Paths with the Freeform Pen Tool

This tool is useful for quick and flexible path creation. It’s a great choice when working on objects with irregular shapes.

This technique is efficient for projects with dynamic designs.

3. Adjusting Path Settings for Specific Needs

Fine-tuning the path settings ensures that each path meets your design requirements.

This step helps achieve a polished and cohesive visual.

4. Creating Depth with a New Layer

Adding a new layer helps enhance the clipping path’s effect. This is especially useful when isolating objects for composite designs.

This method is essential for creating depth and maintaining flexibility.

5. Perfecting the Path with the Add Anchor Point Tool

The add anchor point tool refines paths for precision. It allows for detailed adjustments to achieve the perfect path.

This ensures every detail of the object is captured.

6. Choosing and Selecting the Right Clipping Path

Selecting the right path ensures consistency in your designs. Use the choose clipping path option for accurate results.

This process guarantees professional outcomes for all projects.

By incorporating these advanced techniques, you can elevate your skills and create flawless clipping paths for any design project.

Types of Clipping Paths and Their Applications

Type of Clipping Path Description Applications Example
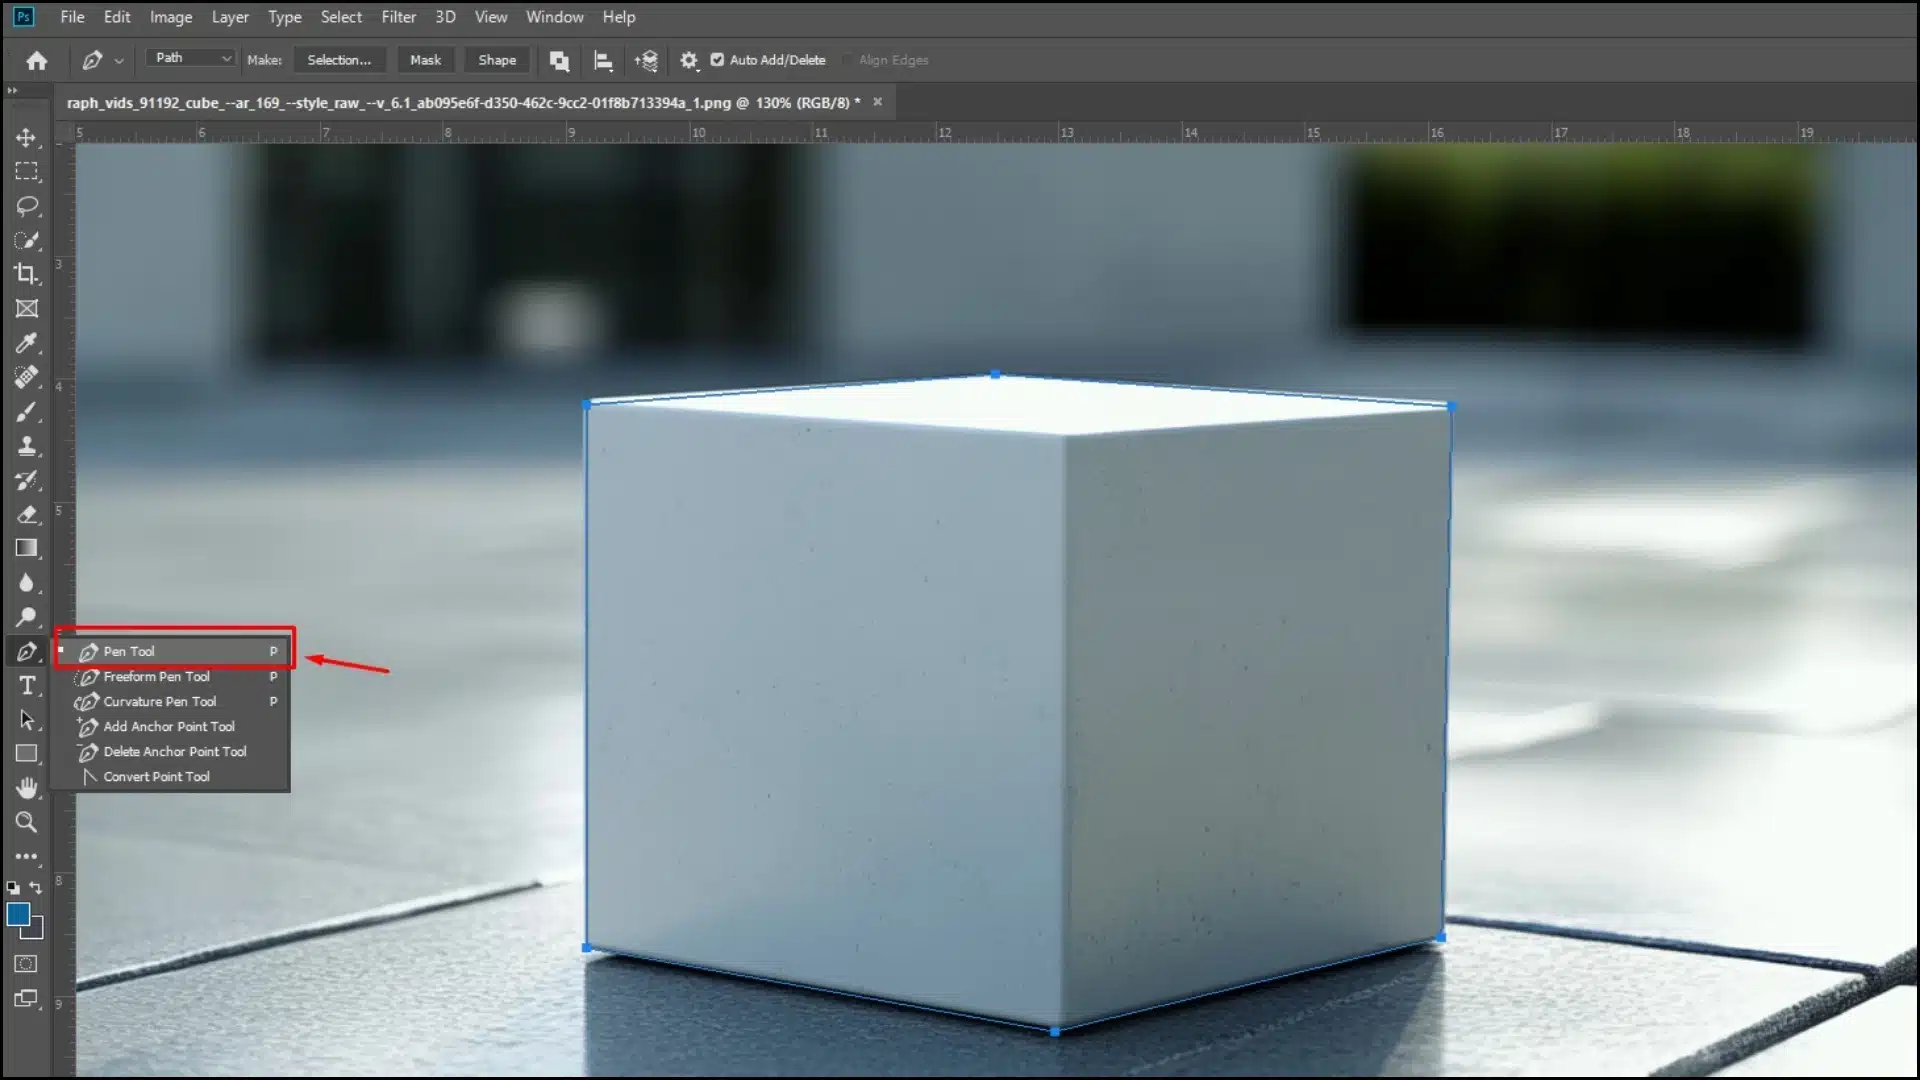
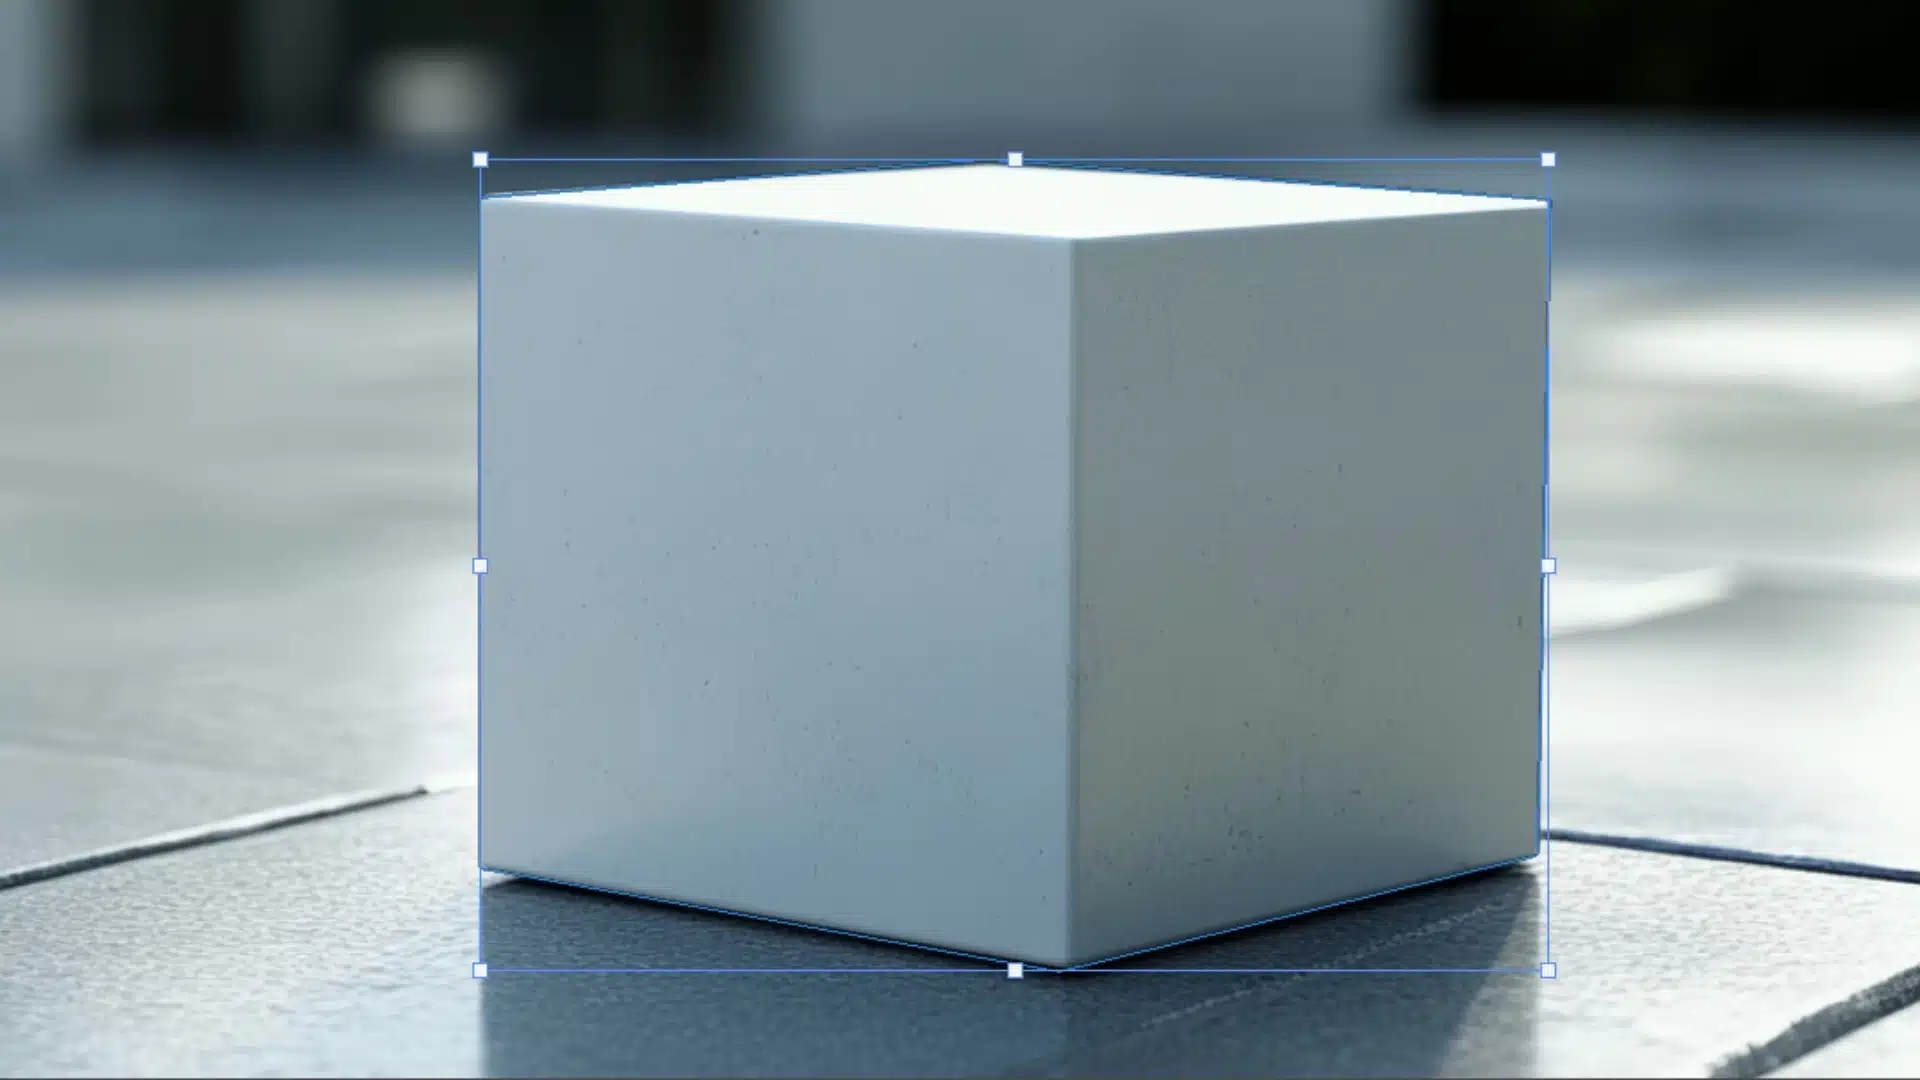
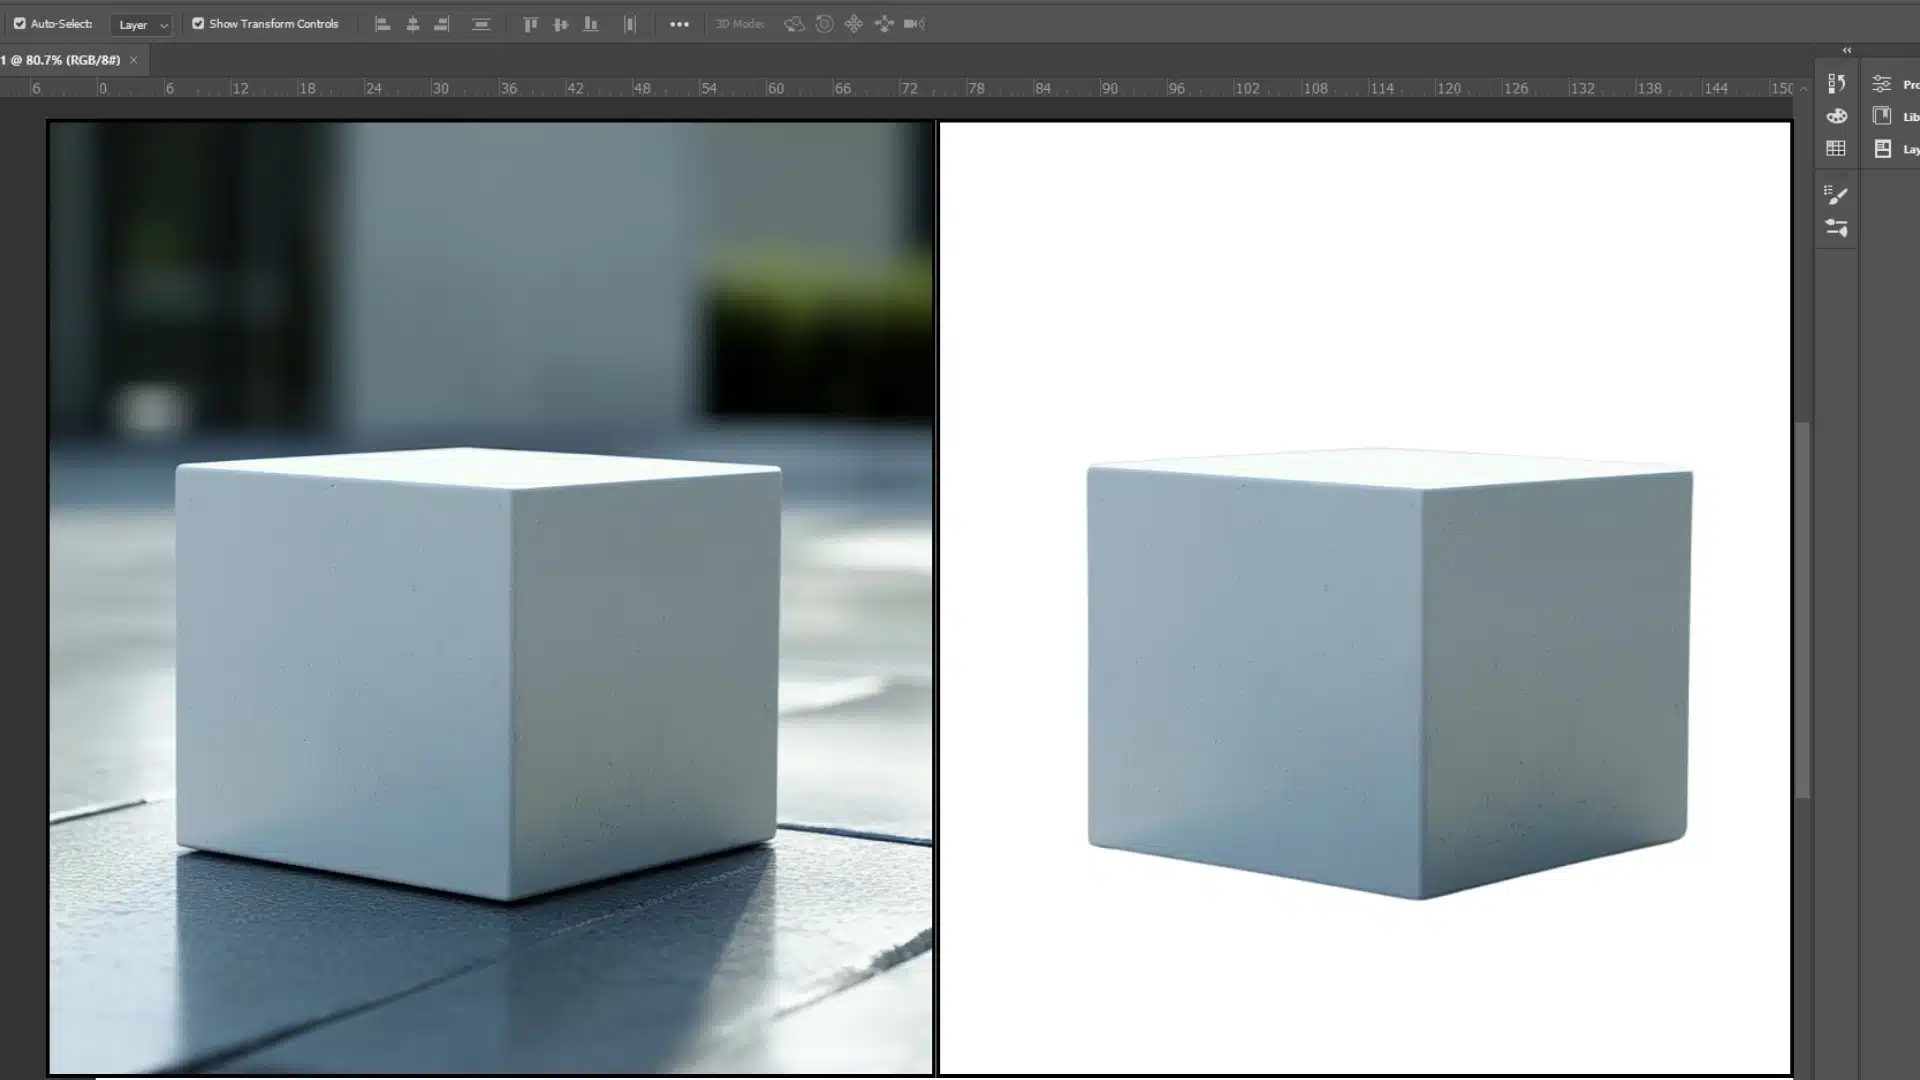
Simple Clipping Path Basic path with straight lines or curves. Used for objects with basic shapes. Books, phones, or boxes.
Compound Clipping Path Combines paths to handle hollow areas. Best for objects with cutouts. Chairs with open spaces, rings.
Complex Clipping Path Handles objects with detailed edges. Works for items with multiple details. Necklaces, furniture.
Super Complex Path For intricate shapes and multiple parts. Ideal for highly detailed objects. Flower bouquets, machinery.
Illustration Clipping Path Custom shapes for unique designs. Used in creative projects. Logos, custom artwork.

A clipping path is a versatile tool used for isolating objects in images. It has different types based on the object’s complexity and purpose. Each type is designed for specific tasks, such as editing product photos, removing unnecessary elements, or creating precise cutouts. The table below will guide you through the various types and their real-world applications.

This table and guide will help you understand when to create a clipping path and how to apply it effectively in your projects.

Frequently Asked Questions

Photoshop-Masterclass-Advanced-Editing-Layer-Manipulation

How to Do a Clipping Path in Photoshop?

To create a clipping path, follow these simple steps:

This method helps isolate the object while keeping the rest intact.

What Is the Difference Between Clipping Path and Masking?

A clipping path creates a precise outline around an object to isolate it. It works best for objects with hard edges. Photoshop masking uses layers to hide or reveal parts of an image, making it suitable for objects with soft edges like hair.

In short, use a clipping path for exact cuts and masking for blended edits.

What Is the Clipping Path Service in Photoshop?

A clipping path service helps users create precise cutouts for objects in images. Professional designers use this service to isolate products, remove unwanted elements, and prepare files for printing or web use. It ensures objects are cleanly separated for use in designs like catalogs or online stores.

How Do I Remove the Clipping Path in Photoshop?

To remove a clipping path:

This will remove the vector path while keeping the image intact.

Conclusion

A Photoshop workspace showing a side-by-side comparison of an object before and after using a clipping path for background removal.

Learning to create a clipping path has been a game-changer in my design work. I remember isolating a detailed product for an online store, and the precision made it look professional and polished. Clipping paths simplify complex edits and help create stunning visuals.

Take your skills further with our Photoshop Course or improve your workflow with our Lightroom Course. Start learning today!

If “Photoshop Clipping Path article has helped you, then Like and Share it with your friends

Facebook
Twitter
LinkedIn
Pinterest

Download Your Free Guide Now!

Discover the secrets of photography with our printable guide! Master essential techniques like aperture, shutter speed, and ISO to create stunning images. Get your free printable PDF now and start turning your snapshots into masterpieces!