
Mastering noise reduction in Photoshop has never been more straightforward!
Typically associated with low light settings, this grainy annoyance can detract from the most captivating pictures.
However, with simple tweaks within Photoshop, even beginners can dramatically enhance their photos by making every pixel count!
In this article, we’ll explore some straightforward steps to help you transform your noisy photos into pristine works of art without fuss or frustration.
Table of Contents
Step-by-Step Guide to Noise Reduction in Photoshop
Here is a step-by-step guide on how to reduce noise in Photoshop
Opening Your Image and Creating a Duplicate Layer
To begin, open your desired image and prepare to reduce noise in Photoshop.
First, duplicate the original image; this preserves the background layer, critical for nondestructive editing.
This process allows you to compare the before and after effects without permanently altering the original image.
2. Selecting the Right Filter to Reduce Noise in Photoshop
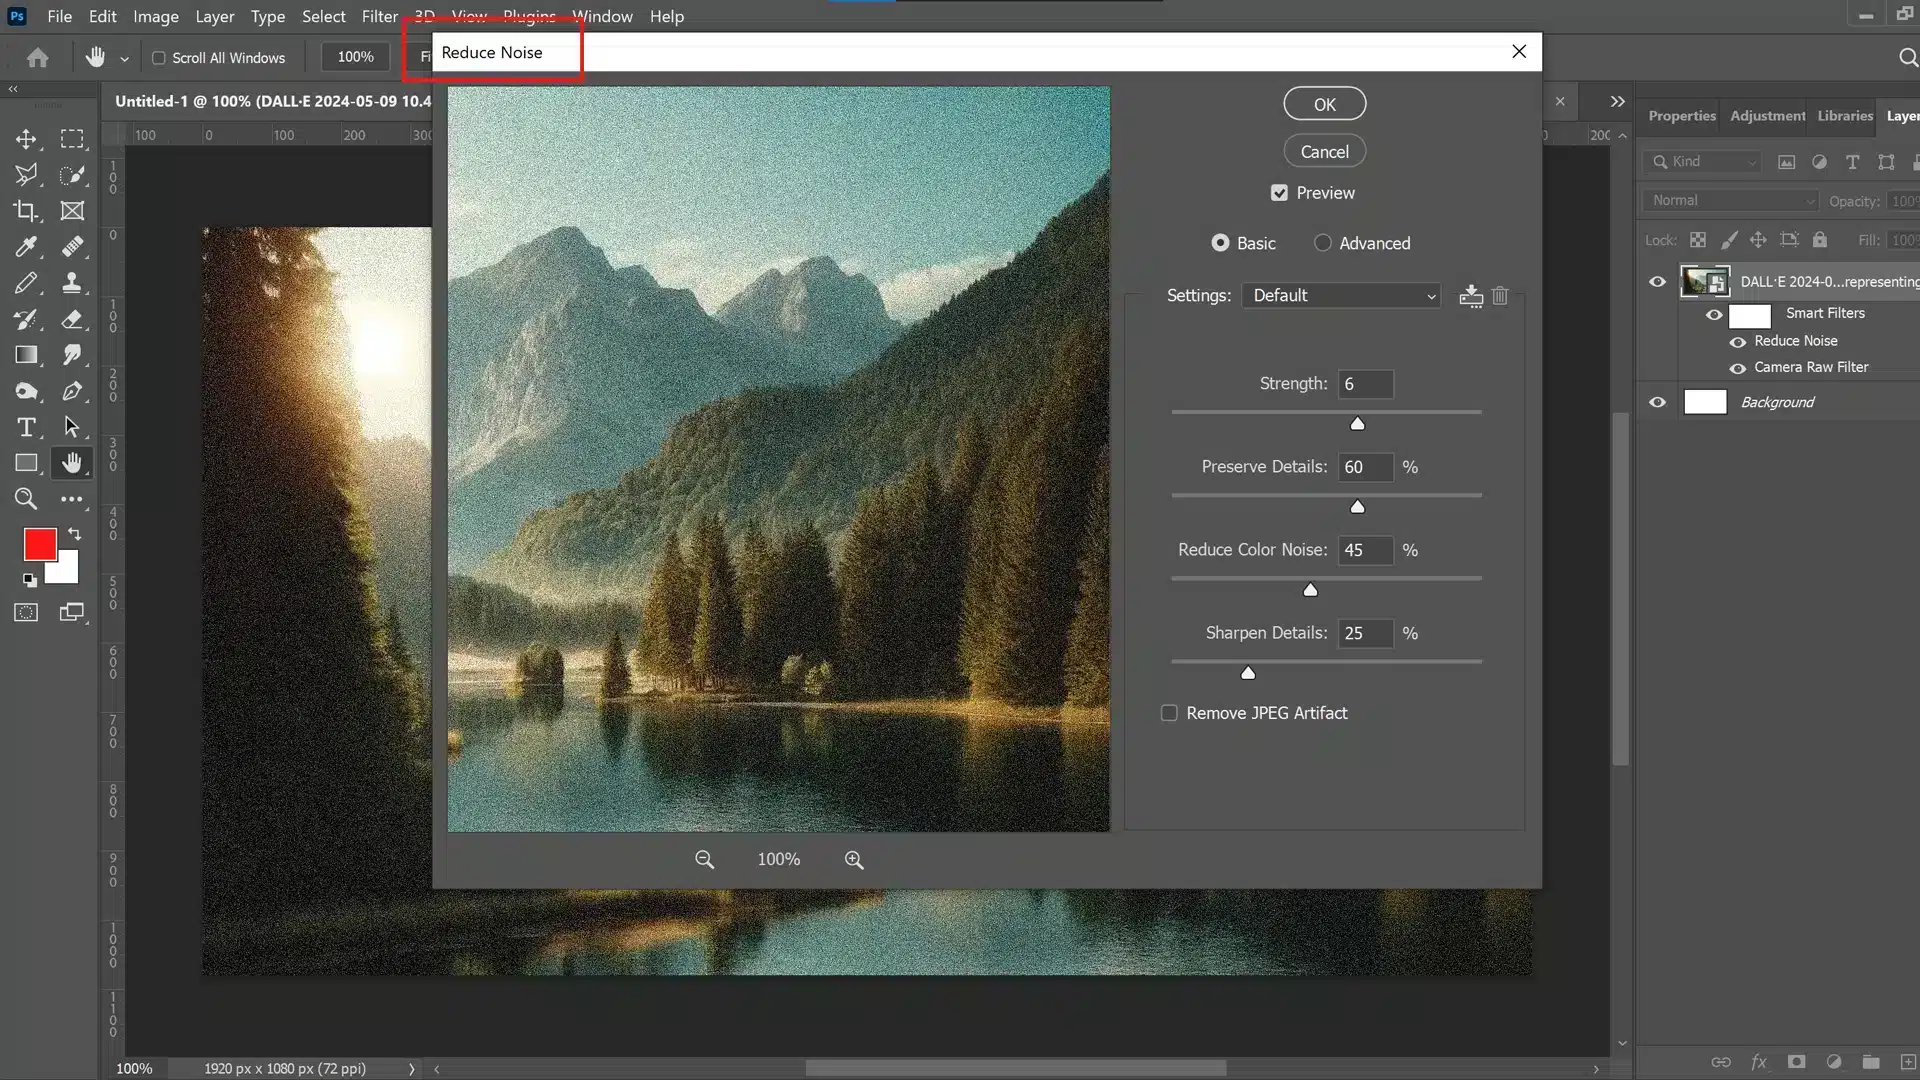
Next, navigate to ‘Filter‘ and select ‘Noise‘ to find the appropriate Filter to reduce noise in Photoshop.
The most commonly used option is the “Reduce Noise” filter.
This filter is optimal for tackling various types of noise, particularly luminance and color noise.
3. Adjusting Filter Settings for Optimal Results
In this step, adjust the noise reduction filter’s settings to minimize noise while preserving imoprtnat image detail.
Critical adjustments include ‘Strength,’ ‘Preserve Details,’ ‘Reduce Color Noise,’ and ‘Sharpen Details.’
Effectively using these settings can help maintain high image quality without introducing too much blur or losing important details.
4. Fine Tuning with Advanced Techniques
Advanced techniques that reduce noise in Photoshop should be applied for images requiring more detailed attention or where standard settings do not suffice.
Here, you might incorporate layers and masks to apply changes selectively or use the ‘Camera Raw‘ Filter for more comprehensive and fine tuned adjustments in areas troubled by digital noise.
5. Previewing and Comparing Before and After
Always utilize the preview window in most dialogues to reduce noise in Photoshop.
You can toggle between the original and modified views to examine whether too much detail has been lost or if more tweaks are necessary.
This step ensures a balanced outcome that effectively reduces noise while keeping your image sharp and clear.
Implementing these steps should significantly enhance your photos by reducing unwanted noise using powerful tools available in Photoshop, making them more transparent, cleaner, and visually appealing.
Using the Noise Reduction Filter in Camera Raw
Adobe Camera Raw offers robust tools that reduce noise in Photoshop, ensuring improved image quality while maintaining important details.
These features are handy in low light conditions where digital noise can compromise photo clarity.
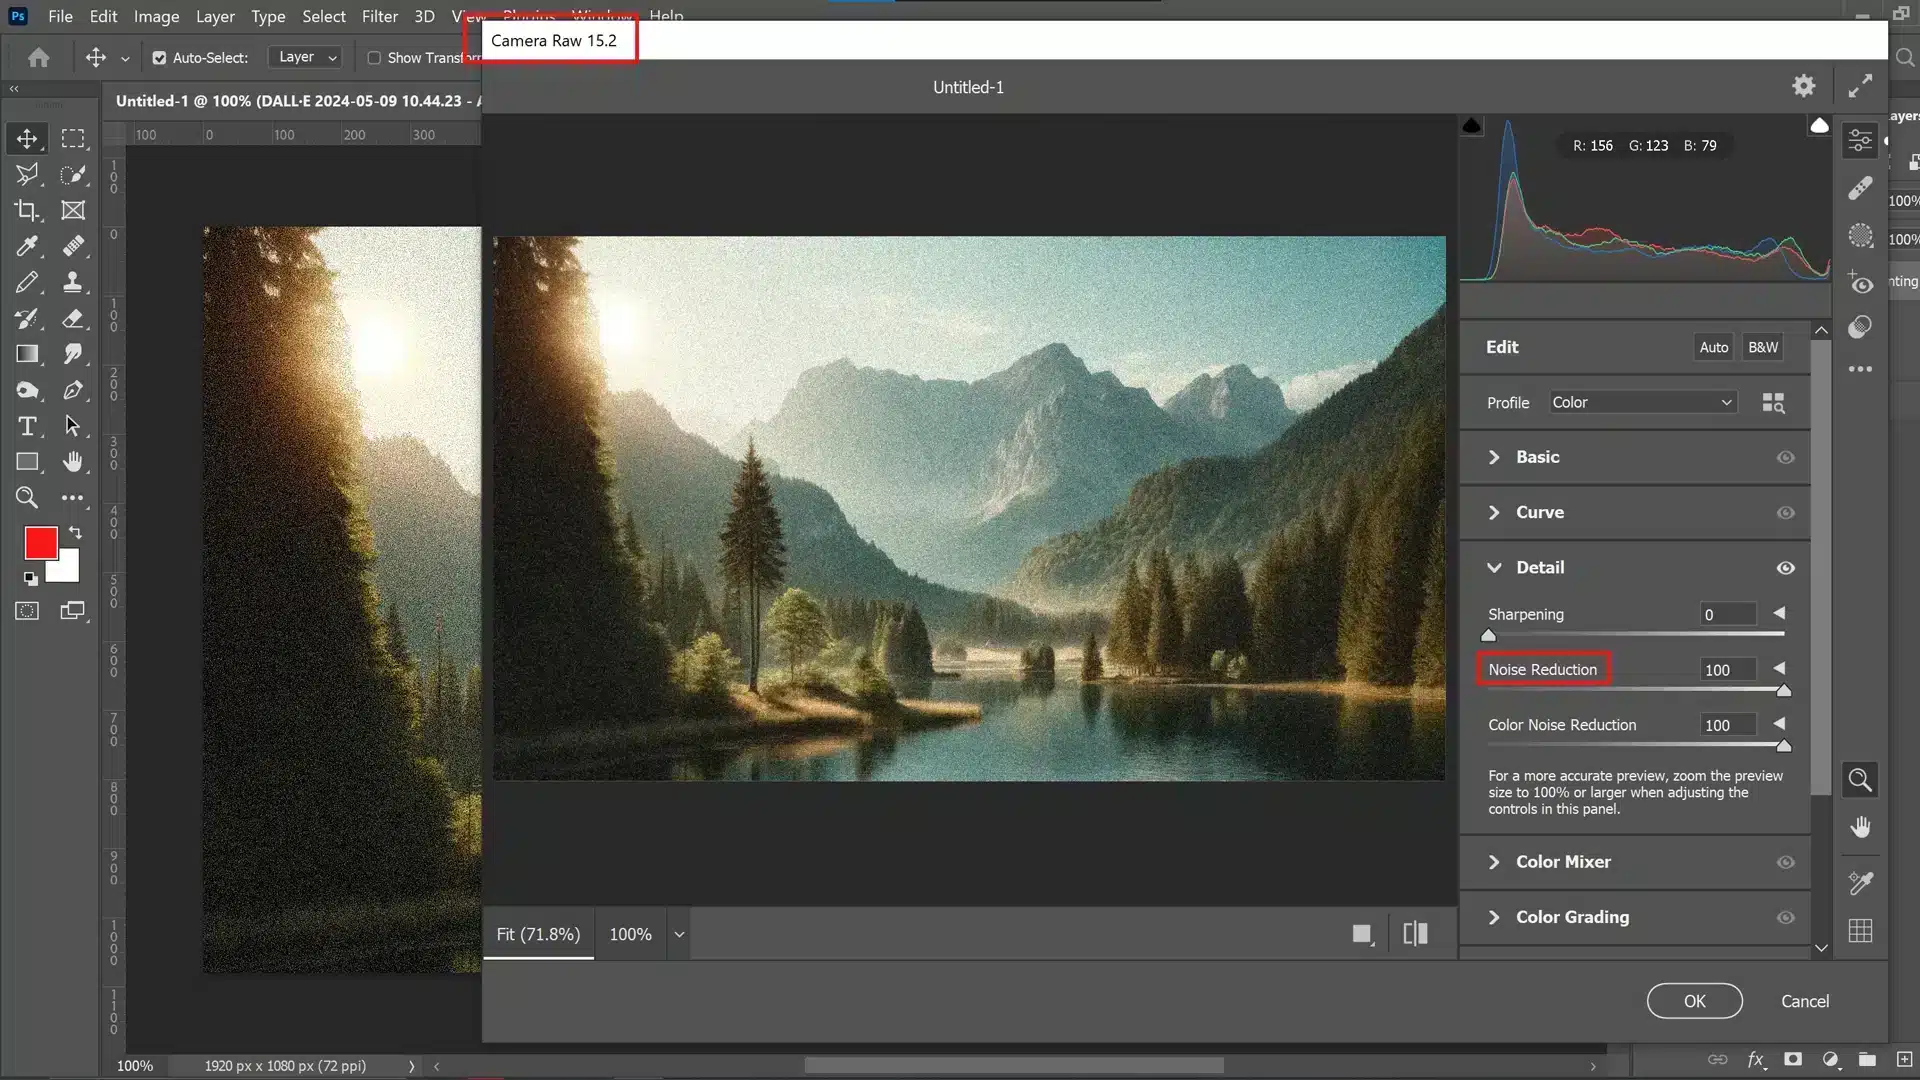
Accessing Camera Raw in Photoshop
Accessing Camera Raw in Photoshop is the first step to reducing noise in Photoshop, especially when handling raw-enabled image files.
This process can be done by directly opening your raw enabled image files in Photoshop and automatically launching the Camera Raw plugin.
Regular JPEG and TIFF users can also utilize these powerful editing tools by selecting ‘Filter’ from the top menu and then choosing ‘Camera Raw Filter.’
This accessibility ensures that all Photoshop users can employ advanced noise reduction techniques.
Adjusting Noise Reduction Sliders in Camera Raw
Detailed adjustments can be made to target specific types of noise within the Camera Raw interface.
Important sliders include:
| Slider | Effect on Image | Ideal Use Case |
|---|---|---|
| Luminance Noise Reduction | Smooths out irregularities without compromising sharpness. | Best for reducing grainy noise in low light photos. |
| Color Noise Reduction | Removes color speckles in darker areas. | Useful for images with noticeable color distortions in shadows. |
| Reduce Noise Filter | General adjustment of noise processing. | Adjust overall to fine-tune the balance of noise and details. |
Properly adjusting these controls allows you to significantly reduce digital disturbances while ideally preserving textures and edges which is a important balance for professionals and enthusiasts alike.
Balancing Noise Reduction and Image Detail
Achieving the right balance between eliminating unwanted noise and keeping significant details.
Overusing luminance reduction may lead to overly smooth images that lack texture, whereas minimal use could retain too much noise.
Experiment with various settings to find a happy medium that suits your visual aesthetic. Each image is unique; thus, each requires a tailored approach based on content complexity and intended use.
In essence, efficient use of Adobe’s camera raw filter optimizes your photos for more apparent outputs and enhances their overall fidelity, which is important for any serious photography workflow.
Effective Strategies for Reducing Color Noise in Photoshop
Chroma noise, often visible as random color dots in your images, can significantly degrade image quality.
This section explores effective strategies to minimize this disruption, ensuring your photos remain clear and vibrant.

Identifying Chroma Noise in Images
Identifying chroma noise is the first step to tackling it effectively.
Look for uneven graininess or colored speckles across darker sections or smooth areas of an image. Photographers must distinguish between luminance noise, which impacts brightness, and color noise, which affects color fidelity.
Recognizing these differences is important for applying the correct noise reduction Photoshop techniques.
Utilizing Chroma Noise Reduction Techniques
Once chroma noise is identified, various techniques for reducing more noise in Photoshop can be used. Adobe Photoshop offers dedicated tools such as the noise Reduction filter.
This tool explicitly targets and reduces luminance and color noise without sacrificing detail. Additionally, employing the filter to minimize noise in Photoshop selectively can help preserve important textures while eliminating unwanted artifacts.
- Use 'Reduce Noise' under Filter Menu
- Adjust strength settings to target chroma (color) Noise
- Preview changes in real time to ensure details are preserved
This process involves a delicate balance between reducing noise and maintaining significant information within the photo.
Fine Tuning Chroma Settings for Color Accuracy
Achieving accurate colors while minimizing chroma noise requires fine tuning specific settings in your editing software.
Leveraging tools like the Adobe Camera Raw filter facilitates more profound control over noise reduction settings, allowing adjustment of detail preservation through sliders controlling sharpening and luminance/color settings.
To refine these adjustments:
- Open Camera Raw.
- Navigate to the 'Detail' panel.
- Adjust the Luminance Smoothing slider for broad range correction.
- Fine tune with the Color Noise Reduction slider.
Each image will demand a unique approach based on content and desired results, emphasizing flexibility in technique application.
By systematically addressing each phase (identification, reduction technique utilization, and setting adjustments), photographers can significantly enhance their workflow in Photoshop when dealing with chroma noise issues, leading to cleaner and color accurate photographs.
Effective Use of Luminance Noise Reduction
Effectively reducing luminance can dramatically enhance a photo’s image quality. This section delves deeper into understanding, applying, and fine tuning luminance reduction techniques to ensure pristine outcomes.
Understanding Luminance Noise and Its Impact
Luminance noise, manifesting as grayscale image variations, primarily affects the perceived sharpness and clarity. Unlike color noise, luminance can lend a grainy texture to photographs even when colors remain accurate.
It’s important to recognize its presence as a primary factor that downgrades image quality.
Preserve details while managing expectations. Higher ISO settings on digital cameras tend to introduce more luminance noise, also known as “image noise.”
Mitigating this without blurring critical details is the benchmark of proficient post processing.
Applying Reduction to Luminance Noise in Photoshop
To remove luminance noise, employ tools like the ‘Adobe Camera Raw filter’ or explore options in software channels dedicated to noise reduction in Photoshop. Here’s how:
- Open your image in Photoshop.
- Select the 'Detail' panel within Adobe Camera Raw.
- Adjust the 'Luminance' slider to mitigate visible noise, watching closely to not soften important textures.
The proper application involves balancing removing unwanted noise and retaining important image detail the core principle of the effective post production workflow.
Adjusting the Luminance Detail and Contrast
Fine tuning involves adjusting sliders for ‘Luminance Detail,’ which preserves finer details against smoothening effects, and ‘Luminance Contrast,’ enhancing subtle contrast nuances potentially washed out by aggressive noise reduction:
- Increase 'Luminance Detail' for crisper edges if preliminary reduction has excessively smoothed out pertinent features.
- Modify 'Luminance Contrast' slightly upwards to reintroduce depth often lost during initial noise corrections.
Through meticulous adjustments, adherence to these advanced steps ensures that your final photos display desired sharpness with minimal distractions from graininess, illustrating competent handling of both “reduce luminance noise” and overall dynamic visual maintenance.
With every change, contemplate the photography principles; reducing distractions amplifies the focus on subjects, elevating your craft above digital challenges afforded by modern technology enhancements such as enhanced sensitivity (ISO) ranges in newer camera models.
Professional Noise Reduction Photoshop Techniques
Adept photographers utilize advanced techniques to eliminate noise in Photoshop beyond primary noise elimination methodologies to achieve a pristine photo.
Here, we explore various premium tools and strategic approaches to suppress unwanted digital noise without compromising the image’s authentic texture and details.
Exploring Advanced Tools Beyond Basic Filters
Beyond conventional methods, innovative tools offer sophisticated options for diminishing noise.
One such powerful tool is the Adobe Camera Raw filter, which integrates seamlessly with Photoshop, enabling users to manage color noise effectively while preserving significant details.
This filter provides sliders for adjusting luminance and color separately, allowing a more tailored approach to cleaning up images.
Utilizing these advanced settings enables photographers to reduce and strategically manage their photos’ noise levels according to specific needs without generalizing the effects across the entire image.
Combining Multiple Tools for Enhanced Results
By layering multiple strategies, professionals amplify their results, merging software capabilities with manual finesse.
A common practice involves using a combination of filters to reduce noise in Photoshop and selective masking and blending modes to target only areas that require adjustments.
In this integrated approach, careful attention is given to treating different types of noise, like luminance and color noise, separately based on their characteristics within the image context, ensuring that each section receives appropriate treatment without affecting overall quality.
This also involves adjustment layers, which help precisely control how much each correction effect gets applied.
How Professionals Maintain Texture While Reducing Noise
The goal of professional grade noise reduction isn’t merely to eliminate digital artifacts; it’s equally important to maintain or enhance the photograph’s original texture and sharpness.
The use of preserve details technology in software like Photoshop plays a significant role here.
By smartly balancing reducing excess pixel variance (noise) and enhancing fine lines (details), photographers accustom sharpening filters to the post-noise reduction process to re-inject life into possibly softened areas due to previous corrections.
These enhanced techniques demonstrate how dynamic yet precise today’s digital photography workflows have become, all while affording creators an unparalleled capacity to craft visually stunning images devoid of distracting noises yet full of desired vivacity and clarity.
Pro Tip: While reducing noise is important for many images, adding noise can sometimes enhance texture, create a vintage effect, or improve overall aesthetics, particularly in certain genres of photography and graphic design.
Automating Noise Reduction for Batch Processing
Automating noise reduction in Photoshop is invaluable, especially when dealing with multiple images. This technique saves time and ensures consistency across your edited photos.
Setting Up Batch Processes in Photoshop
To set up batch processes in Photoshop, you initially need to create an action that includes the noise reduction Photoshop step.
Here’s how you can set it up efficiently:
- Open a representative image to define the standard settings for noise reduction.
- Navigate to Window > Actions, create a new "Batch Noise Reduction" action, and hit record.
- Apply your preferred noise reduction filter, adjusting parameters such as strength and preservation details.
- Once adjustments are complete, stop recording the action.
You can automate this across multiple files by selecting File > Automate > Batch, choosing your set and action, selecting the source folder, and specifying any destination requirements.
This method operationalizes efficient bulk editing while maintaining high quality standards.
Applying Noise Reduction Across Multiple Images
When applying noise reduction across multiple files using actions:
- Ensure all images have similar levels of image noise to maintain consistency.
- Use conditional actions if different images require various noise suppression levels; this could involve segmenting images by ISO ranges into different folders and creating personalized actions for each group.
For en masse adjustments:
- Double check each image post process, as subtle differences might be amplified after batch processing.
- Consistently re-evaluate these photos at 100% magnification to inspect clarity and detail maintenance after applying filters that reduce noise in Photoshop.
Customizing Actions for Specific Needs
While basic actions are helpful for general needs, you may often encounter scenarios requiring customized workflows, such as potential discrepancies like color noise or varying light conditions wherein standard settings provide insufficient or excessive correction.
In these cases:
- Employ conditions within Photoshop's 'Action' functionality by inserting 'Insert Conditional' from the Action panel menu where specific conditions dictate differing approaches to effectively reducing luminance or digital noise levels.
- Execute intricate sequences triggering particular paths only under predefined criteria, thereby achieving optimal outcomes irrespective of initial variances among imagery groups without manual intervention.
This strategy of customizing and automating allows photographers and editors to address unique issues, such as removing or reducing specific kinds of noises point by point.
Optimizing High ISO Images for Reduced Noise
High ISO settings can be a powerful tool in low-light photography, yet they often introduce unwanted digital noise to your images. Mastering the balance between light sensitivity and image quality is critical for achieving professional results.
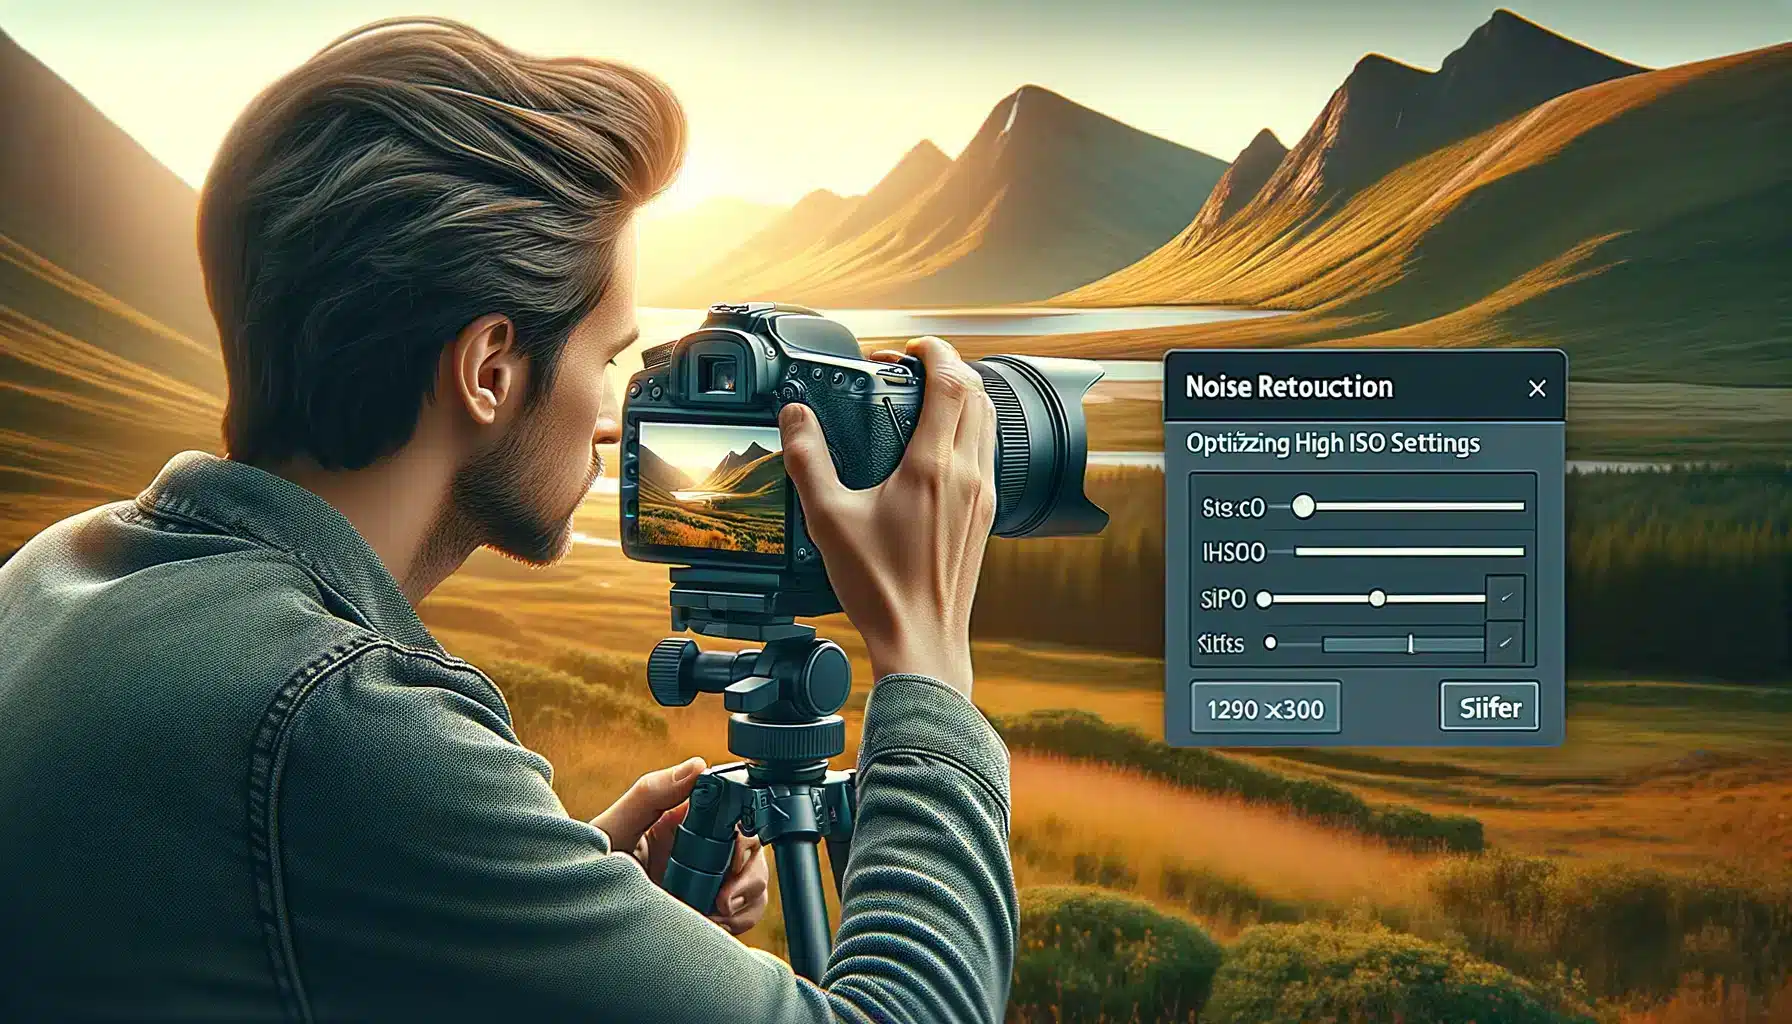
Challenges with High ISO Photography
When you push your camera’s ISO setting higher, it amplifies the signal from the sensor. This process unavoidably introduces more noise in Photoshop and other photo editing software as more image artifacts become visible.
Such noise can manifest as grain or color speckling, which detracts from the overall clarity of your photos.
Strategies for Managing Noise in High ISO Shots
Effective noise reduction starts in the camera. Opting for the lowest possible ISO that allows adequate exposure is a prudent first step.
Additionally, employing a filter to reduce noise in Photoshop during shooting can preempt some issues, but be wary of overuse; these filters might blur important details.
- Use a Tripod: Reduces the need to increase ISO by stabilizing the camera, allowing longer exposure times without blur.
- Shoot in RAW: Provides more flexibility when applying noise reduction techniques during post-processing.
- In Camera Noise Reduction Settings: Explore these options cautiously; each camera brand has different impacts on the details of the image.
Post Processing Techniques for Clarity and Detail
Once your high ISO shots are taken, using Adobe Photoshop offers extensive tools for fine tuning:
- Reduce Noise in Photoshop:
- The 'Reduce Noise' tool targets granular visibility without compromising sharpness. Using advanced sliders, selectively eliminate noise while protecting edge detail.
- Apply "reduce luminance noise" selectively:
- Luminance affects the brightness of color patches and can be adjusted without altering color integrity.
- Utilize layers and masks:
- Adjustments like sharpening or color correction should be applied only to areas significantly impacted by noise.
Remember, each image requires a unique approach based on its characteristics and the extent to which it was modified during the initial capture.
Leveraging these refined techniques will transform noisy photos into stunning contributions to your portfolio.
Avoid common photo editing mistakes by mastering noise reduction. Effective noise reduction enhances image quality, preventing graininess while preserving essential details for stunning, professional results.
Noise Reduction for Night Photography

Night photography often comes with the challenge of dealing with digital noise in low-light conditions. Learning effective noise reduction techniques helps maintain the clarity and quality of your night shots, enhancing their overall impact.
Enhance your long exposure photography by optimizing high ISO images for reduced noise. This approach ensures your night shots remain clear and vibrant, eliminating unwanted grain for professional-quality results.
Unique Challenges of Night Photography
Night photography presents unique technical challenges, primarily due to low light conditions.
Capturing sharp, clear images when the sun sets requires adjusting camera settings that sometimes increase the digital noise in your shots.
This kind of noise manifests as grainy spots or random specks of color, which can degrade the quality of your photographs.
Noise reduction techniques have become important in tackling these challenges.
Understanding how to balance ISO settings and exposure times can mitigate some initial noise generation, but it is often insufficient for high quality results.
Applying Noise Reduction to Enhance Night Shots
Once you’ve captured the night sky or urban landscapes after dark, enhancing your images involves a critical post processing step: applying filters that reduce noise in Photoshop.
The steps are straightforward:
- Import your photo into Adobe Photoshop.
- Navigate to 'Filter,' then select 'Noise' choose the 'Reduce Noise' filter.
- Adjust the strength slider to control how much noise is reduced in Photoshop.
By utilizing the reduce noise function, photographers can maintain the details of the image while minimizing unwanted graininess.
It’s also advisable to experiment with ‘Preserve Details‘ and ‘Reduce Color Noise‘ sliders to fine-tune improvements without over-softening the picture.
Remember not to overly smooth out your photo, as it might lose important details that give depth and context to night scenes.
Pro Tip: For those who prefer using Lightroom, fixing grainy photos can be done by navigating to the ‘Detail‘ panel. Here, you can use the ‘Luminance‘ and ‘Color‘ sliders to reduce noise and correct color artifacts effectively.
This method is particularly useful for bulk editing night shots, offering a streamlined way to enhance multiple images without switching software.
Balancing Exposure and Noise Reduction at Night
Achieving a balance between exposure settings and efficient noise reduction is important in night photography.
Overexposure just to minimize noise might lead to loss of detail in highlight areas.
At the same time, underexposure could necessitate excessive use of tools that reduce noise in Photoshop, potentially leading to a less natural look.
Ideal practice includes:
- Shooting with a tripod for stable long exposures.
- Use a remote shutter or timer to avoid camera shake.
- Experimenting with lower ISO levels combined with longer shutter speeds.
Addressing exposure correctly from the start significantly diminishes reliance on heavy post processing and maintains image integrity.
Handling enhanced settings in post edit, like brightness and contrast adjustments, should complement rather than compensate for poor original exposure choices.
With adept camera settings adjustment coupled with judicious use of post processing features such as removing luminance noise, even challenging night photography situations can yield stunning results that resonate with clarity and brilliance.
The ultimate goal being fewer compromises on quality regardless of environmental constraints.
Frequently Asked Questions

How do I reduce the Noise in a photo in Photoshop?
To reduce Noise in Photoshop, open your image and select ‘Filter’> ‘Noise’> ‘Reduce Noise.’
Here, you can adjust the strength of the noise reduction filter, preserve details, remove color noise, and reduce luminance noise to enhance image quality without sacrificing too much detail.
What is noise reduction in editing?
Noise reduction in editing is a process that minimizes unwanted grainy or speckled visual artefacts known as digital noise, improving overall image quality.
This process can involve different techniques to target color and luminance noise, enhancing the photo while preserving important detail.
How to reduce Noise in an image?
To effectively reduce noise in an image, utilize advanced noise reduction software or tools like Photoshop. Select the minimize noise filter or similar options to fine-tune color and luminance noise removal.
Where to find Denoise in Photoshop?
You can find the Denoise functionality in Adobe Photoshop primarily under the “Reduce Noise” filter.
Here’s how you can access it:
- Open your image in Photoshop.
- Go to the top menu and select Filter.
- Hover over "Noise" to expand the submenu.
- Click on the Reduce Noise Filter.
This will open the Reduce Noise dialog box, where you can adjust various settings to denoise your image, including the strength of the noise reduction, the preservation of details, and the reduction of color noise.
Conclusion
With these detailed steps and strategies, I have already mastered noise reduction in Photoshop.
Whether dealing with low-light environments, high ISO settings, or just enhancing image clarity, these techniques ensure I achieve professional-grade results by removing as much noise as possible.
Explore a comprehensive Photoshop course for a complete guide on all Photoshop tools and techniques, or check out our Lightroom course to enhance your workflow and image management.
Read more about Photoshop:


Course

Light Effect Photoshop


Lightroom Course 2025

Adobe Photoshop Course 2025

Photo Editing Course


