Creating a Lightroom passport photo can be a game-changer for anyone looking to streamline their passport application process. Imagine eliminating the hassle and expense of visiting a professional photographer every time you need a passport photo. Intrigued? You should be.
In this article, I’ll guide you through the simple steps to take and edit to create a perfect passport photo using Lightroom right from the comfort of your home.
Whether you’re a seasoned Lightroom user or a beginner, you’ll find these tips invaluable. Ready to save time and money while ensuring your photo meets all official requirements? Let’s get started!
Table of Contents
Setting Up Lightroom Passport Photo Plugin
Creating passport photos in Adobe Lightroom can be beneficial for both professionals and hobbyists. It ensures standardization and quality that meet government guidelines.
Installing the Passport Photo Plugin
- Search for the Lightroom passport photo plugin online. You can typically find it on the developer's website or marketplace.
- Download the plugin to your computer and unzip the file if necessary.
- Open Lightroom and navigate to the 'File' menu in the upper left corner. Select 'Plugin Manager'.
- Click 'Add' at the bottom left corner, locate your downloaded plugin file, and click 'OK'. Now, your passport photo plugin should be ready to use.
Configuring Lightroom for Passport Photos
- Import your photos into the Library Module. This makes them available for editing.
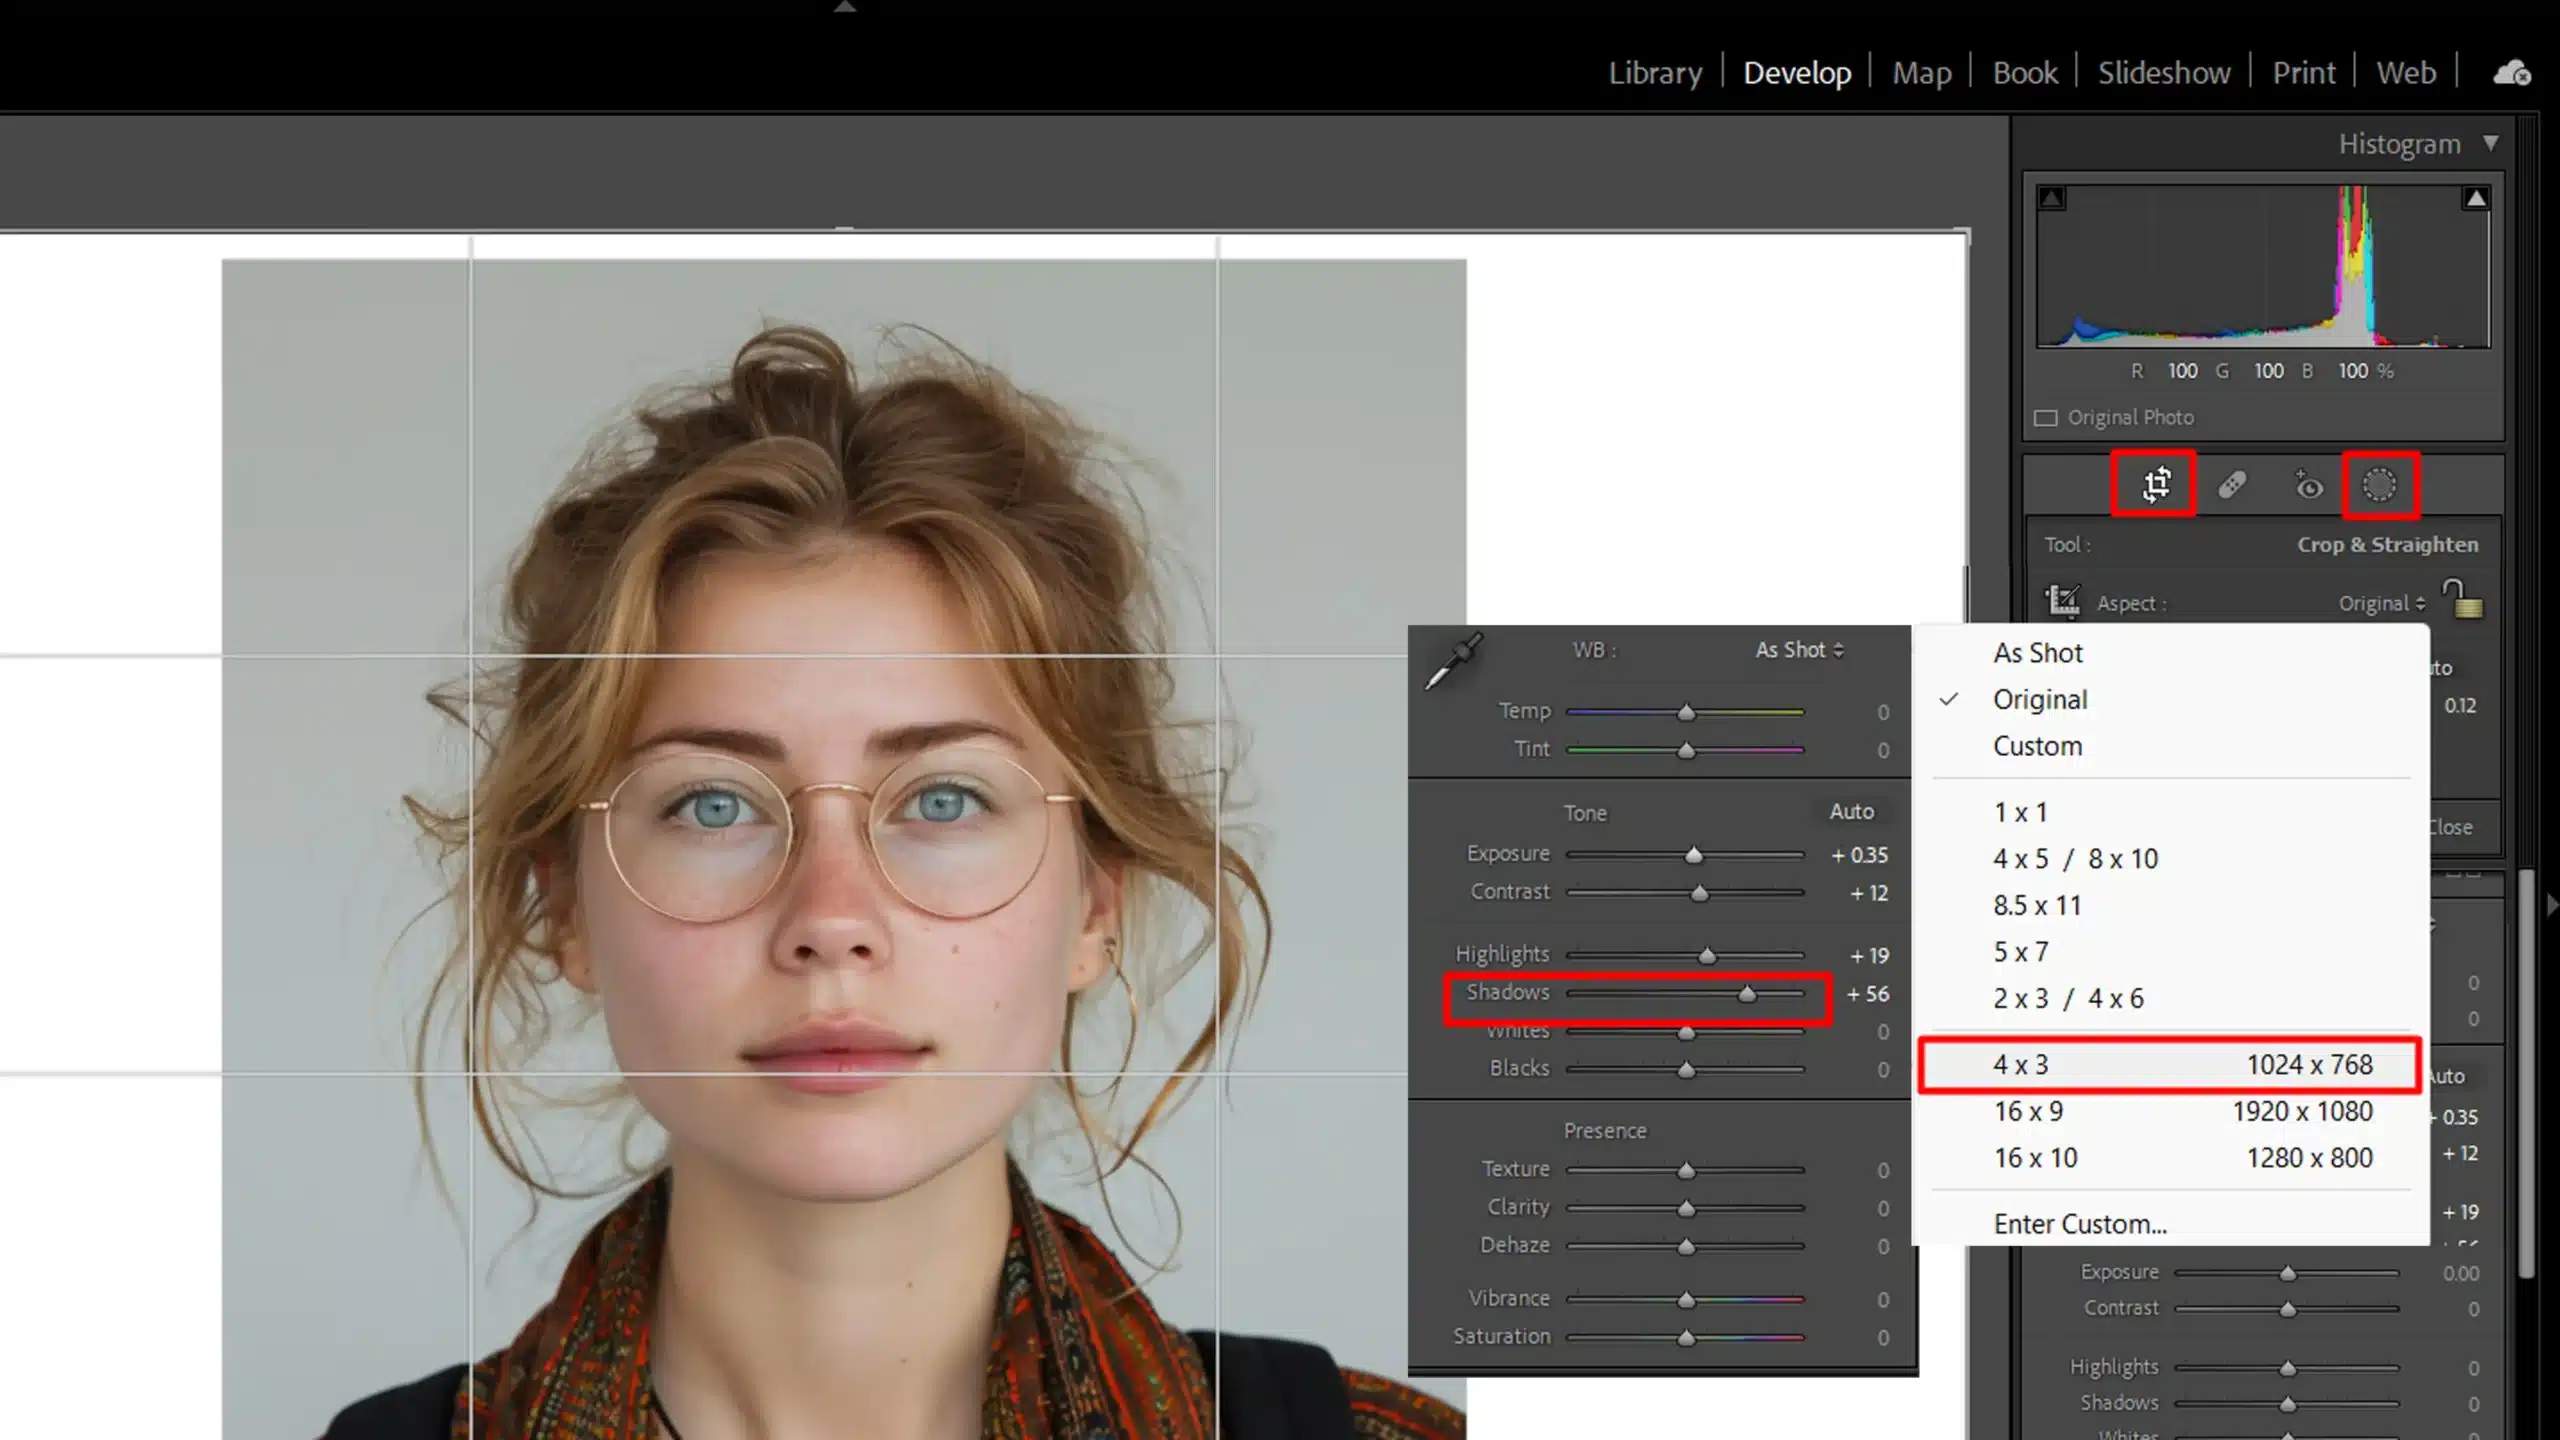
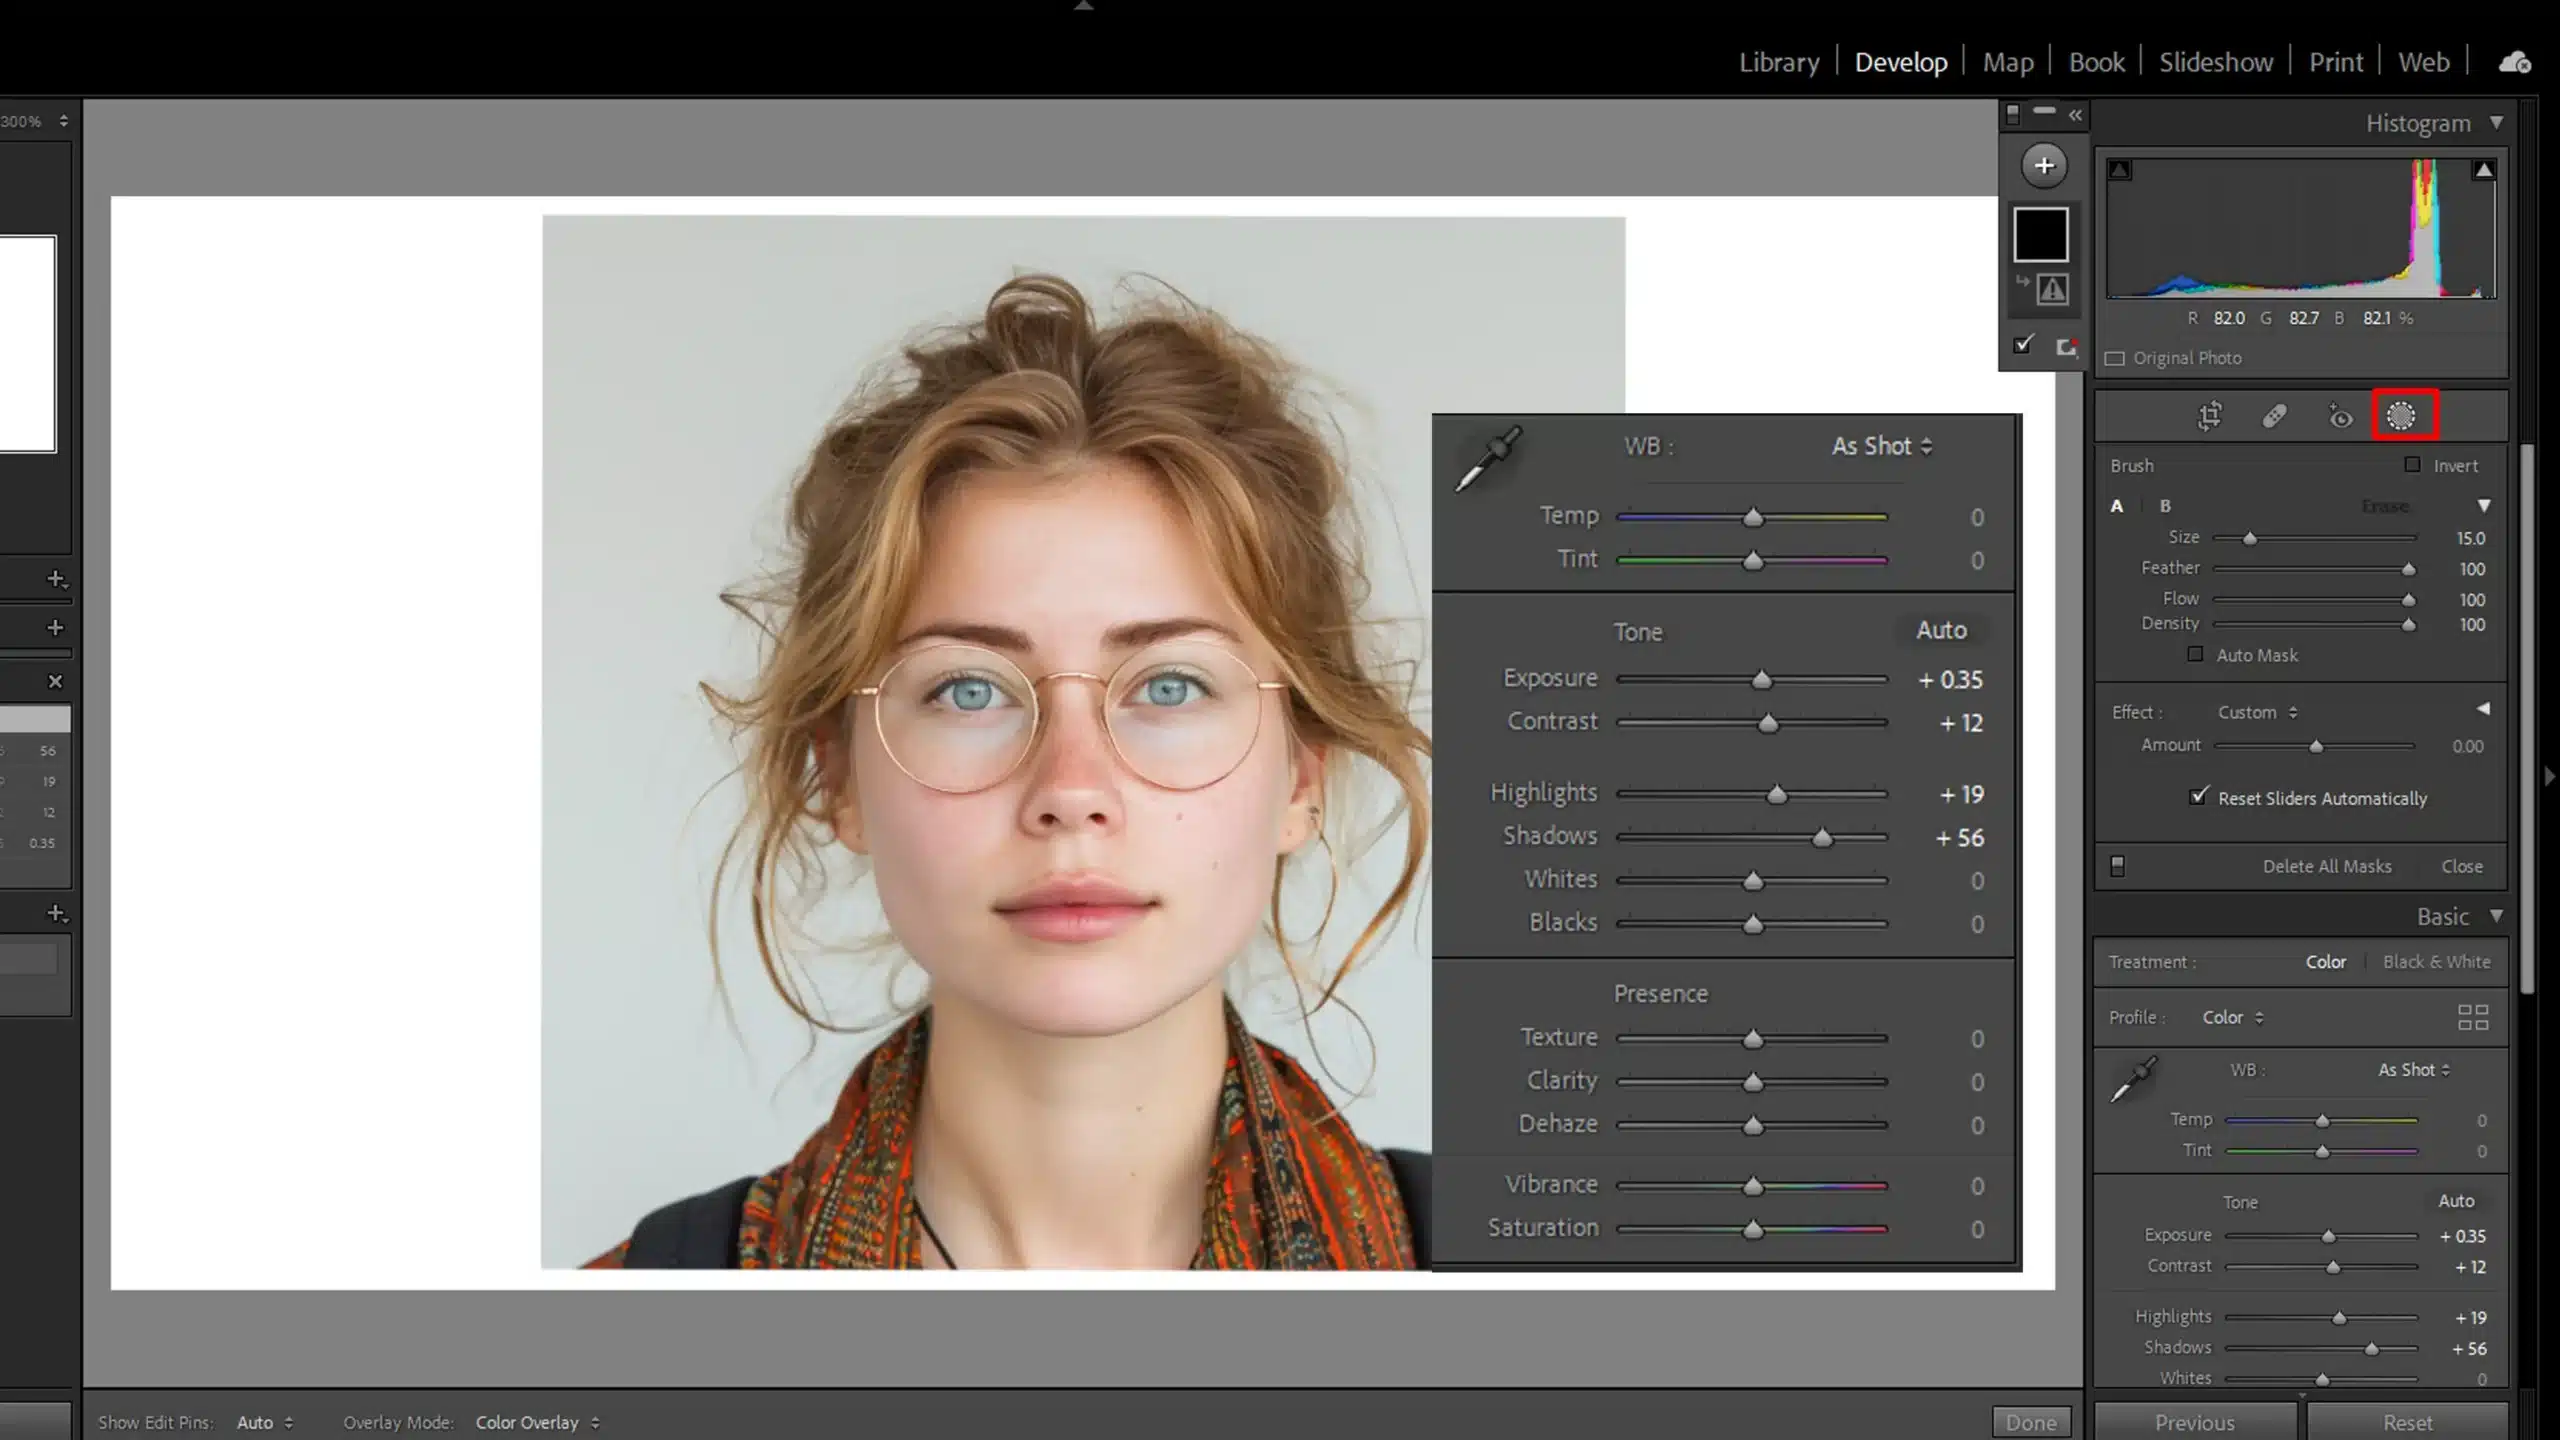
- Go to the 'Develop' module. This is where most of the editing will be done. Start by adjusting the image using the crop tool. Crop the photo to a 4:3 aspect ratio, which is standard for passport photos.
- Use the Adjustment Brush to make any fine-tuning of light, color, or other specific adjustments. Ensuring uniformity is important.
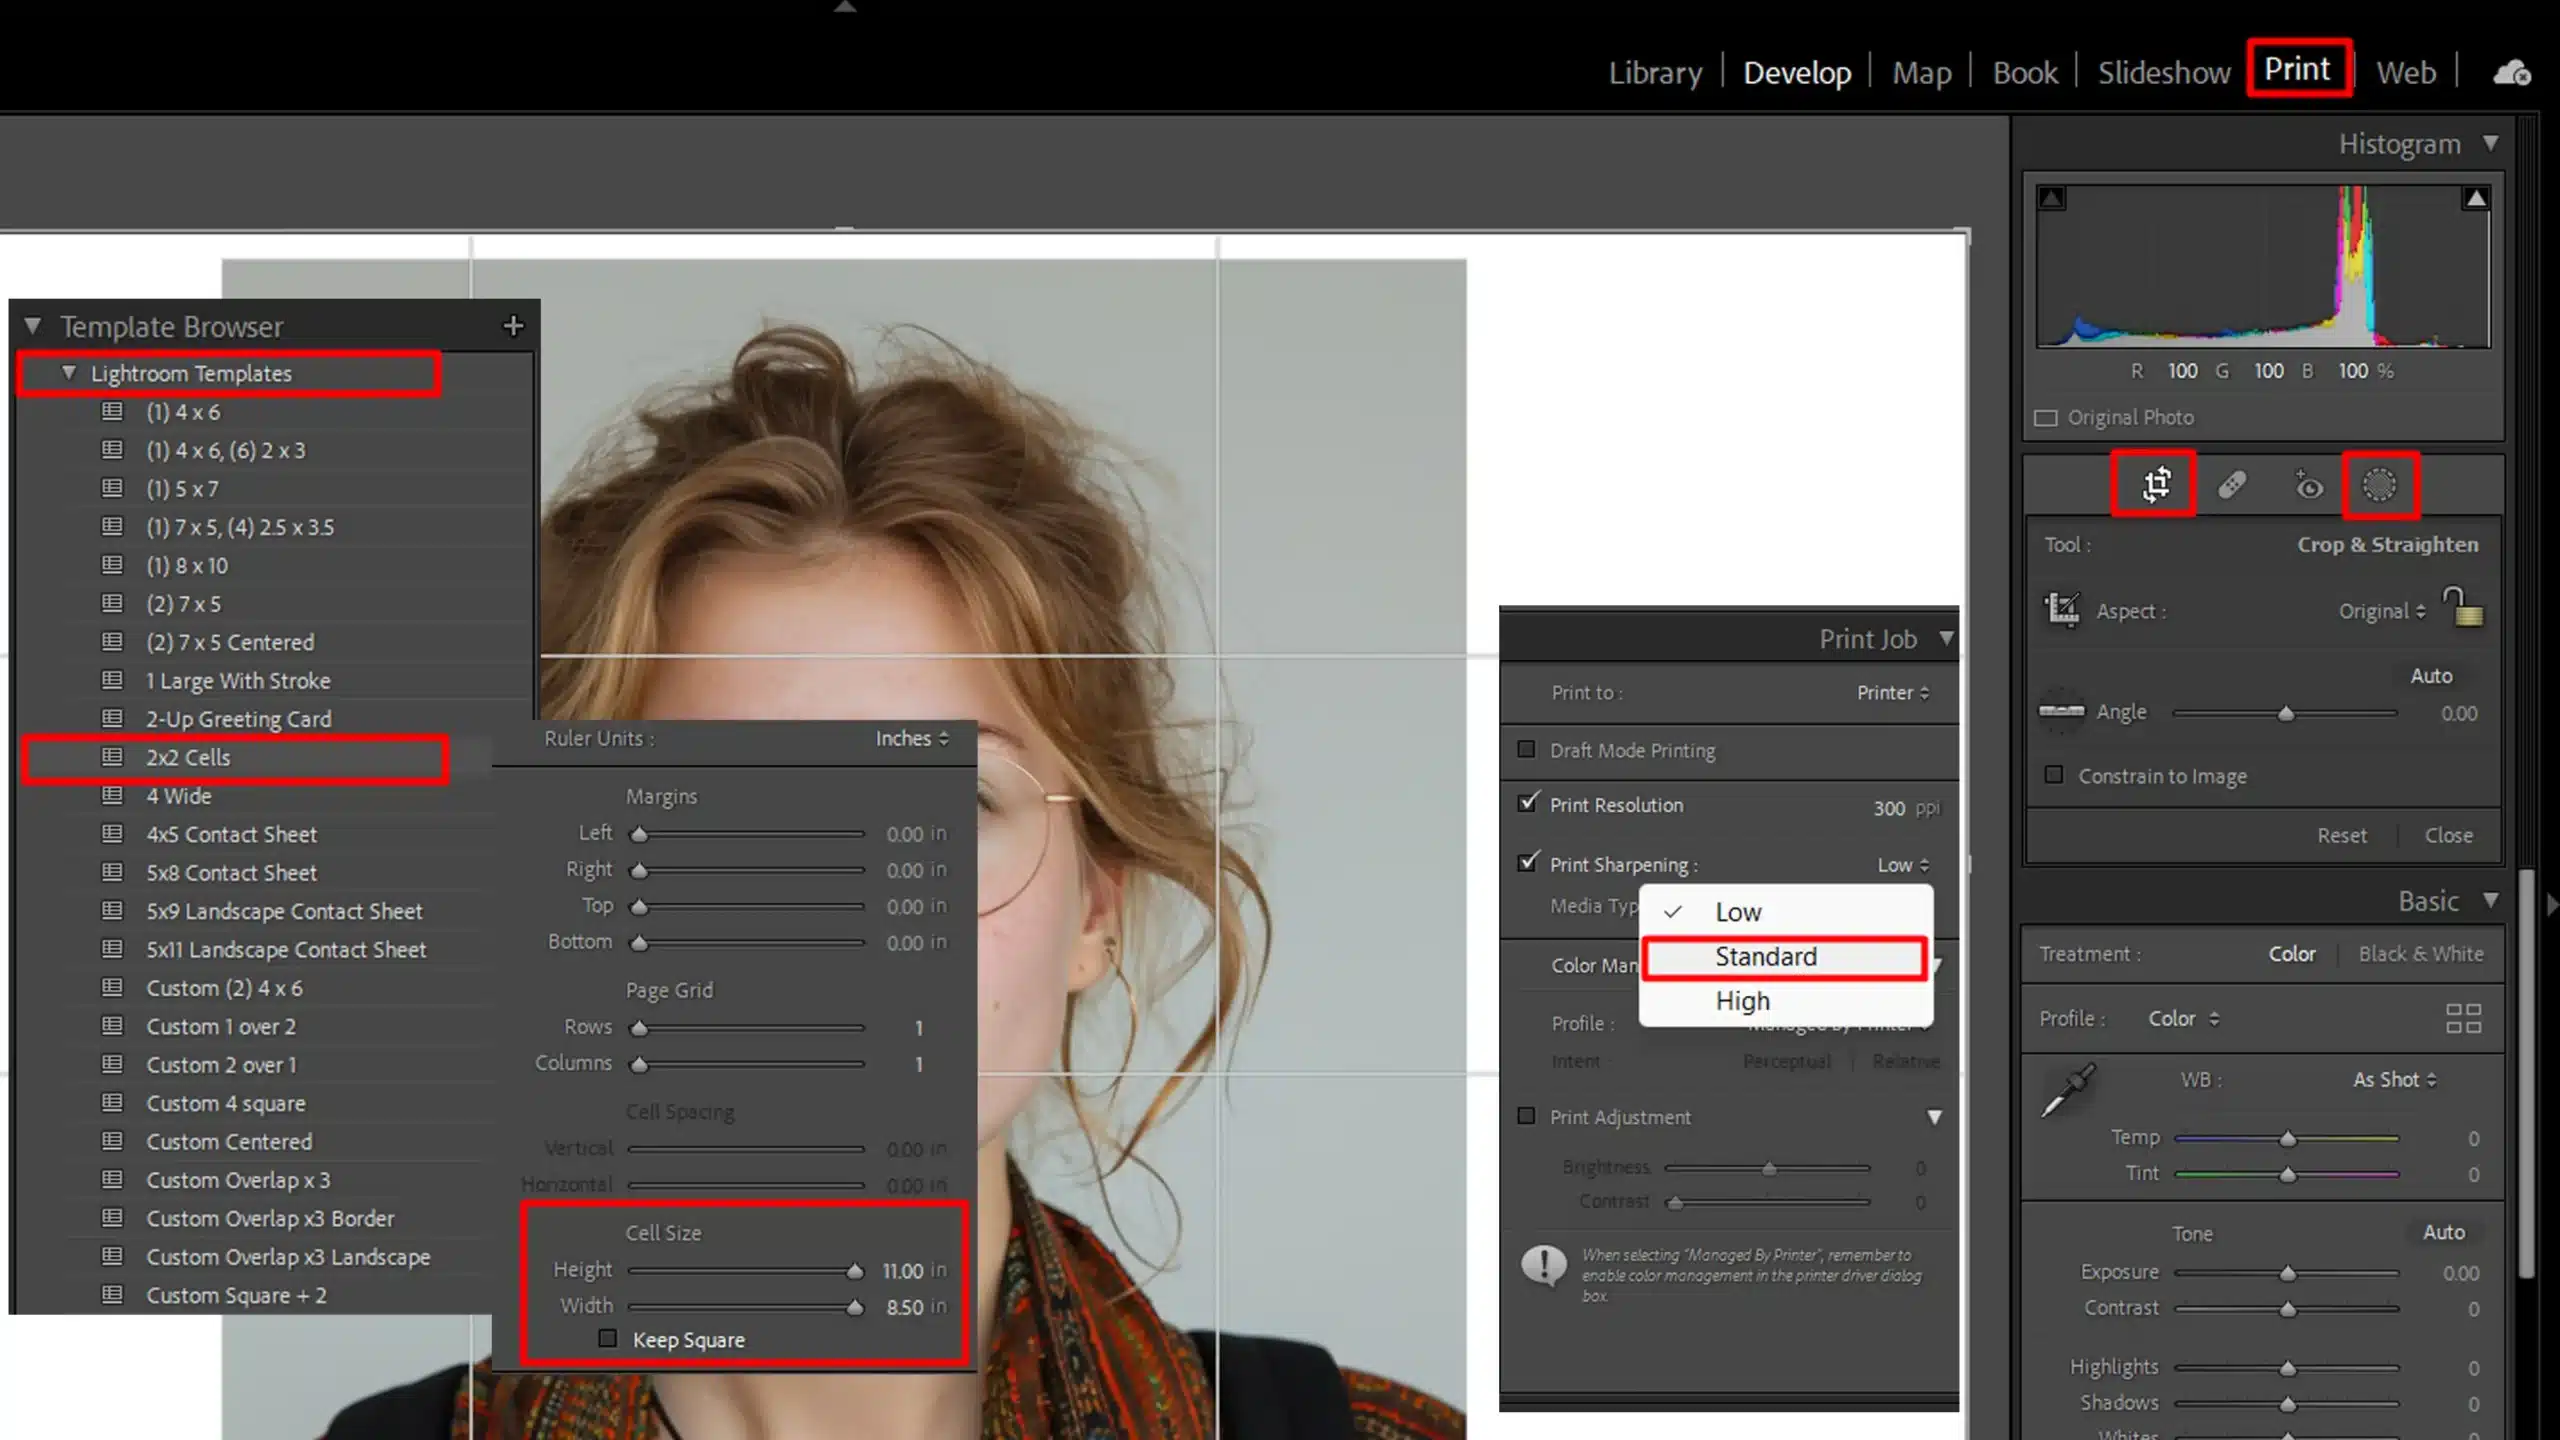
- Navigate to the 'Print' module. Here, you will set the template and cell size to match the passport photo dimensions. Typically, it's 2x2 inches.
- Set the output sharpening options to 'Standard' and select a high-quality printing option in the print setup.
- After configuring, click 'Print' or 'Export' to record your work in the desired format for printing or digital submission with your passport application.
Pro Tip: While setting up Lightroom for passport photos, consider exploring some of the best plugins for Instagram to enhance your overall editing process.
Always preview your image before hitting the output button. This helps avoid any errors and ensures your Lightroom passport photo and overall photo management meet strict regulations.
For more tips on enhancing your workflow, consider learning some important Lightroom Shortcuts and exploring the difference Between Photoshop and Lightroom to understand how each tool can benefit you edit your photography projects.
Additionally, understanding the essential tools in Lightroom can greatly benefit how you edit your photography projects.
Creating a Passport Photo in Lightroom
Learning how to create a passport photo in Lightroom can simplify the process and ensure your image meets all the necessary guidelines.
Step-by-Step Guide to Editing Passport Photos
- Download and Install: First, download the Lightroom passport photo plugin. Record it to your computer and unzip if needed.
- Open Lightroom: Open Adobe Lightroom and go to the 'File' menu. Select 'Plugin Manager' and click on 'Add'. Find the Lightroom passport photo plugin unzipped document and click 'OK'.
- Import Photos: Import your photos into the Library Module. This step is significant to start the process.
- Edit Photo: Go to the 'Develop' module to start editing. Use the crop tool to edit the image to a 4:3 aspect ratio. For more advanced edits, consider using Lightroom shortcuts to speed up the process provided by the Lightroom passport photo plugin.
- Use Adjustment Brush: Need to make specific tweaks? Use the adjustment brush for fine-tuning light and color management.
- Set Printing Dimensions: Navigate to the Print Module. Set your template and cell size to 2x2 inches, which is standard for passport photos.
- Export File: Done with editing? Click on 'Export' to record your image in the format you need for your passport application. You can choose between NEF or JPEG format depending on your requirements.
Common Mistakes to Avoid
- Lack of Consistency: Ensure uniformity in color management, cropping, and overall photo management.
- Wrong Aspect Ratio: Always use a 4:3 aspect ratio for passport photos.
- Poor Lighting: Avoid shadows and stay under well-lit conditions when taking your photo.
- Ignoring Guidelines: Adhere strictly to the passport guidelines provided by your country.
- Over-editing: Simple edits are enough to make your photo look natural.
Pro Tip: Always preview your photo before clicking the ‘Print‘ button. This handy feature helps avoid errors and ensures your passports meets all regulations.
Additionally, consider using the change aspect ratio in Lightroom feature to ensure your photo fits perfectly, and if you’re printing multiple copies, you can make a photo grid in Lightroom to save time and paper
Exporting and Printing Your Passport Photo
Let’s dive into the final steps of creating passport photos in Lightroom. You’ve done the hard work of editing your images, and now it’s time to get them out of the software and into your hands.
Export Settings for Passport Photos
Setting the right export settings for passport photos ensures that your images meet official requirements and look professional. Let’s walk through the process.
Step-by-Step Guide
- Open Lightroom and go to the 'Develop' module. Here you will see all your edited photos.
- Select the photo you want to export.
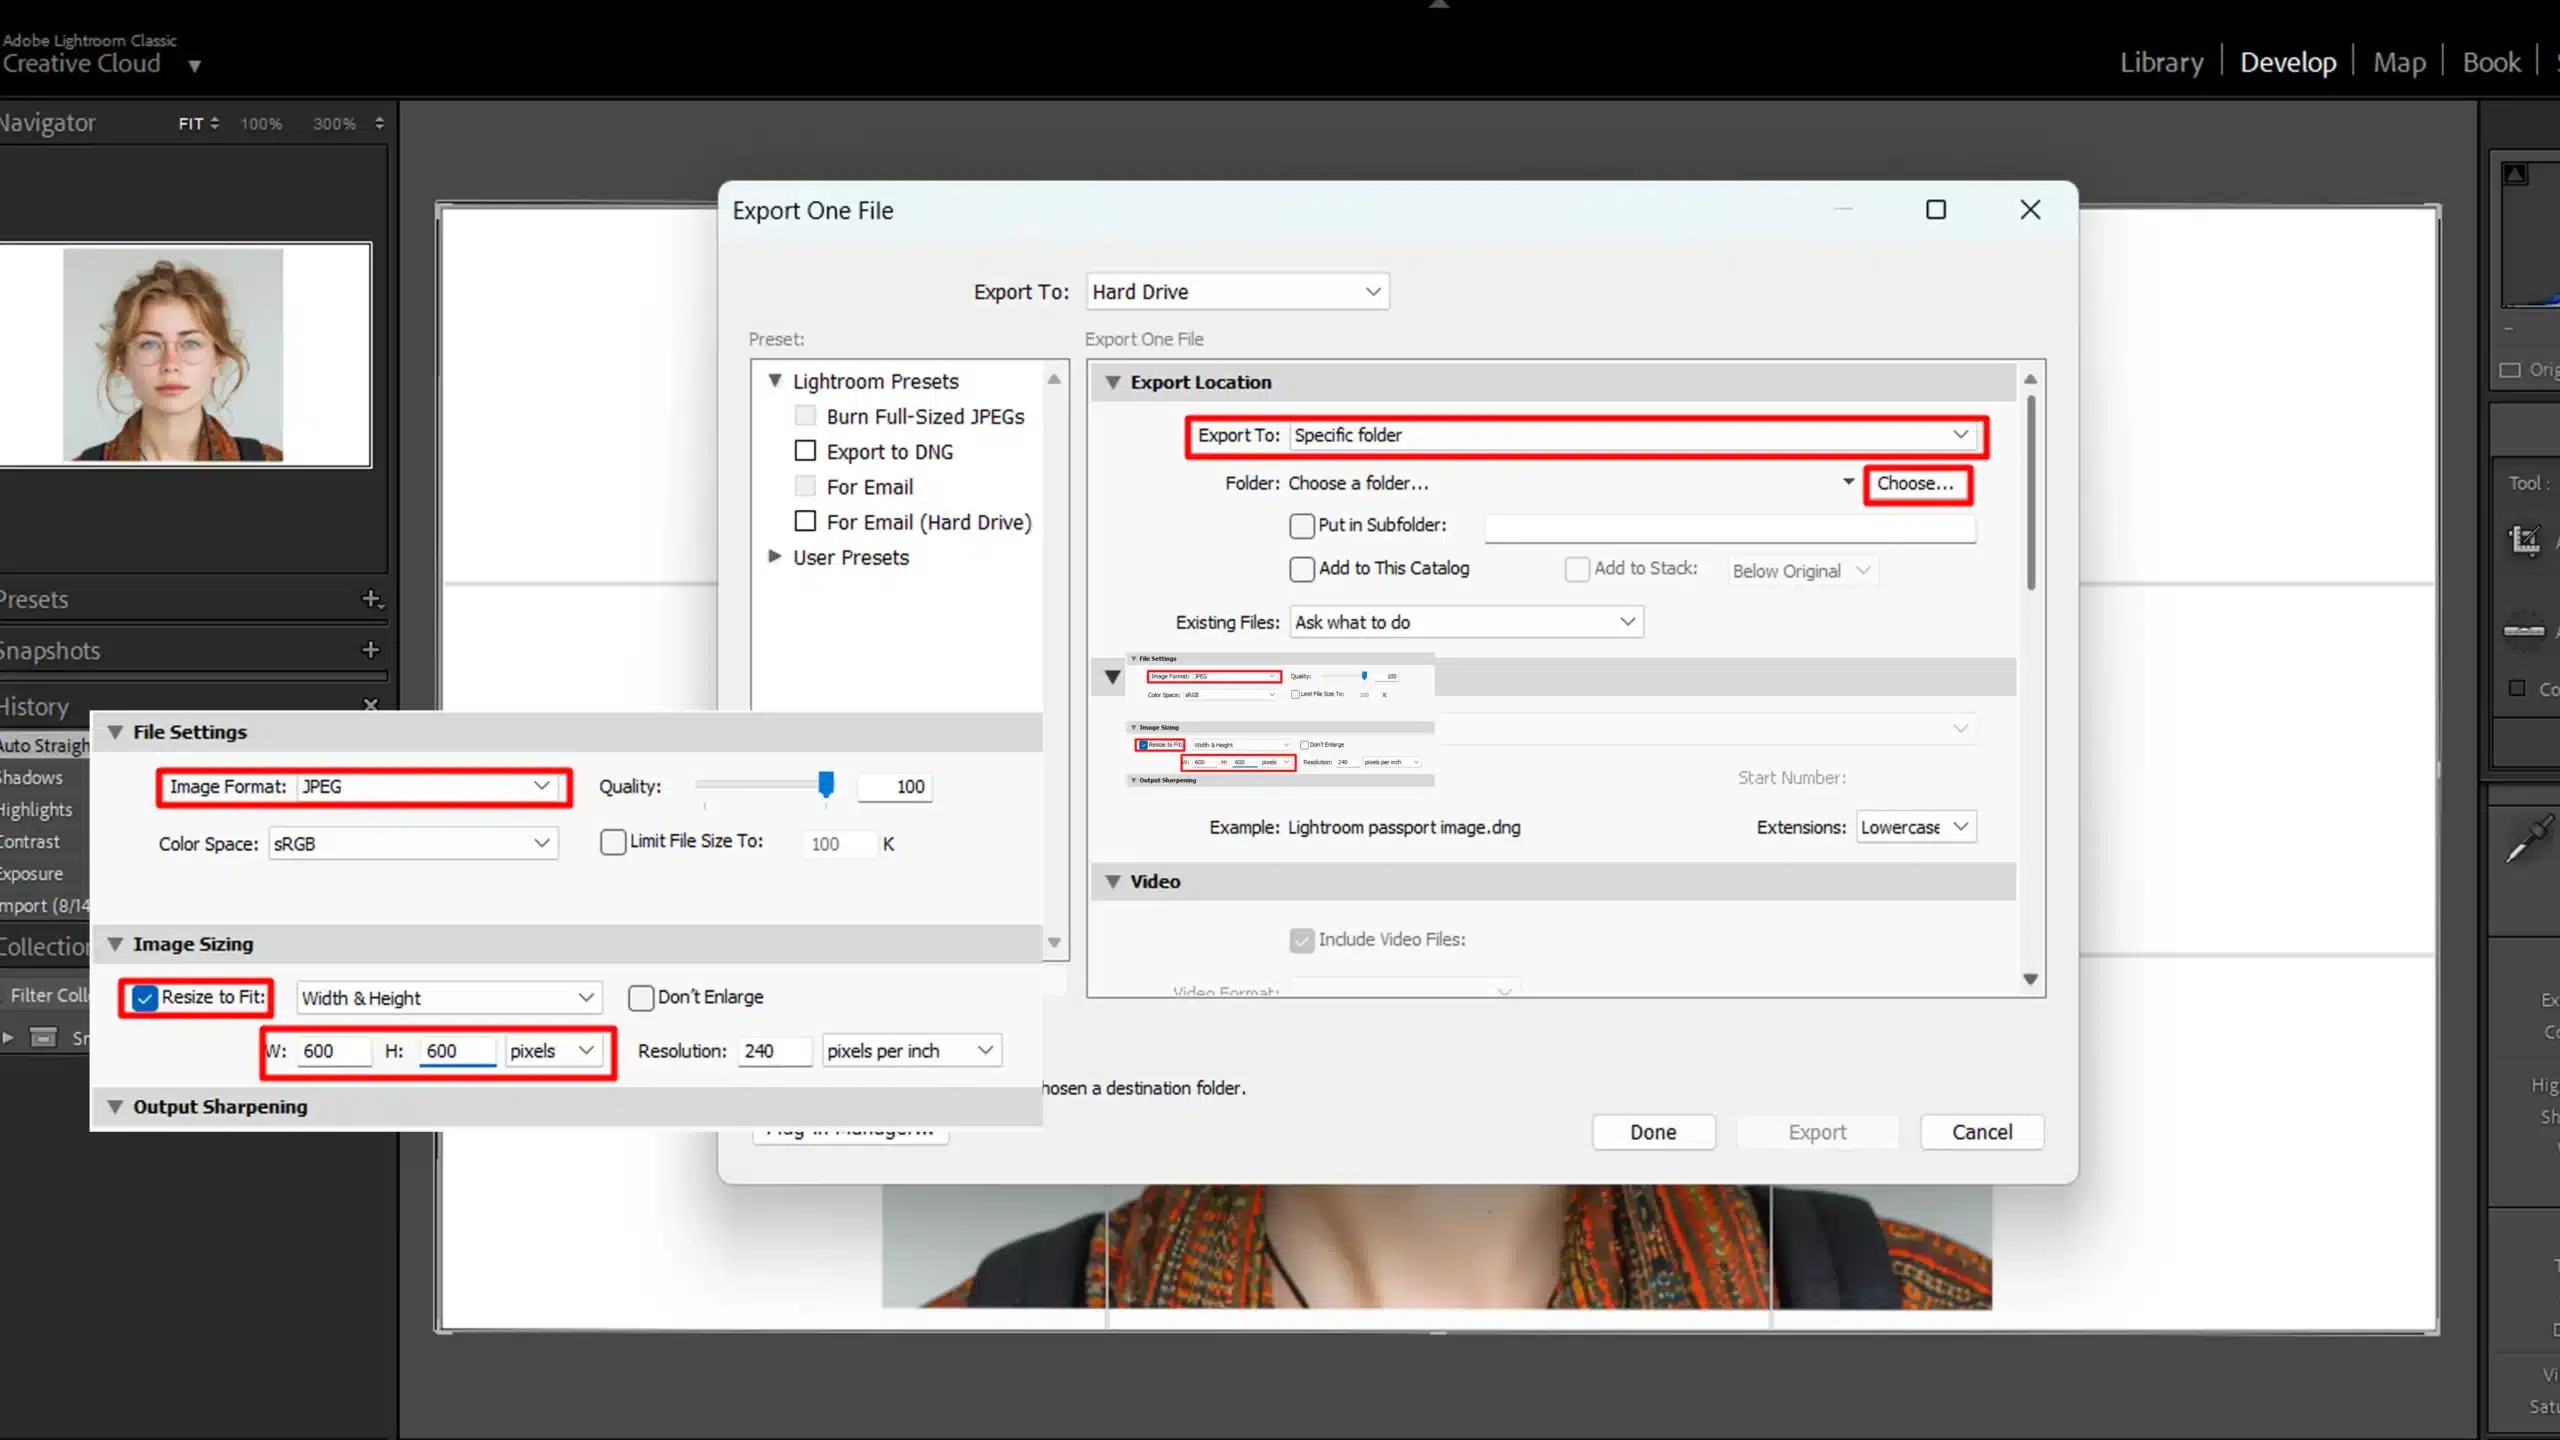
- Click the 'Export' button located at the bottom left corner of the screen. An export dialog box will appear.
- In the export dialog, choose a destination folder by clicking the 'Choose folder' button. This is where your exported images will be saved.
- In the 'File Naming' section, rename your passport photo if you wish. Click the 'Save' button once done.
- Scroll down to the 'File Settings' section:
Set the image format to JPEG. And set the quality slider to 100 for maximum clarity.
Under ‘Image Sizing,’ set the dimensions to 600×600 pixels to meet the required size.
Check the ‘Output Sharpening‘ box and choose ‘For Print’ with a standard amount.
Click ‘Export‘ at the bottom of the dialog box. Your passport photo is now ready for printing.
Pro Tip: If you’re familiar with Lightroom export settings for Instagram, you’ll find that similar principles apply when exporting passport photos.
Just like optimizing images for Instagram, ensuring files have the correct dimensions and quality is crucial for meeting official passport requirements
Best Practices for Printing Passport Photos
To ensure your passport photos are of the highest quality, it’s important to follow some practical steps. Let’s explore the best practices for printing passport photos to get professional results every time.
Preparation and Printing
- Ensure you have a high-quality photo printer. Using an average printer might result in poor quality photos that won't be accepted for your passport.
- Load your printer with glossy photo paper, as it provides the best finish for passport photos.
- Open the exported photo on your computer.
- Use your printer's software to ensure you are printing at the highest resolution available.
- Adjust the print settings to match the size of your passport photo, usually 2x2 inches.
- Preview the photo to ensure correct alignment and size. This step avoids wasting paper and ink.
- Once satisfied with the preview, print your passport photo.
Pro Tip: Always keep a few extra printed copies handy. You never know when you might need another perfect passport photo!
Tips and Tricks for Perfect Passport Photos
You know the drill. You need a passport photo but don’t want to shell out money at a professional studio. Let’s break this passport photo plugin down step-by-step and get you passport-ready without breaking the bank.
Here’s an overview of key aspects to consider when creating a perfect passport photo using Lightroom.
This table breaks down essential tips and tools that will guide you through the process, ensuring your photo meets all necessary standards while looking professional and polished
| Aspect | Overview |
|---|---|
| Lighting and Background Tips | Learn how to optimize natural light, avoid direct sunlight, and choose the perfect background to minimize shadows and highlight features. |
| Posing and Expression Guidelines | Follow these tips to ensure your head position, expression, and overall posture meet passport photo standards. |
| Using the Lightroom Passport Photo Plugin | Leverage the Lightroom plugin for cropping, finishing touches, and ensuring your passport photo is professional and compliant. |
| Additional Editing Techniques | Consider using Photoshop to remove any unwanted shadows or blemishes for a flawless passport photo. |
| Pro Tips for Enhanced Editing | Explore tips for Lightroom editing and understand how to crop in Photoshop for the perfect passport photo. |
Lighting and Background Tips
Lighting is everything. A well-lit photo minimizes shadows and highlights your features, so let’s face it:
- Natural Light: Find a spot where natural light floods in. It helps you stay away from harsh, unflattering shadows.
- Avoid Direct Sunlight: Direct sunlight can be too bright. Instead, go for indirect light, which scatters evenly across your background.
- Plain Background: Use a light-colored wall. No framed images, no decor. Just plain and simple.
- No Flash: The camera flash can cast shadows. Don’t use it unless absolutely necessary.
- Diffuse Light: If indoor lighting is your only option, try diffusing it. Experiment with a white sheet or plastic to soften the light.
Proper lighting and a clean background lay the perfect foundation. And trust me, these small tweaks make a huge difference in your passport photo.
Posing and Expression Guidelines
Now that we’ve sorted out the lighting and background let’s discuss posing and expressions. This part is easier than it sounds:
- Relax: Take a deep breath before taking the shot. It helps to relax your facial muscles.
- Neutral Expression: A slight, neutral expression works best. Imagine you just woke up and are in no rush no big smiles, no frowns.
- Head Position: Your head should face the camera directly, with the background evenly lit. No tilting or turning. This ensures the photo meets passport standards.
- Eyes Forward: Look directly at the camera lens. This helps maintain that ever-important eye contact.
- Stay Still: Any movement can blur the photo. Ensure your whole body remains steady.
By following these guidelines, you reduce the chances of your photo being rejected, saving tons of time and hassle.
Pro Tip: Use the Lightroom passport photo plugin tool to streamline the process. This tool is especially useful for cropping and finishing touches, helping you get a professional result without professional cost.
Additionally, if you need to make more precise adjustments, you can learn how to crop in Photoshop to ensure your image fits the passport photo requirements perfectly.
Consider using Photoshop to remove any unwanted shadows or blemishes, ensuring your passport photo looks flawless. For more insights, note that you can also explore tips for Lightroom editing to further enhance your photo’s quality before finalizing it.
Frequently Asked Questions

How to Resize a Photo to Passport Size in Lightroom?
Here is a simple step-by-step guide on how to resize image.
- Open your photo in Lightroom.
- Go to the Develop module.
- Select the Crop Overlay tool from the toolbar.
- Under the Aspect Ratio options, choose 1x1 for a square format.
- Adjust the frame to include only the important parts of the photo.
- Double-check the dimensions in the Size & Info panel to ensure the size meets passport requirements.
- Export the photo by choosing a high resolution.
How to Make a 2x2 Photo for My Passport?
- Load your image in Lightroom.
- Switch to the Develop mode for editing.
- Use the Crop Overlay tool and set the aspect ratio to 1x1.
- Resize the box to make sure it fits a 2x2 space, ensuring your head and shoulders are visible.
- Finalize it and export the picture at 300 dpi for print quality.
What is the Ratio for Passport Photos in Lightroom?
- The ratio for passport photos typically requires a square format.
- In Lightroom, select the 1x1 aspect ratio when cropping for a passport photo.
- This ensures the photo maintains the necessary dimensions for passport standards.
How to Crop a 2x2 Picture in Lightroom?
- Open Lightroom and select your photo.
- Move to the Develop module and pick the Crop Overlay tool.
- Set the aspect ratio to 1x1 to maintain square dimensions.
- Adjust the box to cover a 2x2 inch area of the photo, focusing on framing the face properly.
- Apply it and export your photo, selecting the appropriate resolution for printing.

Conclusion
Creating a Lightroom passport photo has been a game-changer for me. It streamlined my workflow and ensured that my passport photos always met the necessary standards.
The precision and ease of user offered by Lightroom allowed me to achieve professional-quality results without the hassle.
If you’re looking to expand and elevate your photo editing skills, I highly recommend checking out these courses: Photoshop course and Lightroom course.
They have been invaluable resources in my journey, and I’m confident they will be for you, too.
Read more about Photoshop:


Course

Light Effect Photoshop


Lightroom Course 2025

Adobe Photoshop Course 2025

Photo Editing Course


