Lightroom 360 Photos are a powerful way to capture and edit immersive, all-around images. This special feature lets you make panoramic views that take your photography to the next level.Â
In this article, we will explore everything you need to know about Lightroom 360 Photos. You’ll learn the steps to import, edit, and export 360-degree images. Let’s dive in!
Table of Contents
Why Choose Lightroom for 360 Photo Editing?
Lightroom is one of the best choices for editing 360 photos because of its intuitive interface and powerful editing tools. It offers a wide range of features that allow photographers to enhance their images quickly and efficiently.Â
Whether you are a beginner or a pro, Lightroom makes the 360-degree photo editing process seamless and enjoyable.
1. User-Friendly Interface
Lightroom works with CR2 files by processing them as raw images, meaning it does not alter the original file. Instead, it creates a set of instructions that apply adjustments, so you can always return to the unedited version of your photo.
- Simple layout: Everything is organized in one space, from importing to exporting.
- Customizable tools: You can adjust the tools you use most, making your workflow smoother.
- Built-in presets: Lightroom comes with a variety of ready-to-use presets for quick adjustments to your photos.
2. Powerful Editing Tools
Adobe Lightroom has some of the most effective tools for 360 photo editing:
- Clarity and Dehaze adjustments help bring out details in images without causing the unwanted seam problem often seen with other software.
- Exposure settings allow for easy light adjustments to ensure even lighting across the entire 360-degree image.
- The Boundary Warp tool adjusts the photo edges, which can help when stitching panoramas together.
3. No Seam Issues with Camera Raw 11.4
A common problem with editing 360 photos is the appearance of seams. This is when two edges of a 360-degree image don’t align perfectly after stitching. With the Adobe Camera Raw 11.4 update, Lightroom provides edge-aware editing. This means you can make adjustments like Clarity or Highlights without creating a visible stitching line across your photo​.
4. Metadata Preservation
When exporting 360 photos from Lightroom, it retains the important metadata needed to view and share the images in their full 360-degree form. This is especially useful when uploading to platforms like Facebook or other social media sites that require metadata to recognize the file as a 360-degree photo​.
5. Integration with Other Adobe Products
Another advantage of Lightroom is its seamless integration with Photoshop and other Adobe software. For more complex edits or when working with multiple cameras or file types, you can quickly switch between programs while maintaining your progress. Explore how to do 360 product photography and streamline your editing workflow.
Step-by-Step Process for Editing 360 Photos in Lightroom
Here is a simple guide to help you start editing 360 photos using Lightroom Classic:
- Import Your Photos: Start by importing the 360 images into Lightroom. You can drag and drop them directly or use the import function.
- Apply Basic Adjustments: Use Exposure, Clarity, and Dehaze to make the photo pop without creating unwanted seams.
- Use Boundary Warp: If needed, use the Boundary Warp tool to correct any distortions around the edges of the panorama.
- Check for Seams: After editing, zoom in to the edges to make sure there are no seam problems. If there are, you can adjust them using the Edge-Aware feature.
- Export with Metadata: Make sure to include all metadata when you export your finished photo. This ensures that your image remains viewable as a full 360-degree photo.
By following these steps, you can create high-quality 360 photos without the common issues like seams or metadata loss. This makes Lightroom Classic one of the most effective tools for photographers working with panoramic images.
This guide explains why Lightroom is perfect for 360 photo editing and easy-to-follow steps for both beginners and advanced users.
Capturing and Importing 360 Photos into Lightroom
Capturing and bringing 360-degree photos into Lightroom is the first essential step in editing panoramic images. This step can be simple if you use the right techniques and tools.
1. Best Cameras for Capturing 360 Photos
To get great 360-degree images, you need a reliable camera built for this type of photography. Some popular options include:
- Ricoh Theta V: This camera is easy to use and offers high-quality 360 photos with good resolution.
- Insta360 ONE X2: Known for its stabilization and dual-lens setup, this camera is great for action shot.
- GoPro MAX: Ideal for capturing 360-degree action photos, this camera is rugged and waterproof.
These cameras capture two hemispheres and combine them into one spherical image. This process is known as equirectangular projection and is essential for editing in photo software.
2. Setting Up for the Best Shots
When capturing 360-degree images, there are a few key tips to follow:
- Use a tripod: A tripod ensures your shot is stable, especially when shooting panoramic scenes.
- Check the lighting: Make sure your lighting is even to avoid shadows or bright spots in the final image.
- Avoid busy areas: Keep your scenes simple. Too much movement can create distortions.
Using these methods will make it easier to stitch the panoramic image later on.
3. How to Import 360-Degree Images into Lightroom
Once you’ve captured your 360-degree images, the next step is bringing them into Lightroom for editing. Here’s a simple process to follow:
- Transfer files: Use your computer to move the images from your camera’s SD card. Save them in an organized folder.
- Open Lightroom: Launch the software and navigate to the Library module. This is where you manage your images.
- Select photos: Click on the Import button and select the folder where your 360-degree images are saved.
- Review settings: Ensure you retain all your image data (such as color profiles) and select the option to keep metadata intact.
By following these steps, you’ll easily import your 360 images into Lightroom without losing any quality or data.
4. Organizing and Sorting Your Images
After importing, it’s helpful to organize your images. You can use keywords and collections to sort them by location, date, or type of shot. This makes it easier to locate specific images for editing later.
5. Preparing for Editing
Once your 360-degree images are in Lightroom, the next step is getting them ready for editing:
- Preview the image: View the full panorama and check for any distortions or areas that may need extra attention.
- Apply basic corrections: Adjust the overall exposure, shadows, and highlights to get a balanced starting point for your edits.
This basic workflow will help you smoothly capture and import your 360-degree images into Lightroom, ensuring a simple and effective start to your editing journey.
Essential Lightroom Tools for Editing 360 Photos
Editing 360-degree images requires specialized tools that offer precision and flexibility. Lightroom Classic provides a comprehensive set of features to make editing seamless and effective.
1. Basic Develop Tools for 360 Photos
When you begin working on 360-degree images, you will rely heavily on Develop Settings. These settings help you create a balanced and professional output by adjusting various aspects of the image. The key tools in this category include:
- Exposure Control: Adjusting the light across the entire panorama to ensure even lighting.
- Contrast and Tone: These options help in balancing light and dark areas without distorting the overall image.
- White Balance: Set the correct color tone, especially in outdoor shot where lighting conditions vary.
Example: You’ve captured a 360-degree sunset photo. The sun might create bright areas while the sky is darker. Using the Exposure tool, you can make sure the light is even across the entire frame.
2. Advanced Tools for Precision Editing
For detailed editing of 360-degree panoramas, Lightroom offers more advanced tools. These allow you to work on specific areas and fine-tune the details:
- Adobe Camera Raw Filter: This filter provides greater control over raw images, allowing for detailed edge refinement without losing clarity. It is particularly helpful in maintaining sharpness across the panoramic shot.
- Local Adjustments: These tools let you adjust specific areas of the panorama, such as highlights or shadows.
- Automatically Fill: This tool helps fill gaps or blank areas in the canvas when the edges of the panorama don't perfectly match.
Example: You might need to remove an unwanted object from a particular area of your panorama. Using Adobe Camera Raw and local adjustments, you can focus on that specific section without affecting the rest of the image.
3. Using the Cloning and Healing Brush
The Cloning and Healing Brush Tools in Lightroom Classic are very useful for fixing imperfections in 360-degree images. Whether it’s a minor lens flare or an unwanted object, these tools help you clean up the photo:
- Cloning Tool: This tool copies a specific part of the image to cover imperfections.
- Healing Brush: This helps blend areas of the image smoothly to create a seamless effect.
Example: Say you’re working on a panorama where a shadow or an object is distracting from the main focus. You can use the cloning tool in lightroom to remove the object and the Healing Brush to blend the area, creating a smooth finish.
4. Boundary and other Adjustments
One of the key issues with 360 photography is keeping the edges clean and connected. This is where Boundary Adjustments come in:
- Edge Control: Helps you adjust the edges of your 360-degree images so that they align correctly and don’t show a visible line.
- Frame Adjustments: This tool lets you fine-tune the positioning of your panorama to make sure everything fits perfectly in the frame.
5. Exporting and Sharing Your Final Output
Once you’re done with editing, the next step is preparing the final image for export. Lightroom Classic allows you to create various file types and formats suitable for different platforms:
- Web-Ready Exports: Lightroom optimizes your 360-degree images for the web, ensuring that the quality remains intact while reducing the file size for quicker uploads.
- Post-Processing: This is where you apply the final touches, such as sharpening the image or reducing noise.
By using these essential tools in lightroom classic, you can turn your 360-degree photos into professional-quality work, ready to share on websites, social media, or print. These features are not only easy to use but also give you the ability to maintain a smooth workflow and consistent quality across all your projects.
Exporting 360 Photos with Metadata Retention for Social Media
Sharing 360-degree images on social media can be tricky if you don’t retain the necessary details to display the image correctly. Platforms like Facebook require that specific information remains intact to identify the file as a 360-degree image. This is where Lightroom Classic comes in handy. With the right steps, you can ensure that all the images are exported with the necessary metadata for seamless sharing.
1. Why Metadata is Important for 360 Photos
When sharing 360-degree panoramas, the details about the image format, pano dimensions, and other specifics help social media platforms display them correctly. Without this data, the image may show as a flat picture rather than an interactive 360 view.
Solution: Ensure you preserve this information during the export stage in Lightroom Classic by selecting the right options.
2. Step-by-Step Guide to Exporting 360 Photos in Lightroom Classic
Here’s a quick guide to retaining all the necessary details when exporting 360-degree images:
- Select the Panorama: Choose your finalized panorama in Lightroom Classic for export.
- Navigate to the Export Menu: Go to the export option in the top right corner of Lightroom Classic.
- Choose Export Settings: In the export window, ensure you select the options to keep the necessary metadata. This ensures the image is identified as a 360-degree image when uploaded.
- File Type and Size: Select the correct output file type, such as JPEG, and ensure the size fits social media requirements.
- Export All the Images with Metadata: Click export, and Lightroom Classic will handle the rest.
Note: Make sure that when exporting, you include the data required for social media platforms. This will allow users to interact with the 360 images correctly.
3. Fixing Common Export Issues
If your 360-degree images do not display correctly, it may be due to missing data. This is a same problem many users face when sharing on social media. Here’s the solution:
- Re-export the image, ensuring that all necessary fields like pano dimensions and tags are kept.
- Use third-party tools like Affinity Photo if you need to further edit and fix the metadata.
4. Optimizing for Social Media
When exporting for social media, it’s important to ensure that the output file is optimized for online viewing. Keep the file size manageable without losing quality. Here are some tips:
- Ensure the image retains the edge details, so it fits properly within the 360-degree format.
- Avoid overexposure or underexposure to keep the sky and surroundings balanced.
Example: You shot a 360-degree video at sunset, and you want the sky to remain clear and bright. Before exporting, reduce the brightness slightly to prevent it from being overexposed when shared on social media platforms.
5. Enhancing Your Export with Post-Processing
Before exporting, you might want to add final touches to enhance the output. These steps include adding filters or adjusting the colors for a better viewing experience. Lightroom Classic allows you to apply these final adjustments and export the finished image without losing data.
Following these steps will ensure that all the images you export from Lightroom Classic retain the metadata necessary for sharing on social media. With this solution, you can share stunning 360-degree panoramas that look professional and are ready for viewers to explore. Additionally, learning how to export from photoshop to lightroom helps refine your images with advanced tools.
Comparison of Lightroom vs Photoshop for 360 Photo Editing
When deciding between Photoshop and Lightroom for 360-degree photo editing, it’s important to look at how each tool works for this specific task. Below is a simple table that compares the two based on key features, performance, and user-friendliness.
| Feature | Lightroom | Photoshop |
|---|---|---|
| Ease of Use | Easier for beginners, offers presets and quick edits. | Requires advanced skills for detailed edits. |
| Handling Exposure Issues | Adjusts overall exposure smoothly for the entire panorama. | Can fix exposure in specific areas, but requires more steps. |
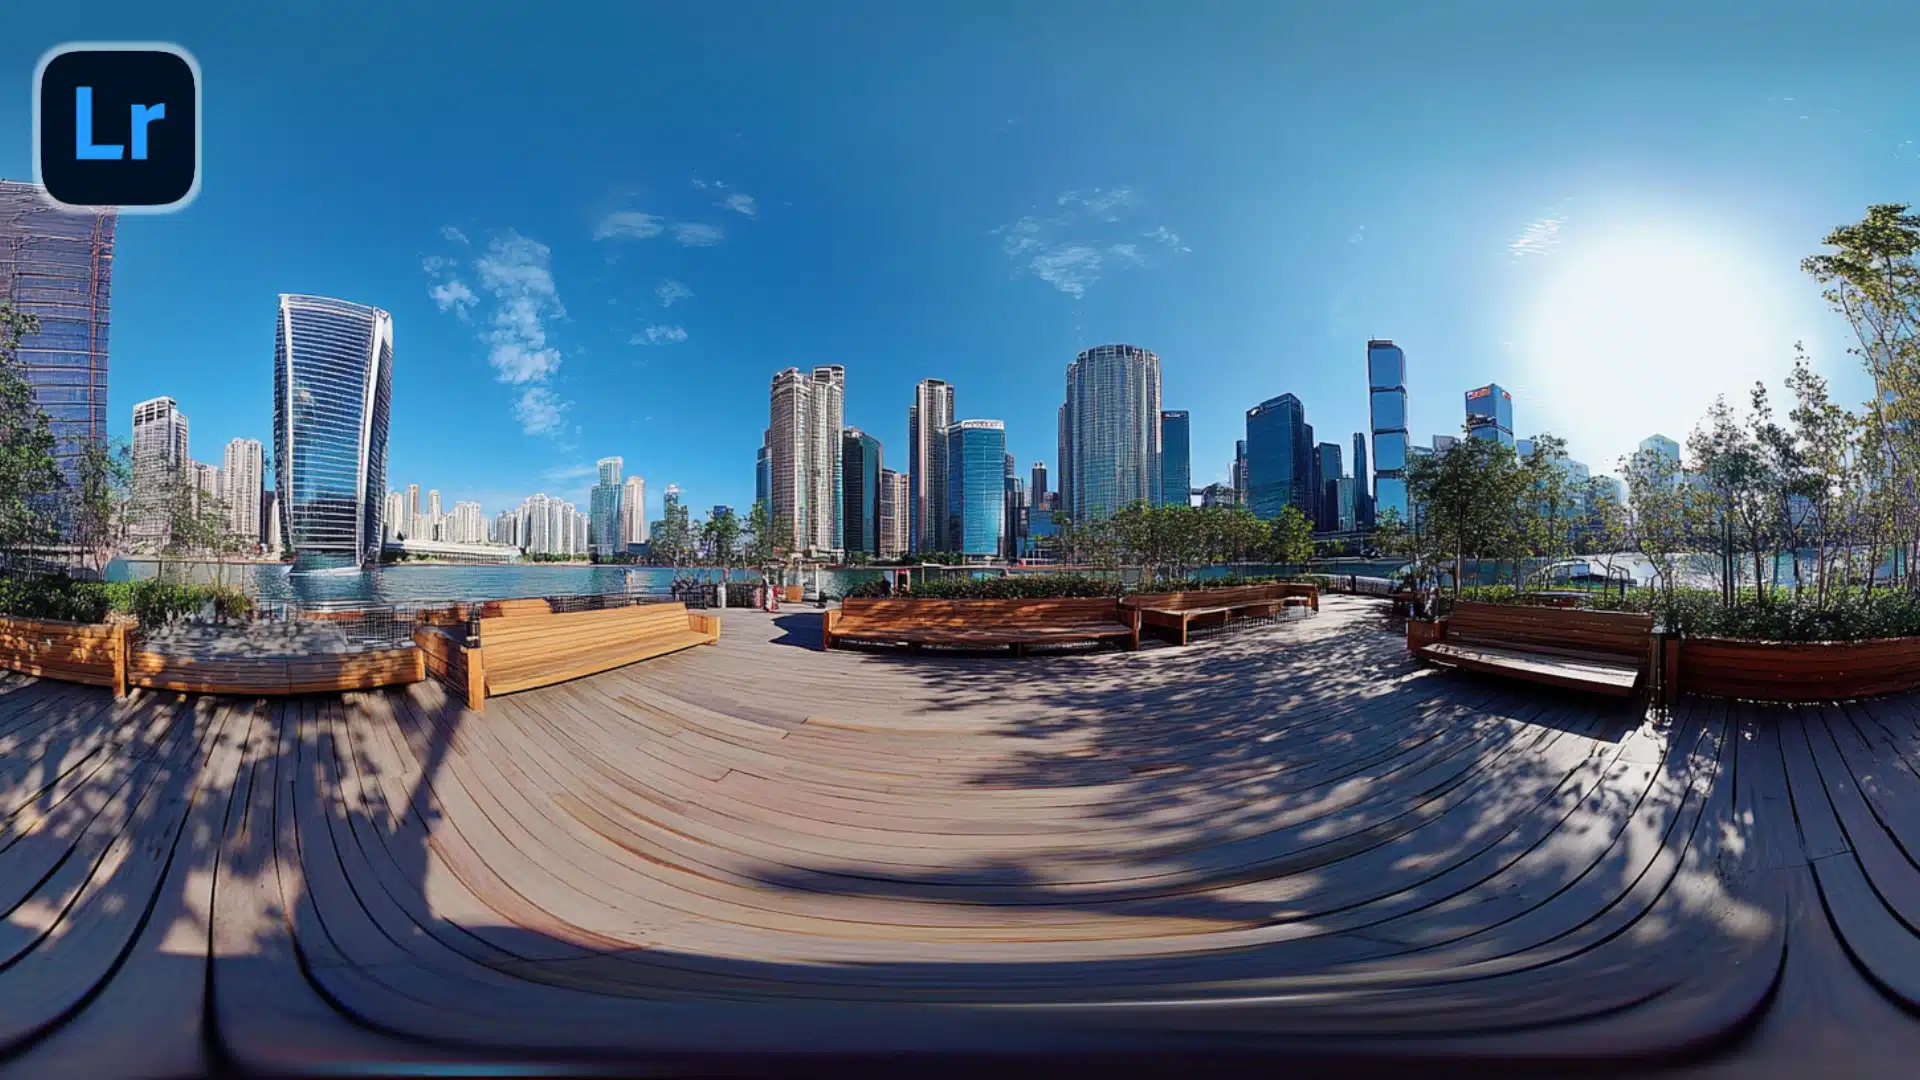
| Working with Panoramas | Has built-in tools for pano creation and merging shots easily. | Offers more manual control but takes more time. |
| Edge Control | Automatically fixes minor edge issues with minimal manual effort. | Gives full control over edge cleanup but takes longer. |
| Fixing Seams | Built-in solution to fix minor seam problems. | Advanced tools allow more precise seam fixes. |
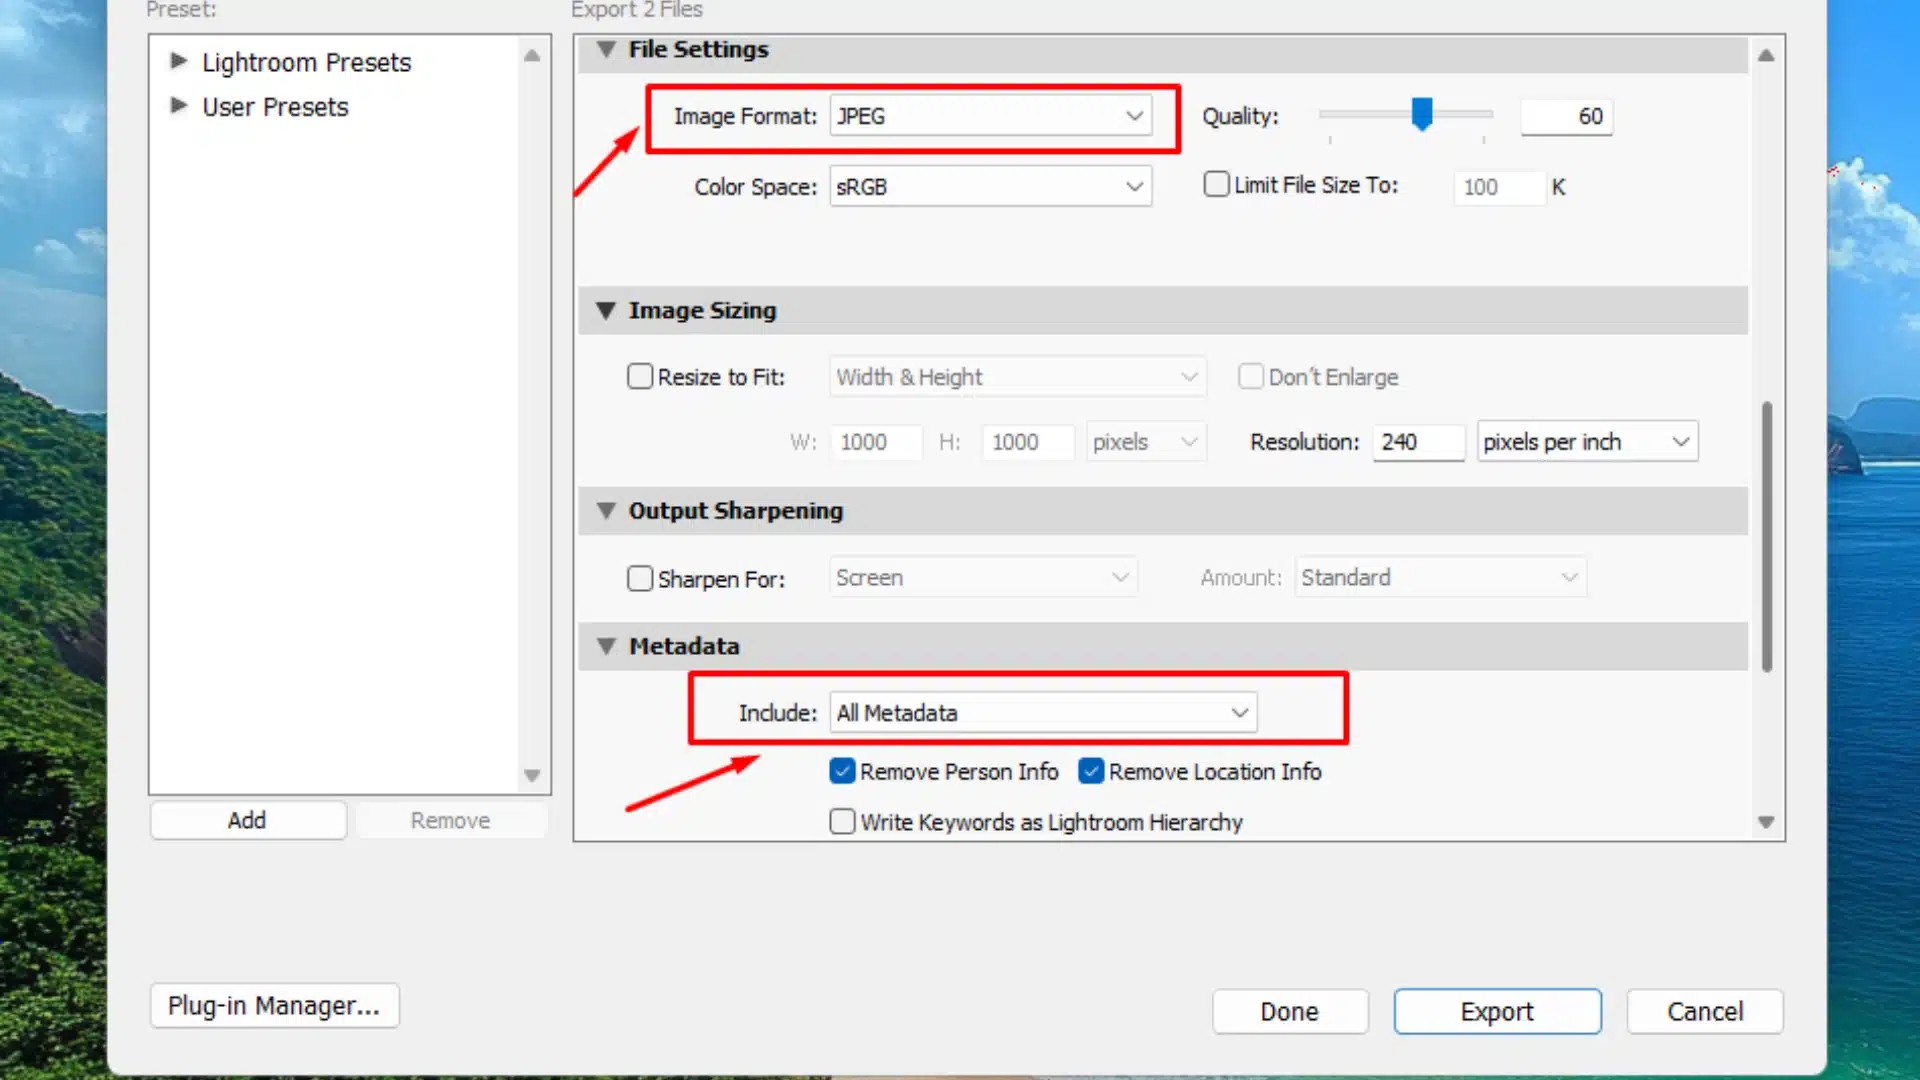
| Metadata Handling | Retains necessary metadata for 360-degree photos. | Requires manual metadata entry for proper sharing. |
| Sun and Sky Adjustments | Basic tools for adjusting sun and sky without over-editing. | Advanced controls for deep sky and color enhancements. |
| Cost | Usually part of an Adobe subscription, often bundled with other apps. | Part of the same Adobe subscription, but with more features. |
| Time Required | Faster to edit and merge pano shots. | More time-consuming but offers more detailed control. |
| Free Plugins and Add-ons | Limited free add-ons, focused on basic features. | Many free add-ons for enhanced functionalities. |
| Final Output Quality | Great for fast, high-quality outputs with little waiting time. | Higher quality output with precision, but more wait time. |
Lightroom is better for beginners or those who want a quick and simple way to edit and share their 360-degree panoramas. Adobe Photoshop gives more control and precision but requires more time and skill.Â
This comparison helps you decide which tool is best for your needs.
Frequently Asked Questions
Can Lightroom do 360 photos?
Yes, Lightroom Classic can handle 360-degree photos. You can edit these images just like any other, using tools like exposure and contrast adjustments. Light room also retains the necessary details for sharing 360-degree photos on social media.
How to stitch a 360 photo in Lightroom?
While Lightroom Classic allows you to import and edit panoramic images, it doesn’t have a direct feature to stitch multiple photos into a 360-degree image. However, you can stitch the photos together using other programs like Photoshop or dedicated stitching tools, then import the merged panorama into Lightroom for further editing.
Can Lightroom stitch photos together?
Yes, Lightroom can stitch photos together to create panoramas. It has a built-in tool to merge photos into one pano. You just need to select the photos, then choose the panorama option to stitch them.
How to make panoramic photos in Lightroom?
To create panoramic photos in Lightroom Classic, follow these steps:
- Select the images you want to merge.
- Right-click and choose Photo Merge > Panorama.
- Lightroom will stitch the images and create the panorama for you.
This method is fast and keeps all the necessary data for further edits or sharing.
Conclusion
Lightroom Classic and Photoshop both offer powerful tools for editing 360-degree panoramas, but each has its strengths. For example, I’ve used Lightroom to quickly fix exposure issues in a 360-degree sunset shot, but for complex tasks, Photoshop’s precision was necessary.
If you’re ready to take your skills further, check out our Photoshop Course and Lightroom Course to learn everything about these powerful tools:
If “Lightroom 360 Photos” article has helped you, then Like and Share it with your friends
Have a nice photoshoot!
Read more about: Photo Editing with Lightroom and Photoshop


