How to Rotate Image in Adobe Lightroom for Perfect Alignment

Ever feel your photos are just a bit wonky? As a pro photographer I know how important every detail is. In Lightroom Classic, learning how to rotate image in Adobe Lightroom is easy and powerful. Whether you’re aligning horizons or adding a bit of tilt, Lightroom has many ways to adjust your photos. From precise angle adjustments to automatic straightening to adjustment layers for fine tuning, I’ll show you how to rotate your images with ease and make every shot look its best. Let’s get your photos straight and show off your creativity.

Table of Contents

How to rotate Image in Lightroom Classic: A Step-by-Step Guide

Lightroom Classic interface displaying a photo of a vintage camera, flowers, and coffee on a wooden table, with editing tools visible.

Rotating photos in Lightroom Classic is a fundamental yet essential task, especially when you want to correct the orientation of your images or make creative adjustments. Whether you’re adjusting a slight tilt or making a complete 90-degree rotation slider, Lightroom offers several methods to achieve this. Here’s a step-by-step guide on how to rotate your photos effectively.

Rotate Photos in the Library Module

Lightroom Classic Library Module interface displaying the rotate photo option highlighted below a vintage camera and coffee scene.

Rotating Single Images

Rotating Multiple Images

Grid View: To rotate many images at once, switch to Grid View by pressing G. Select the images you want to rotate and then use either the Toolbar buttons, the menu method, or the keyboard shortcuts. This will apply the rotation to all the selected images simultaneously.

Rotate Photos in the Develop Module

Lightroom Classic Develop Module interface showing the Crop & Straighten tool in use, rotating a photo of a vintage camera and coffee.

Flipping Photos

Lightroom Classic Library Module with a menu open to the options for flipping an image horizontally or vertically.

Sometimes, you might need to flip a photo in flip horizontal or vertical. Lightroom makes this straightforward:

Advanced Rotation Techniques

Lightroom Classic Develop Module showing an image rotated at an angle using the Crop & Straighten tool with advanced rotation settings.

Tips for Better Results

Mastering these techniques ensures your images are always aligned and presented as you intend, enhancing their visual impact and maintaining their integrity across different viewing platforms.

By following these steps, you’ll be able to rotate photos in Lightroom Classic with precision, whether you’re making small adjustments or performing bulk rotations. These methods are vital for any photographer looking to refine their workflow and present their work in the best possible light.

Adjust crop and rotation: How to Rotate Image in Adobe Lightroom

Lightroom Classic Develop Module showing an image of a green apple and flowers, with the Crop & Straighten tool active for adjusting crop and rotation.

Rotating and cropping images in Lightroom is a fundamental process that allows photographers to correct image alignment and enhance composition. Whether you need to make minor adjustments to straighten a horizon or completely change the orientation from landscape to portrait, Lightroom provides a variety of tools to accomplish this with precision. By using the Crop Overlay tool, you can easily crop the image, rotate it to correct alignment, and choose or customize the aspect ratio in Lightroom to suit your requirements. This comprehensive approach ensures that your images are perfectly aligned and formatted to meet your creative vision.

How to Rotate Images Using the Crop Tool

The Crop Tool in Lightroom is not just for cropping your images; it’s also the primary device for rotating them. Here’s how you can do it:

Switching Between Landscape and Portrait Orientation

Sometimes, you may want to switch the orientation of your image from landscape to vice versa. Here’s how:

Advanced Tips: Using Geometry and Transform Tools

For images that need more complex adjustments, Lightroom’s Geometry and Transform tools can be particularly useful:

By mastering these tools, you can ensure that your images are perfectly aligned and cropped, enhancing their visual impact whether they’re viewed on screen or in print.

Three Easy Ways to Rotate Image in Lightroom

Rotating images in Lightroom is a common task, whether you’re correcting orientation, straightening a horizon, or adjusting the composition. Here is a comparison table outlining the three easy ways to rotate an image in Adobe Lightroom:

Method How It Works Best Used When Advantages Limitations
Keyboard Shortcuts Use Ctrl + ] (Windows) or Cmd + ] (Mac) to rotate right, and Ctrl + [ or Cmd + [ to rotate left. Quick adjustments during editing Fast and efficient, works in both Library and Develop modules Requires memorizing shortcuts
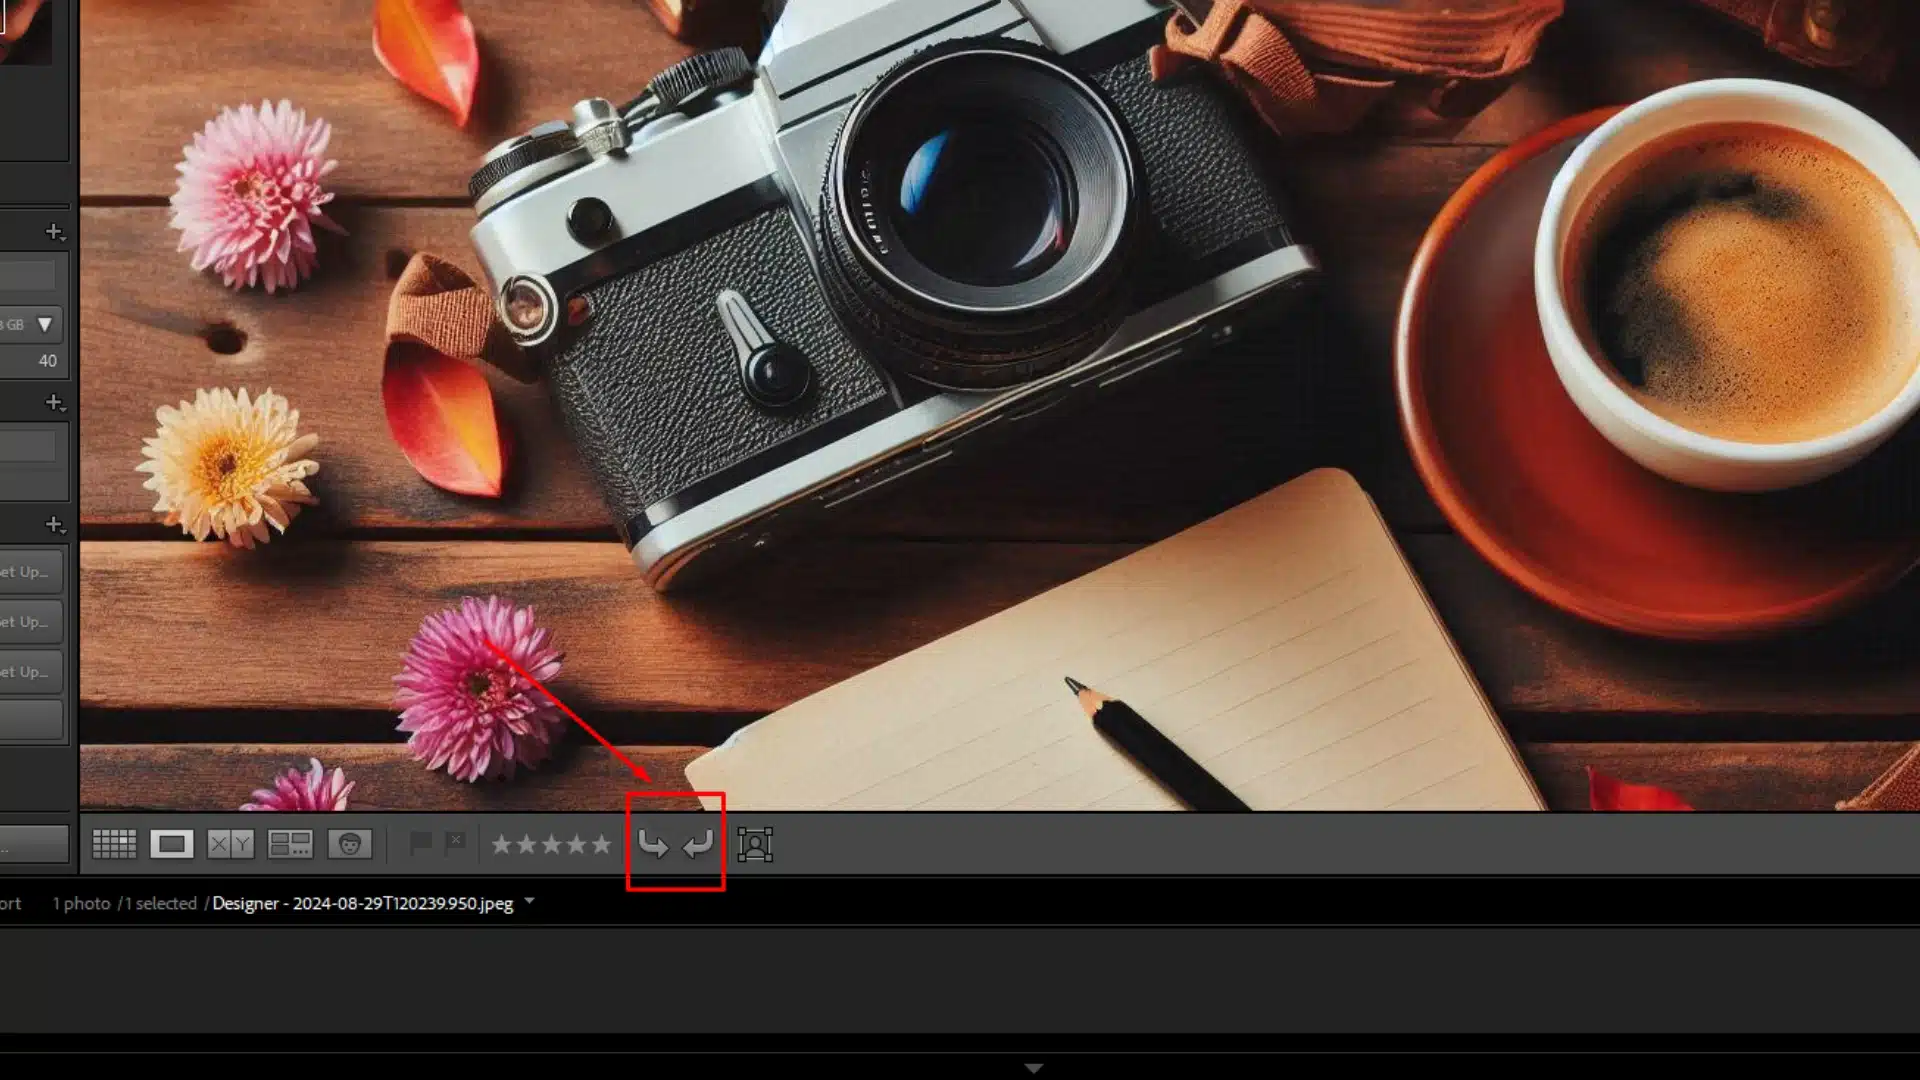
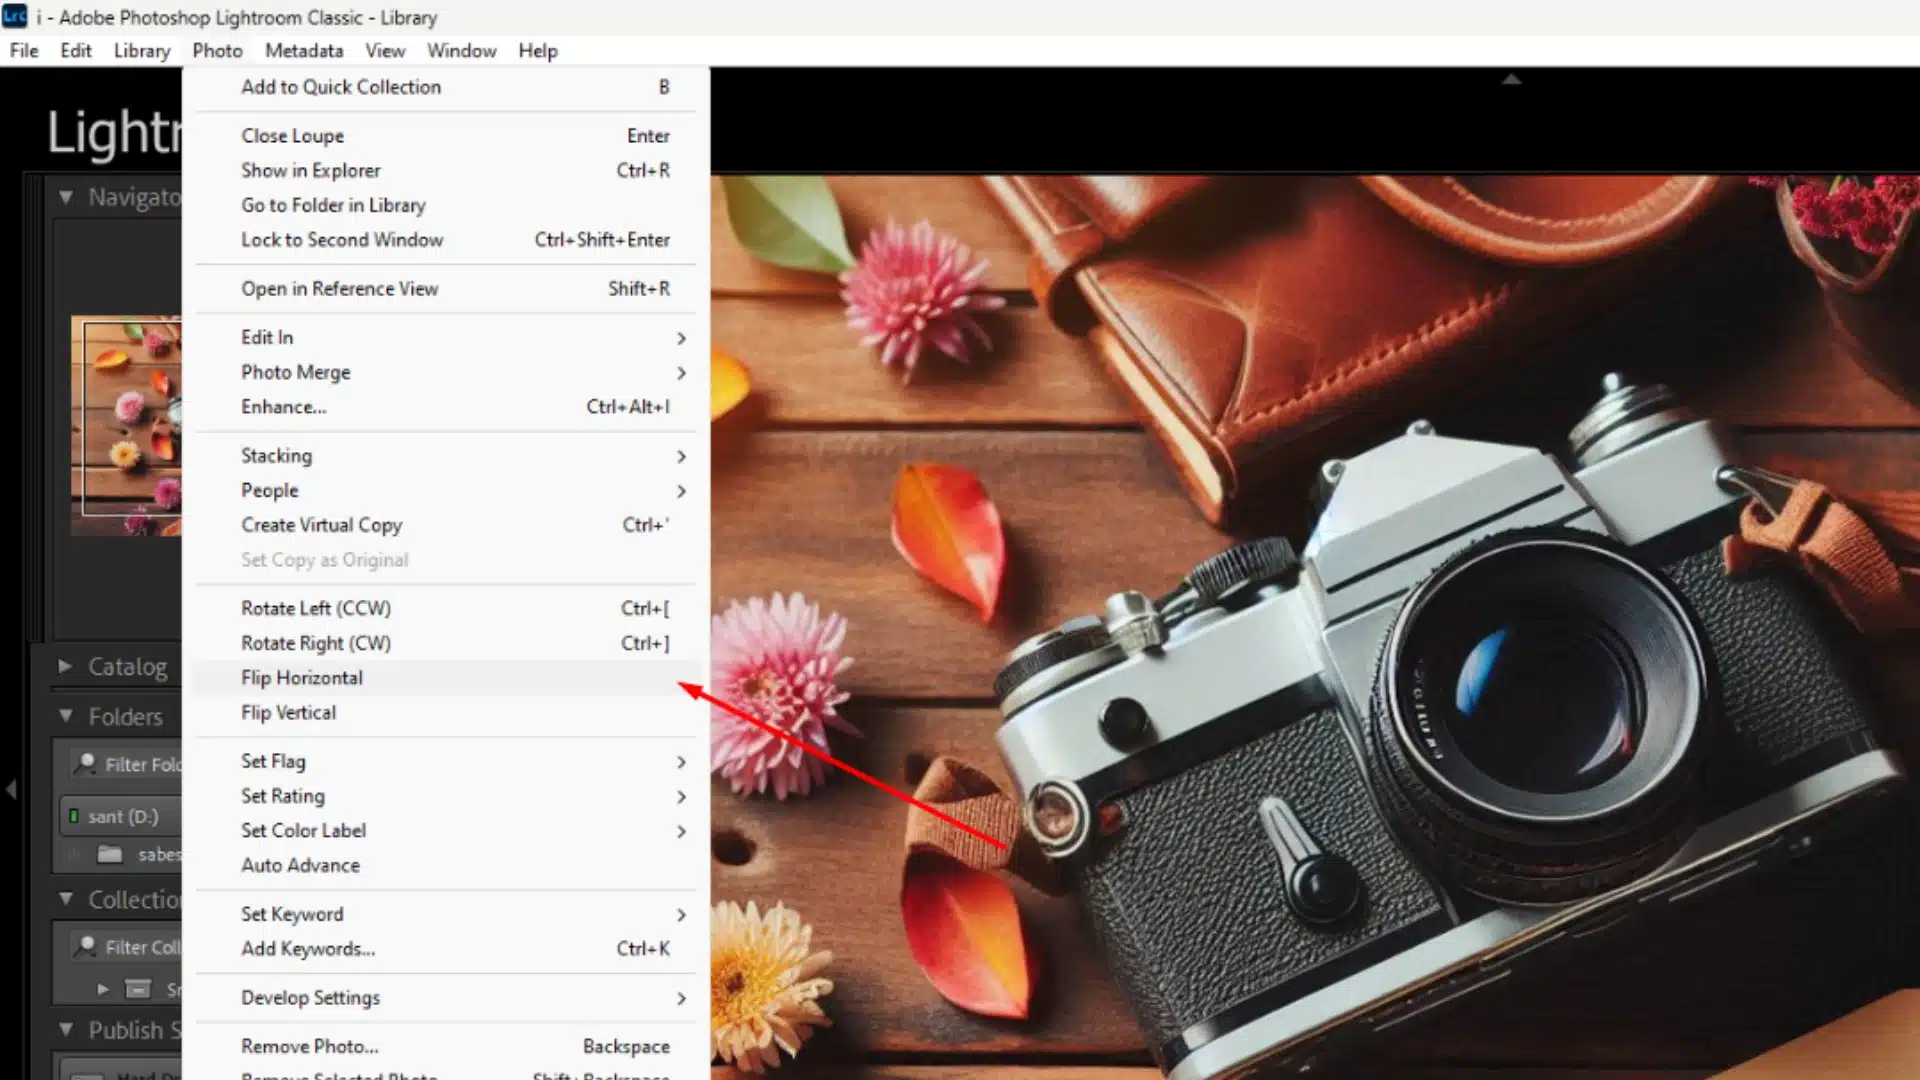
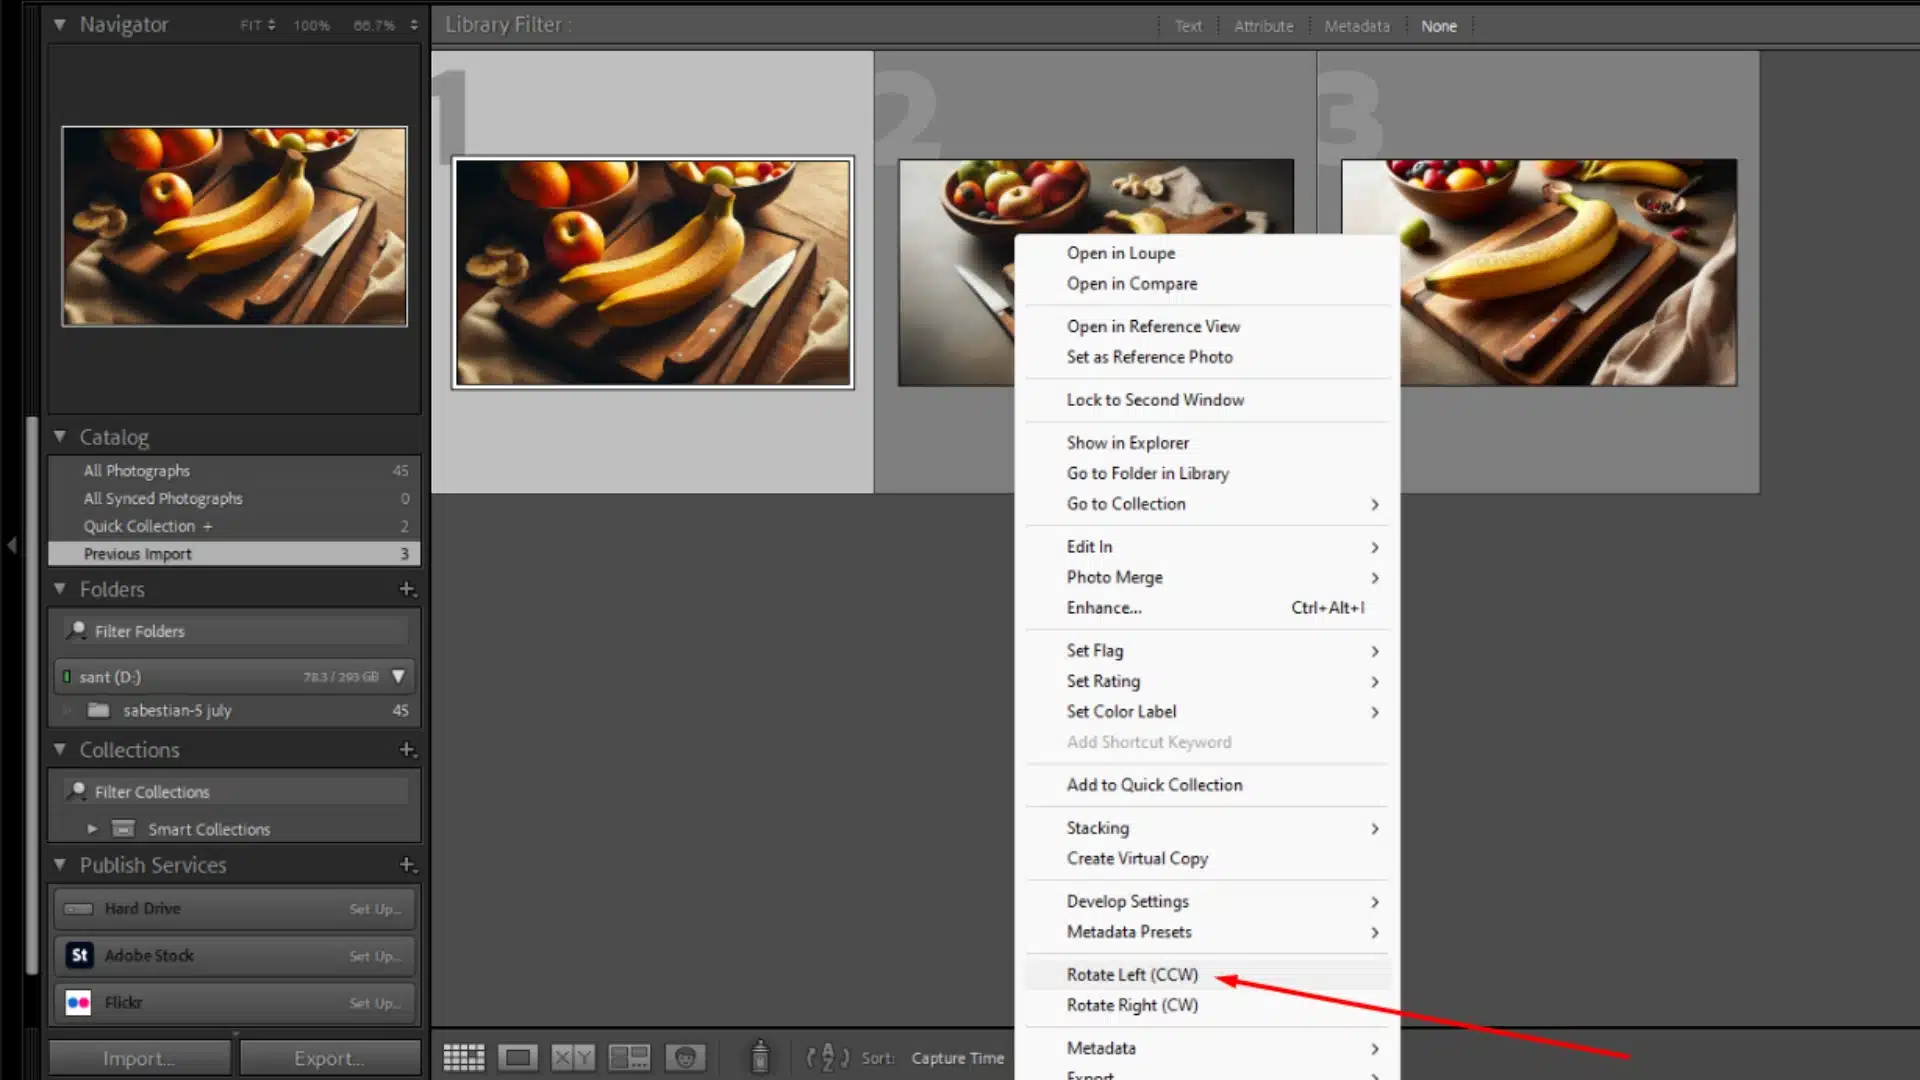
Popup Menu (Right-Click) Right-click on an image or selection of images, then choose Rotate Left or Rotate Right from the context menu. Rotating single or multiple images quickly Easy to use, no need to memorize shortcuts, accessible in both modules Less efficient for large batches compared to keyboard shortcuts
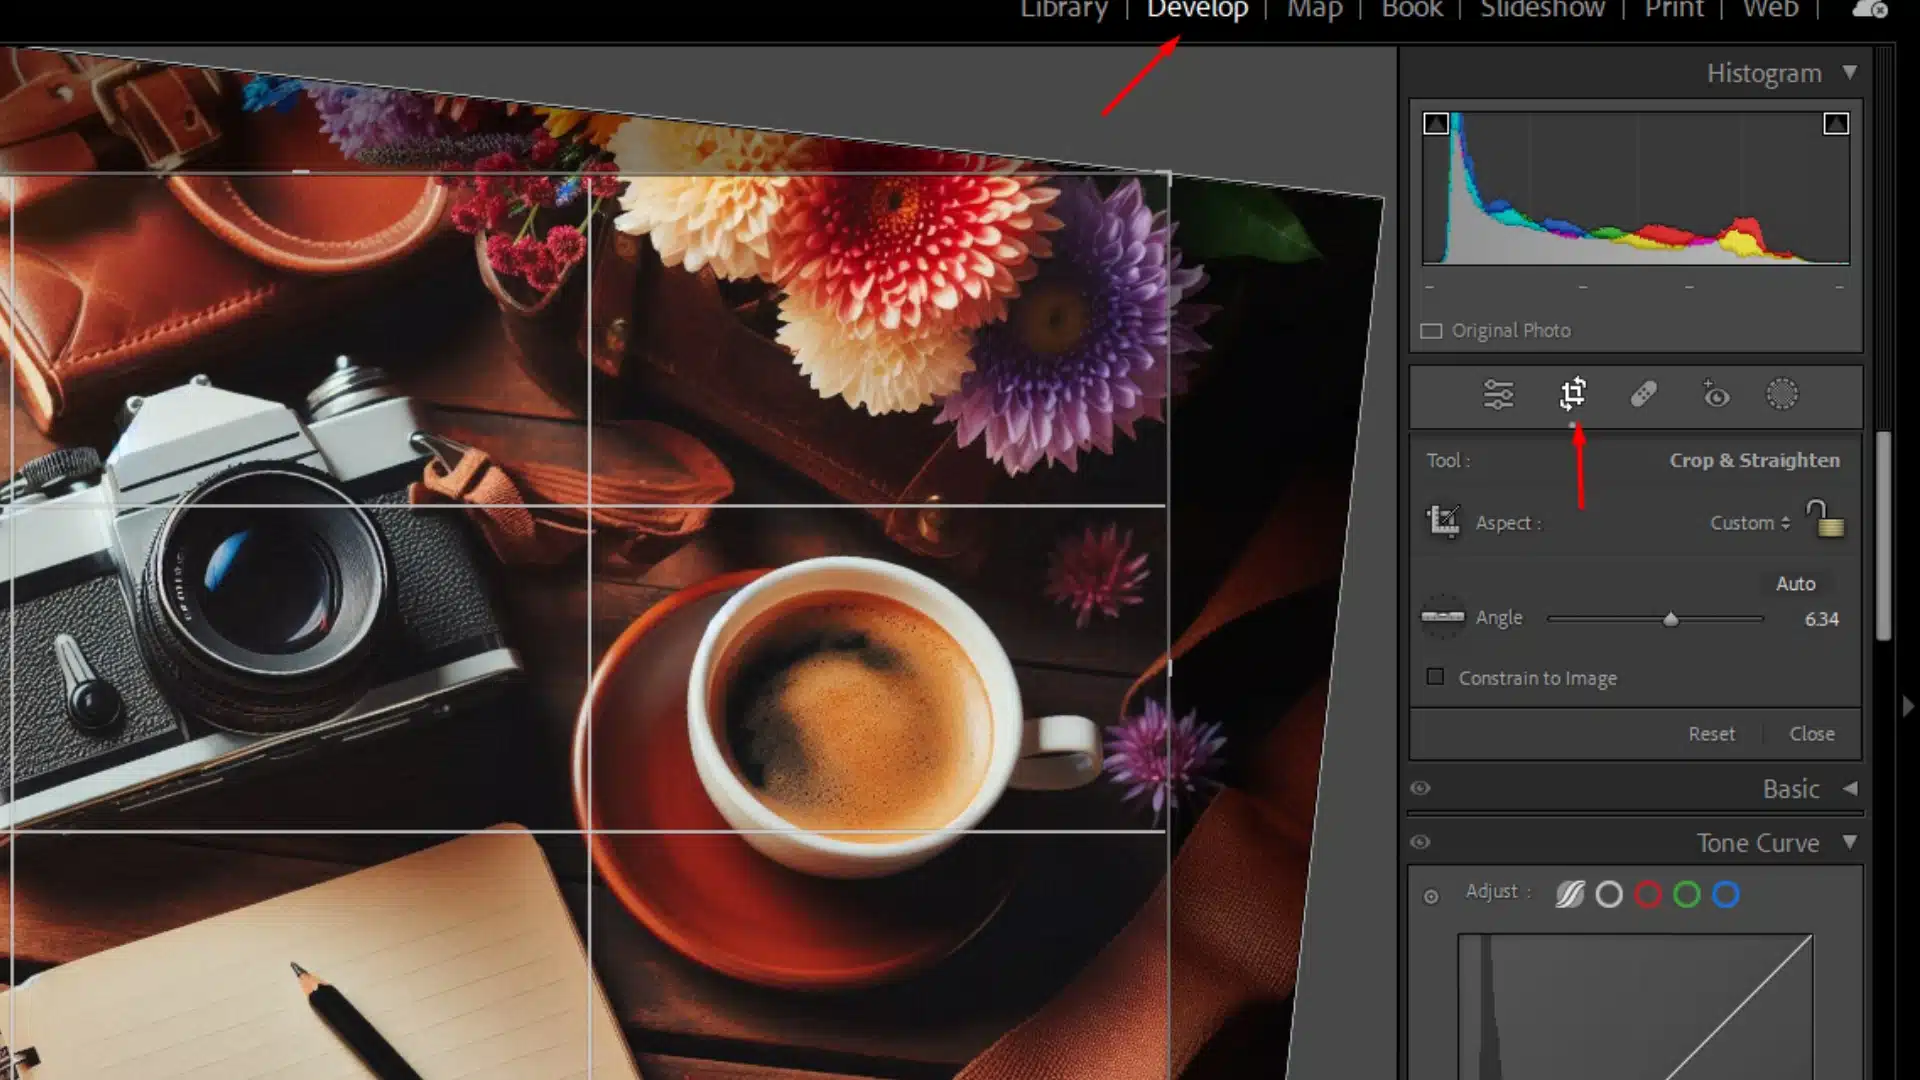
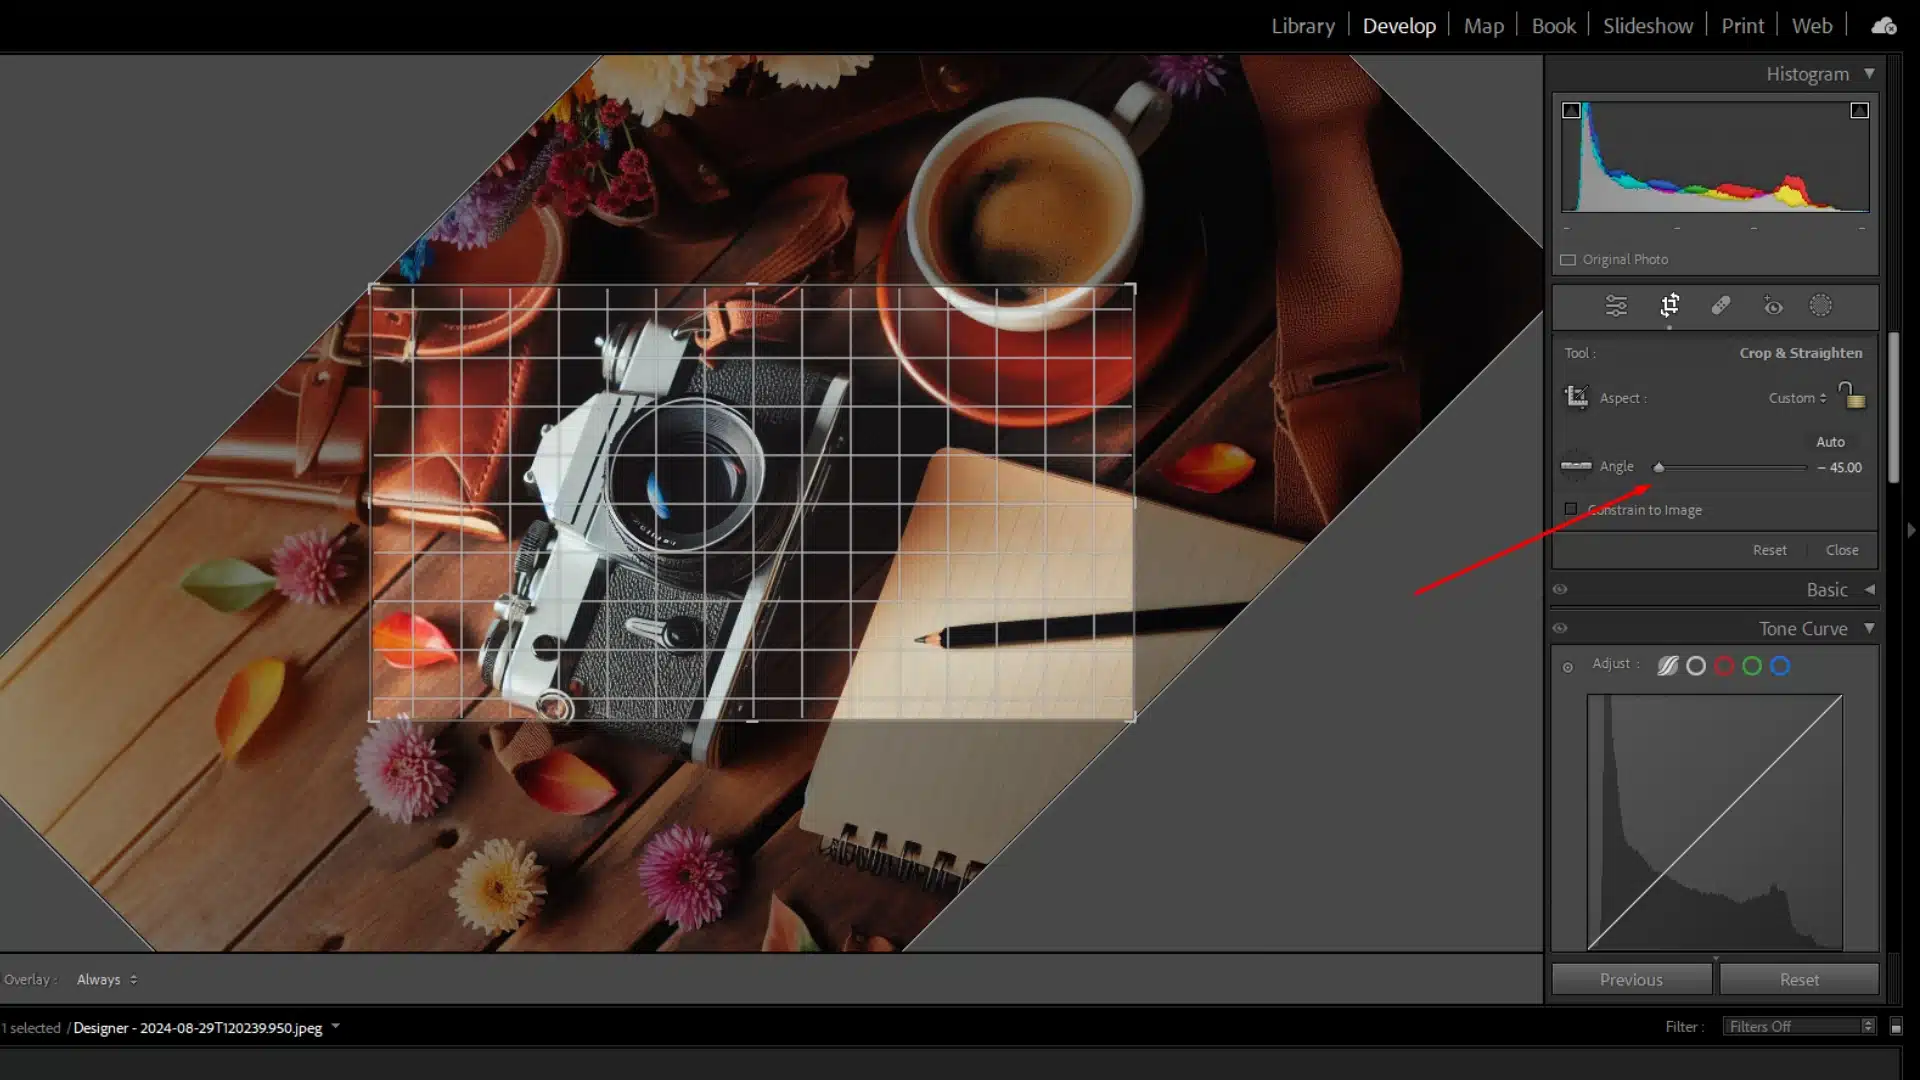
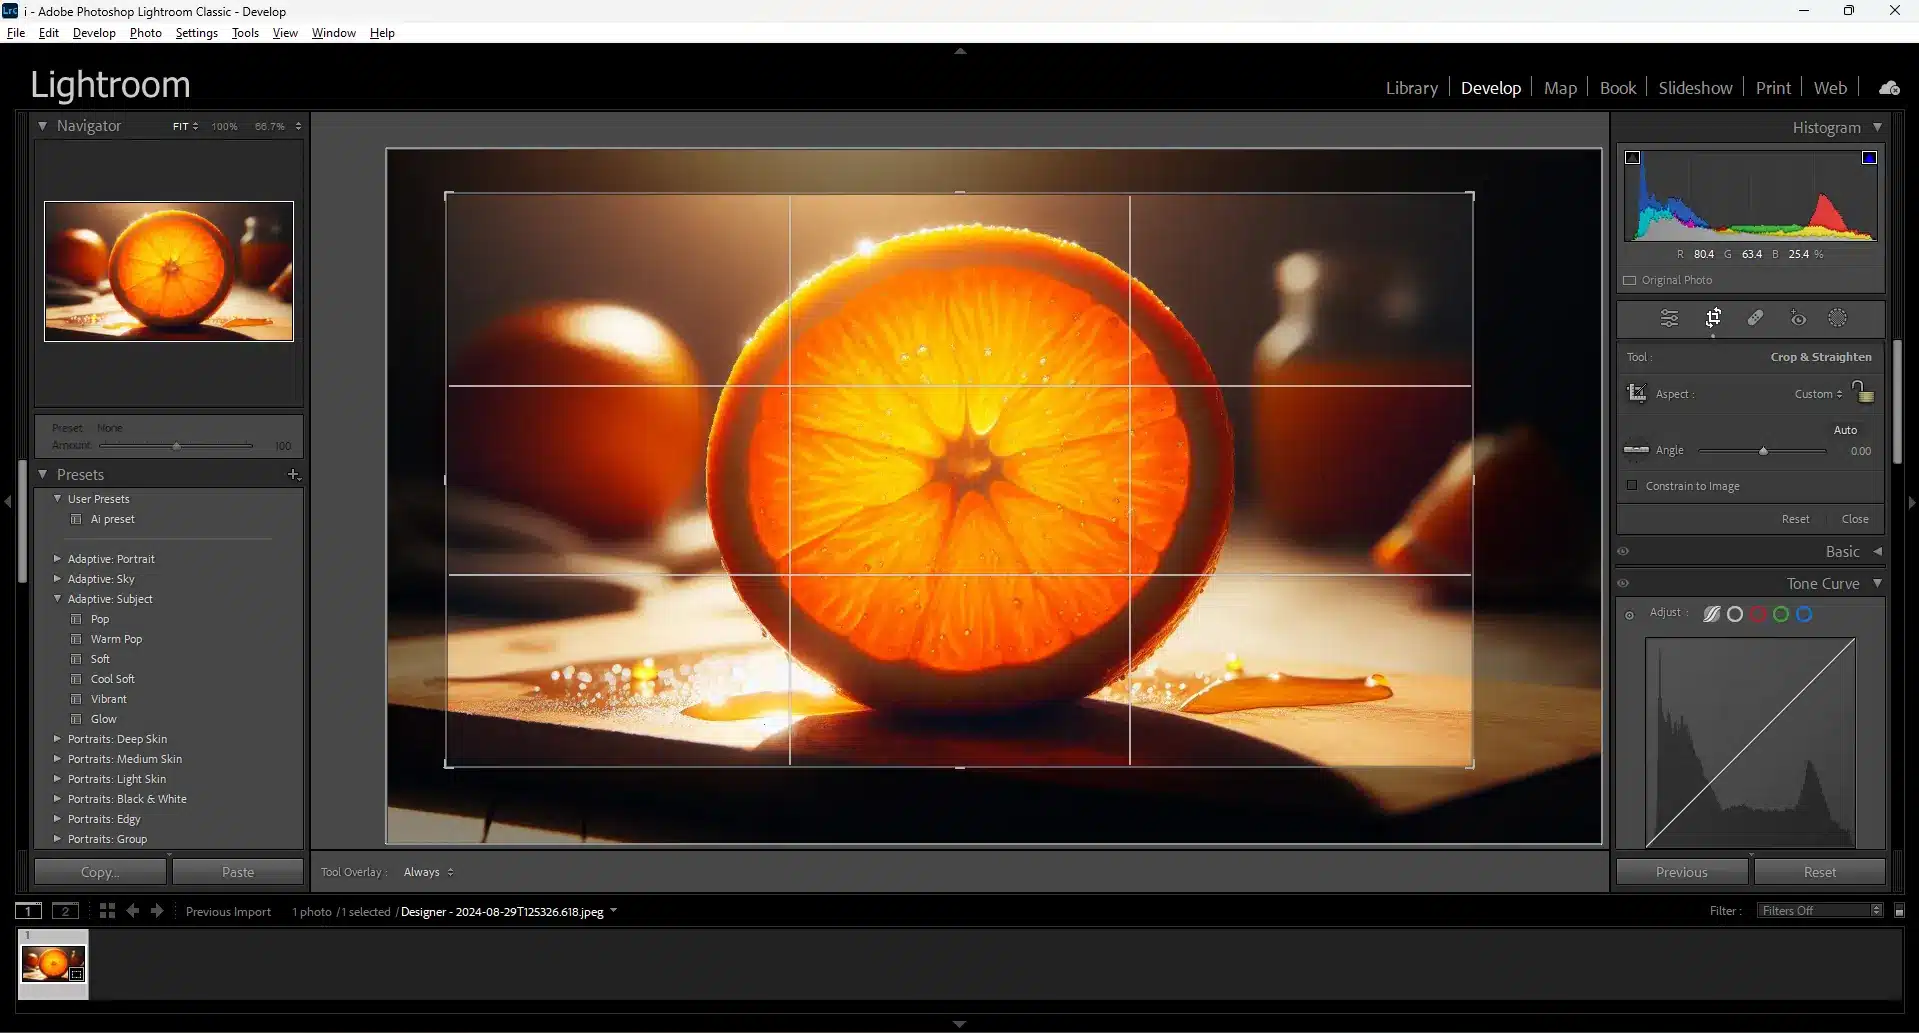
Crop Tool in Develop Module Activate the Crop Tool (R key), then drag outside the crop boundary to rotate, or use the Angle slider for precision. When fine-tuning angles or straightening horizons Precise control over rotation angles, integrates with cropping More time-consuming, best for single images or precise adjustments

Using Keyboard Shortcuts

One of the quickest methods to rotate an image in Lightroom is by using keyboard shortcuts. This method is highly efficient, especially when you’re working on multiple images.

These shortcuts work in both the Library and Develop modules, making them versatile and convenient for quick adjustments.

Using the Photo Menu

If you prefer using the menu bar, you can rotate images through the Photo menu.

This approach is beneficial for those who prefer using the mouse over keyboard shortcuts.

Using the Crop Tool in the Develop Module

For more precise control over rotation, especially when you need to rotate by less than 90 degrees or straighten a horizon, the Crop Gear is ideal.

This method is perfect when you need fine-grained control over the image’s orientation, such as aligning a horizon or creating a specific artistic angle.

These methods give you flexibility and control, allowing you to rotate your images in Lightroom with ease, whether you’re making minor adjustments or handling multiple photos at once.

Using the Lightroom Popup Menu to Rotate Image

Lightroom Classic Library Module showing a popup menu with options to rotate an image left or right, demonstrated on a photo of fruit.

The popup menu in Lightroom provides a straightforward way to rotate images, making it an ideal method for those who prefer using the mouse over keyboard shortcuts. Here’s how you can use the popup menu to rotate your images in Lightroom:

Access the Popup Menu

Rotate the Image

Additional Options

Practical Example

Imagine you have a series of landscape photos that need to be rotated to portrait orientation. By selecting all the selected images in the Library Module, you can right-click to access the popup menu and rotate them all at once, saving time and ensuring consistency across your photo editing.

This method is particularly handy for batch processing, as it allows you to rotate multiple images quickly and efficiently without needing to switch to other tools or remember keyboard shortcuts.

Using the Lightroom popup menu for image rotation is a simple yet powerful method, perfect for quick adjustments and bulk editing.

Common Questions about How to Rotate Image in Lightroom

Photoshop-Masterclass-Advanced-Editing-Layer-Manipulation

How do I rotate an image in Lightroom?

To rotate a single image in Lightroom, you can use several methods:

These methods work well for quick adjustments or more precise rotations depending on your needs.

How do I turn a photo 90 degrees?

To rotate a photo by 90 degrees in Lightroom:

This method is effective whether you need to correct an orientation or adjust the layout of multiple photos at once.

What is the shortcut for rotate crop in Lightroom?

The shortcut for flipping the crop in Lightroom is:

These Lightroom shortcuts help streamline the cropping and rotation process, making it faster and more efficient.

How do I rotate an image in Adobe?

In Lightroom, you can rotate a single image by:

These options provide flexibility depending on whether you need a quick fix or more precise control.

Conclusion: How to Rotate Image in Adobe Lightroom

Lightroom Classic Develop Module showing a photo of an orange slice with the Crop & Straighten tool active, symbolizing final adjustments in the editing process.

Mastering Lightroom’s rotation tools has been a game-changer for me. For example, I remember fixing a series of coastal sunrise shots where the horizon was slightly off. By aligning the horizon with Lightroom’s tools and fine-tuning the rotation in Photoshop, I enhanced the images’ beauty and detail.

Want to boost your editing skills? Check out our Lightroom Course and Photoshop Courses to take your portrait photography to the next level.

If How to Rotate Image in Adobe Lightroom article has helped you, then Like and Share it with your friends

Facebook
Twitter
LinkedIn
Pinterest

Have a nice photoshoot!

Read more about: Photo Editing with Lightroom and Photoshop

Download Your Free Guide Now!

Discover the secrets of photography with our printable guide! Master essential techniques like aperture, shutter speed, and ISO to create stunning images. Get your free printable PDF now and start turning your snapshots into masterpieces!