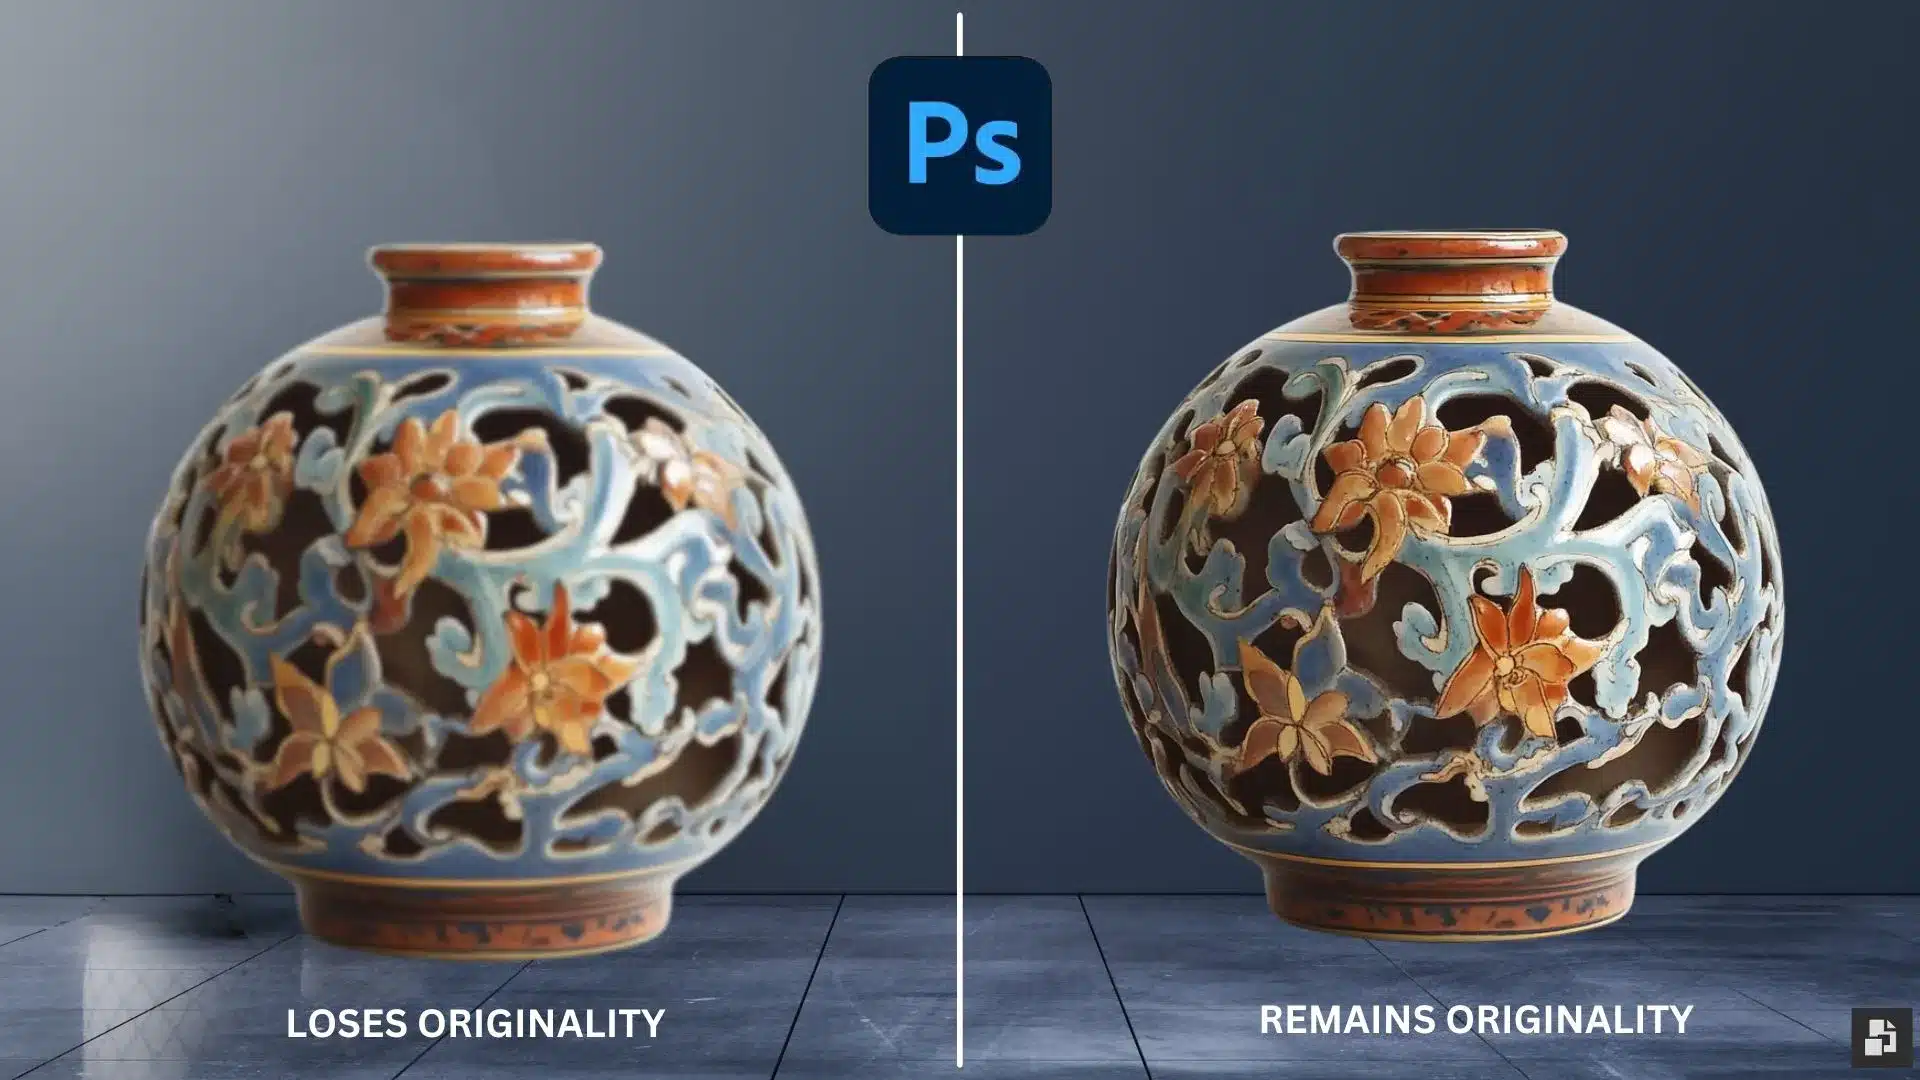
| Nondestructive Transformations |
Transformations such as scaling, rotating, skewing, distorting, or warping can be performed without permanently altering the base image. |
Preserves the clarity and detail of the image, allowing for flexible resizing and adjustments. |
| Re-editable Effects |
Effects like Gaussian Blur can be applied in a non-destructive manner, allowing for adjustments and readjustments as needed. |
Ensures flexibility for ongoing adjustments and fine-tuning, without permanently altering the layer. |
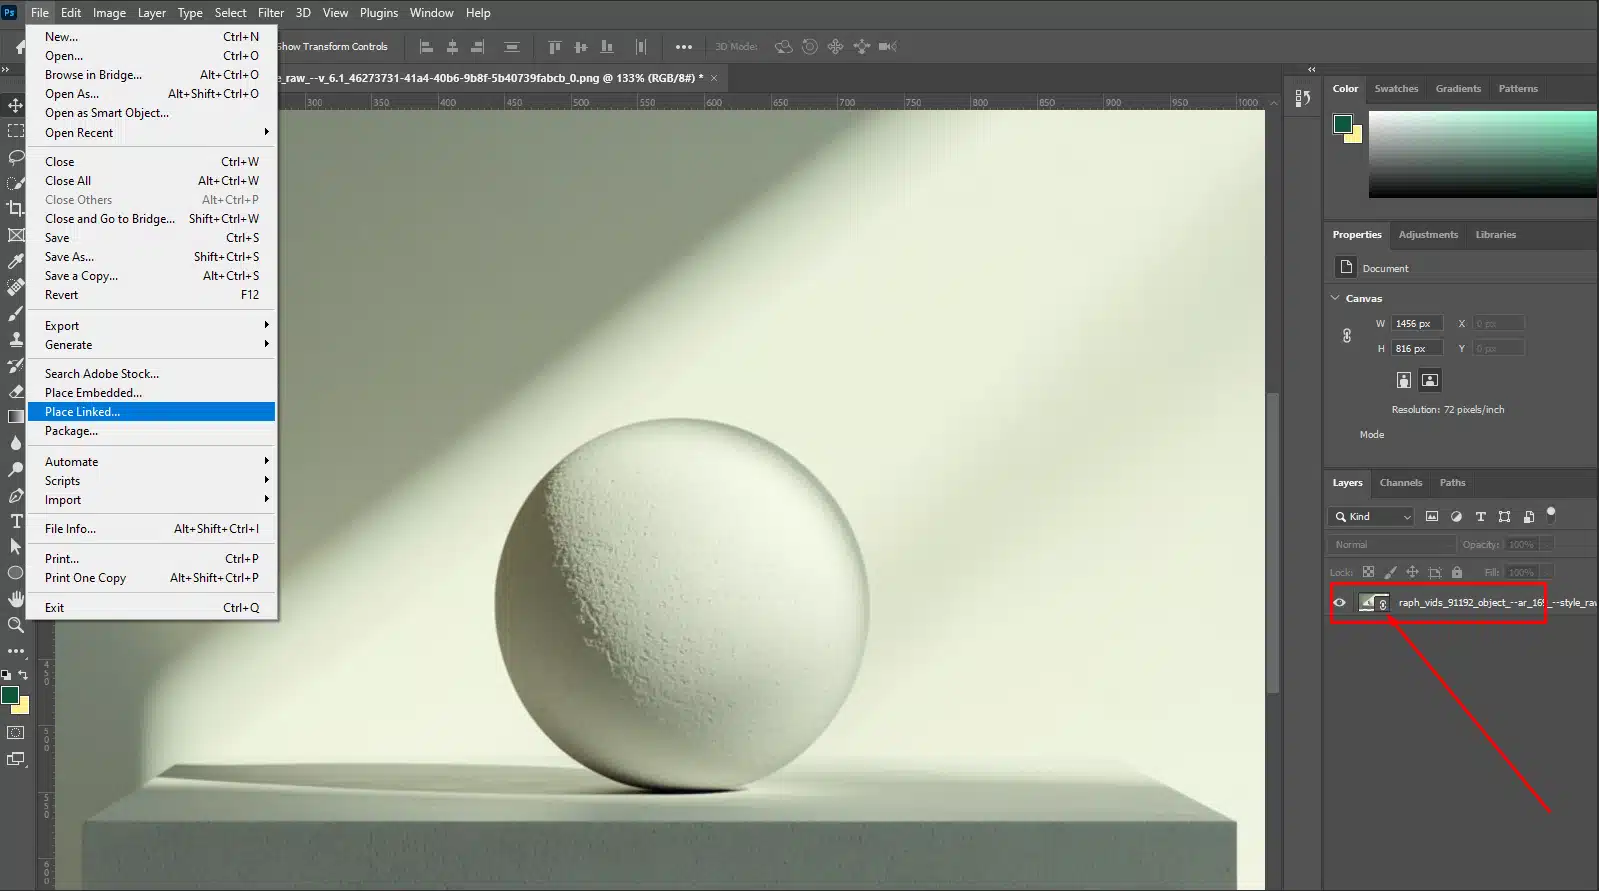
| Linked Instances |
Create linked instances that update automatically when the source file is modified. |
Maintains consistency across various projects or models by updating all instances simultaneously, streamlining workflow and ensuring uniformity. |
| Integration with Vector Elements |
Supports vector elements from Adobe Illustrator, allowing import without rasterizing. |
Preserves scalability and editability of vector images, ideal for tasks requiring both pixel-based and scalable vector elements. |
| File Dimension Management |
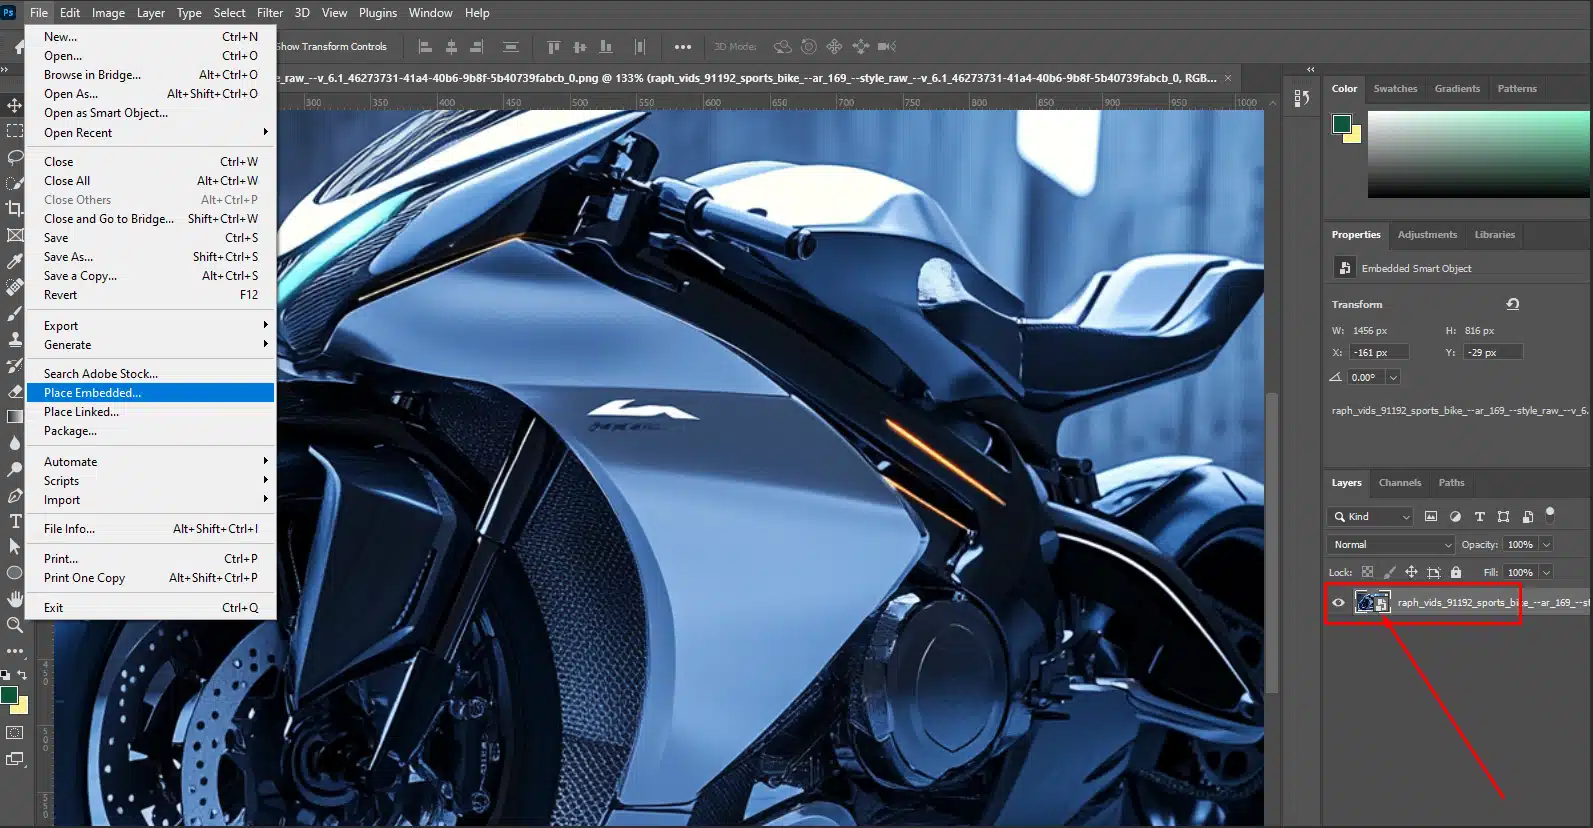
Using linked Smart Objects refers to an external document rather than embedding it within the Photoshop document. |
Reduces record dimension, making the Photoshop document more manageable and responsive, especially useful for projects with high-resolution assets. |
| Flexibility in Projects |
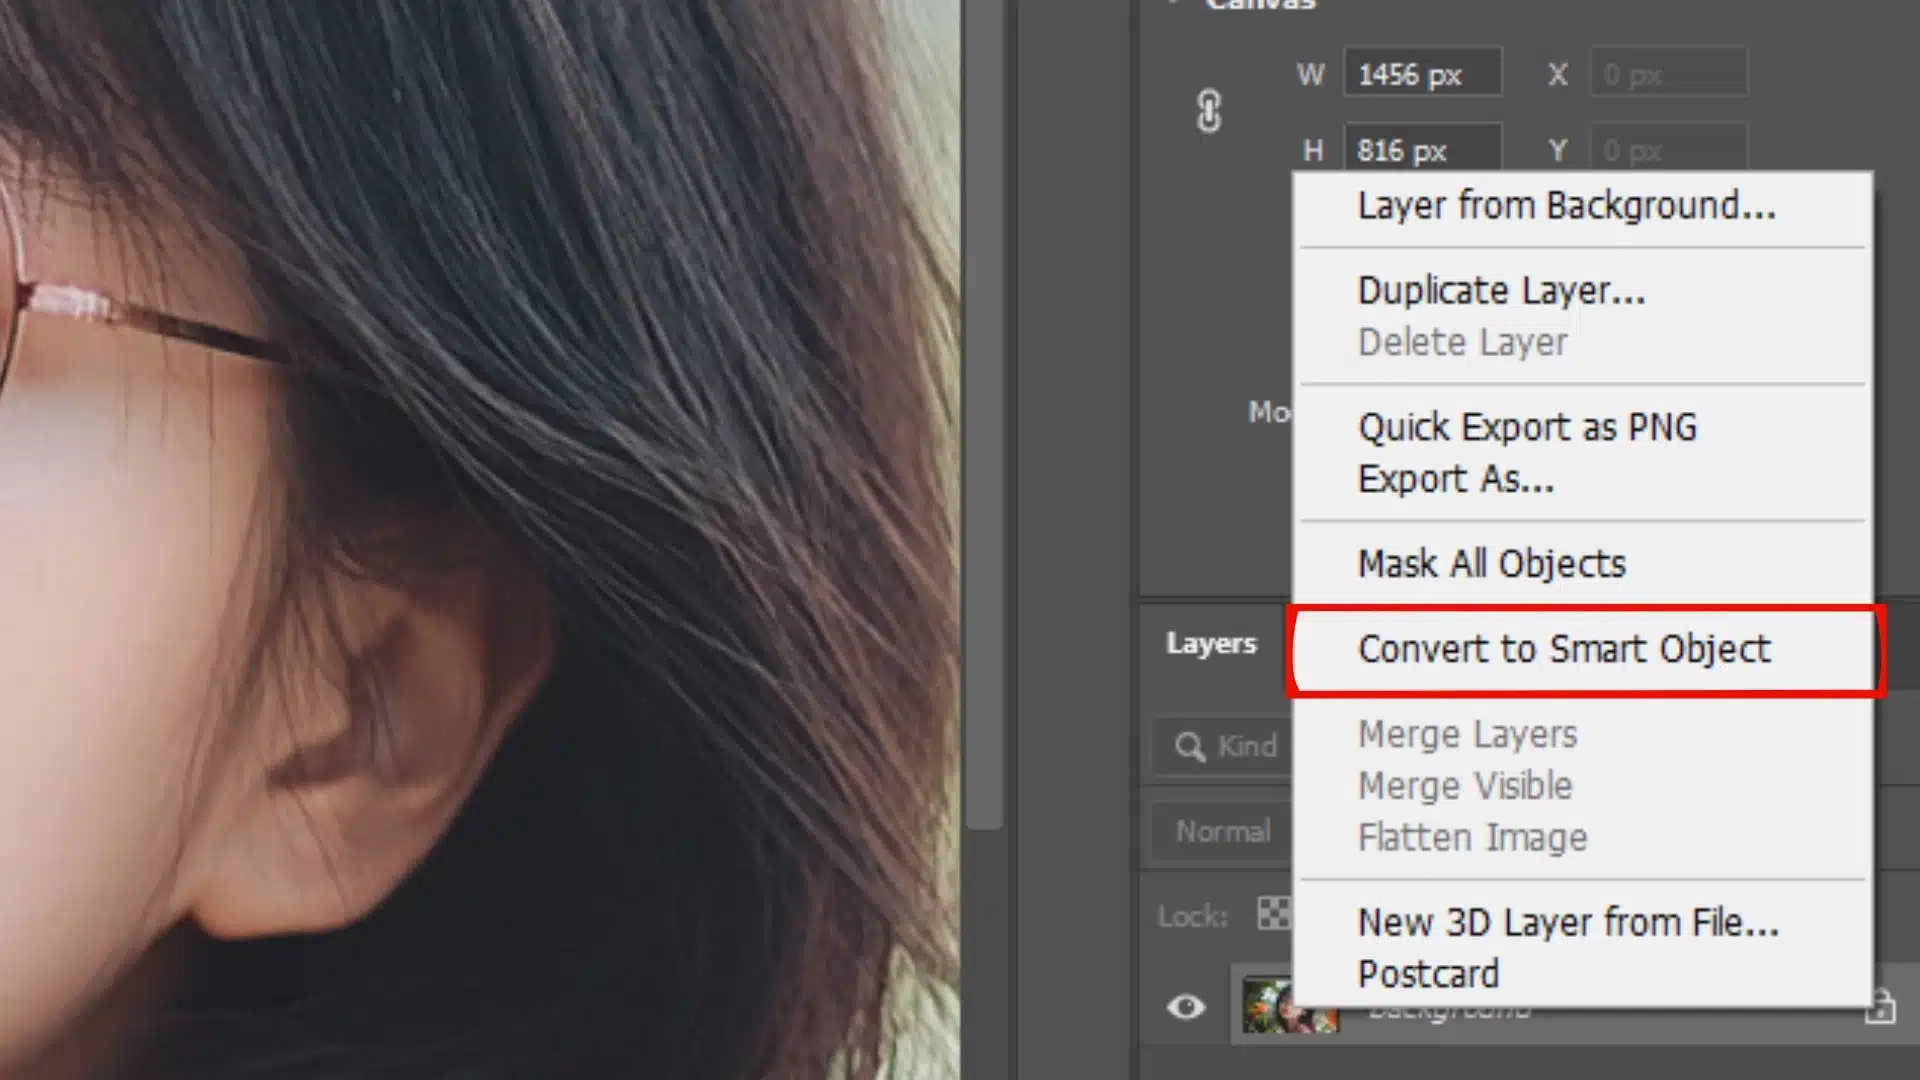
Group elements into Smart Objects, use adjustments, and build global transformation affecting all instances. |
Provides flexibility for complex projects, such as creating mockups, where updating plan elements across various contexts within the same project are necessary. |