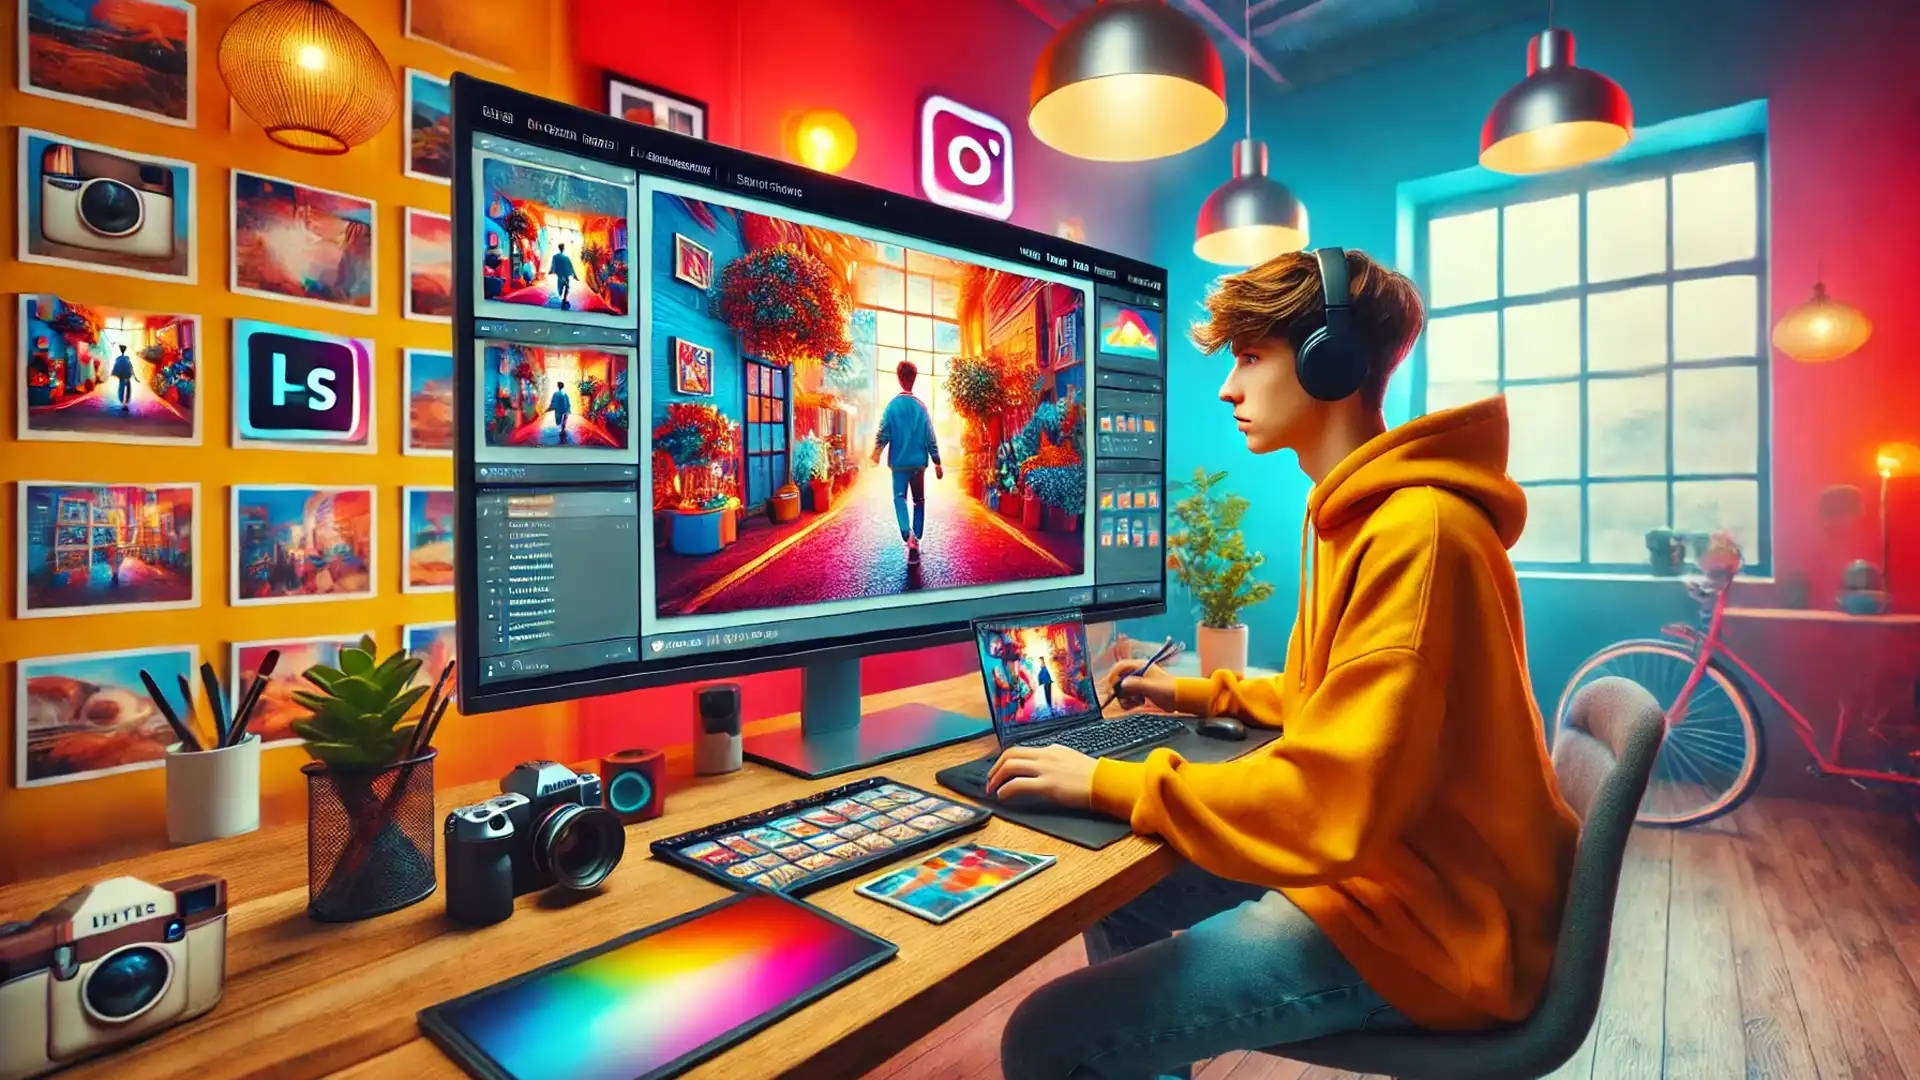
Are you looking to elevate your Instagram game with stunning photos? In this guide, I’ll show you exactly how to edit photos in Lightroom for Instagram to make your images stand out.
Imagine turning your ordinary snapshots into eye-catching masterpieces with just a few tweaks.
Stay with me, and I’ll walk you through the essential steps, tips, and tricks to transform your photos using Lightroom.
By the end of this article, you’ll have the skills and confidence to wow your followers and boost your Instagram presence.
Ready to get started?
Let’s dive in!
Table of Contents
How to Edit Photos in Lightroom for Instagram
Editing photos in Lightroom can elevate your Instagram game. Whether you’re starting out or you’ve been at it for some time, these tips will help you streamline your photo editing workflow.
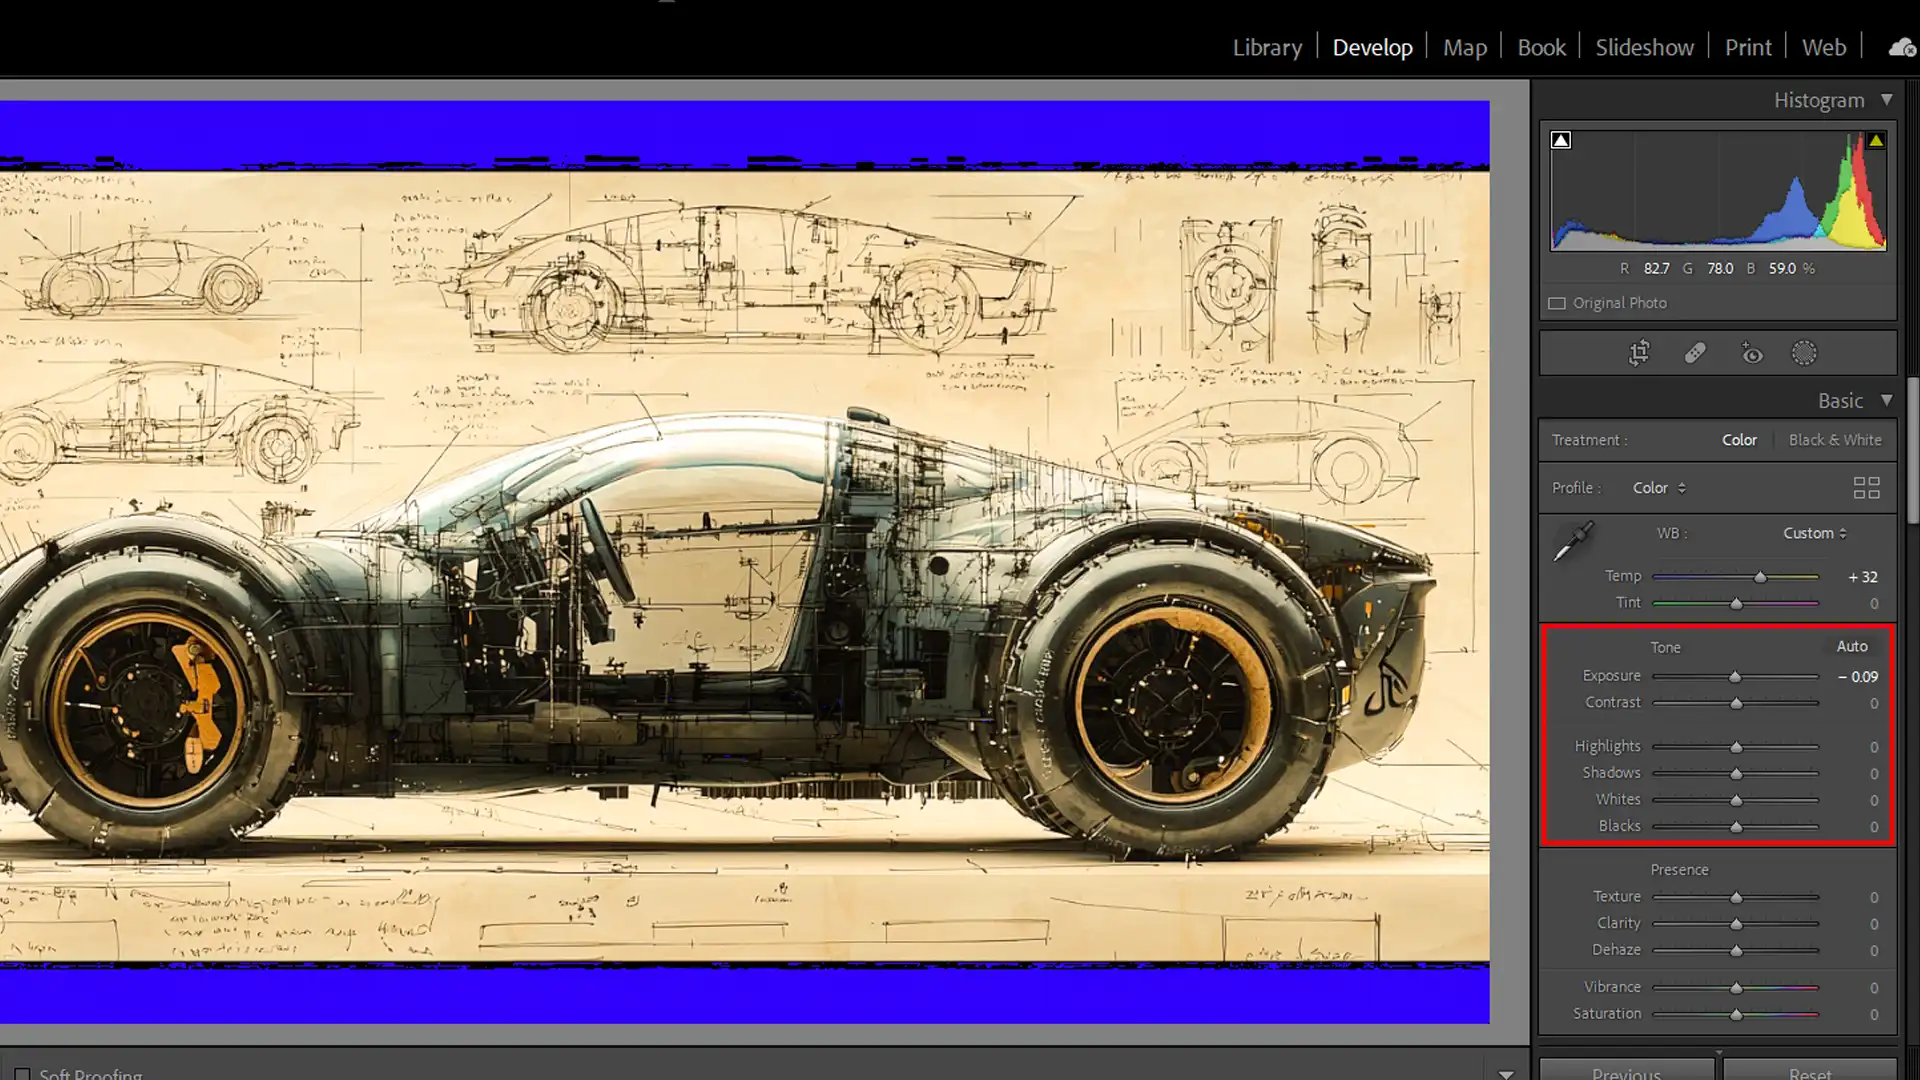
Basic Adjustments
To begin, open Adobe Lightroom and import your photos. Start with the exposure slider to adjust the brightness of your image.
Next, tweak the contrast to make your shadows and highlights pop.
Then, adjust the white balance to ensure the colors in your photo are accurate. A correct white balance makes your images look natural and appealing.
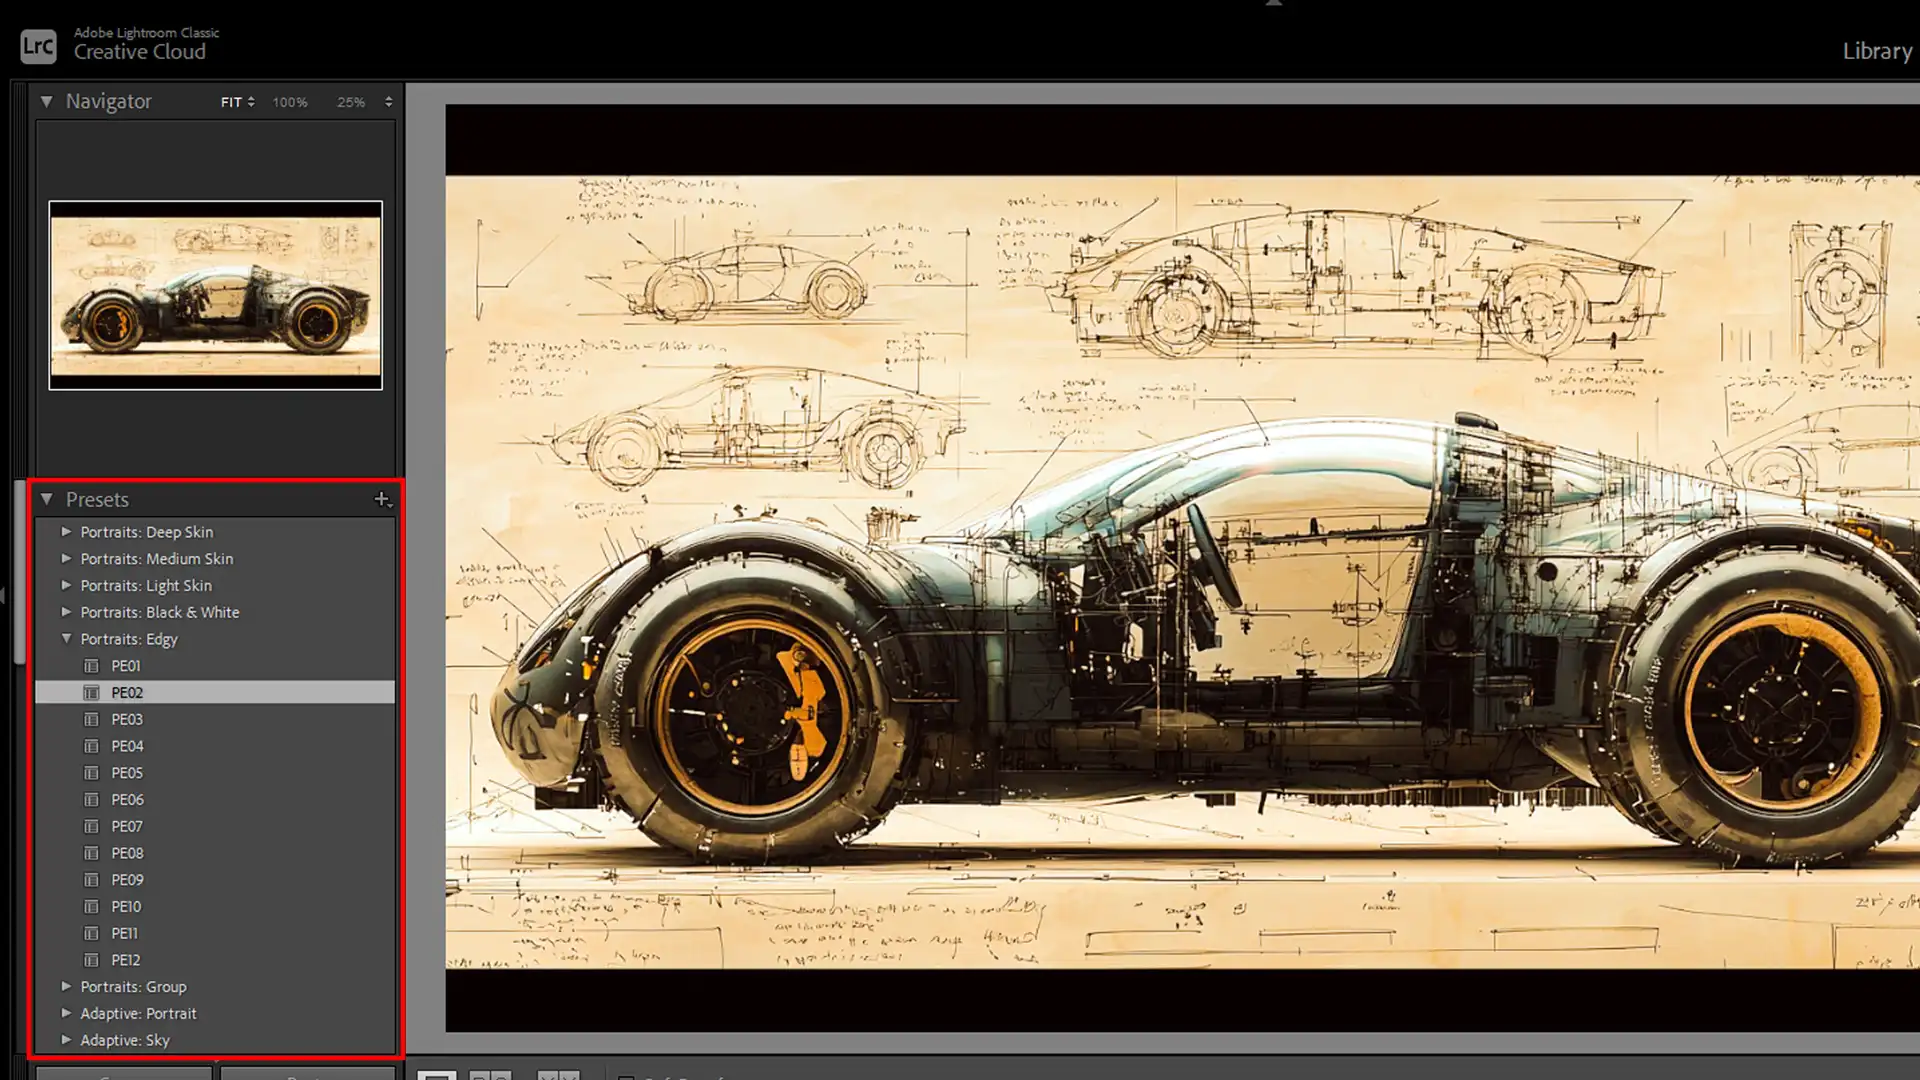
Using Presets in Lightroom
Presets can save you a lot of time. They apply pre-defined settings to your photos, giving you a consistent look.
Click on the presets iconin the develop module. Explore different Lightroom presets to find the one that suits your style.
You can even create your own preset by clicking on the create preset button. Save it for future use to maintain the same look for a cohesive Instagram feed.
Advanced Editing Techniques for How to Edit Photos in Lightroom for Instagram
To truly elevate your photos, mastering advanced editing techniques like color grading and detail enhancement can add a professional touch to your images.
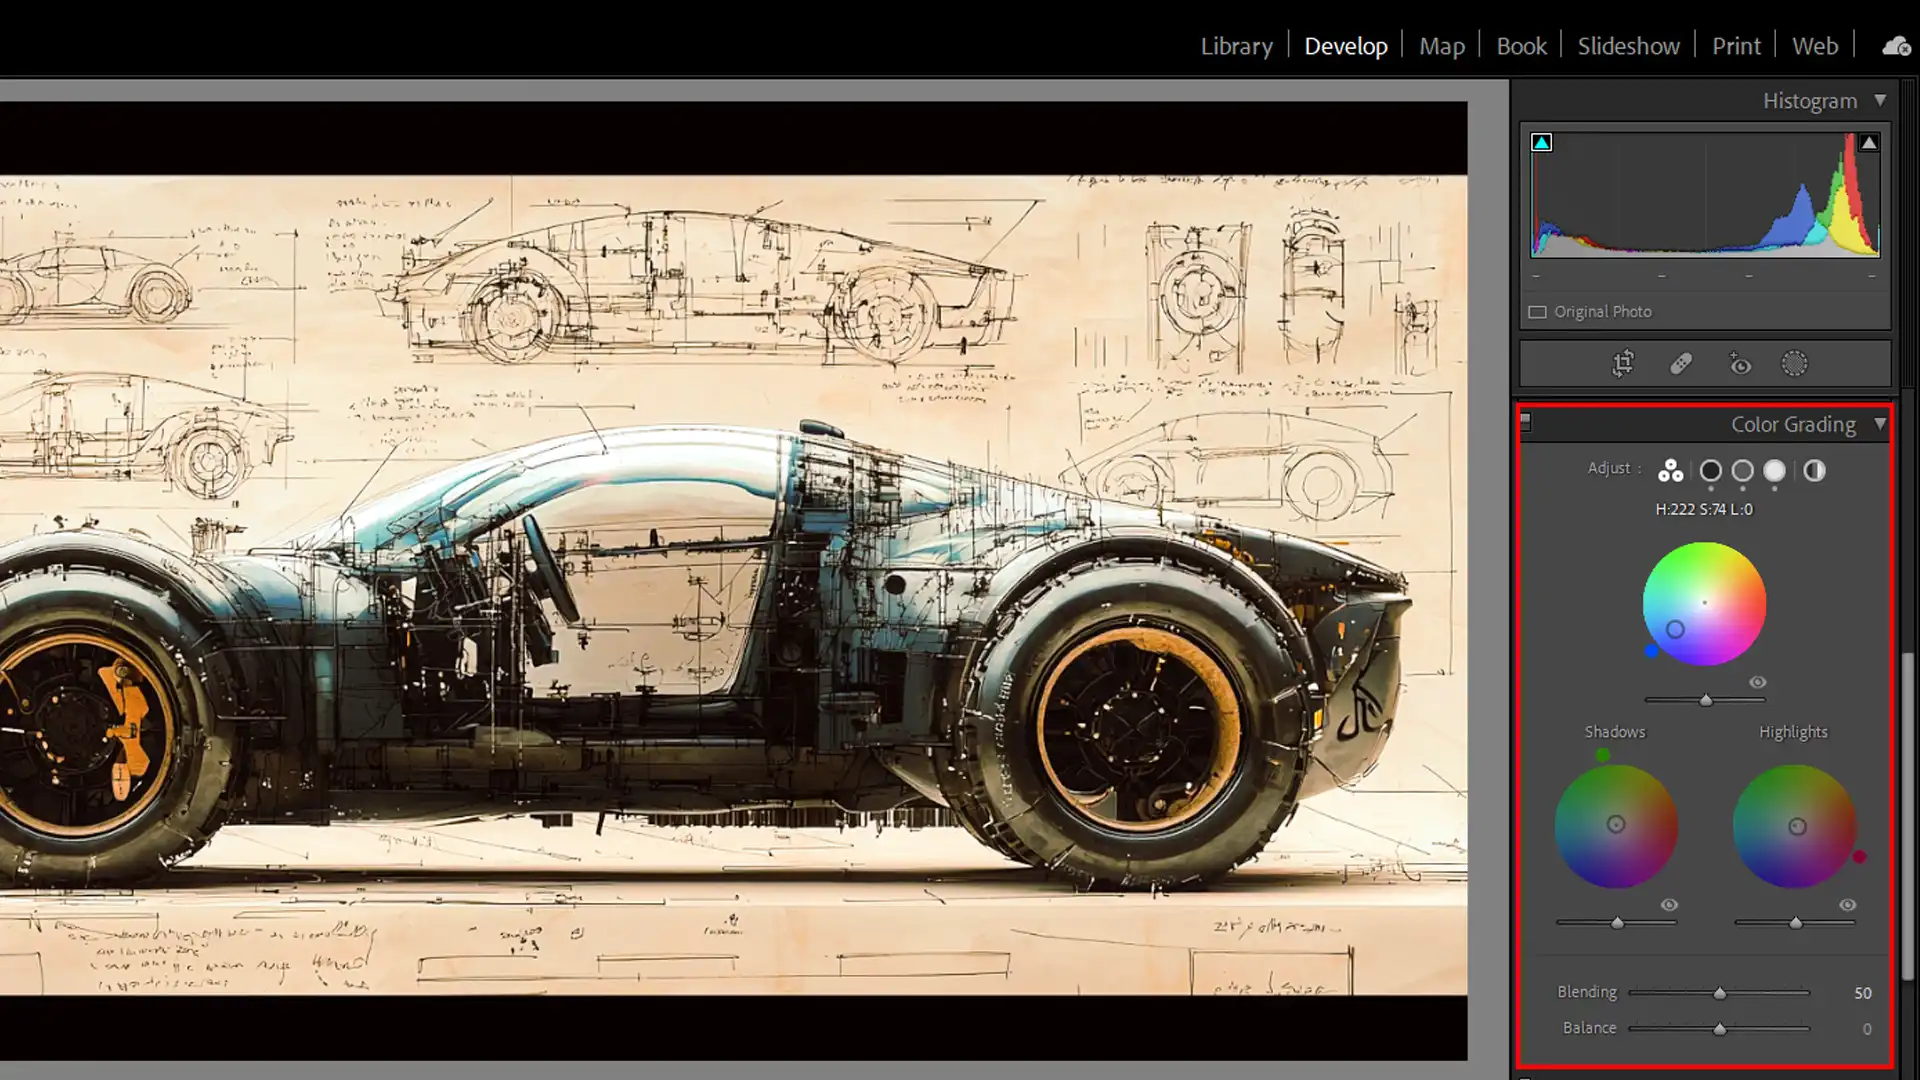
Color Grading
For advanced users, color grading can give your photos that extra edge. Use the tone curve tool in the develop section to fine-tune colors.
Adjust the red, green, and blue channels individually to achieve the desired color balance and mood. This intricate process can transform a good photo into a beautiful Instagram photo.
Detail Enhancement
Detail enhancement involves sharpening your image and removing noise. In the develop module, use the clarity and texture sliders to bring out details.
However, be cautious not to overdo it as it can make the image look unnatural. Zoom into your image to make sure every detail looks just right.
Lightroom Export Settings
Now that your photo looks perfect, it’s time to export it. Proper export settings ensure your image clarity remains intact.
For the best mobile photography, using the Lightroom Mobile App can significantly enhance your photos. Its powerful editing features and user-friendly design help you achieve stunning results right from your phone.
Lightroom Mobile App
Don’t forget, Lightroom mobile offers fantastic tools as well. Import your dng files and use the light icon to make basic adjustments on the go.
The Lightroom mobile app is a powerful tool that ensures you’re never far from perfecting your Instagram photos.
If you want to edit beautiful Instagram photos, Adobe Lightroom is your best friend. Keep these tips in mind, and you’ll see a significant improvement in your other photos.
To capture professional-quality photos with your phone, the Lightroom Mobile App is an invaluable tool. It provides advanced editing features that elevate your mobile shots to a professional level.
Pro Tip: Always shoot in RAW format. It gives you more flexibility during the editing process, allowing you to adjust the exposure and colors without compromising image clarity.
Now, go ahead and use Lightroom to create stunning Instagram posts!
Photo Editing Workflow for How to Edit Photos in Lightroom for Instagram
Ensuring a streamlined photo editing process is essential. Our approach covers basing our workflow on organizational, batch editing practices, and ensuring consistency.
Organizing Your Photos
I always start by organizing photos.
To organize effectively:
Import your dng files first. This gives flexibility in editing.
Create folders and subfolders based on event, date, or subject. Keep it simple, so it's easy to navigate.
This foundation aids in speeding up later editing processes.
Batch Editing
Next, batch editing speeds up your workflow dramatically.
You can:
Edit photos with similar settings at once. Adjust the exposure slider, contrast, and white balance, saving hours of work.
Apply Lightroom presets for consistent results across multiple photos. For those using Lightroom, knowing some Lightroom shortcuts can further enhance efficiency.
Batch editing not only saves time but also ensures your collection is uniform.
Consistency in Edits
Consistency is crucial for a professional finish.
Remember to:
Utilize the same image crop and aspect ratio to maintain a cohesive look.
Create a new preset if your style evolves. This assures uniformity in future edits.
Final adjustments with the Lightroom mobile app while on the go keep updates frequent and consistent.
As you become more familiar with your workflow, these steps become second nature, resulting in beautiful photos every time.
Pro Tip: Use Lightroom’s soft proofing option to preview how edits appear on different devices.
This enhances your social media presence by ensuring high-quality visuals on all platforms.
By following these steps, your entire batch of edited photos will maintain a professional and consistent look.
This technique captures beautiful light trails and enhances your night shots. It allows you to create dramatic and eye-catching photos even in low light.
Edit Beautiful Instagram Photos
Editing photos for Instagram might seem daunting, but with the right tools and steps, it becomes manageable.
Today, you will learn how to create those stunning Instagram photos that leave people scrolling through your feed in awe.
When searching for the best mobile photo editing apps for Instagram, you’ll find that the right tools can make a huge difference.
A cohesive feed makes your Instagram profile visually appealing. This simple approach ensures consistency and helps in making your entire image gallery appear organized and aesthetically pleasant.
Let’s dive into how you can achieve this:
Steps to Create a Cohesive Feed
Import and Organize: Start by importing your DNG files. Proper organization is essential—create folders based on events, dates, or subjects. This step saves time when you start editing.
Batch Editing: Once your photos are organized, use batch editing. Edit photos with similar settings simultaneously. Tools like Lightroom Classic or the Lightroom mobile app allow you to apply presets across multiple images, ensuring uniformity.
Use Presets: Presets save time and offer consistency. Lightroom mobile offers a wide range of presets, but you can create custom ones as your style evolves. Make sure to tweak them slightly to suit each photo.
Adjust Image Sizing: Keeping the same crop and aspect ratio for all photos maintains a uniform look. At this point, adjust the image sizing to fit Instagram's dimensions.
Final Touches: For final adjustments, use the Lightroom app. Quick edits can enhance your photos' overall look, ensuring they stand out on social media platforms.
Highlighting Key Features
Key features in Lightroom mobile and other photo editing tools make the process smoother. These features help you enhance specific aspects of your photos, making them more engaging and visually striking.
Here’s how to use some main features:
Main Features to Enhance Photos
Color Adjustments: You can adjust hues, saturation, and brightness to make colors pop. This feature is particularly useful for emphasizing certain elements within your image.
Exposure Control: Proper exposure is key. Use the Lightroom app to balance lights and shadows, ensuring no area of your photo is too dark or overexposed.
Clarity and Texture: Increasing clarity and texture adds depth to your photos. Be cautious—too much can make your picture appear unnatural.
Selective Edit: Sometimes, only parts of your photo need editing. The selective edit tool in Lightroom mobile allows precise adjustments, enhancing specific areas without affecting the whole image.
Final Export: After fine-tuning your edits, export your photos in high resolution. This ensures they look great when uploaded, maintaining quality across devices.
Your Instagram photos can shine with these simple yet effective techniques.
Following these steps ensures your feed remains cohesive and professional.
Pro Tip: Use Lightroom’s soft proofing function to preview edits on different devices. This step ensures your photos look impeccable wherever they’re viewed.
Lightroom Export Settings
When getting the most out of your images, the export settings in Lightroom are crucial. This ensures your creations look stunning on mobile phone and on any platform, especially Instagram.
Setting
Recommended for Instagram
File Format
JPEG
Quality
80-90
Color Space
sRGB
Image Sizing
Max 1080px on longest side
Resolution
72 PPI
Sharpening
Standard for screens
Let’s dive into the details.
Optimal Export Settings for Instagram
If you want your photos to pop on Instagram, you should follow these optimal settings:
File Format: Always choose JPEG for high-quality results.
Quality: Set the quality slider to 80-90. This balances file size and image quality.
Color Space: Use sRGB since Instagram prefers this color space.
Image Sizing: Resize to fit within 1080px on the longest side for better loading times while maintaining quality.
Resolution: Restructure images at 72 pixels per inch (PPI); this works best for web viewing.
Sharpening: Apply standard sharpening for screens to enhance the final appearance.
Using these settings ensures that your photos appear consistent and attractive on Instagram.
Maintaining Quality
It’s important to maintain quality during the export process to avoid pixelation or loss of detail.
Take note of the following tips:
Metadata: Keep metadata minimal by only including copyright info if needed.
Watermark: Use a subtle watermark if you want to protect your photos.
Export Presets: Save export presets to streamline your workflow in the future.
Review: Always review exported images to ensure they meet your expectations before sharing them.
Maintaining image quality is paramount. You want every detail to stand out and every color icon look crisp.
Pro Tip: Always check how your photos look on different devices before posting them to spot any inconsistencies.
For more detailed guidance, consider exploring Lightroom training resources.
Frequently Asked Question
How do I make photos fit in Lightroom for Instagram?
Easy steps to make a photo fit in Lightroom for instagram:
Open your photo in Lightroom and navigate to the Develop module.
Find the Crop & Straighten tool in the panel on the right.
Select the aspect ratio dropdown and choose 4:5 for portrait posts or 1.91:1 for landscape posts, which are ideal for Instagram.
Adjust the crop frame to fit the desired area of your photo.
Double-check the composition and click Done to apply the crop.
How to upload from Adobe Lightroom to Instagram without losing quality?
Follow these steps to upload instagram from Adobe Lightroom:
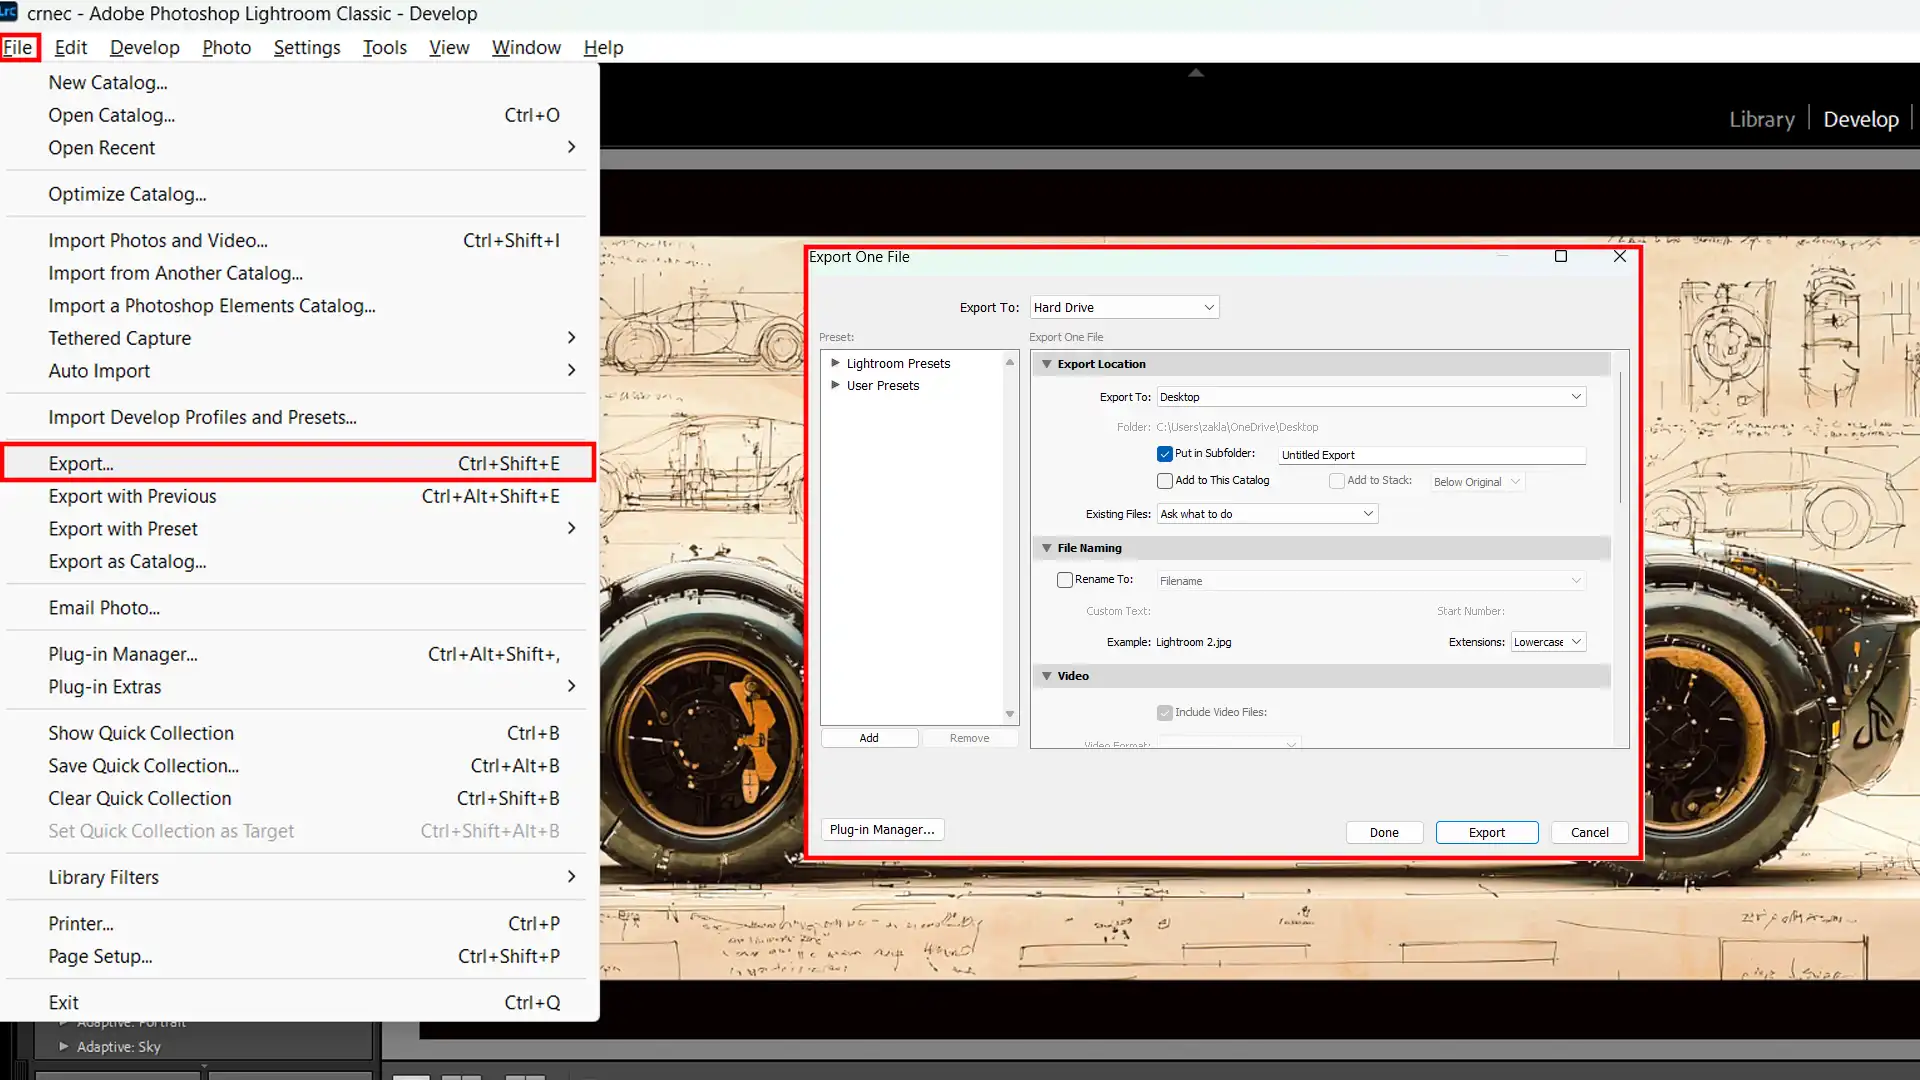
After editing, go to the File menu and select Export.
In the export settings, set the image format to JPEG and color space to sRGB to ensure compatibility with Instagram.
Adjust the quality slider to 76%. This is a sweet spot that balances image quality and file size.
Ensure the resolution is set to 72 pixels per inch and limit the file size to 1600 pixels on the longest edge.
Export the photo to your device and use the Instagram app to upload it.
How do you split photos in Lightroom for Instagram?
Steps to split a photo in Adobe Lightroom:
Use Lightroom, edit your photo to your liking and then go to the Print module.
Select the Custom Package in the Layout Style options.
Create multiple cells in the layout, each corresponding to a segment of your photo for the Instagram grid.
Drag your photo into each cell, adjusting to ensure each part aligns with the next for a seamless look.
Export each cell as a separate image, ensuring all have the same dimensions and aspect ratio.
How should I edit my photos for Instagram?
Follow these steps to edit your photos for Instagram:
Start by adjusting the exposure and contrast to ensure your photo pops.
Enhance colors with saturation and vibrance controls, but avoid over-saturating skin tones.
Use the sharpening tool sparingly to add clarity without making the photo look gritty.
Apply vignetting to focus attention on the central subjects if needed.
Finally, ensure your photo fits one of Instagram's preferred aspect ratios (square, 4:5, or 1.91:1).
$2,061.00Original price was: $2,061.00.$1,061.00Current price is: $1,061.00. 27584
Download Your Free Guide Now!
Discover the secrets of photography with our printable guide! Master essential techniques like aperture, shutter speed, and ISO to create stunning images. Get your free printable PDF now and start turning your snapshots into masterpieces!