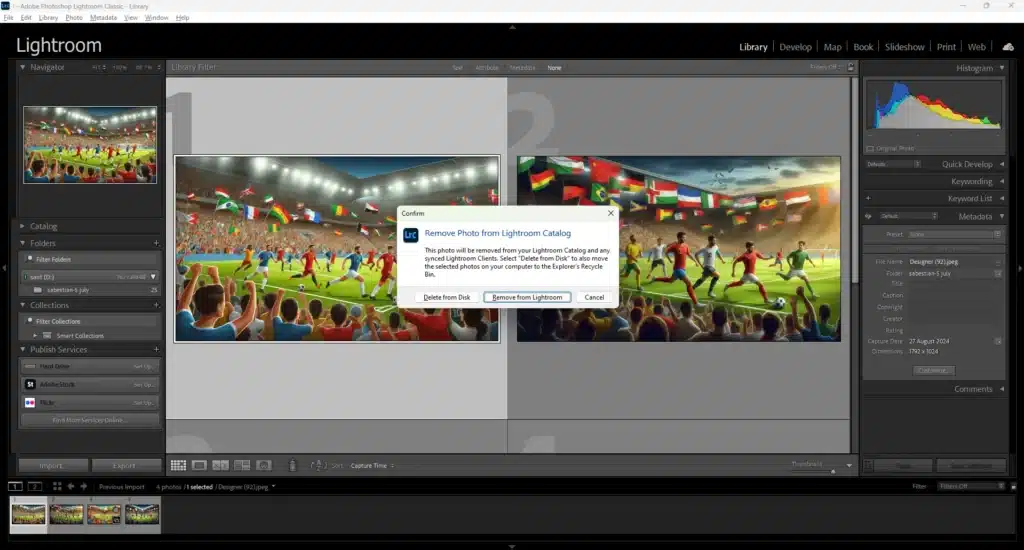
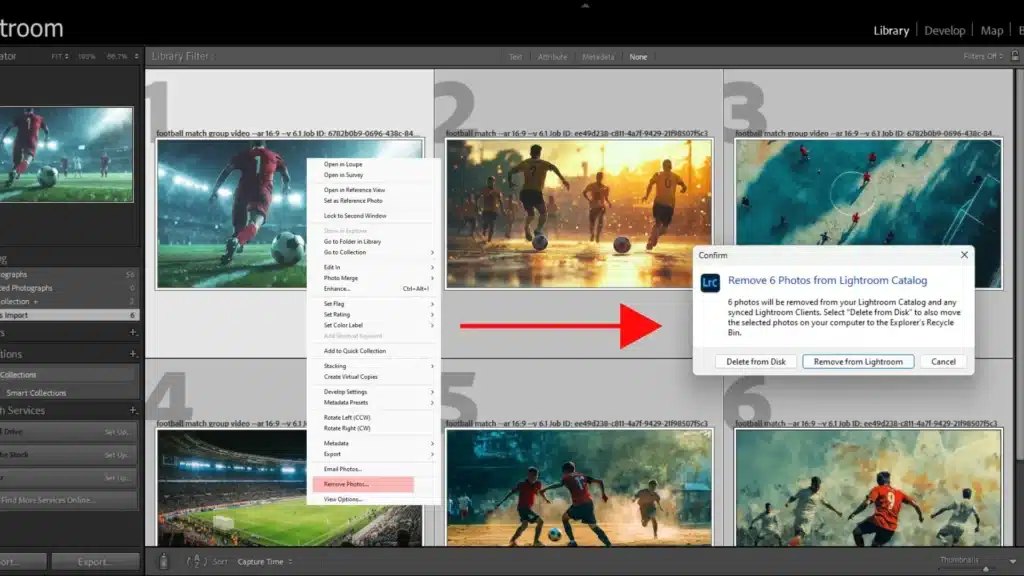
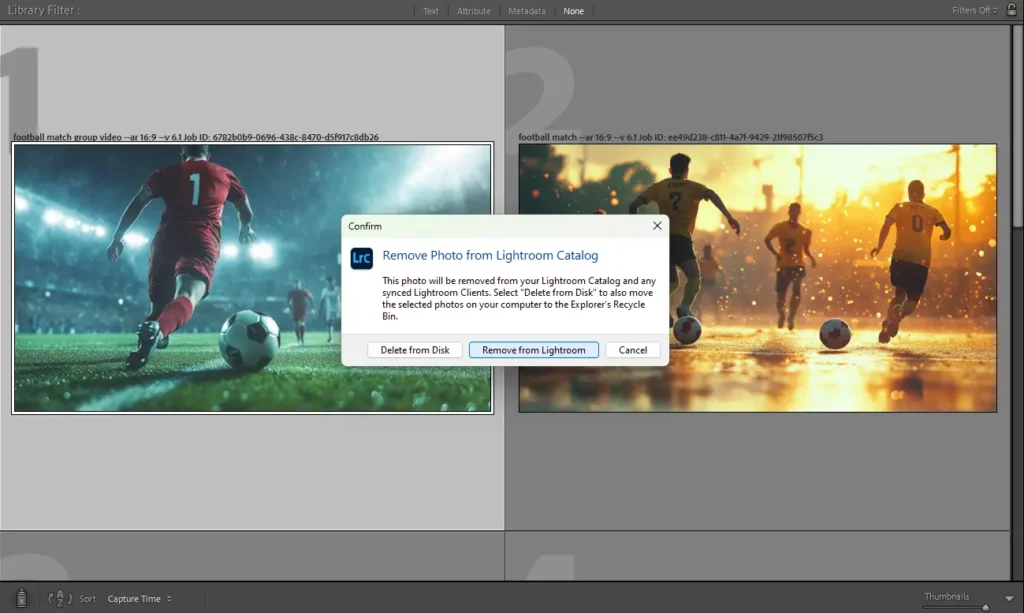
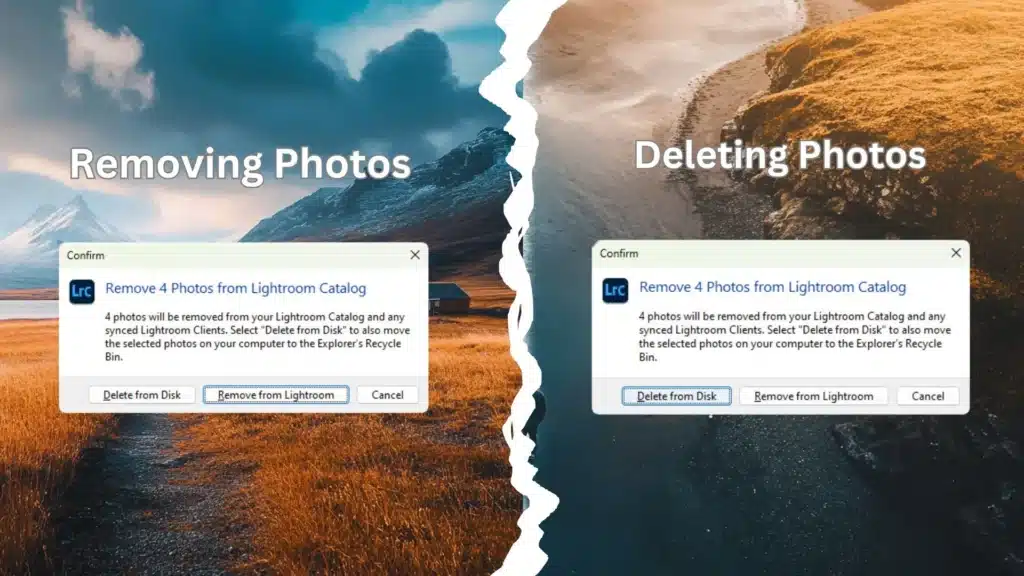
How to Delete Photos from Lightroom and Streamline Workflow

As a photographer, I know how quickly a Lightroom library can get out of hand. Fortunately, Lightroom offers essential tools that make deleting photos and maintaining an organized workspace a breeze. If you’re finding it tough to manage a cluttered catalog, you’re in the right place. In this quick guide, I’ll show you how to delete photos in Lightroom with ease, helping you keep your workspace organized and focused on the shots that matter.
Ready to streamline your photo management?
Let’s get started!

Table of Contents

How to Delete Photos from Lightroom: Open in Library Module

A screenshot of Adobe Lightroom Classic's Library Module displaying four selected images with metadata on the right panel and a catalog folder structure on the left panel.

Deleting images in Adobe Lightroom can be a crucial step in maintaining an organized and efficient workflow. Whether you want to remove clutter or make space for new images, understanding how to delete photos effectively is key. Below, I’ll walk you through the process of deleting one or more photos from the Library Module in Lightroom, ensuring you maintain control over what stays and what goes.

Steps to Delete Individual Photos

A screenshot of Adobe Lightroom Classic's Library Module displaying a confirmation dialog box for deleting a single selected photo with options to "Delete from Disk" or "Remove from Lightroom.

Navigate to the Library Module:

Start by opening Lightroom and switching to the Library Module. You can do this by pressing G for Grid view in lightroom, which provides a comprehensive overview of all your photos in the catalog.

Select the Photo Menu You Want to Delete:

Delete the Selected Photo(s):

A pop-up dialog box will appear, giving you two options:

Use Keyboard Shortcuts for Efficiency:

Batch Deleting Multiple Photos

A screenshot of Adobe Lightroom Classic's Library Module showing the process of batch deleting multiple selected photos, with the "Remove Photos" option highlighted and a confirmation dialog box asking to confirm deletion or removal.

If you need to delete various selected photos from photo menu, especially after a culling session:

Flag the Photos

While reviewing, press the X key to flag the photos you want to delete. A small black flag icon will appear on each flagged photo’s thumbnail.

Filter the Rejected Photos

In the Library Module, filter the view to show only the rejected photos by clicking on the flag icon in the filter bar.

Delete All Rejected Photos

Tips for Efficient Photo Deletion

A screenshot of Adobe Lightroom Classic's Library Module showing the process of deleting a single photo with a confirmation dialog box asking to either delete the photo from the disk or remove it from Lightroom.

By following these steps, you can keep your Lightroom catalog streamlined and efficient, which not only helps with organization but also improves performance.

How to Delete Photos from Lightroom: Remove photos from catalogs

A screenshot of Adobe Lightroom Classic's Library Module showing a grid of multiple selected photos with a confirmation dialog box asking to either delete the photos from the disk or remove them from Lightroom.

Managing your Lightroom catalog efficiently involves not just organizing and modifying photos but also knowing when and how to delete all the images you no longer need. Removing photographs from a Lightroom catalog is a straightforward process, but it’s essential to understand the implications of different deletion methods.

Steps to Remove Images from Lightroom Catalog

Open the Library Module

Begin by navigating in Lightroom, as this is where you can manage your catalogs most effectively.

Select the Image(s) You Wish to Delete:

Delete Images:

Batch Deleting Photos:

If you need to delete rejected photos, you can use batch selection methods:

Steps to Remove Images from Lightroom Catalog

Removing Photos from Collections

If your photo is part of a collection, removing it from the catalog will delete it from all associated collections. However, if you only remove it from a collection, it will remain in the catalog and on your disk.

Deleting a Catalog Entirely:

If you need to delete an entire catalog, first ensure that you no longer need any of the images or edits within it. To delete a catalog:

By understanding these methods, you can manage your Lightroom catalogs more effectively, ensuring that your workspace remains organized and that unnecessary files don’t take up valuable storage space.

How to Delete Photos from Lightroom: Understanding the Differences Between Removing and Deleting

A split-image comparison showing two dialog boxes from Adobe Lightroom Classic, highlighting the differences between removing photos from the catalog and deleting photos from the disk.

In Adobe Lightroom, managing your photo catalog efficiently requires a clear understanding of the options available for deleting images. Specifically, it’s crucial to grasp the differences between removing photos from Lightroom shortcuts and deleting them. Here’s a detailed comparison table that outlines the key differences between removing photos from Lightroom and deleting them:

Aspect Removing Photos Deleting Photos
Effect on Catalog 
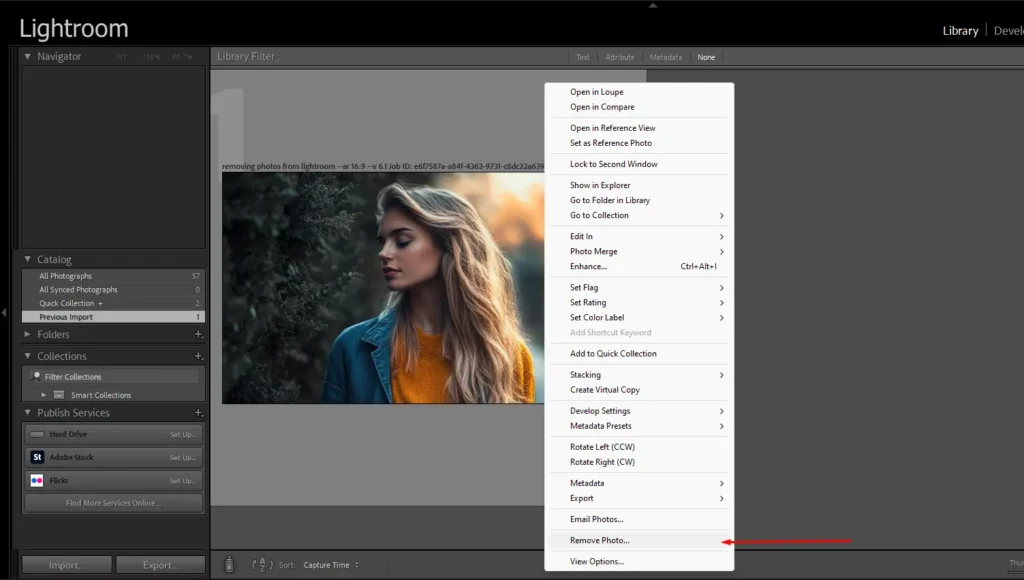
Removes the photo from the Lightroom catalog, breaking the link between Lightroom and the image file. Removes the photo from the catalog and all associated collections.
Effect on Hard Drive The original image file remains on your hard drive, unaffected. The image file is moved to the trash/recycle bin, freeing up disk space.
Undo Option Can be re-imported into Lightroom since the file is still on the hard drive. Cannot be undone after the trash/recycle bin is emptied; the file is permanently deleted.
Ideal Use Case When you want to clean up your Lightroom catalog without losing the actual files. When you need to permanently delete unwanted photos and free up disk space.
Impact on Disk Space No impact, as the files remain on your disk. Frees up disk space by removing the files completely from your system.
Accessibility The photo can be accessed again if re-imported into Lightroom. The photo is permanently inaccessible once deleted and the trash is emptied.
Common Scenarios Tidying up catalogs, maintaining backups of original files, temporarily removing unused photos. Permanently deleting blurry, duplicate, or unnecessary photos to save storage.

Let’s explain the differences in detail: 

What Happens When You Remove Images from Lightroom

Removing a photo from Lightroom means that the image is taken out of the Lightroom displays catalog, but the original file remains untouched on your hard drive. Essentially, you are breaking the link between Lightroom and the photo, but the file itself is still stored safely in its original location. This option is ideal if you want to declutter your Lightroom catalog without permanently losing the image.

Use Case:

When you want to tidy up your Lightroom workspace without permanently deleting files.

How to Remove:

What Happens When You Delete Rejected Photos from Disk

Delete a image from the disk is a more permanent action. When you select subject, Lightroom will remove the photo from the catalog and also move the original file to the trash or recycle bin on your computer. This action is irreversible once you empty the trash, so it’s crucial to ensure you no longer need the photo before choosing this option.

Use Case

  • When you need to free up disk space or permanently get rid of unwanted images.

How to Delete:

Select the photo(s) in the Library, press the Delete key or right-click and choose “Remove Photo,” then in the dialog box, select “Delete from Disk” to permanently delete the image.

Key Differences between Removing and Deleting

Practical Tips for Deciding When to Remove or Delete

Understanding these options helps you maintain an organized Lightroom catalog while ensuring that your storage space is managed effectively.

Frequently Asked Questions about How to Delete Photos from Lightroom

Photoshop-Masterclass-Advanced-Editing-Layer-Manipulation

How do I permanently delete photos from Lightroom?

To permanently eliminating images from Lightroom:

How do I delete multiple photos in Lightroom?

To delete photos in Lightroom:

For bulk deletion, especially after culling, consider using the Reject Flag system. Flag the photos you want to delete with X, filter to show only rejected photos, and then delete them all at once​.

Can I delete photos after uploading to Lightroom?

Yes, you can delete photos after uploading them to Lightroom. If you delete from Lightroom, you can choose to either remove them from the catalog (keeping the files on your hard drive) or permanently delete them from both Lightroom and your hard drive. For synced photos, deleting from one device removes them from all synced devices, but they remain recoverable in the “Deleted” album for 60 days. Just as using shortcuts in Photoshop can speed up your editing process, mastering Lightroom’s deletion options and shortcuts will help you manage your catalog more efficiently.

How do I clear storage in Lightroom?

To clear storage in Lightroom:

How do I delete unused photos in Lightroom?

To delete unused photos in Lightroom:

Conclusion: How to Delete Photos from Lightroom

A screenshot of Adobe Lightroom Classic's Library Module showing the process of removing a selected photo with the right-click context menu open and the "Remove Photo" option highlighted.

In my own experience, mastering photo management in Lightroom has been a game-changer. Early on, I hesitated to delete photos, but as my catalog grew, I realized the importance of keeping it organized. Understanding the difference between removing photos from Lightroom and permanently deleting them has helped me maintain an efficient workspace.

If you want to elevate your photo editing skills, I highly recommend our Photoshop course and Lightroom course.

If How to Delete Photos from Lightroom article has helped you, then Like and Share it with your friends

Facebook
Twitter
LinkedIn
Pinterest

Have a nice photoshoot!

Read more about: Photo Editing with Lightroom and Photoshop

Download Your Free Guide Now!

Discover the secrets of photography with our printable guide! Master essential techniques like aperture, shutter speed, and ISO to create stunning images. Get your free printable PDF now and start turning your snapshots into masterpieces!