How to Change the Color of a Shirt in Photoshop: Quick Guide
How to Change the Color of a Shirt in Photoshop: Quick Guide
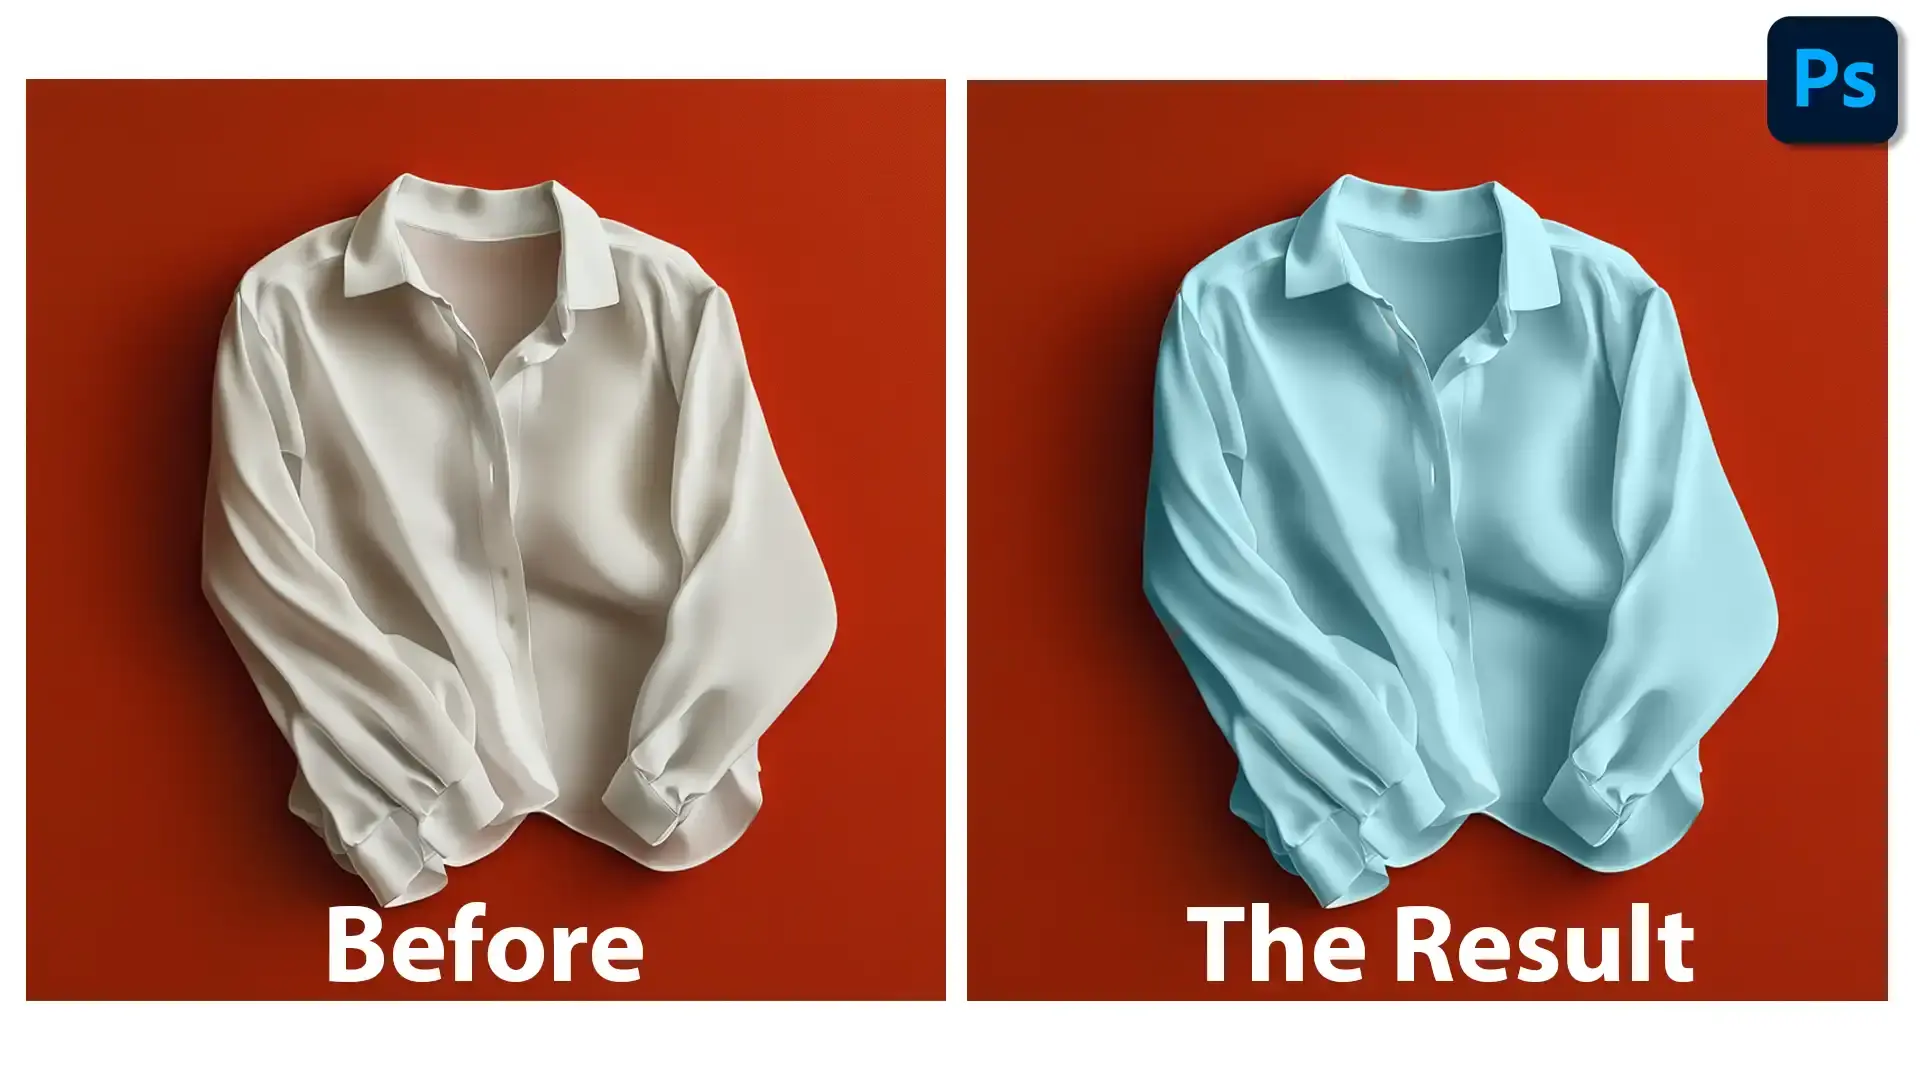
Have you ever wondered how to change the color of a shirt in Photoshop? Imagine having the power to transform the look of any shirt with just a few clicks!
Whether it’s for creating a cohesive wardrobe look, designing a unique outfit for a project, or simply experimenting with different hues, knowing how to change the color of a shirt can be an invaluable skill.
By the end of this article, you’ll be equipped with the knowledge to confidently alter shirt colors like a pro, making your creative vision a reality.
Dive in, and let’s unlock the colorful potential of your images together!
Table of Contents
How to Change the Color of a Shirt in Photoshop
How to change shirt color in Photoshop might seem daunting, but it’s pretty simple.
Setting Up Your Workspace
To begin, open Adobe Photoshop and load the image of the shirt you want to change.
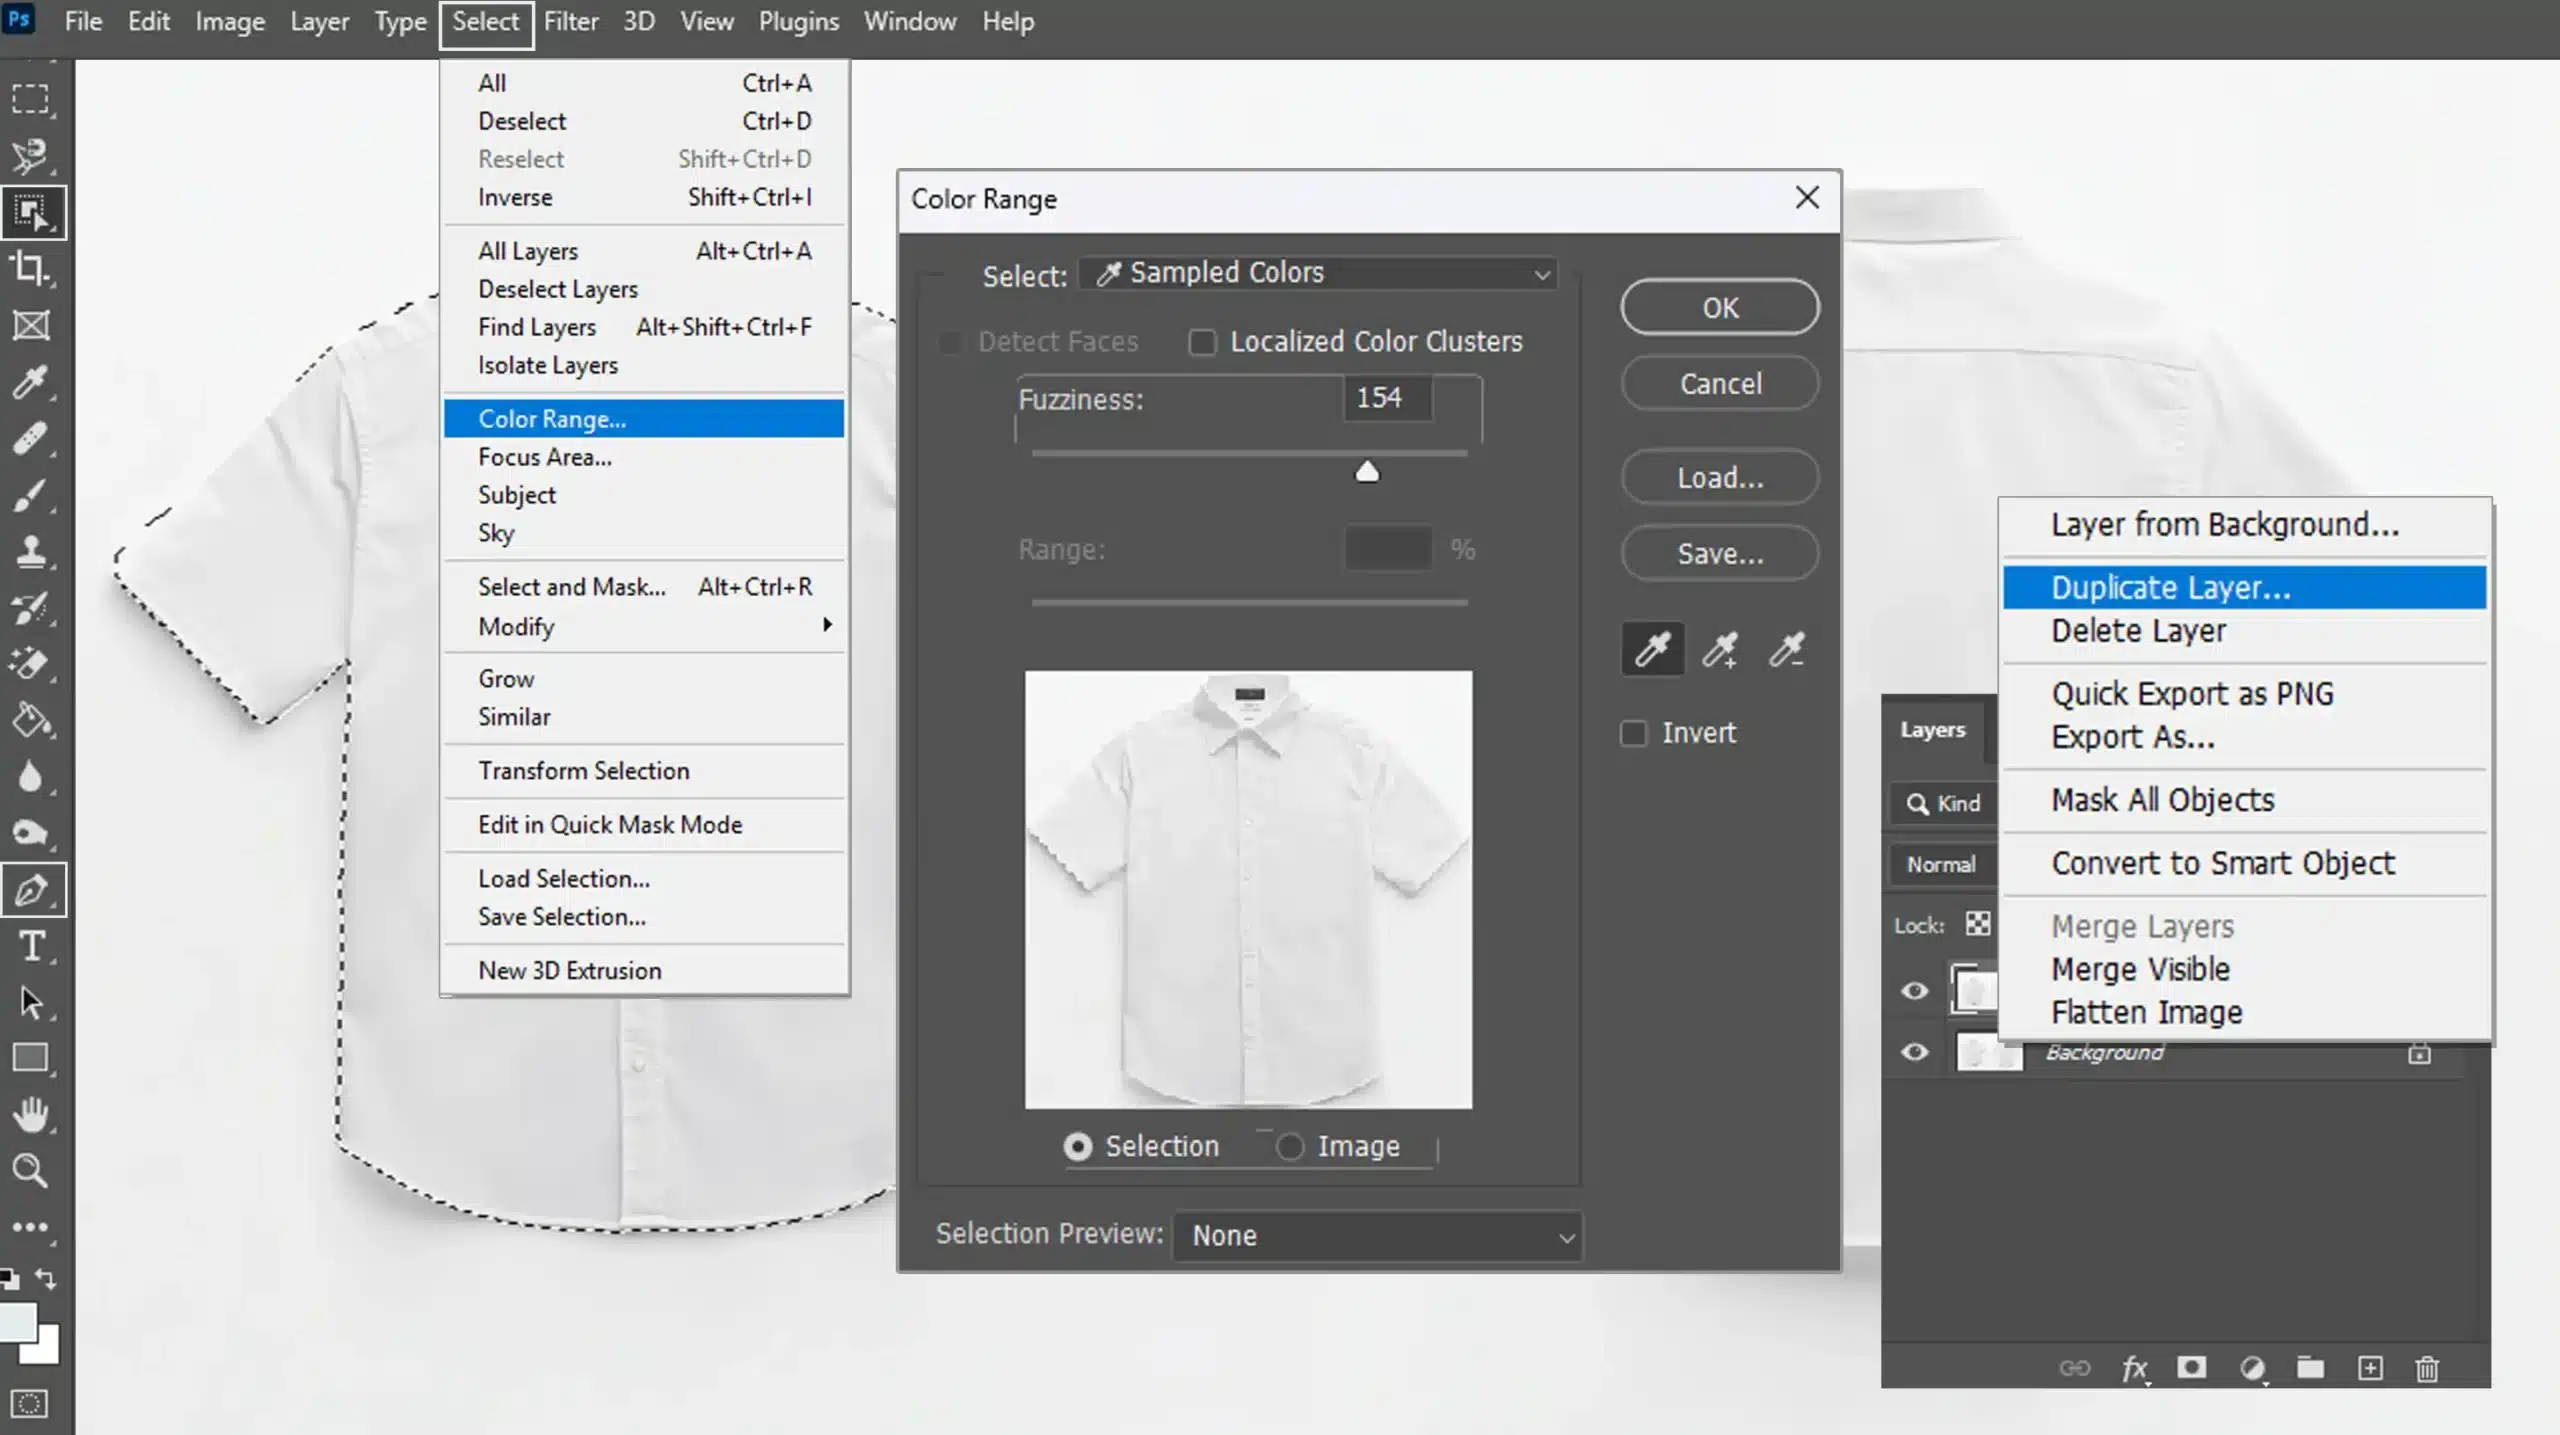
Use the “Layers Panel” to duplicate the layer, ensuring that changes don’t affect the original image.
Select your favorite selection tool, such as the pen tool or object selection tool, to outline the shirt. Make sure the selection only includes the shirt by refining edges or using the Color Range option to perfect it.
If you’re looking to learn more about these tools, there are many learn Photoshop resources available online.
Using Adjustment Layer for Shirt Color Change
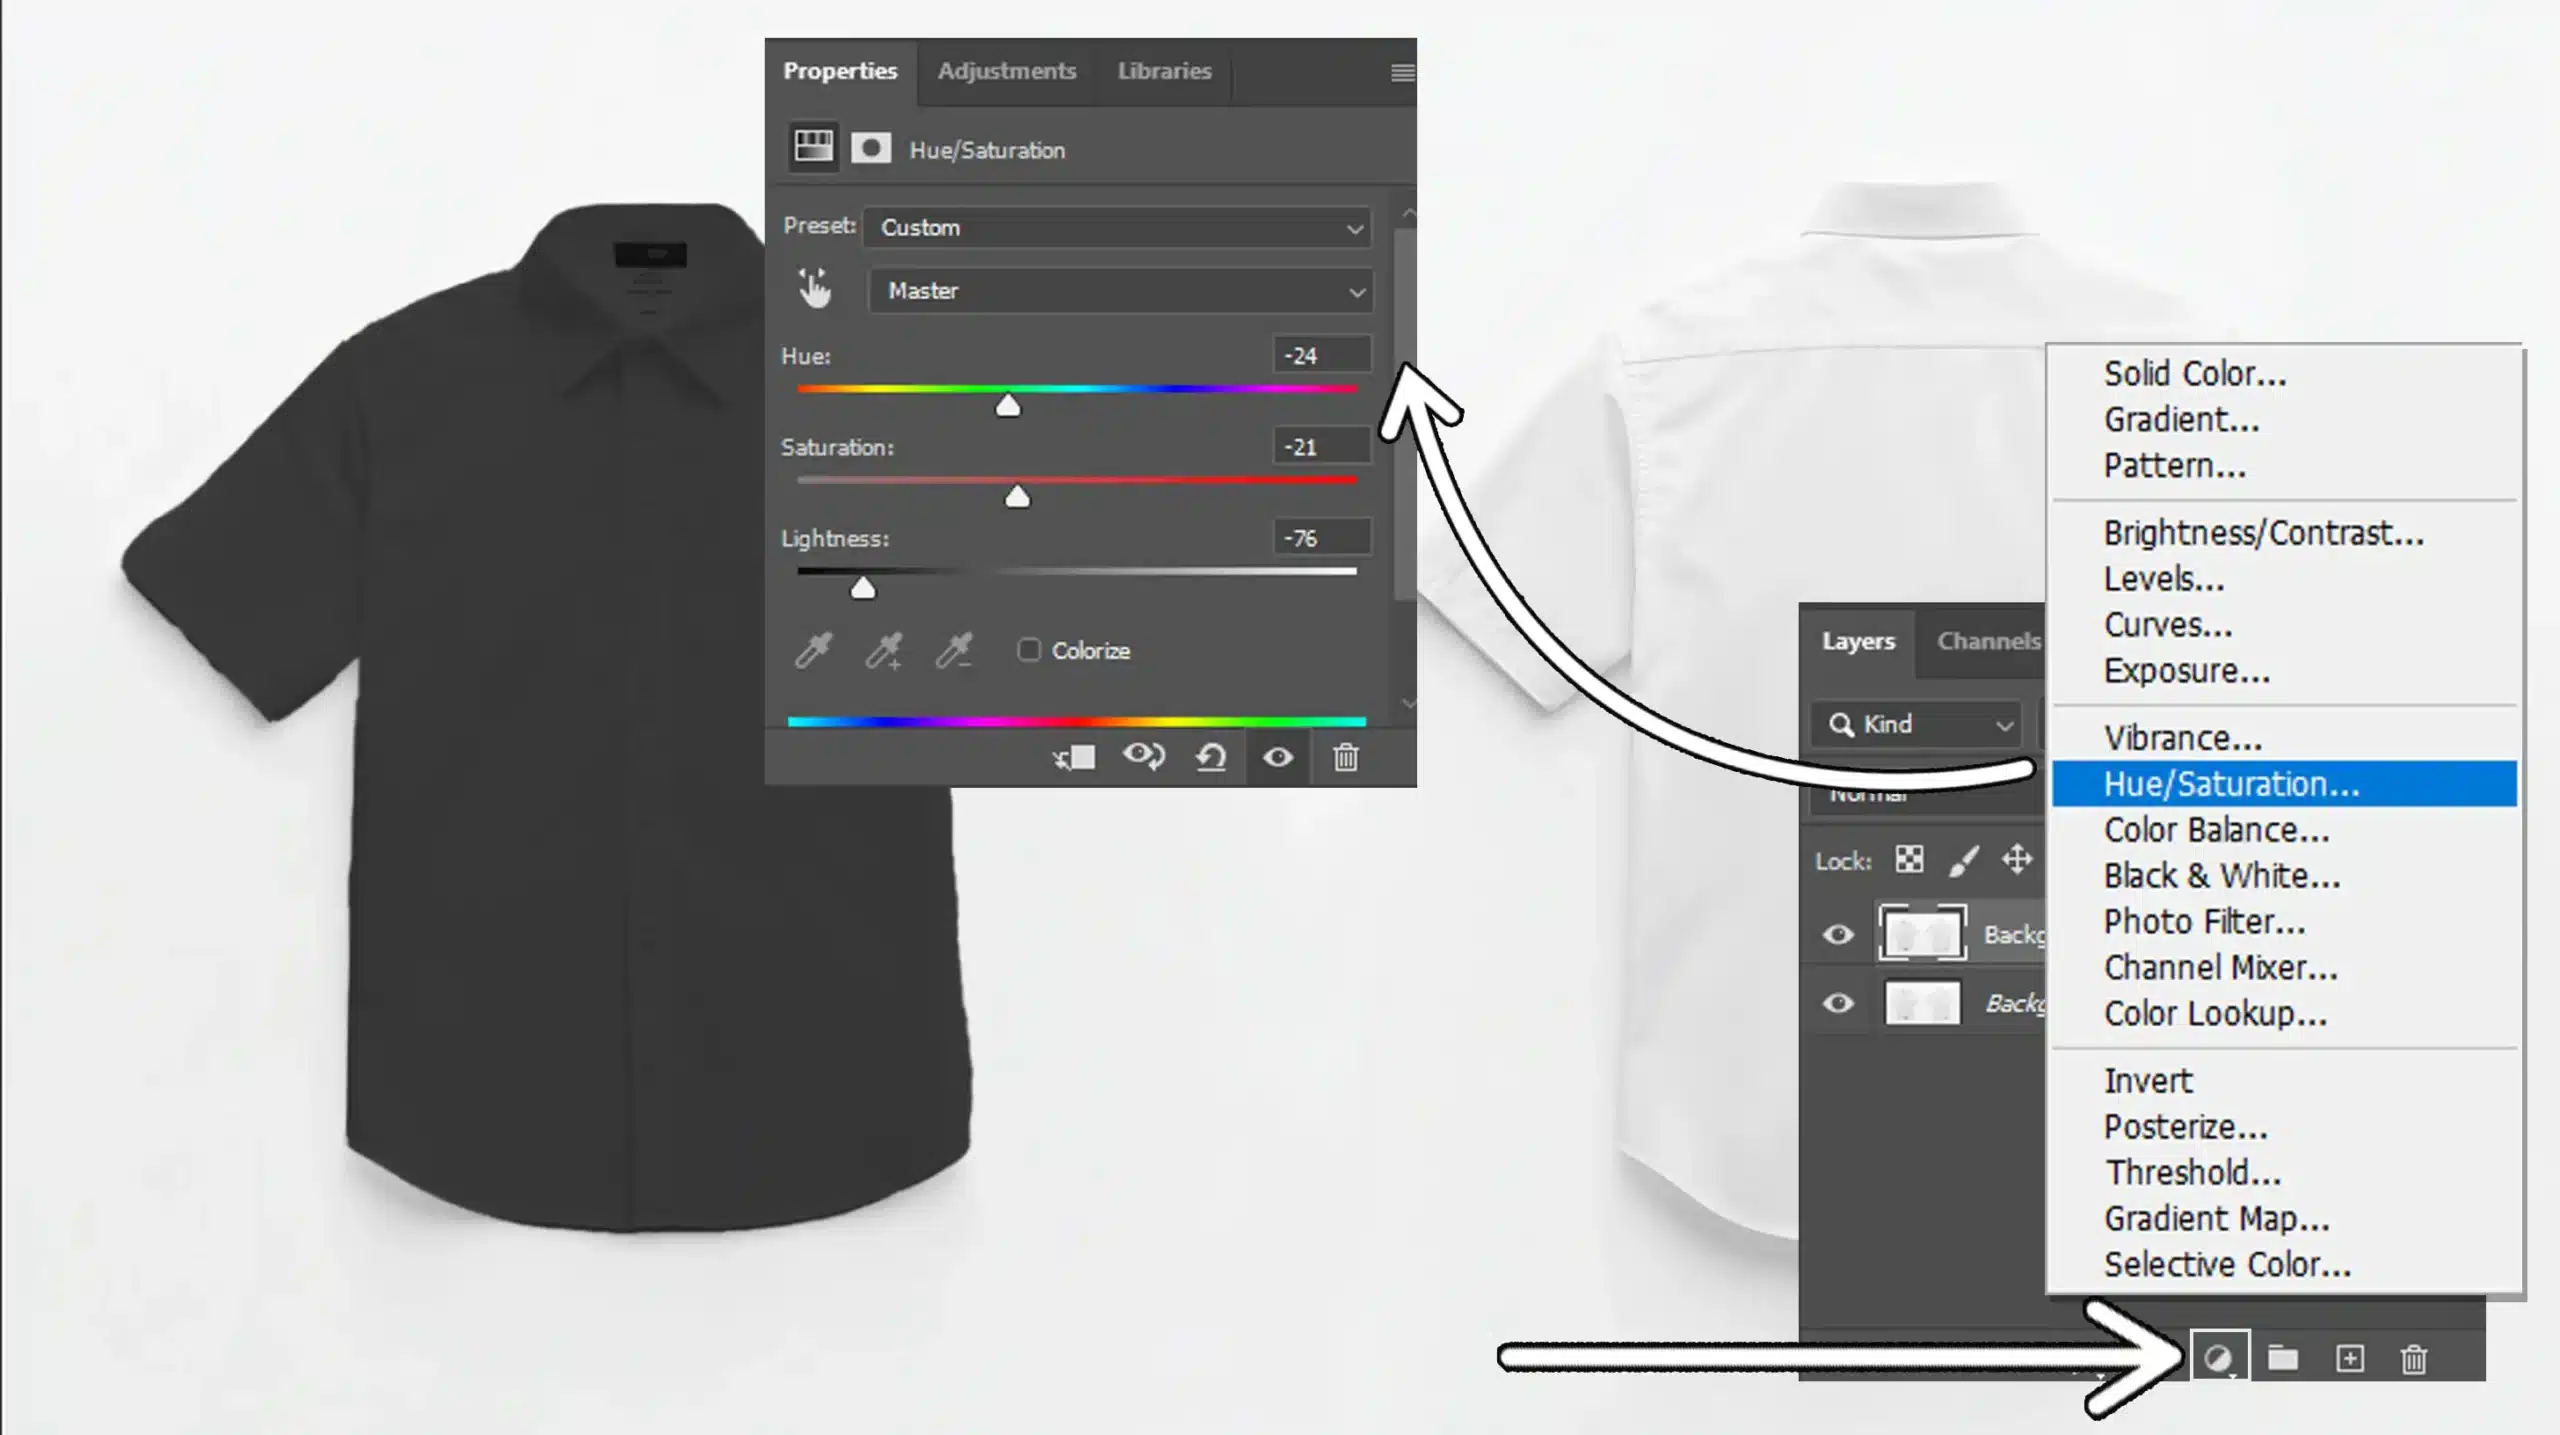
Create a new adjustment layer by selecting “Hue/Saturation” from the adjustment menu. Locate the “Hue Slider” in the adjustment layer panel to adjust the hue.
Adjust saturation and lightness sliders to match your vision of the shirt color in Photoshop.
Use the blend mode settings to enhance how the new color interacts with the image.
To further refine, enable a layer mask on the adjustment layer to selectively apply changes to the shirt color in Photoshop. Toggle between colors by clicking the Color Replacement Tool if further tweaks are required.
View your edited photo to ensure the preferred color appears natural. Once satisfied, save the photo with your modifications.
Pro Tip: Always rename layers; it keeps your workspace organized and makes it easier to perform a layer color swap when working through various Photoshop tutorials.
Using Layer Mask for Precision in Changing Shirt Color in Photoshop
Layer masks are a powerful tool in photo editing, enabling precise adjustments without altering the original image. When used with the color replacement tool, they allow for selective edits that enhance your composition.
Understanding Layer Mask
Layer masks in Photoshop allow us to control what part of a layer is visible or hidden. Imagine wanting to paint a photo but using an eraser that only removes parts you choose.
This tool provides precision, making elements like changing the shirt color in Photoshop, accurate and easy. An important tip for Photoshop beginners is always to create a duplicate layer before starting.
Step-by-Step Guide to Layer Mask
Follow these steps to effectively use a layer mask for changing the shirt color in Photoshop.
First, ensure your desired image is open in Adobe Photoshop.
Create a new layer over the photo of the shirt you intend to edit.
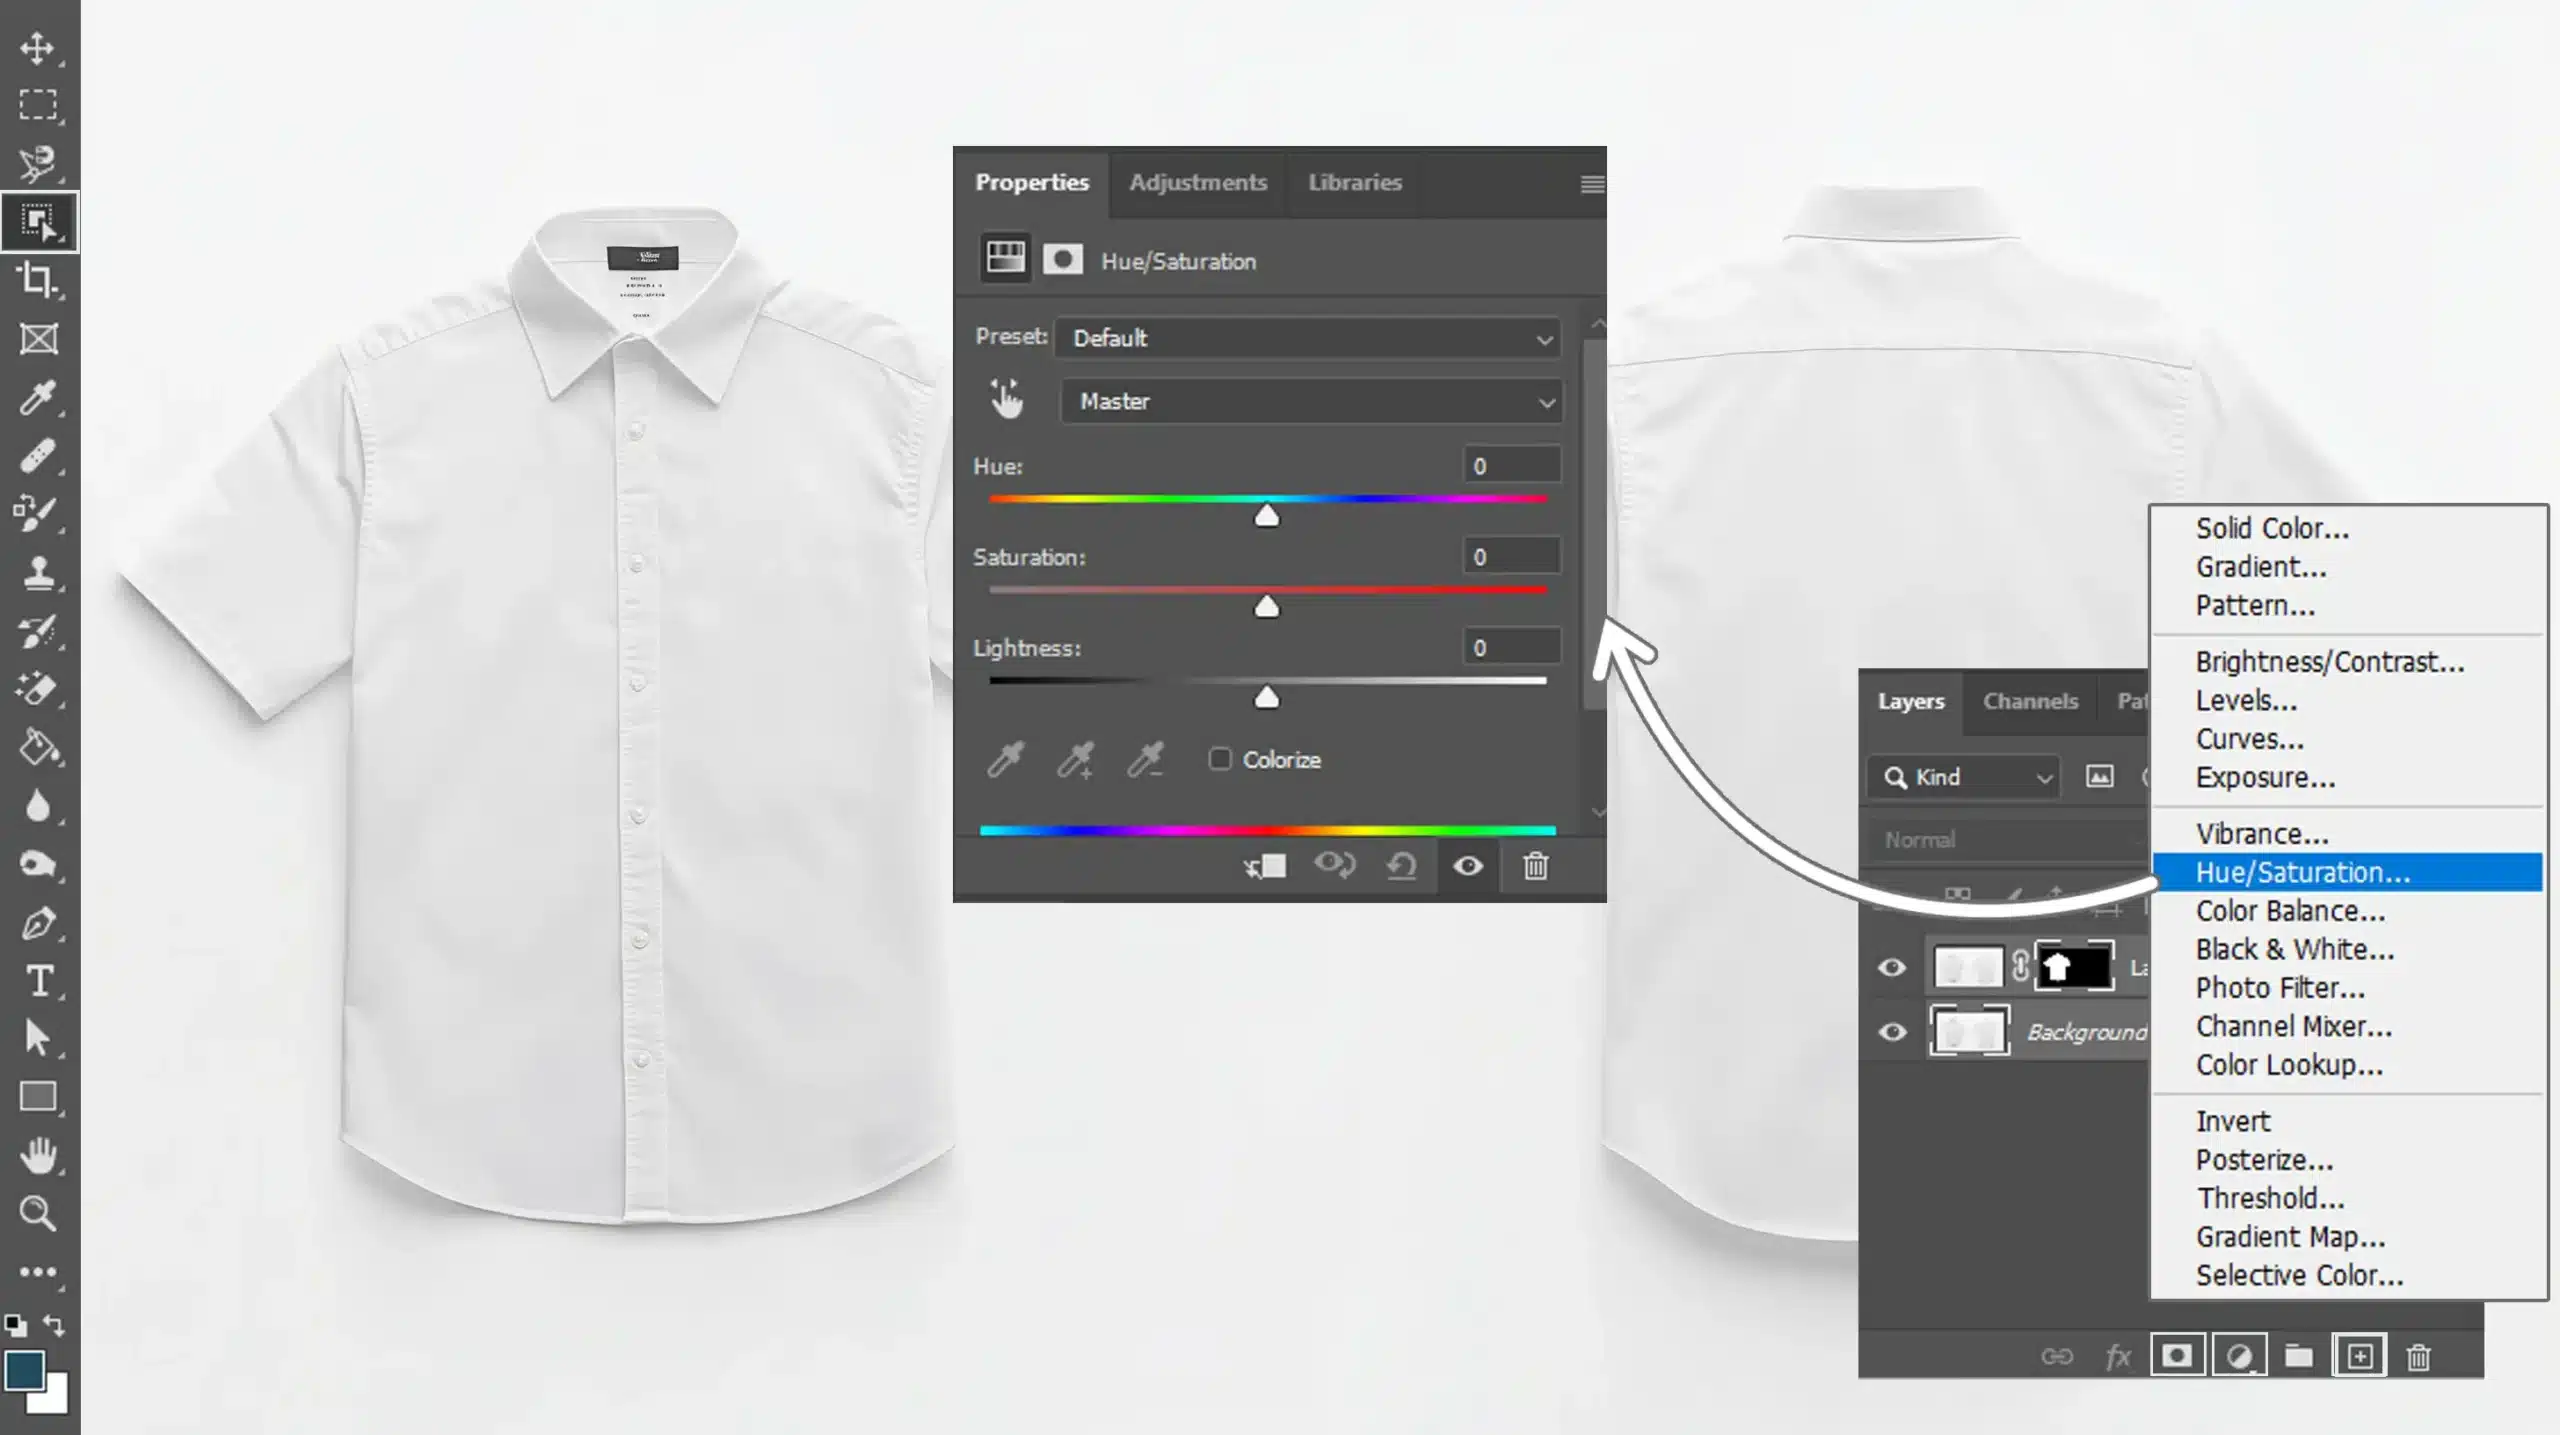
Use the object selection tool to carefully highlight the shirt and apply a layer mask to this selection.
With the layer mask active, navigate to image adjustments and add a hue saturation adjustment layer.
Move the hue slider to change the shirt color where necessary.
Common Mistakes and How to Avoid Them
Here are the main errors to avoid when changing colors in Photoshop, along with helpful tips.
Photoshop users often forget to check the layers panel when applying adjustments, resulting in unintended changes. Always double-check which layer is selected before making an adjustment.
Another frequent mistake is not refining mask edges, leaving harsh lines and an unnatural look. To resolve this, use the feather tool to blend mask edges seamlessly.
Furthermore, many individuals overlook the blend mode option, which affects how layers interact with each other.
Lastly, novice editors sometimes choose the wrong adjustment tools, impacting the final look of the shirt color in Photoshop. Always opt for specific tools like hue saturation to ensure precision.
Pro Tip: To achieve the best result, use the hue saturation adjustment layer after selecting a shirt. The quick selection tool in Photoshop can be very effective for this selection.
Doing this grants you comprehensive control over the color in Photoshop, from subtle tweaks to dramatic changes.
Exploring Different Shirt Colors
In photo editing, shirt color is important in conveying style and personality. With tools like Photoshop, you can tweak and transform colors with ease. Let’s explore how to effectively utilize these features in a straightforward manner.
Popular Color Choices
When it comes to shirts, people often lean towards the classic choices. The timeless appeal of a white shirt or a black shirt serves as the perfect canvas for any occasion. In Photoshop, changing a white or black shirt is straightforward:
Use the "replace color tool in Photoshop" to swap one color for another without diving into layers of complexity.
A "new layer" isn't always necessary, but it offers a safety net for those who fear irreversible edits.
Once you familiarize yourself with the "color range," no photo will ever feel limited.
Pro Tip: Before you start a session in Photoshop, save your original photo separately. This way, if all else fails, you have a backup.
Tips for Achieving the Desired Color
Achieving the desired color is often a straightforward task. The following table highlights fundamental tips that can help you navigate the editing process with ease.
By implementing these strategies, you can ensure that your color adjustments align with your creative vision.
Aspect
Overview
Fixing Overlapping Colors
Isolate the shirt and edit separately to manage its shade without interference from the background.
Using Color Balance
Adjust the reds, blues, and greens to eliminate unwanted tints and achieve the desired vibrant color.
Zooming In on Details
Always zoom in while editing clothing to ensure precision and avoid accidental edits on adjacent areas.
Using the Color Replacement Tool
Utilize the color replacement tool for a more straightforward approach to changing the shirt color accurately.
Matching Colors Accurately
Have you ever noticed that the color of your shirt in a photo doesn’t match reality? You’re not alone; many people experience this issue. Getting the shirt color accurate can be tricky.
However, mastering the basics of photo editing is easier than you might think. Let’s explore some practical methods to achieve the right color.
Fixing Overlapping Colors
It’s common for a shirt color to run into areas they shouldn’t. A helpful technique is to isolate the shirt and edit it separately from the rest of the clothing.
This way, you can manage its shade and prevent unwanted colors from affecting your project.
In Photoshop, use the Object Selection Tool to neatly pick your shirt, cutting out interference from the background. Remember, when adjusting, you want to focus solely on the shirt itself.
One sneaky tip is always zoom in when editing clothing items. Keeps the eyes sharp, reduces headaches, and prevents hangups with those pesky overlapping colors.
Using Color Balance
Now, let’s talk about fine-tuning with the color balance tool. This Photoshop feature helps to eliminate unwanted color tints that might give an unappealing look. Imagine changing your white shirt into a more vibrant shirt color.
By balancing the reds, blues, and greens, you can shift things around smoothly.
If your goal is to change shirt color and not have a technicolor disaster, hitting "Auto" first can save much effort.
Pro Tip: Always keep a backup copy before diving into changes.
Frequently Asked Questions (FAQs)
Can you change the color of clothes in Photoshop?
Yes, you can change the color of clothes in Photoshop using the Hue/Saturation adjustment layer.
First, select the area of the clothing using the Quick Selection Tool or Lasso Tool.
Next, create a new Hue/Saturation layer and adjust the color sliders until you achieve the target color.
How can I change the color of my shirt in a picture?
Open your image in Photoshop and select the shirt using a selection tool like the Magic Wand Tool.
Add a Hue/Saturation adjustment layer and play with the hue, saturation, and lightness sliders to change the shirt's color.
How to change shirt design in Photoshop?
To change a shirt design, first select the shirt area in the image.
You can use the Clone Stamp Tool or the Healing Brush Tool to adjust or hide the existing design.
Then, you can layer a new design by pasting it onto a new layer and adjusting it to fit the shirt.
How can I change the color of my clothes?
Select the clothing area in Photoshop with the appropriate tool, such as the Quick Selection Tool.
Create a new adjustment layer for Hue/Saturation and adjust the settings to get the new color you want.
Learning how to change the color of a shirt in Photoshop has been a game-changer for me. It has allowed me to experiment with different styles and color combinations without the need to actually buy new clothes, saving both time and money.
This technique has also been incredibly useful in my work, helping me to enhance photos with a professional touch.
If you’re looking to develop this valuable technique, I encourage you to check out my Photoshop Course and Lightroom course. These resources have significantly sharpened my editing abilities, and I believe they can do the same for you. Once you master how to change the color of a shirt in Photoshop, you’ll wonder how you ever edited without it.
For further improvements in your editing skills, consider exploring Adobe Photoshop and Adobe Lightroom, which offer powerful tools to elevate your projects!
If this article has helped you, then Like and Share it with your friends
$2,061.00Original price was: $2,061.00.$1,061.00Current price is: $1,061.00. 27584
Download Your Free Guide Now!
Discover the secrets of photography with our printable guide! Master essential techniques like aperture, shutter speed, and ISO to create stunning images. Get your free printable PDF now and start turning your snapshots into masterpieces!