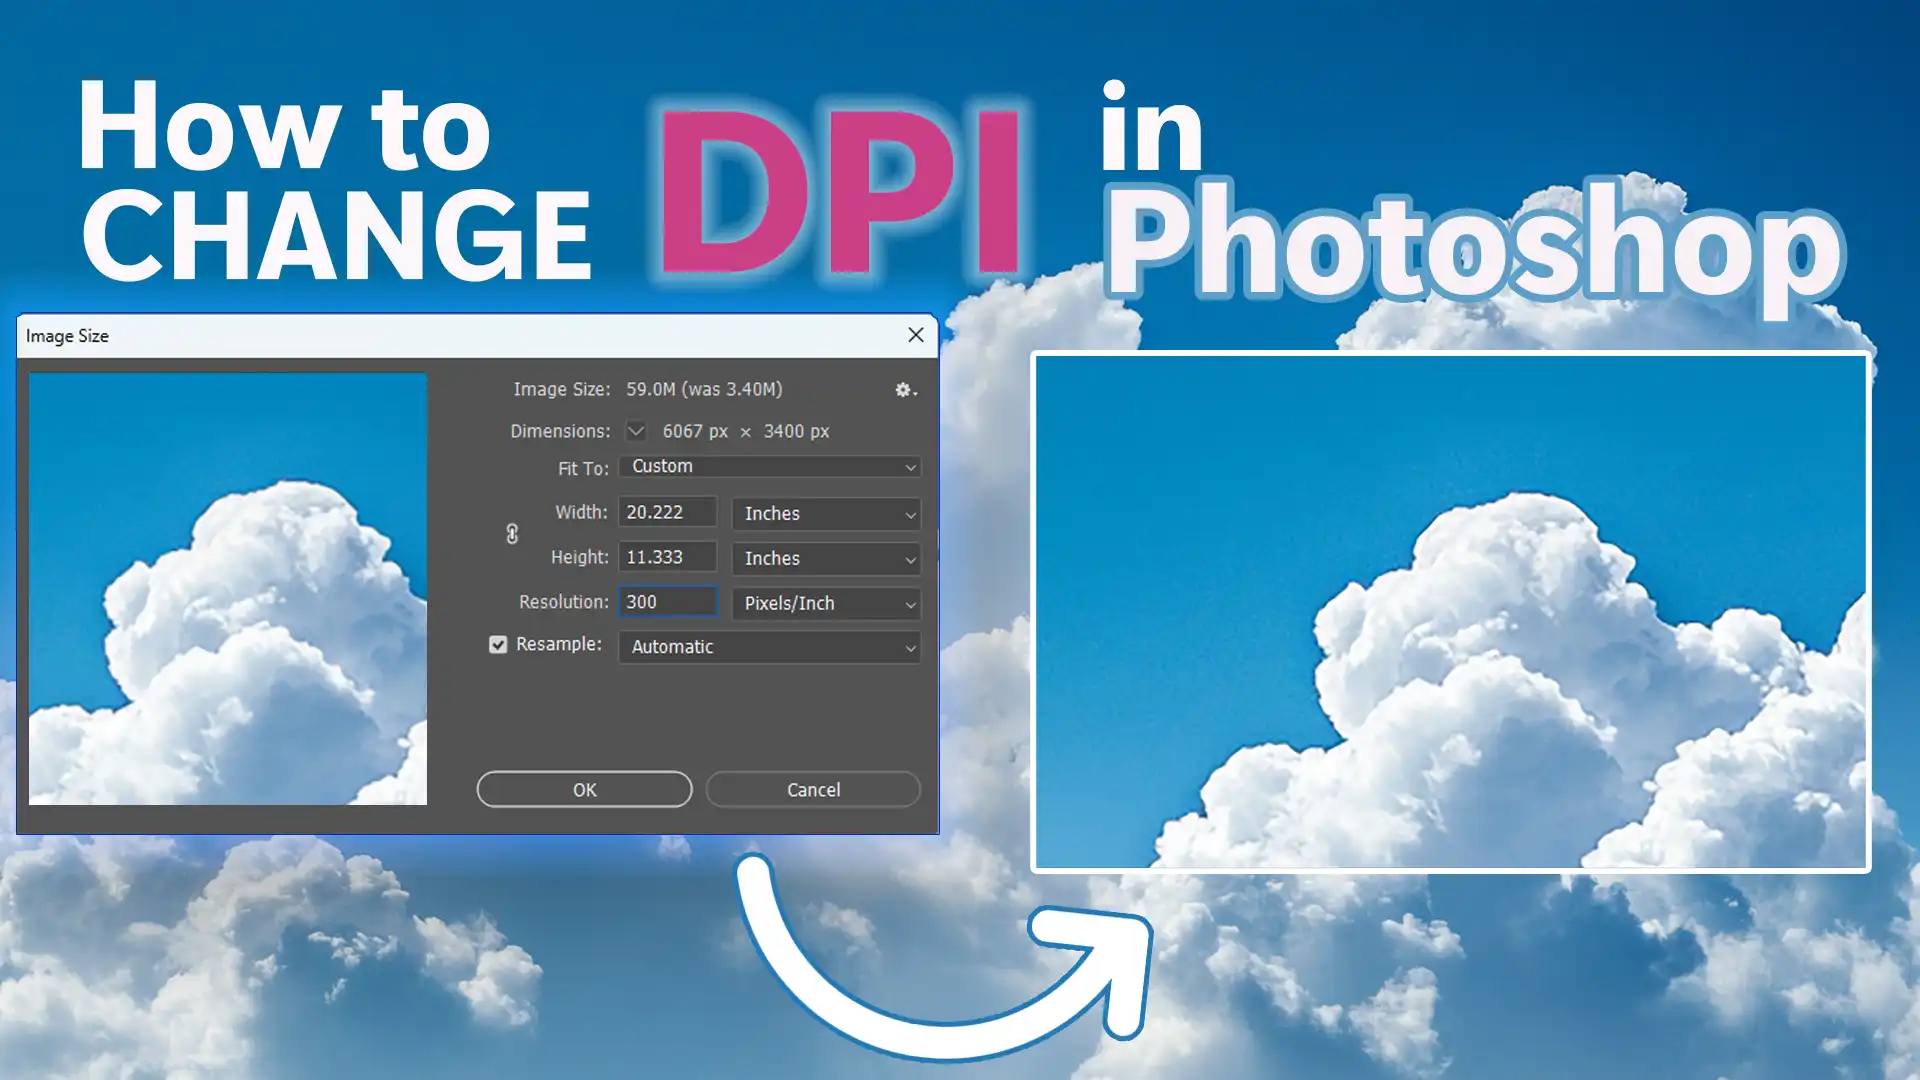
If you’ve ever wondered how to change DPI in Photoshop, you’re in the right place. With a few simple steps, you can transform your digital images into high-resolution prints that stand out.
In this guide, I’ll show you exactly how to adjust DPI in Photoshop, ensuring your photos look sharp and professional.
Whether you’re a novice or someone with some experience, understanding this process is important for achieving the best results.
So, let’s dive in and explore how you can enhance your images with just a few tweaks.
Table of Contents
Understanding DPI, How to Change DPI in Photoshop, and Its Importance
Understanding DPI resolution is important for both a printed image and a digital image. DPI, or dots per inch, determines the quality and clarity of an image when printed or viewed on a screen. A proper DPI resolution helps maintain sharpness and detail in any type of image.
What is DPI?
DPI stands for “dots per inch.” It’s a measure of the resolution of a printed image. A higher DPI means more dots and finer detail in the print. When you work with digital images, understanding DPI is important. It dictates how your image will look when printed.
Why DPI Matters in Digital Images
Knowing DPI in Photoshop helps produce high-quality images. If you want to print your image larger, you need a higher DPI.
Lower DPI results in blurry images that appear pixelated and blurry. For high-quality prints, 300 DPI is standard. Always check the image resolution before printing.
DPI vs PPI: What's the Difference?
DPI refers to printed dots, while PPI talks about pixels on a screen. Convert DPI to adjust print size without affecting picture resolution or adding pixels unnecessarily.
Understanding the difference ensures proper image dimensions when printing. Professional printers use DPI to describe print resolution. Digital screens use PPI for image clarity.
How to Change DPI in Photoshop: Quick Steps for Resolution Adjustment
To easily improve the resolution of your image for print or web, follow these quick steps on how to change DPI in Photoshop. This guide will help you adjust the DPI settings for optimal image quality.
- Open Photoshop and select your image.
- Go to the 'Image' menu and choose 'Image Size.'
- In the dialog box, set the desired DPI resolution.
- If necessary, check 'Resample Image' to adjust the existing pixels.
- Click 'OK' to apply the changes.
Pro Tip: For more advanced editing techniques, consider learning about Photoshop shortcuts or exploring the difference between Photoshop and Lightroom to optimize your workflow.
How to Change DPI in Photoshop
To change the DPI in Photoshop, you’ll need to adjust some settings within the program. This process involves accessing the dialog box where you can update the image resolution to meet your specific needs. Follow the steps below for a quick guide on how to do this.
Step-by-Step Guide to Changing DPI in Photoshop
Learning how to change DPI in Photoshop can improve the quality of your printed images. “DPI” stands for “dots per inch,” and it determines the resolution of your image for printing purposes.
Follow these steps to change the DPI and ensure high-quality prints:
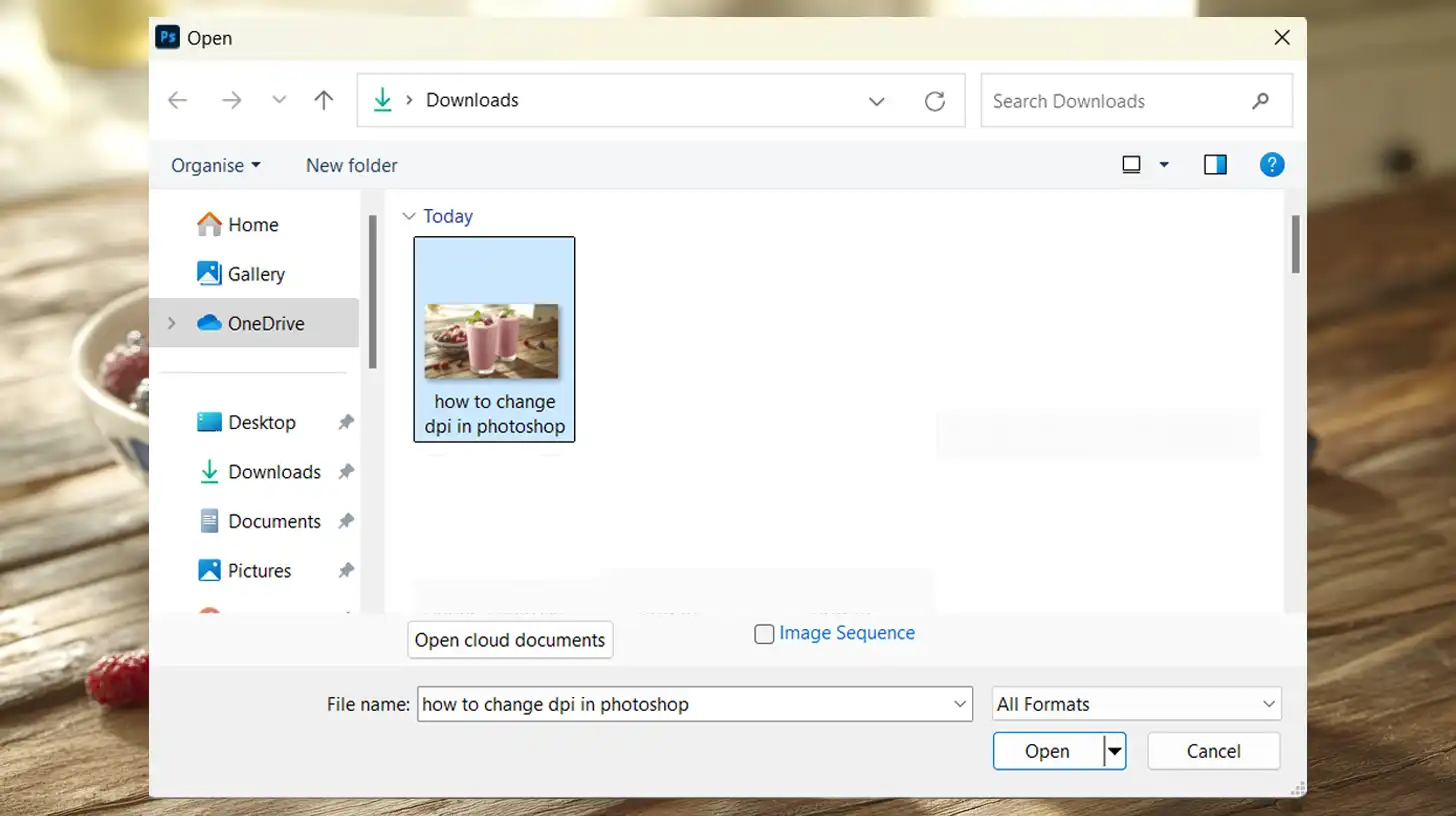
Step 1: Open you Image
Open your image in Photoshop.
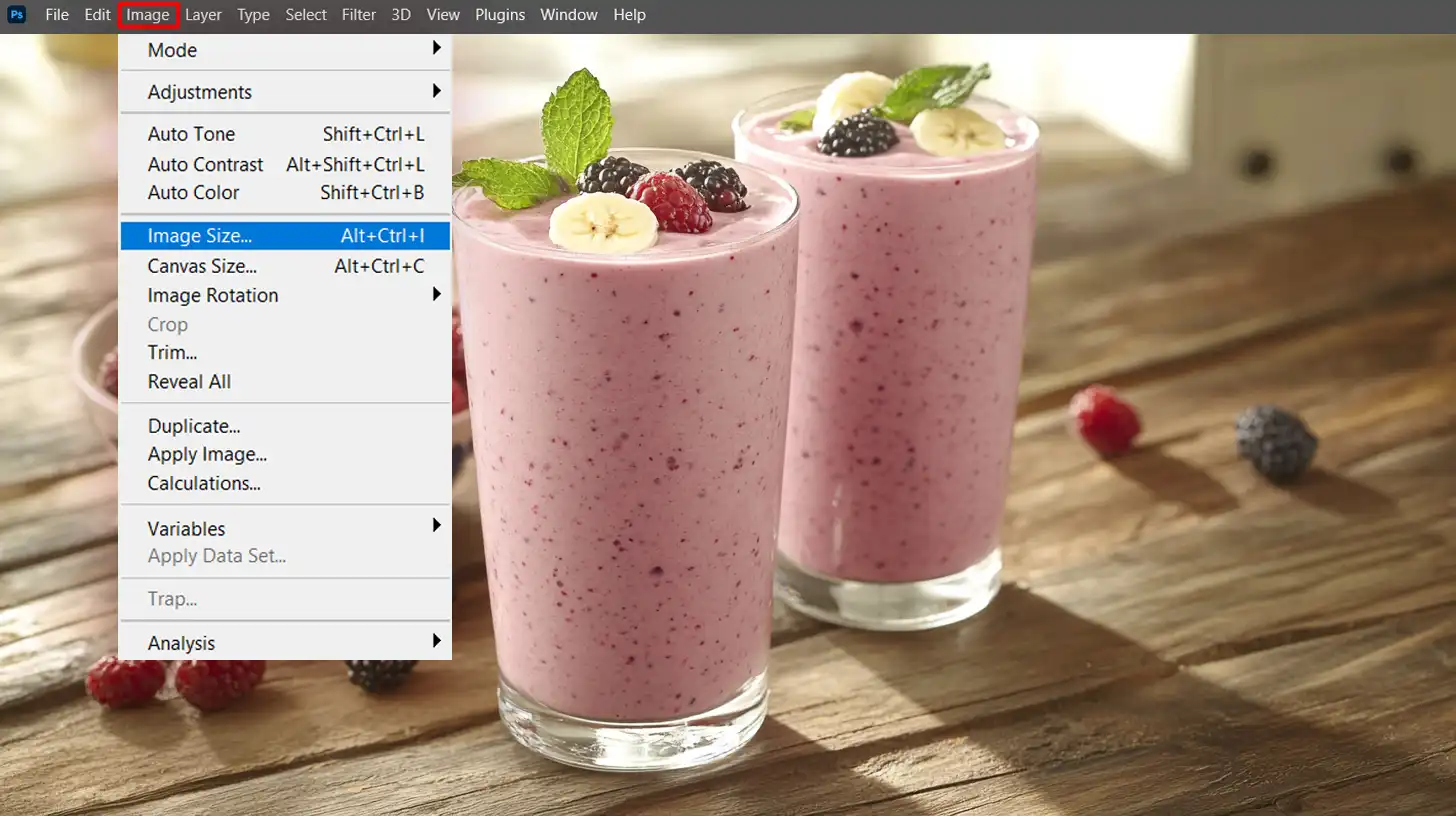
Step 2: Select Image Size
Click on ‘Image‘ from the top menu. Then select ‘Image Size‘ from the drop-down menu. A window will pop up showing various settings. Look for the ‘Resolution‘ box, which typically shows the current DPI.
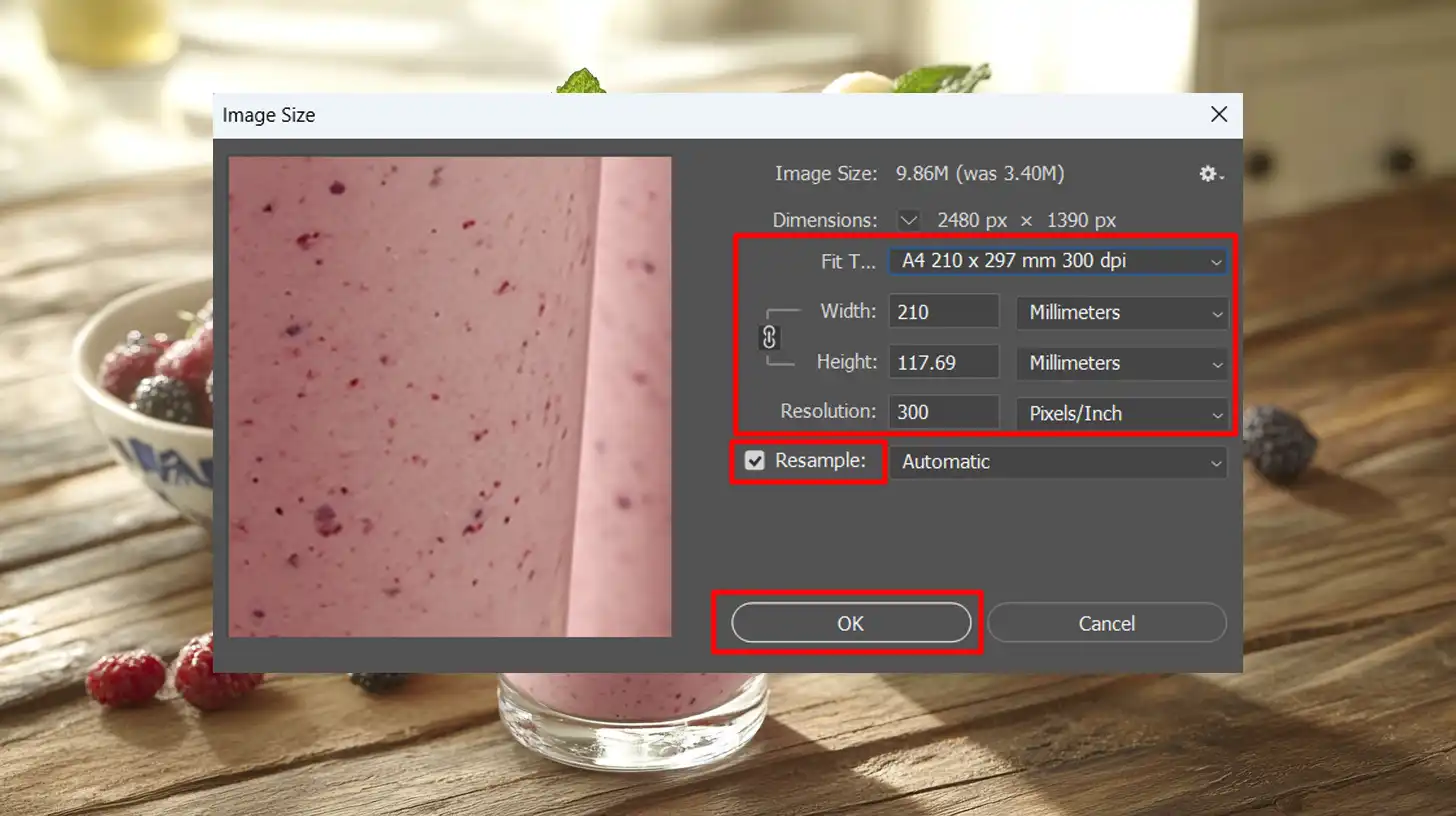
Step 3: Image Size Dialog Box and DPI values
Look for the ‘Resolution‘ box, which typically shows the current DPI. Enter your desired DPI value. For instance, 300 DPI can be used for a standard high-definition photo.
Optionally, check ‘Resample Image‘ if you need to adjust the image dimensions along with the DPI. Click ‘OK‘ to apply changes.
Remember to save your changes by going to ‘File‘ > ‘Save As‘. This ensures you do not overwrite the original image.
Adjusting Image Size and Resolution
Changing DPI affects both the image size and resolution. High DPI means more physical dots per inch, resulting in better print quality. Conversely, low DPI could result in a blurry, low-resolution image, especially when enlarged.
The relationship between image size, resolution, and pixel dimensions is critical. By increasing the DPI, you will have more pixels per inch, enhancing overall picture resolution.
Maintaining Image Quality
Maintaining image quality when adjusting DPI in Photoshop is important. Ensure you preserve image details by using ‘Resample Image’ carefully. This feature allows you to change the number of pixels without compromising image quality.
Common Mistakes to Avoid When Changing DPI in Photoshop
Changing dots per inch in Photoshop may seem straightforward, but there are common pitfalls:
- Avoid using an excessively high DPI for images that don’t require it; this unnecessarily increases file size.
- Do not uncheck 'Resample Image' if you wish to maintain proportions.
- Always preview your adjustments. Blurry prints often result from failing to check the final image resolution.
Pro Tip: To master image quality, especially when considering high resolution vs web size, use the ‘Choose Preserve Details‘ option while resampling. This helps to keep the image clear and sharp for both print and online use.
Alongside this, make use of essential tools in Photoshop like the Zoom Tool for closer inspection, and the Hand Tool for easy navigation across the image, ensuring every adjustment maintains high quality.
Image Resolution and Quality: How to Change DPI in Photoshop
Image resolution and quality play a big role in how a printed image looks. The resolution directly affects the print size and how sharp or detailed the final result will appear. Understanding how this works can help improve your prints.
Understanding Image Resolution
Image resolution refers to the amount of detail an image holds. You measure it in dots per inch (dpi). A higher resolution means more detail, important for high-definition images.
DPI Resolution
Dots per inch (dpi) is the number of ink dots a printer uses to produce an image. For digital images, it translates to the number of pixels per inch.
300 DPI
The standard for dpi in high-quality printed images is 300 dpi. It ensures the print images are clear and sharp.
Factors Affecting Image Quality
Several elements can either improve or deteriorate the quality of an image.
Original Resolution
Starting with a higher resolution image leads to better results when downsizing. Low-resolution images may appear blurry if enlarged.
Compression
File compression reduces file size but can affect visual clarity. Always choose the right balance between file size and quality to achieve optimal results.
Optimizing Images for Print and Web
To ensure your images look their best in print and online, it’s important to optimize them for both mediums. Learning how to change DPI in Photoshop is a simple way to adjust image resolution for high-quality results.
Changing DPI in Photoshop
To change dpi in Photoshop:
- Open your image.
- Click on 'Image' in the top menu.
- Select 'Image Size'.
- Enter the desired dpi resolution.
This will ensure high-definition photos for printing.
Adjusting Image Size
When adjusting the image size, be mindful of maintaining the aspect ratio to avoid distortion. Checking ‘Resample Image‘ can help preserve the quality when resizing.
Print and Digital Differences
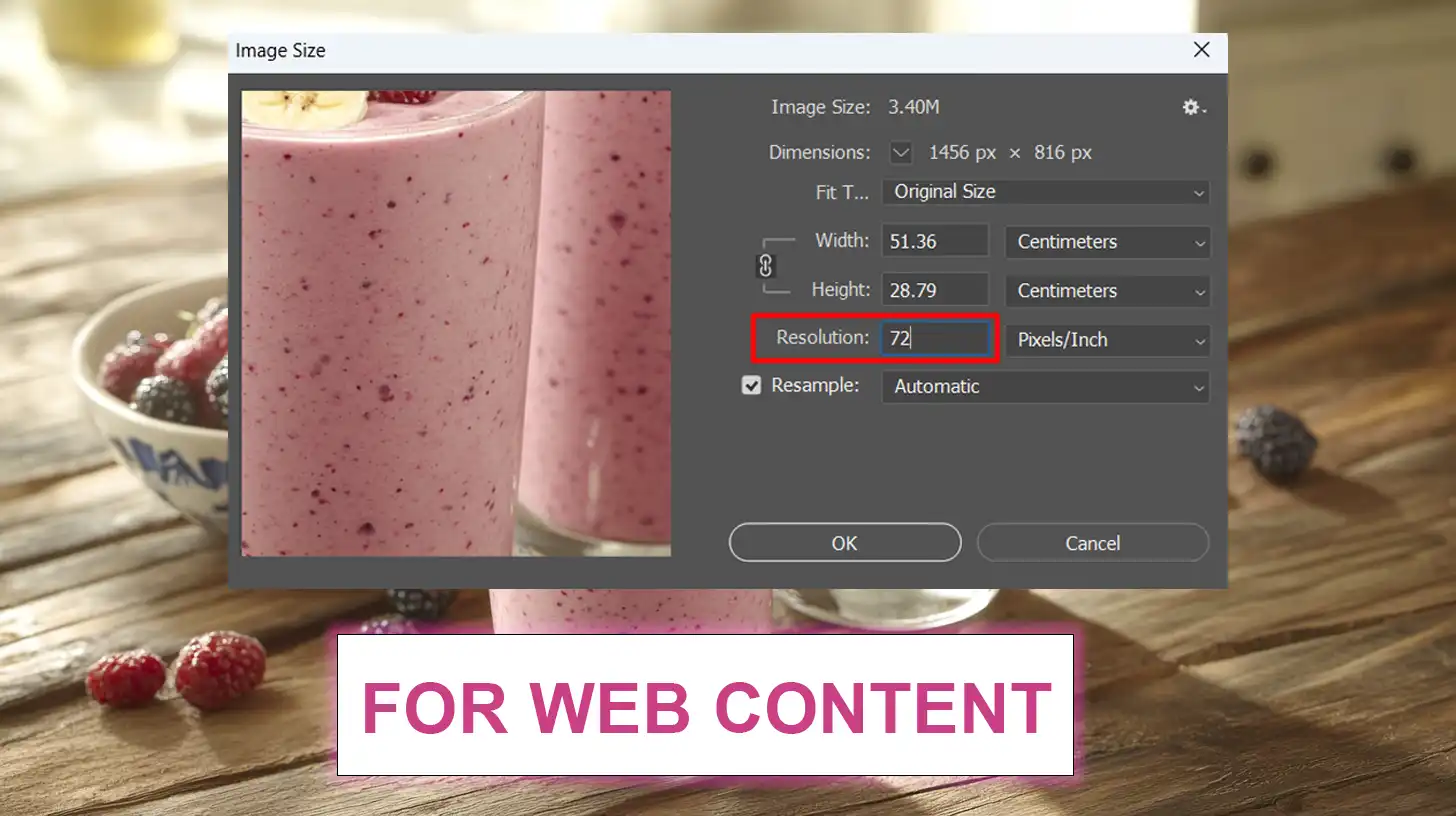
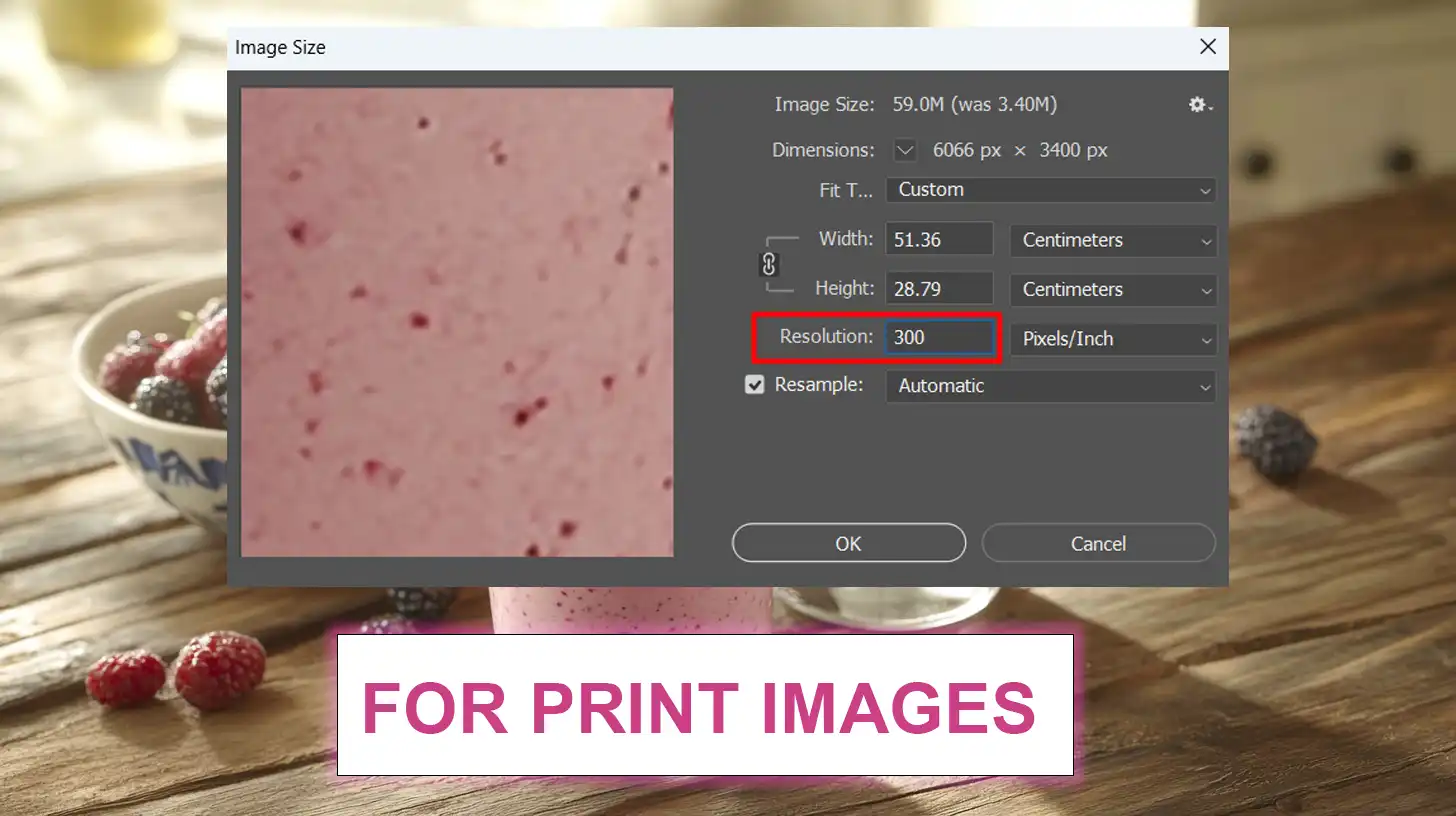
Printed documents require higher resolution compared to web images. To optimize web image quality, 72 dpi is often adequate, while print images benefit from 300 dpi or higher.
Optimizing for Web
Use tools for web optimization to help your images load faster without significantly compromising quality. Choose the appropriate format like JPEG for photographs and PNG for graphics.
Pro Tip: When changing DPI, always start with the highest available resolution image. Upscaling a low-resolution image often leads to poor results.
Remember that the best resolution for Photoshop depends on your project’s purpose: 300 dpi is ideal for a printed document, while 72 dpi works for web content.
Digital Image Best Practices
When working with a digital image, enhancing its quality involves using various Photoshop tools and settings. Adjustments to brightness, sharpness, print size, and even learning how to change DPI in Photoshop can be made through a dialog box, improving the overall look of your image.
Tips for Enhancing Digital Images
When working to improve the quality of a digital image, small adjustments can make a big difference. From learning how to change DPI in Photoshop to adding sharpness, the right techniques can help your images stand out and look their best.
Here’s a quick overview of the best practices for enhancing digital images. From starting with a high-resolution photo to choosing the right file format and organizing your photos efficiently, these tips will help you improve image quality and streamline your editing process
| Aspect | Overview |
|---|---|
| Start with a High-Resolution Photo | Ensure the image resolution is at least 300 dpi for high-definition. Work with the highest-resolution image available to avoid blurriness when enlarged. |
| Adjust Brightness and Contrast | Tweak brightness, contrast, and saturation carefully for a natural look. Small adjustments can enhance the image without losing its original appeal. |
| Add Sharpness | Improving sharpness adds detail. Save the original before making changes and compare before and after to ensure enhancement without overpowering the photo. |
| Choosing the Right File Format | Select file formats based on needs: JPEGs for web, PNGs for transparency, TIFFs for print quality, and RAW for detailed image adjustments. |
| Storing and Managing Digital Images | Organize photos in folders by event or date. Back up regularly, use tags for easy search, and delete duplicates or low-quality shots to save space. |
Start with a High-Resolution Photo
Click the “Image Size” option from the drop-down menu in Photoshop. Ensure the resolution is at least 300 dpi to produce high-definition images. Always work with the highest-resolution image available, as low-resolution images blur when enlarged.
Adjust Brightness and Contrast
Small tweaks can make a big difference. For lush colors, tweak the saturation and color balance. Avoid overdoing it to keep a natural look.
Add Sharpness
This improves detail. Always save the original before making significant changes. Compare before and after. Remember, these enhancements should complement, not overshadow, the subject of your photo.
Choosing the Right File Format
Selecting the correct file format involves understanding your needs:
- JPEGs: Popular for web use. They balance quality and size. Use them for photos. Perfect for Facebook or Instagram posts.
- PNGs: Maintain transparency. Use them for graphics and images with text.
- TIFFs: Provide the best quality. Ideal for high-resolution images and printing, though they produce large files.
- RAW: Retains all image information. Often the choice for professional photographers. If you're working with RAW files, Lightroom offers excellent tools for initial adjustments.
Storing and Managing Digital Images
Efficiently managing your digital images is important:
- Organize your photos using folders and subfolders. Name them by year, event, or person.
- Back up your files regularly. Use external hard drives or cloud storage to prevent loss from hardware failures.
- Use tags and metadata. Add keywords describing each image to make searching easier.
- Delete duplicates and poor-quality shots. Keep only the best ones.
- Regularly update and clean up your storage. This saves space and improves accessibility.
Pro tip: When you need to resize image for printing, always maintain the aspect ratio to avoid distortion.
This can be done in Photoshop’s “Image Size” menu, ensuring your photo prints with the correct proportions and sharpness.
Frequently Asked Questions

How do I change a photo from 72 DPI to 300 DPI?
- Open your image in a photo editing software like Photoshop or GIMP.
- Find the Image Size or Resize option in the menu.
- Uncheck the "Resample Image" box to keep the original picture resolution.
- Change the DPI value from 72 to 300.
- Click OK to apply changes.
What is 300 DPI in pixels?
- DPI means Dots Per Inch, a measure of spatial printing or video dot density.
- 300 DPI means there are 300 dots per inch (both vertically and horizontally).
- The pixel dimension depends on the size of the image; for example, a 4x6 inch image at 300 DPI would be 1200 x 1800 pixels.
How do I change the DPI?
- Open your image in any photo editing tool that supports DPI changes like Photoshop.
- Go to the Image Size or Resize menu.
- Type in your desired DPI value in the DPI input box.
- Make sure to maintain the dimensions or adjust as needed without resampling to preserve quality.
- Save the image with the new DPI setting.
How can the resolution of the image be increased to 600 DPI?
- Open your image in a photo editing program.
- Access the Image Size or Resize function.
- Change the DPI setting to 600, ensuring "Resample Image" is not selected if quality preservation is necessary.
- Confirm changes and save the new high-resolution image.

Conclusion
Understanding how to change DPI in Photoshop has made a big difference in my photo editing work. It’s helped me create images that look sharp for both web and print, saving me time and improving my projects’ quality.
Whether you’re just starting out or have some experience, learning this skill will help make your images stand out.
If you want to learn more, I suggest checking out my Photoshop Course and Lightroom Course. These courses have helped me, and they can help you, too!
Also, if you’re ready to explore Photoshop yourself, consider using Adobe Photoshop for detailed editing.
And for organizing and fine-tuning your photos, Adobe Lightroom is a great option. Keep practicing, and you’ll be on your way to creating high-quality images in no time!
Read more about Photoshop:


