Glitch Effect in Photoshop to Make Your Designs Stand Out

The Glitch Effect in Photoshop is a fun and creative way to add digital distortions to your images. It makes your photos look like they are broken or malfunctioning, giving them a unique and modern vibe. You can use it to make your designs stand out and grab attention.

In this article, we will show you how to create the Glitch Effect in Adobe Photoshop. You will learn step-by-step how to apply it to photos, explore different types of glitch effect in photoshop, and discover tips to perfect your designs. Whether you’re a beginner or looking to improve your skills, this guide has something for everyone.

Table of Contents

How to Get the Glitch Effect in Photoshop

Ultimate-Lightroom-Course-Detailed-Image-Adjustments

Creating a glitch effect in Photoshop can be a fun and easy process! To start, you’ll need Adobe Photoshop open and your image ready. Once you have your photo, follow these steps to add that cool glitch effect to your image.

Open Your Image in Photoshop

Astronaut image in Photoshop showing the start of glitch effect creation process.

Start by opening Photoshop and selecting the image you want to apply the glitch effect to. This will be the base for your photo manipulation.

Duplicate the Background Layer

Step to duplicate the background layer in Photoshop to keep the original image safe while applying the glitch effect.

In the Layers Panel, right-click on this layer and select “Duplicate Layer.” This keeps your original image safe while you work on the glitch effect.

Use the Rectangular Marquee Tool

Select the Rectangular Marquee Tool in Photoshop to begin creating the glitch effect by selecting a part of the image.

Select the Rectangular Marquee Tool from the tool panel. Use it to select a small part of the image where you want to apply the glitch. This will help you create the “broken” look.

Move the Selection

Use the Move Tool in Photoshop to shift the selected area and add distortion to the image.

Hold down the Shift key and use the Moving Tool to drag your selection slightly to the side. This adds the first layer of distortion.

Apply the RGB Channels

Using the RGB channels in Photoshop to create a glitch effect by copying and pasting the blue channel.

Go to the Channels Panel. Here, you will see the red channel, green channel, and blue channel. Select the blue channel and copy it. Paste it into a new layer to distort the color.

Use the Wave Filter

Applying the Wave filter to add distortion.

Apply the Wave Filter to your new blue channel layer. Go to Filter > Distort > Wave. This will add the wavy distortion effect that’s typical for glitch art. Adjust the settings like Amplitude and Speed to get the desired effect.

Change the Blending Mode

Change the blending mode to "Screen" in Photoshop to blend the glitch effect with the image smoothly.

Once the wave effect is applied, change this mode of your layer to Screen in the Layers Panel. This helps blend the glitch effect smoothly with the image.

Halftone Pattern Effect (Optional)

Applying the Color Halftone filter in Photoshop to add a retro glitch effect.

For a more retro glitch effect, you can add a halftone pattern effect. Create a new layer and go to Filter > Pixelate > Color Halftone. Adjust the size of the dots to your liking. This effect adds a cool, digital look.

Apply the Glitch to Other Layers

Applying the glitch effect to multiple layers in Photoshop to create a dynamic distortion effect.

Repeat the steps for other parts of the image, duplicating layers, applying the Wave filter, and shifting the colors in the RGB channels. You can create several layers with different distortions for a more dynamic glitch effect.

Adjust Opacity and Layer Effects

Adjusting the opacity of layers to fine-tune the effect.

Adjust the opacity of each layer to fine-tune the glitch effect. If the effect is too strong, reduce the opacity until it looks just right. Play around with the blending options for different looks.

Tips for Enhancing the Photoshop Glitch Effect:

This process will help you turn a simple photo into a dynamic glitch effect Photoshop masterpiece. Experiment with these tools to make the glitch as subtle or intense as you like! You can add more layers, adjust the amplitude and speed of the wave filter, or even add more distortion effects to achieve the desired look for your glitch art. If you’re looking to explore more creative options, dive into Lightroom shortcuts to enhance your workflow and design process.

Different Types of Glitch Effects You Can Create in Photoshop

In Photoshop, there are many creative glitch effects you can use to make your images look distorted, futuristic, and eye-catching.  Here’s a simplified table to explain different types of photoshop glitch effect you can create in Photoshop. It helps break down the process for easy understanding:

Glitch Effect Type How to Create It Tools/Techniques
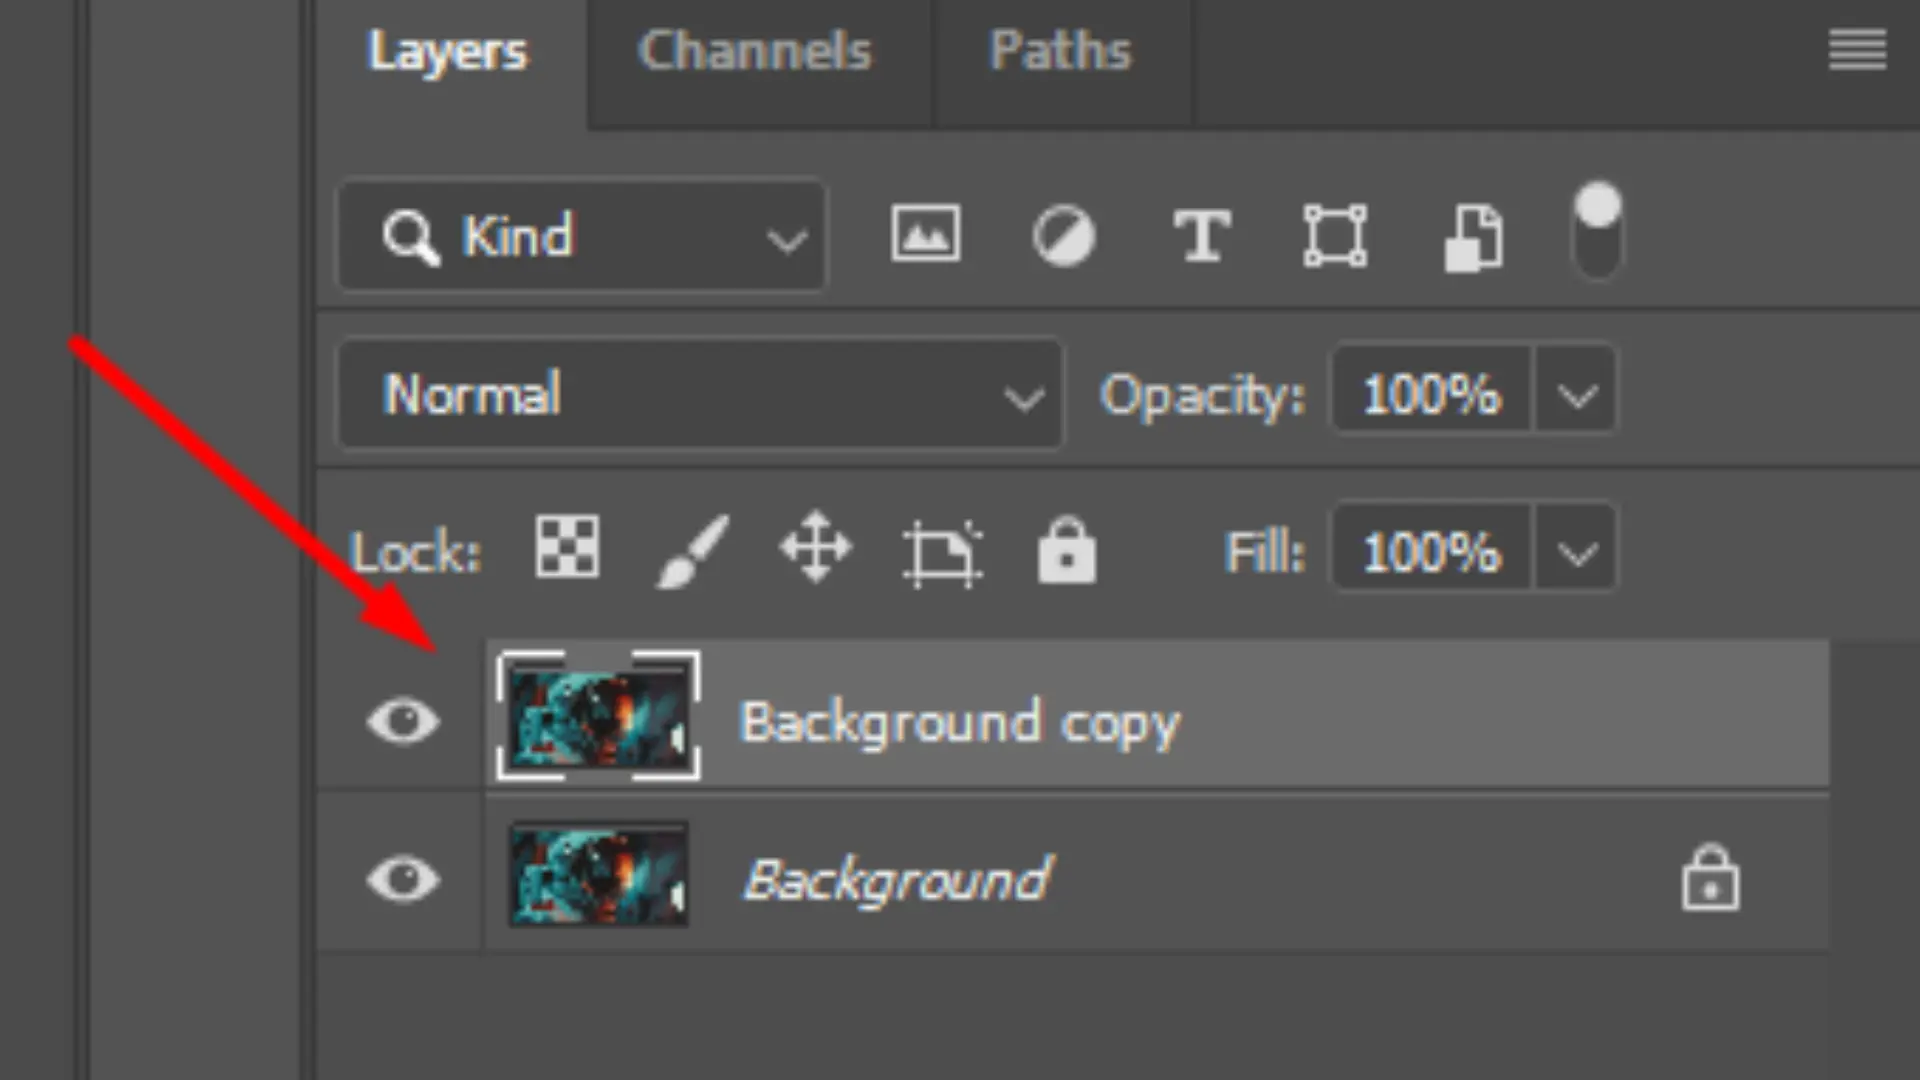
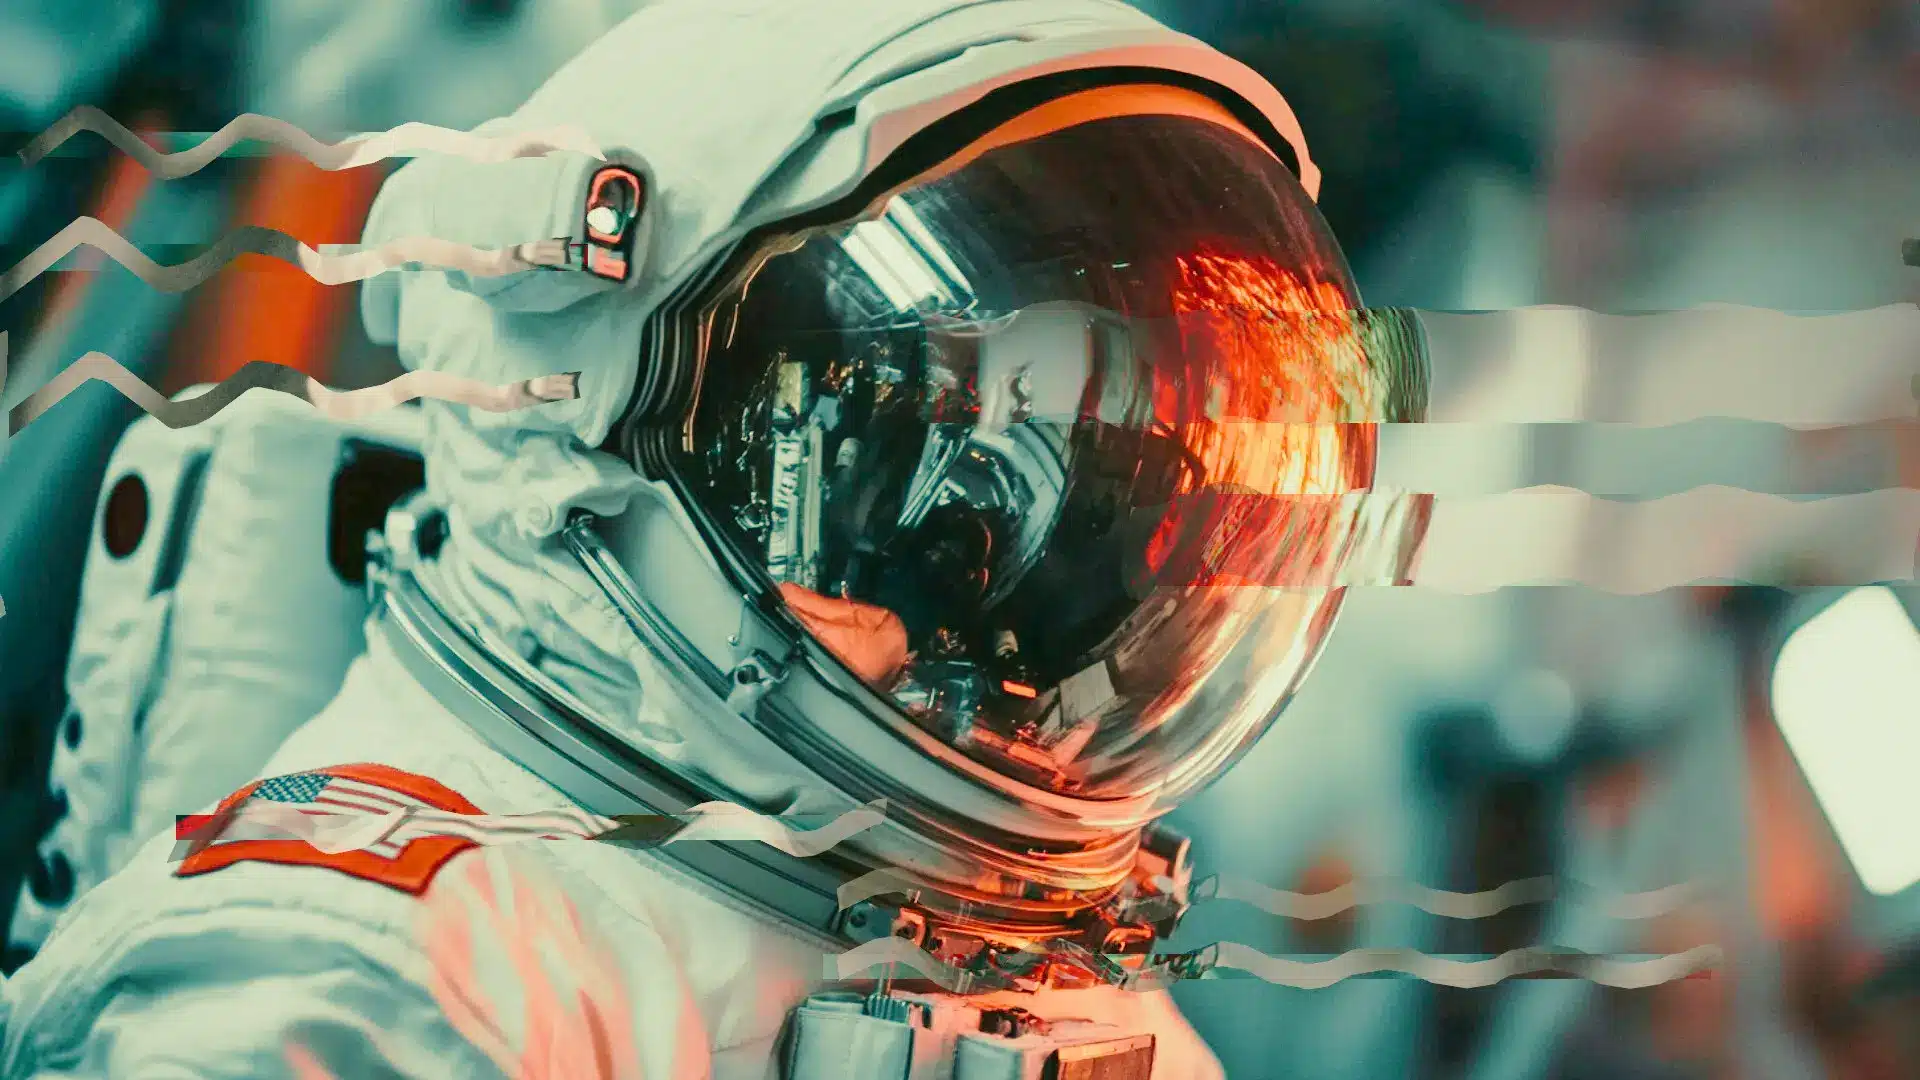
Horizontal Shift Glitch 
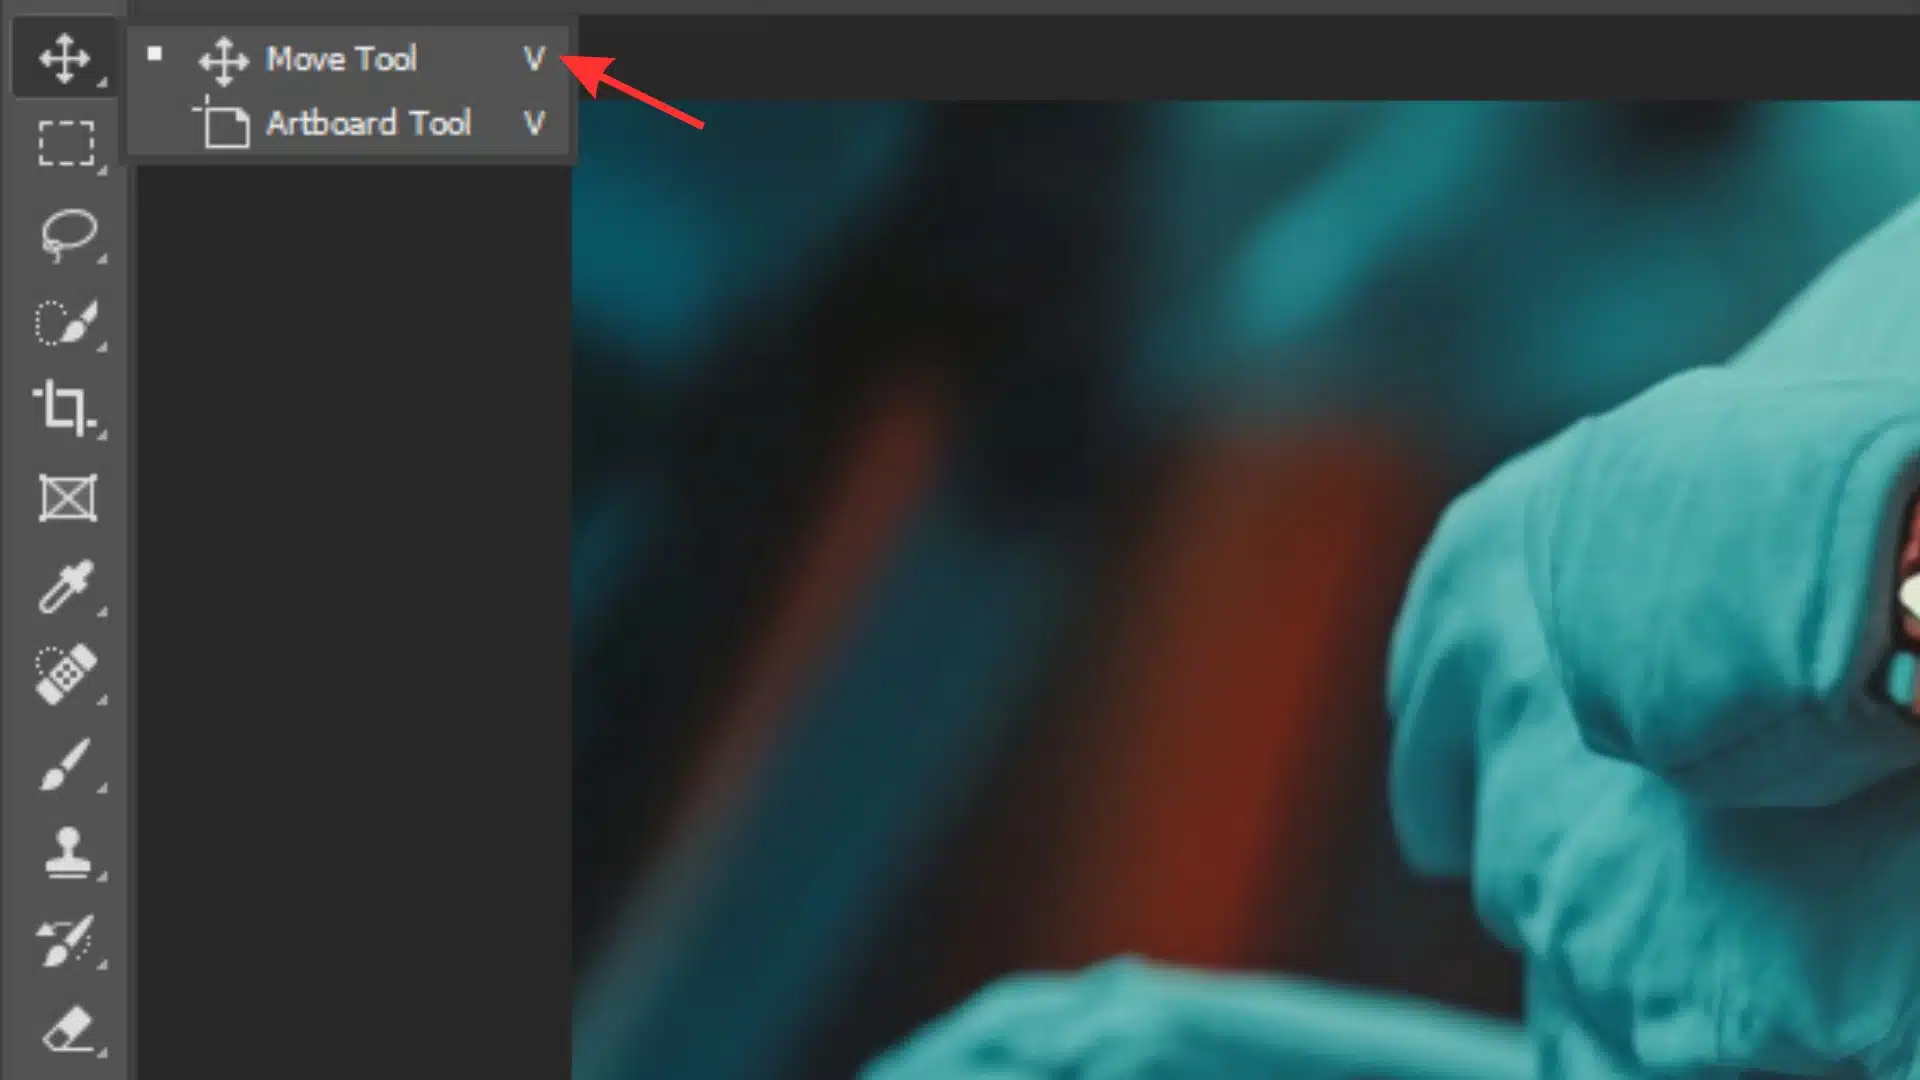
Shift parts of the image horizontally. 
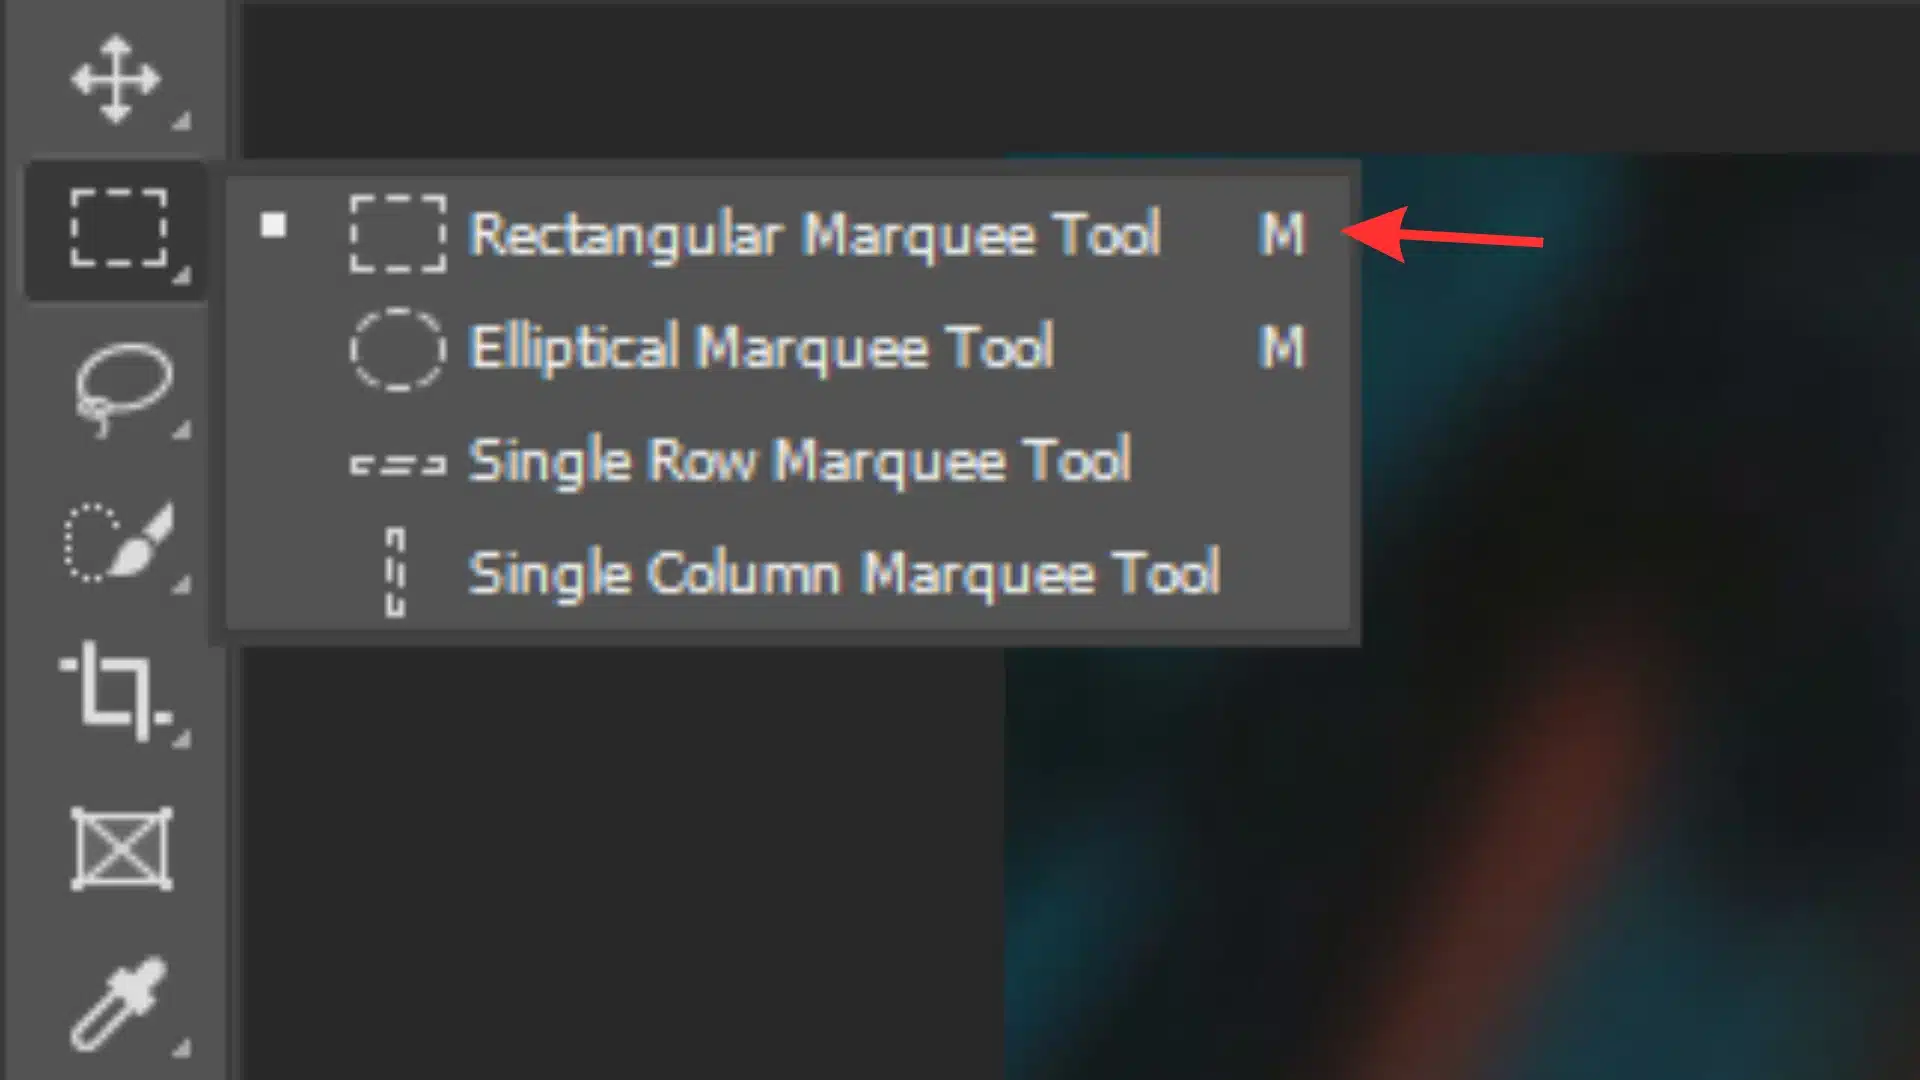
Use Move Tool and Marquee Tool.
Color Channel Shift 
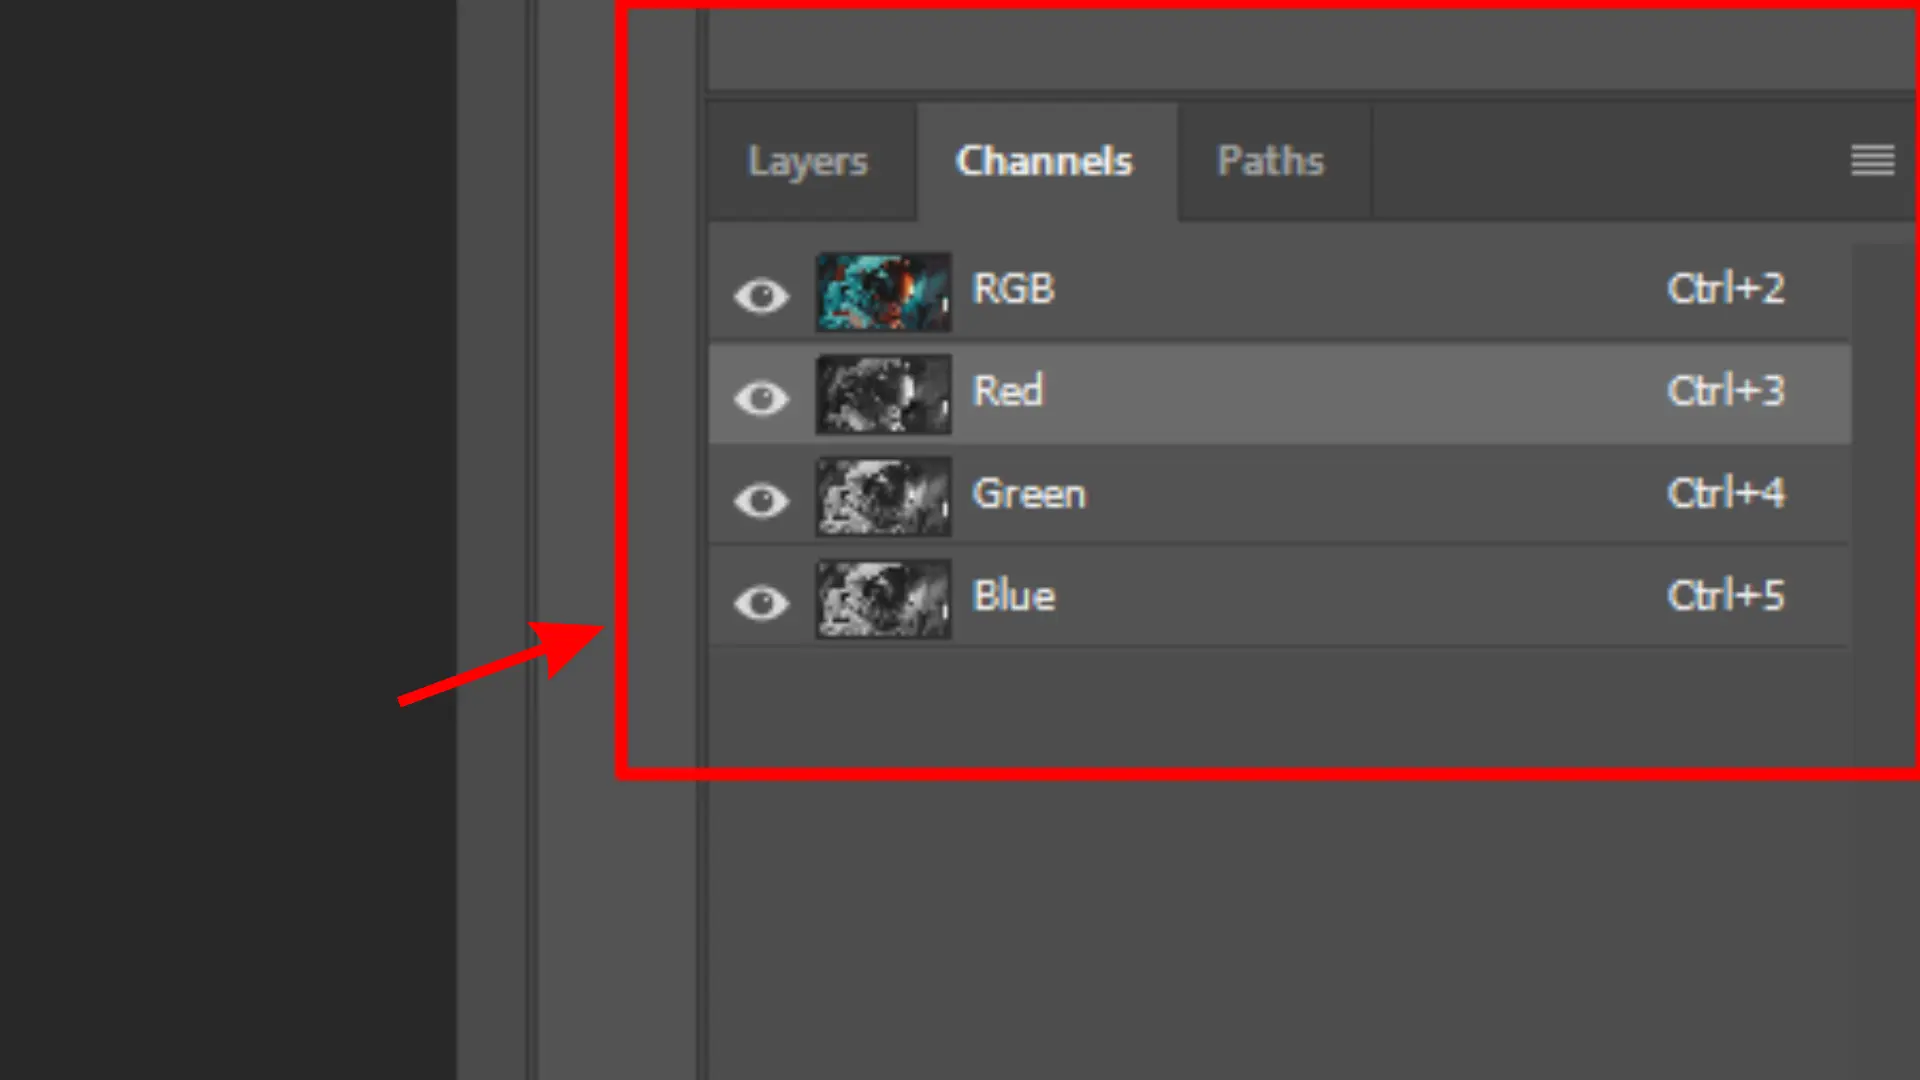
Move the green channel to create a color shift. Use Advanced Blending and Blending Options.
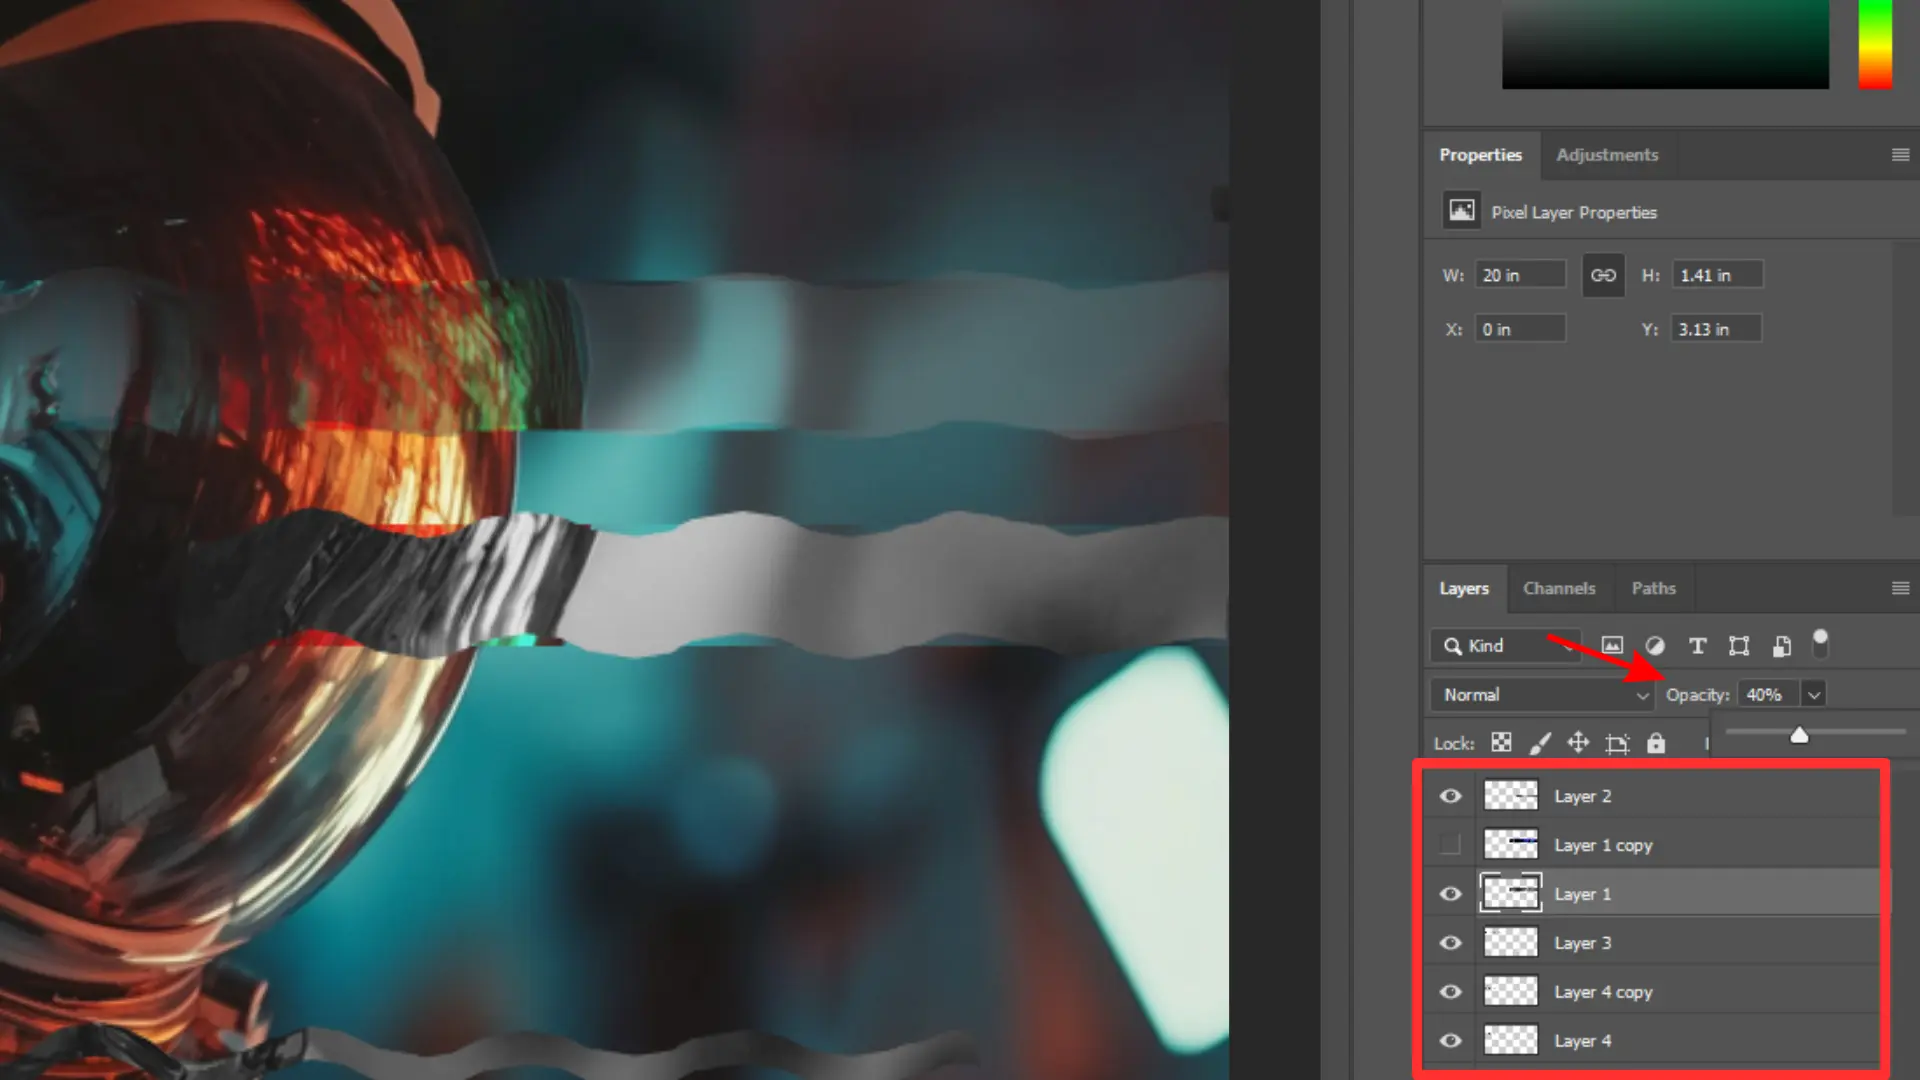
Static Noise Glitch Add static or noise to the image for a distorted feel. Noise Filter and adjust Layer Opacity.
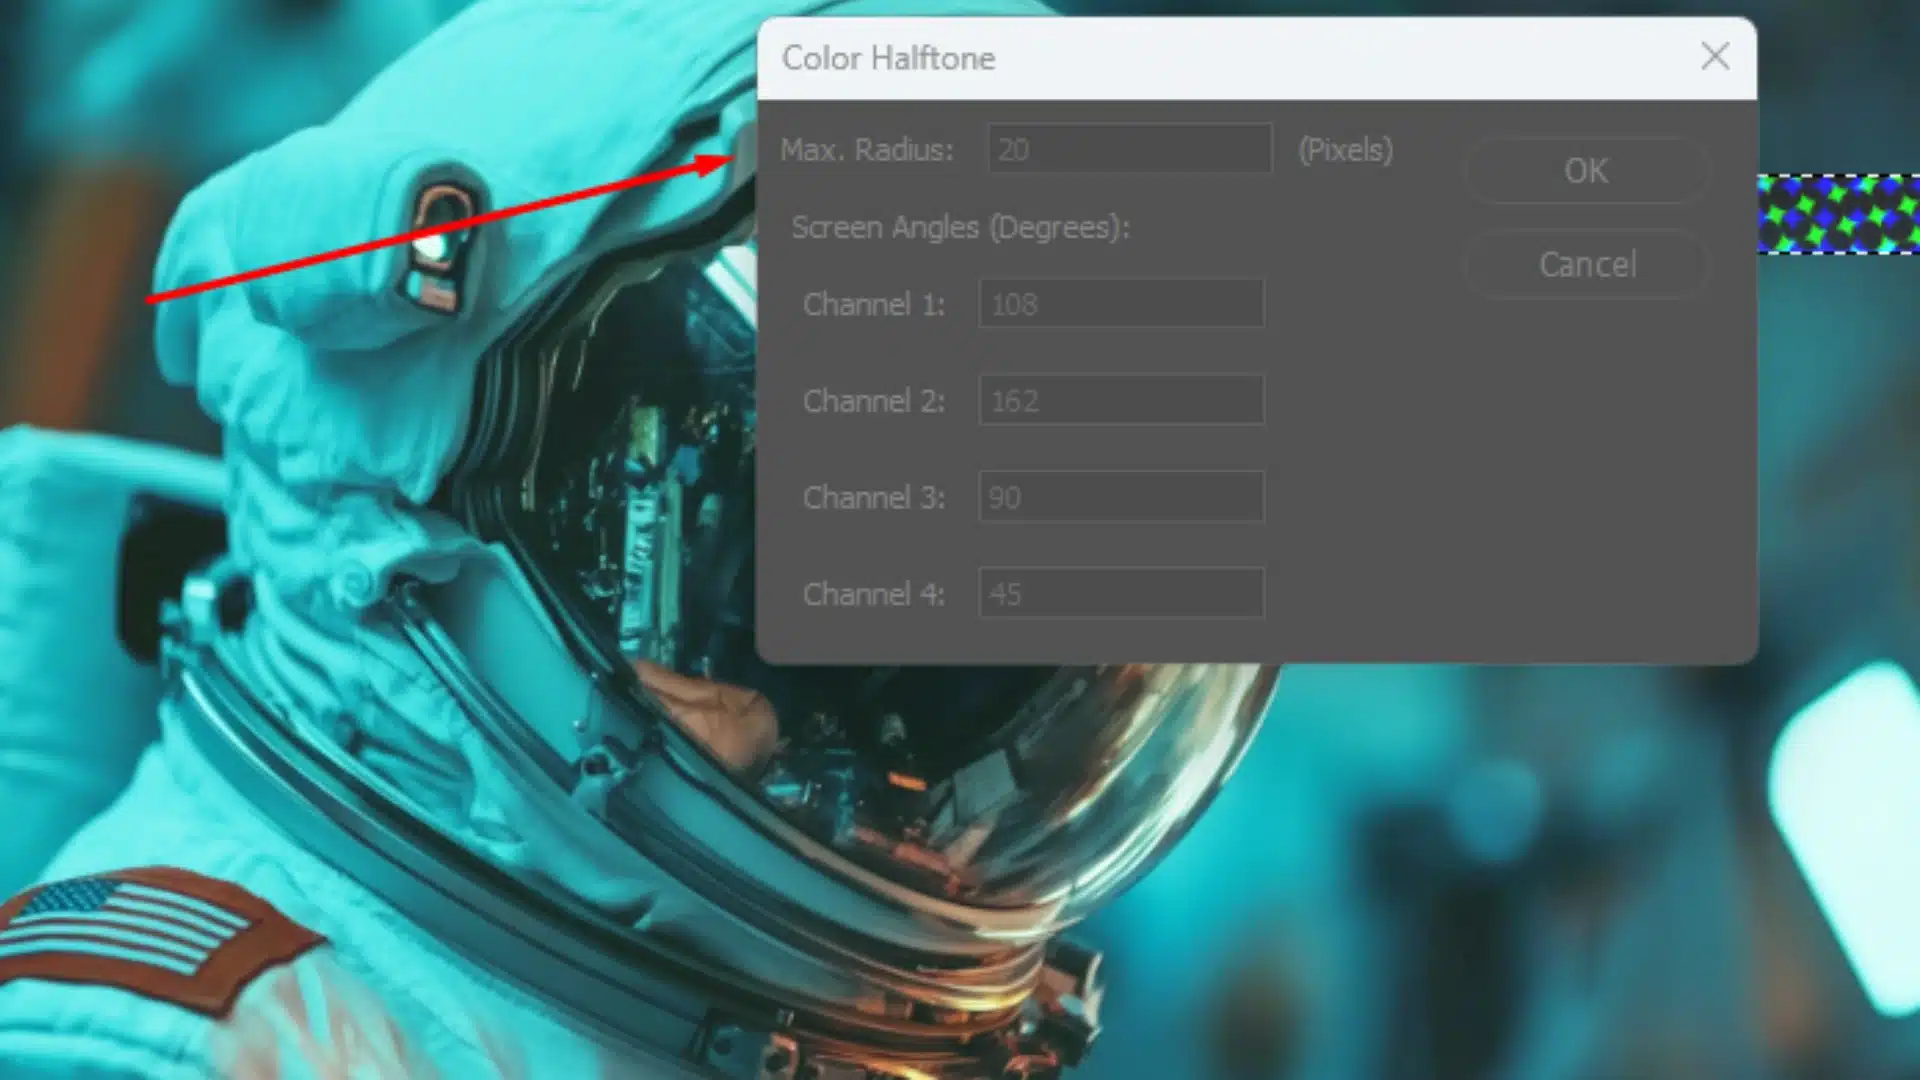
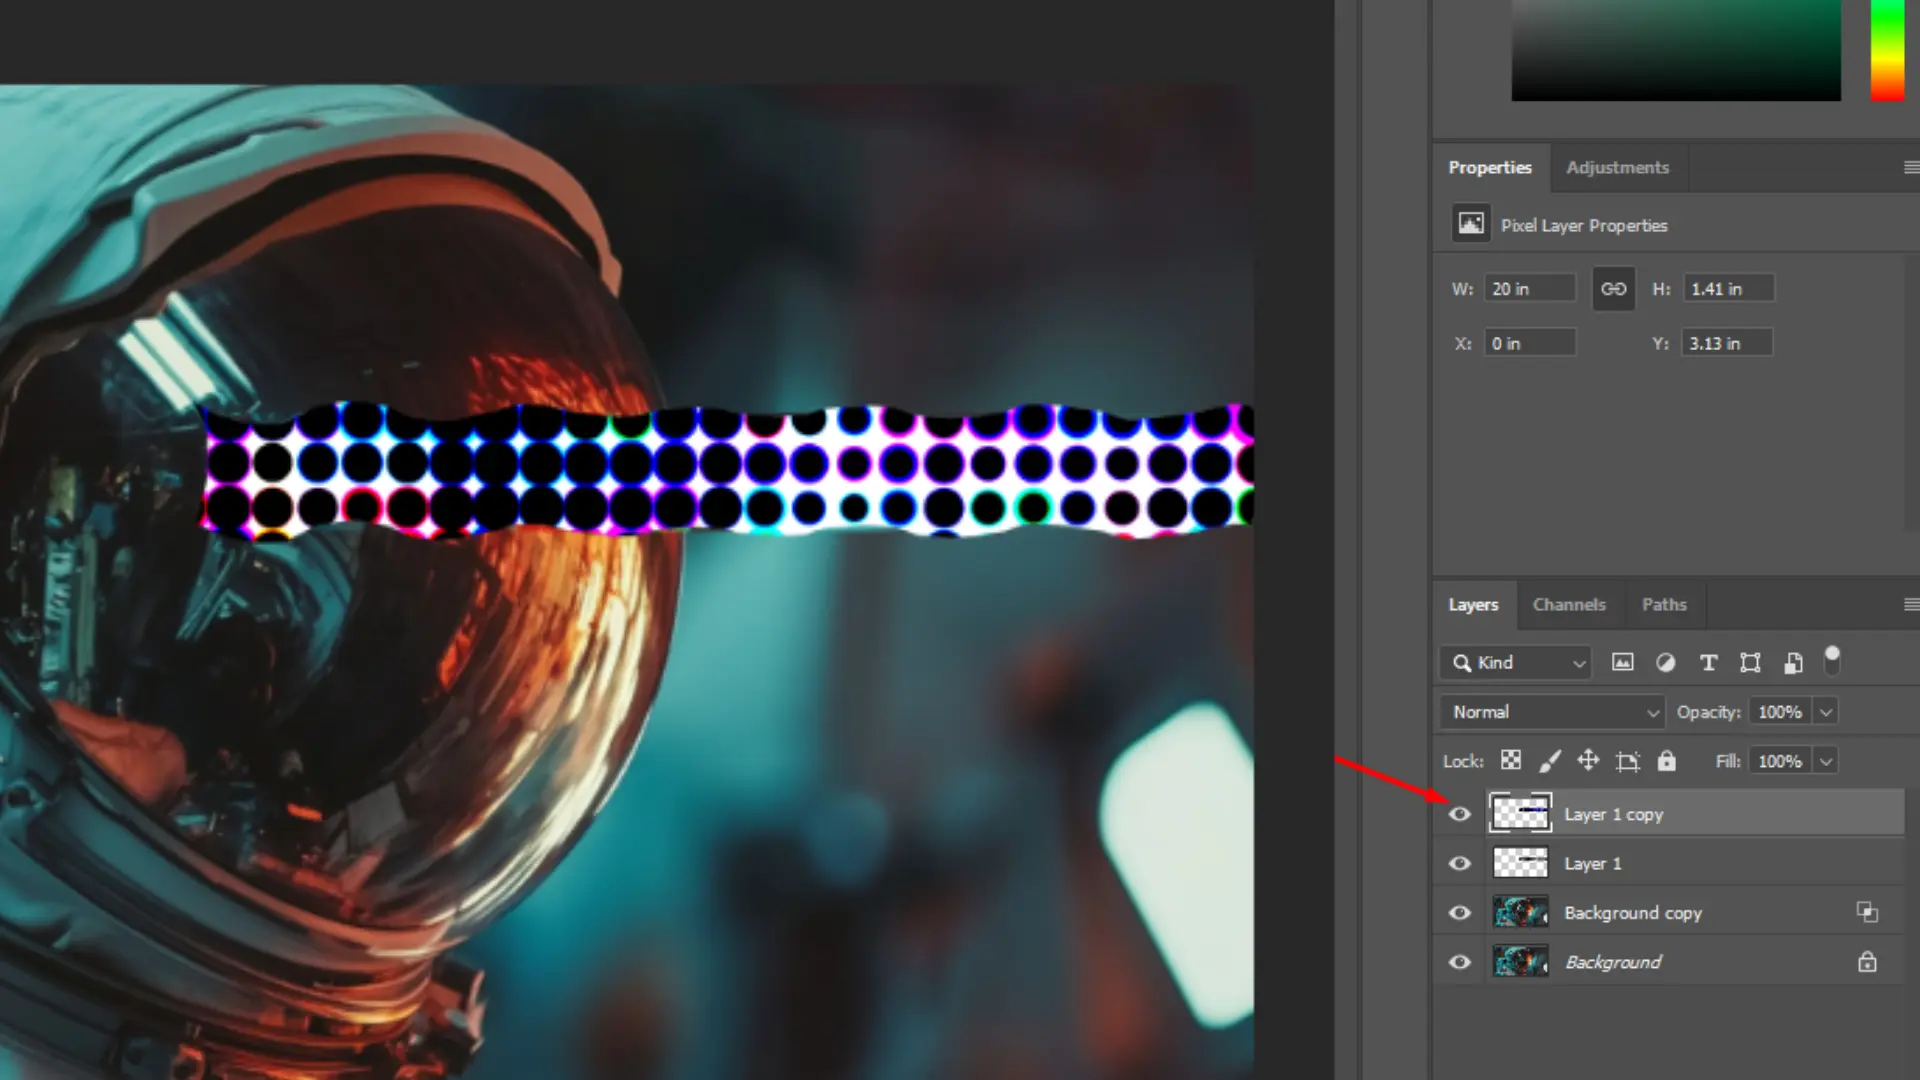
Halftone Pattern Glitch 
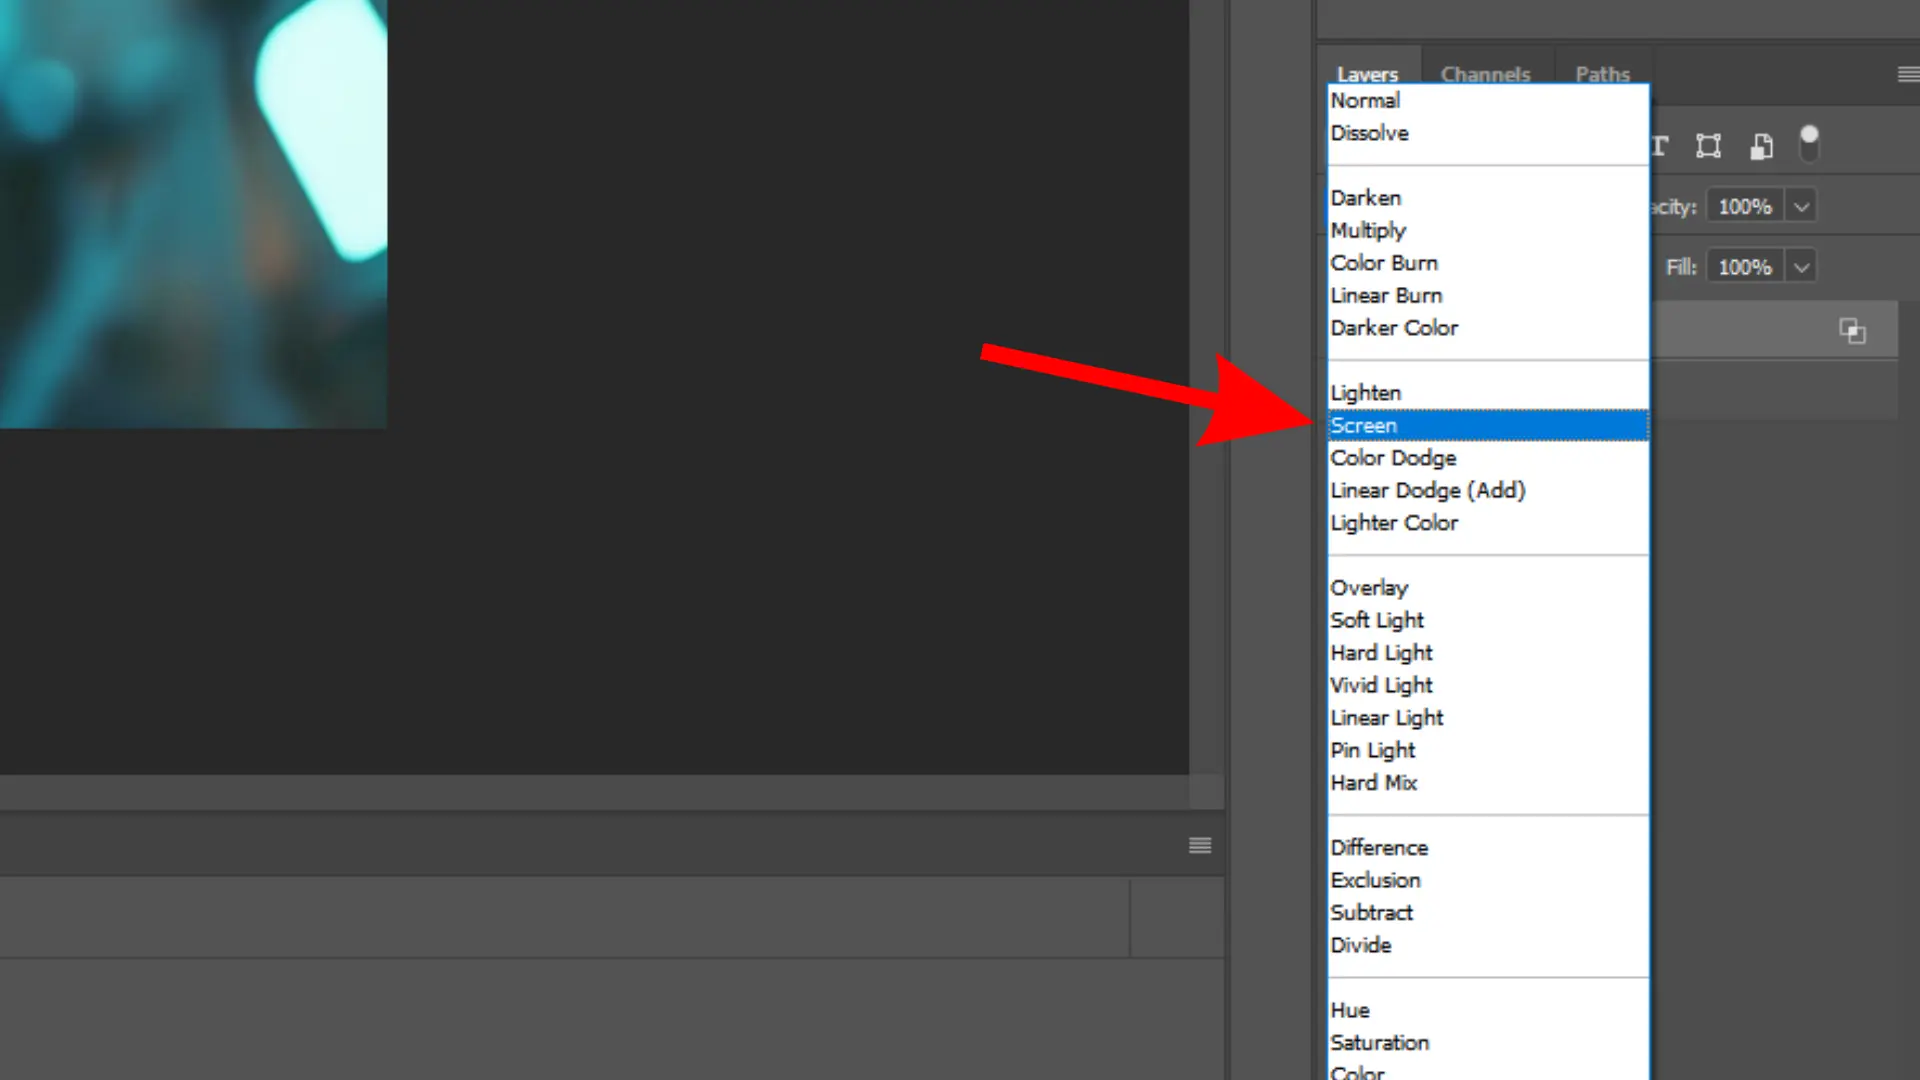
Add pixelated dots for a retro glitch effect. Halftone Filter and adjust the Layer Blending.
Vertical Distortion Glitch 
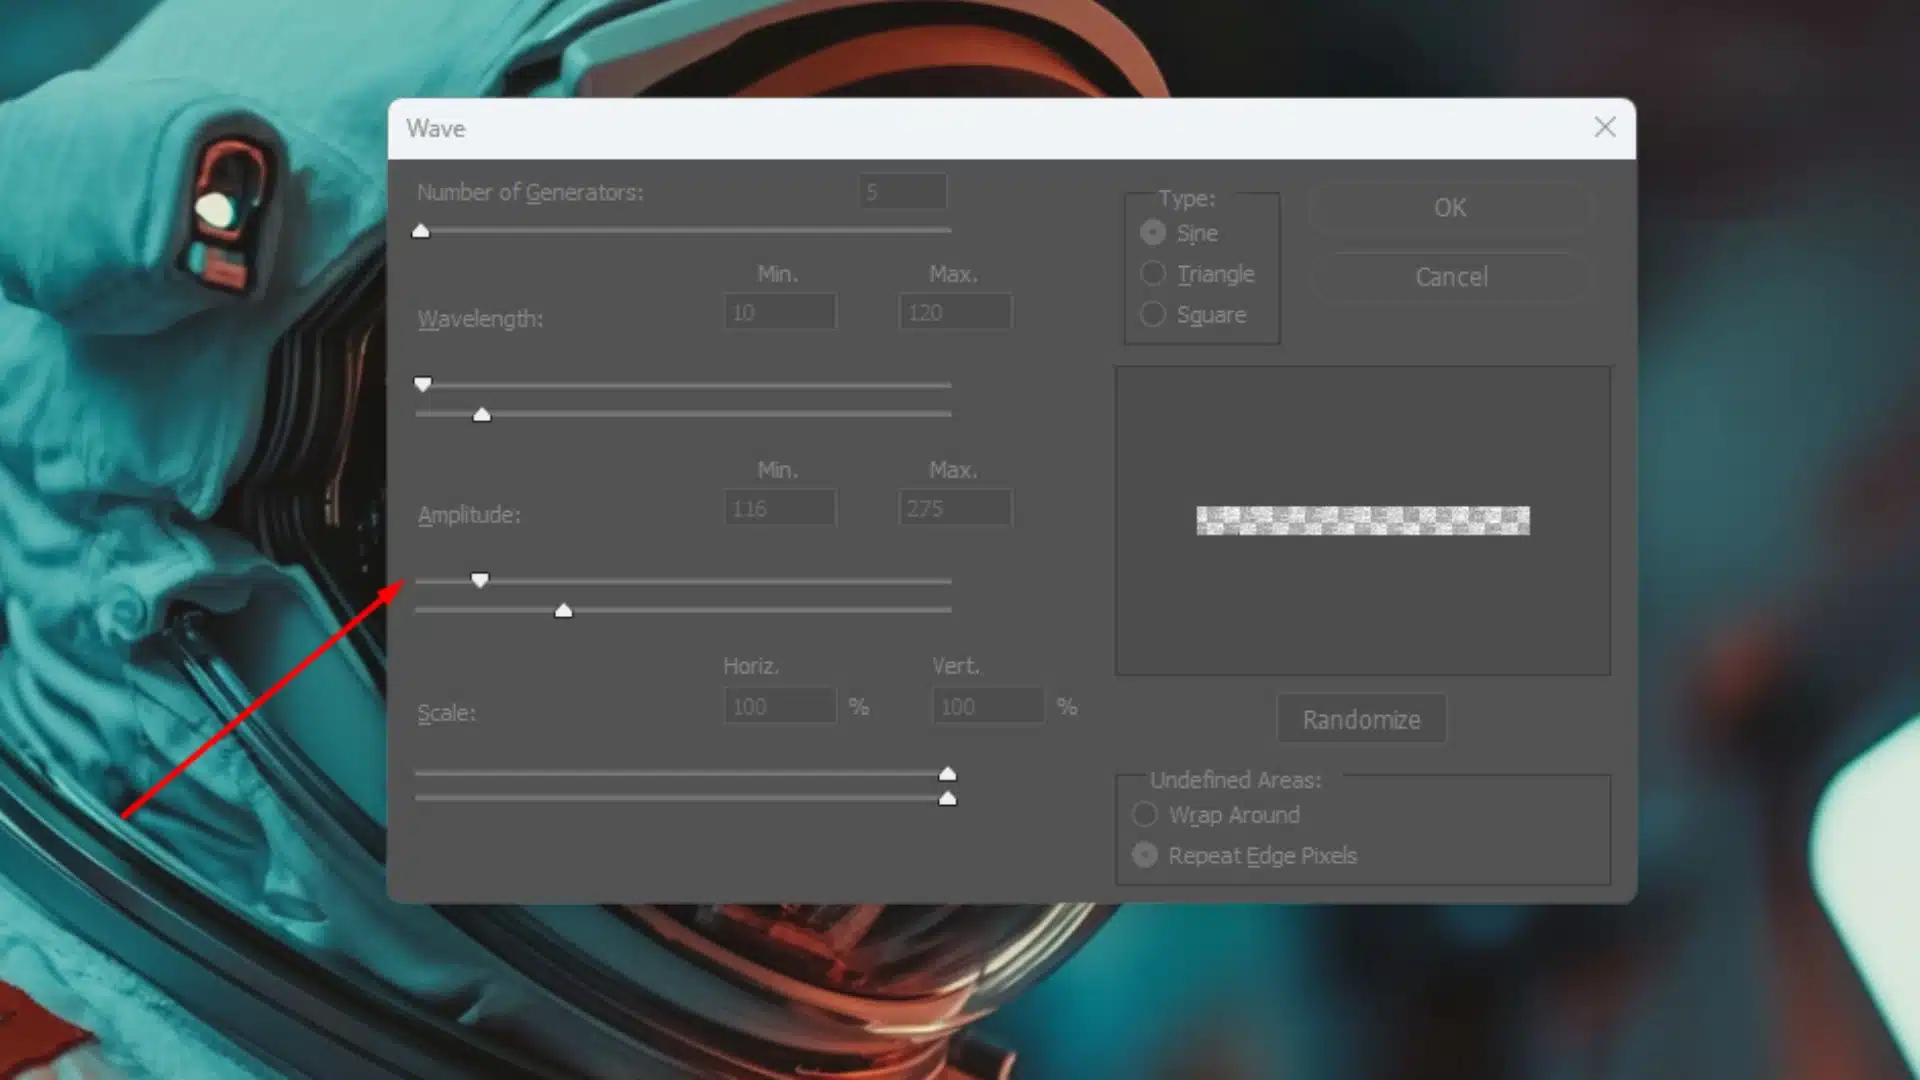
Stretch parts of the image vertically to create a “tear.” Use Marquee Tool and Move Tool.

This table shows the different ways you can use photo effects to create a photoshop glitch effect. The key is to experiment with tools like the Move Tool, Advanced Blending, and Blending Options to get the look you want. Each method gives a unique glitch feel to your photo! Let’s explore in detail.

1. Horizontal Glitch Effect

The horizontal glitch effect is one of the most common types of glitches. It involves shifting parts of the image in a horizontal direction to create a distorted, broken appearance.

Steps to Create:

This type of glitch is perfect for adding a futuristic, malfunctioning look to your images.

2. Color Channel Shift Glitch

A color channel shift glitch creates a distorted look by separating the color channels in your image. This effect gives each color (red, green, and blue) its own displacement, making the photo look broken.

Steps to Create:

This effect is a great way to create a digital glitch art feel by playing with color.

3. RGB Distortion Glitch

This Adobe Photoshop glitch effect focuses on shifting the three main color channels (red, green, and blue) to create a colorful, distorted look that feels like a digital malfunction. The RGB channels are adjusted to cause a split in the image colors, creating a unique, glitchy appearance.

Here is How:

The RGB glitch effect adds a colorful and intense distortion to your image, perfect for bold glitch art.

4. Static Noise Glitch

Static noise glitches simulate the look of a digital error, where random static appears in the image. It creates a “broken” feel as if the image is struggling to load.

Steps to Create:

The static noise glitch works great for creating a more subtle, but still noticeable, digital error.

5. Halftone Glitch

The halftone glitch gives your photo a pixelated, retro feel. It simulates the look of old-school printing methods but adds a modern glitch twist. This effect is popular in digital artwork and graphic design.

Steps to Create:

This effect is especially useful when you want to give your image an old-school glitchy feel with a modern twist.

By experimenting with different Layers in Photoshop, color channels, and tools like the Wave filter or Halftone pattern, you can customize the glitch effect to fit your unique style. Whether you want a subtle distortion or an intense digital breakdown, there’s a Adobe Photoshop glitch effect for every project! Don’t forget to explore Lightroom perspective correction to ensure your images stay aligned and professional, enhancing your overall creative workflow.

Frequently Asked Questions

Photoshop-Masterclass-Advanced-Editing-Layer-Manipulation

How do you get the glitch effect in Photoshop?

To add a photoshop glitch effect, first, open your image. Select parts of the image and move them in different directions. You can also play with color settings to separate the red, green, and blue parts of the picture, causing a glitchy look. Use the right blending settings to help the new changes fit in smoothly.

How do you make a glitch effect on a photo?

Start by selecting a part of your photo. Move that section slightly to one side to give it a broken look. You can add more parts of the photo with a similar shift to create a bigger effect. Use different layers and adjust how each one blends into the rest of the photo.

What is the aliasing effect in Photoshop?

Aliasing happens when the edges of shapes or lines look jagged instead of smooth. This happens when there aren’t enough pixels to make the edges smooth. In Photoshop, you can reduce aliasing by using better resolution settings or using tools that smooth out the lines.

How to create a distortion effect in Photoshop?

To create this effect, use tools in photoshop that let you move or bend parts of your photo. For example, you can stretch or shift parts of the picture. Another way is to add random effects like noise or small pixel changes. This can make your photo look like it’s been changed or malfunctioned.

Conclusion

Glitch effect applied to an astronaut image in Photoshop, creating a futuristic and distorted look.

Creating a glitch effect in Photoshop can really enhance your designs and give your images a unique, modern touch.  I once added a glitch to a simple photo, and it instantly gave it a modern, edgy look. It’s amazing how such a small tweak can completely change the vibe of an image.

Want to learn more techniques like the glitch effect? Enroll in our Photoshop Course or Lightroom Course today!

If “Glitch Effect in Photoshop article has helped you, then Like and Share it with your friends

Facebook
Twitter
LinkedIn
Pinterest

Have a nice photoshoot!

Read more about: Photo Editing with Lightroom and Photoshop

Download Your Free Guide Now!

Discover the secrets of photography with our printable guide! Master essential techniques like aperture, shutter speed, and ISO to create stunning images. Get your free printable PDF now and start turning your snapshots into masterpieces!