Frequency Separation Lightroom Guide for Skin Retouching

Frequency Separation Lightroom is a powerful technique that helps you edit photos while keeping important details. It separates the colors and textures, making skin retouching easier without losing quality. This method is popular for portraits because it smooths the skin while preserving natural textures.

In this article, you’ll learn how to use Frequency Separation in Lightroom to get professional results. I’ll guide you through the steps, and provide helpful tips to improve your editing. Whether you’re new to this or looking to sharpen your skills, this guide has everything you need!ado

Table of Contents

Benefits of Using Frequency Separation in Lightroom for Skin Retouching

While frequency separation is primarily a technique used in Photoshop, adobe lightroom offers effective methods for skin retouching that can help maintain important details. Here are the benefits of using Lightroom for skin edits:

Why is Frequency Separation Useful for Skin Retouching?

For example, when editing portraits in Lightroom, frequency separation techniques effectively remove blemishes and redness without blurring out all the skin texture.

Real-Life Benefits for Portrait Editing

Using frequency separation techniques in Lightroom makes skin retouching look natural. Editors can remove minor blemishes with the healing brush while keeping details intact. Unlike traditional methods, this process enhances portraits without creating a plastic appearance. It’s a great tool for professionals who want to maintain realism in their photo retouching work.

This approach not only works for portraits editing but can also be applied to retouching photos of products, landscapes, and fabrics to retain important details while making necessary adjustments.

Step-by-Step Guide to Frequency Separation in Lightroom

Frequency separation is a technique used to retouch skin in portraits while preserving the texture of skin. This method allows you to smooth out imperfections without losing the natural look of the skin. Here’s a guide on how to do it:

1. Prepare Your Image

Image in Lightroom showing a portrait with skin imperfections being selected for retouching.

2. Duplicate the Image

Lightroom interface showing the option to create a virtual copy of a portrait for non-destructive editing.

3. Adjust the Virtual Copy

Lightroom interface applying the Clarity setting at -100 to smooth skin on a portrait.

4. Work on the Original Layer

Lightroom interface showing local adjustments using the Adjustment Brush to enhance details by adjusting the Texture and Clarity sliders.

5. Fine-Tune Your Edits

Lightroom interface showing global adjustments to exposure and contrast for refining a portrait.

6. Compare and Export

Lightroom export settings dialog for saving a final edited image.

Example Use Case

While Lightroom may not allow for the full capabilities of frequency separations like Photoshop, these steps will help you achieve a similar effect, keeping your edits non-destructive and organized.

Tips for Best Results:

By following this process, you’ll be able to perform frequency separation retouching that enhances your portraits while maintaining natural-looking skin texture.

Common Mistakes to Avoid When Using Frequency Separation in Lightroom

While frequency separation is a powerful tool for retouching, it can be easy to make mistakes that lead to unnatural or over-edited results. Here are some common errors to watch out for and tips to avoid them.

Over-Blurring the Low Frequency Layer

One of the biggest mistakes is applying too much Gaussian blur to the low frequency layer. This removes too much color and tone detail, making the skin look flat or plastic-like.

What to do instead:

Over-Reliance on the Healing Brush Tool

Using the same brush repeatedly can lead to a noticeable pattern in the skin, especially when working on the texture layer. This can make the retouching look fake or robotic.

Solution:

Editing on the Wrong Layer

Sometimes, users make the mistake of editing on the wrong layer, either the top layer or the blurred low frequency layer, instead of the texture layer or vice versa.

Avoid this by:

Inconsistent Texture with Frequency Separation Action

When using frequency separation actions in Lightroom or Photoshop, failing to pay attention to fine details can result in patchy skin textures. This often happens when users apply the brush tool too aggressively or without blending.

To prevent this:

Ignoring Shadows and Highlights

A common mistake when retouching with frequency separation layers  is to focus only on the skin and ignore the shadows and highlights. This can create a flat image with no depth.

Best practice:

Applying the Same Settings to Every Image

Each image is different, and applying the same settings across the board can result in poor-quality edits. Skin types, lighting conditions, and even camera settings can influence how you should apply frequency separation.

Tips:

Following these steps will help you retouch photos professionally, keeping the skin looking realistic and polished.

Frequency Separation Lightroom vs Photoshop: Key Differences

Here is a comparison of Frequency Separation Lightroom and Photoshop based on key differences:

Feature Lightroom Photoshop
Purpose Primarily for photo organization and editing Advanced editing and manipulation
Frequency Separation Method 
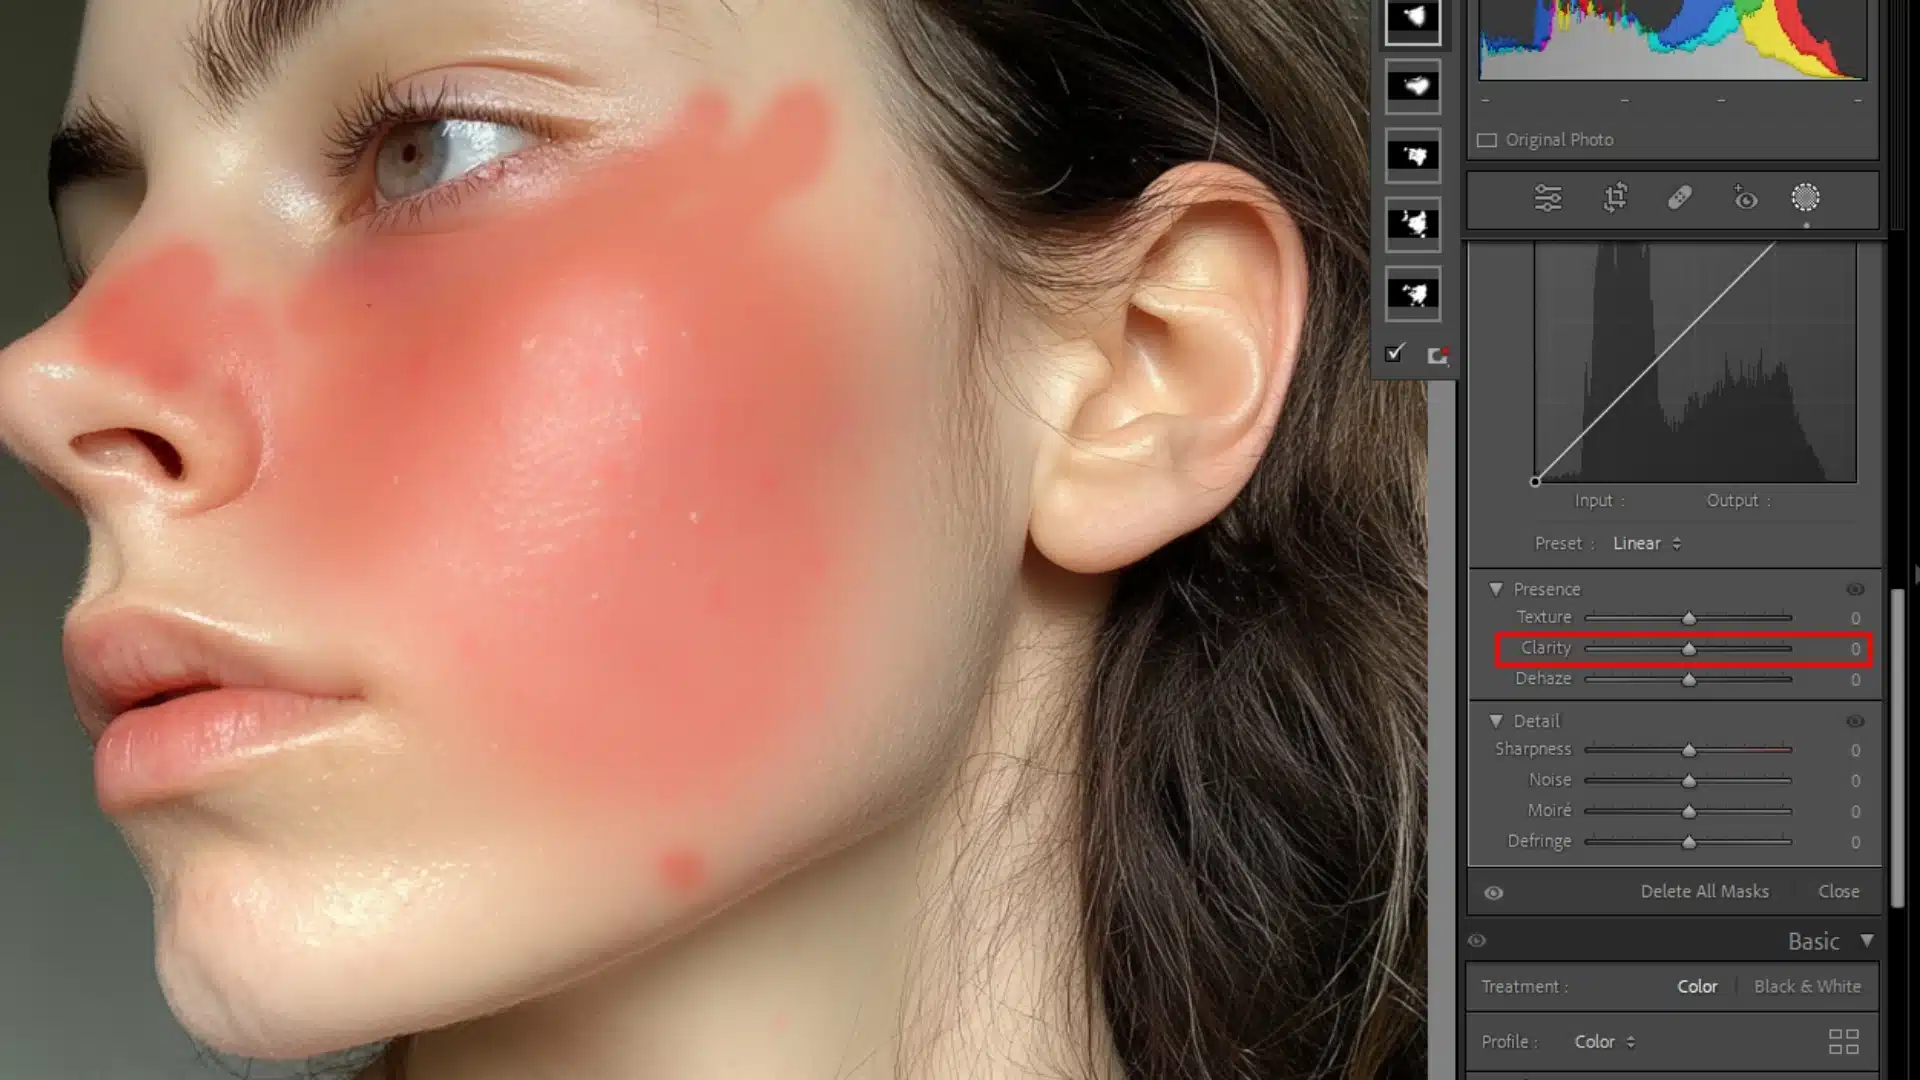
Limited to basic sliders like texture and clarity Full control using layers and blending modes
Ease of Use 
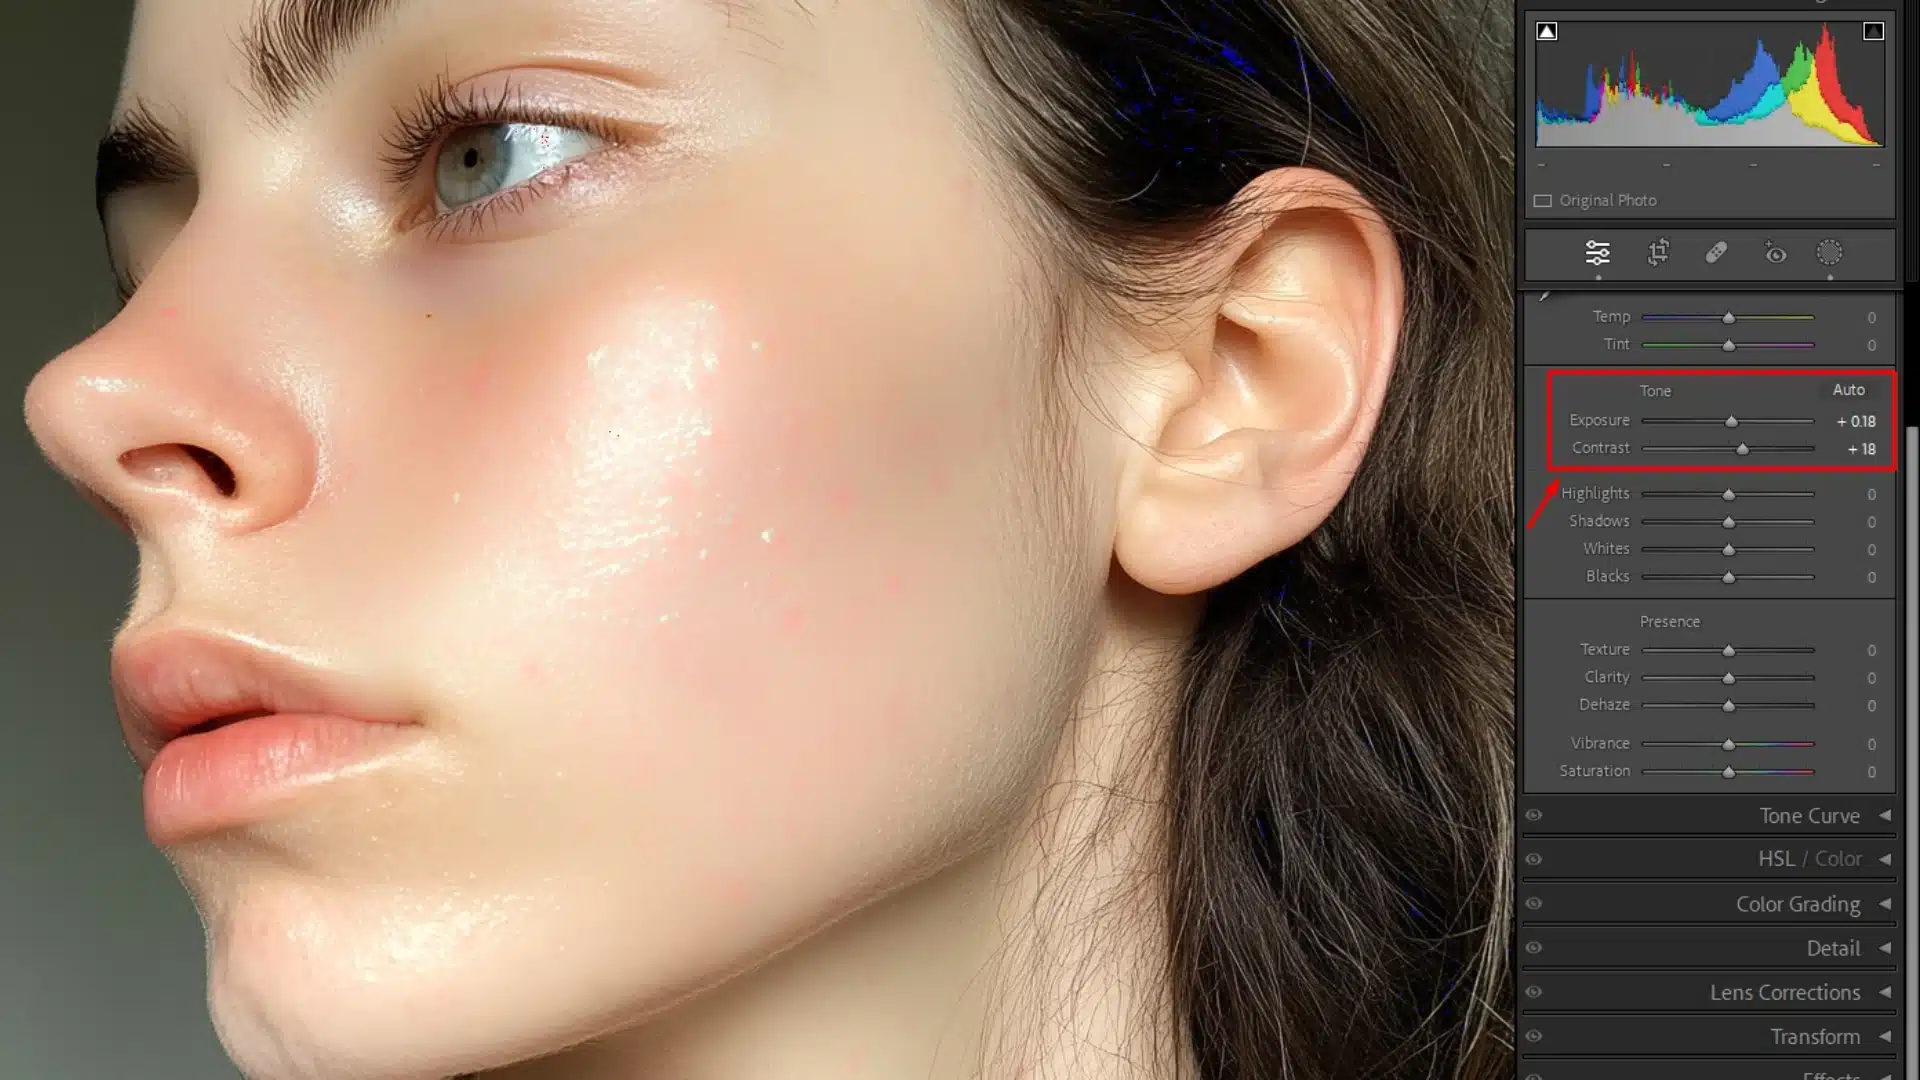
Beginner-friendly with simple adjustments More complex, requires experience
Control Over Skin Retouching 
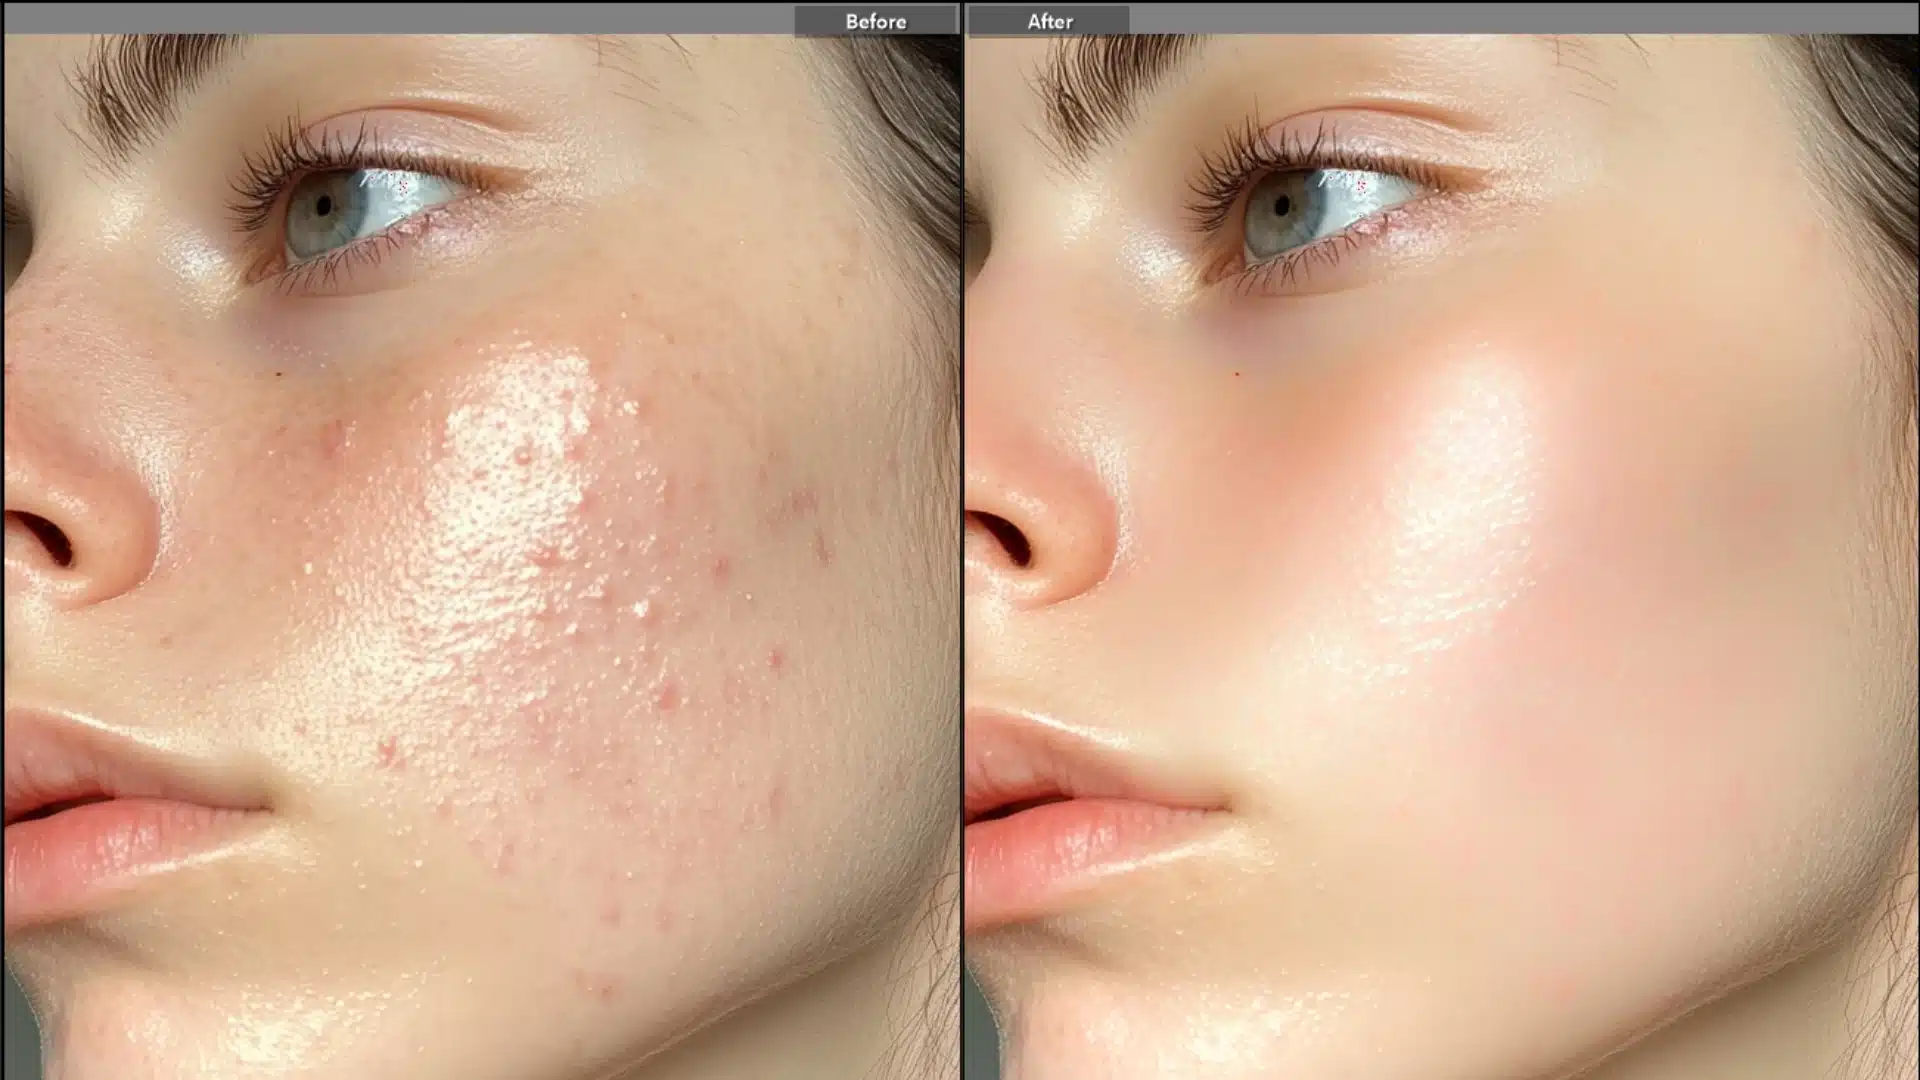
Limited, best for light edits Full control with detailed frequency separation techniques
Customizable Tools Fewer custom tools available Highly customizable with brushes and actions
Layer Management No layer support Full layer support for in-depth edits
Speed Faster workflow for basic retouching Slower, more precise with detailed edits
Best For 
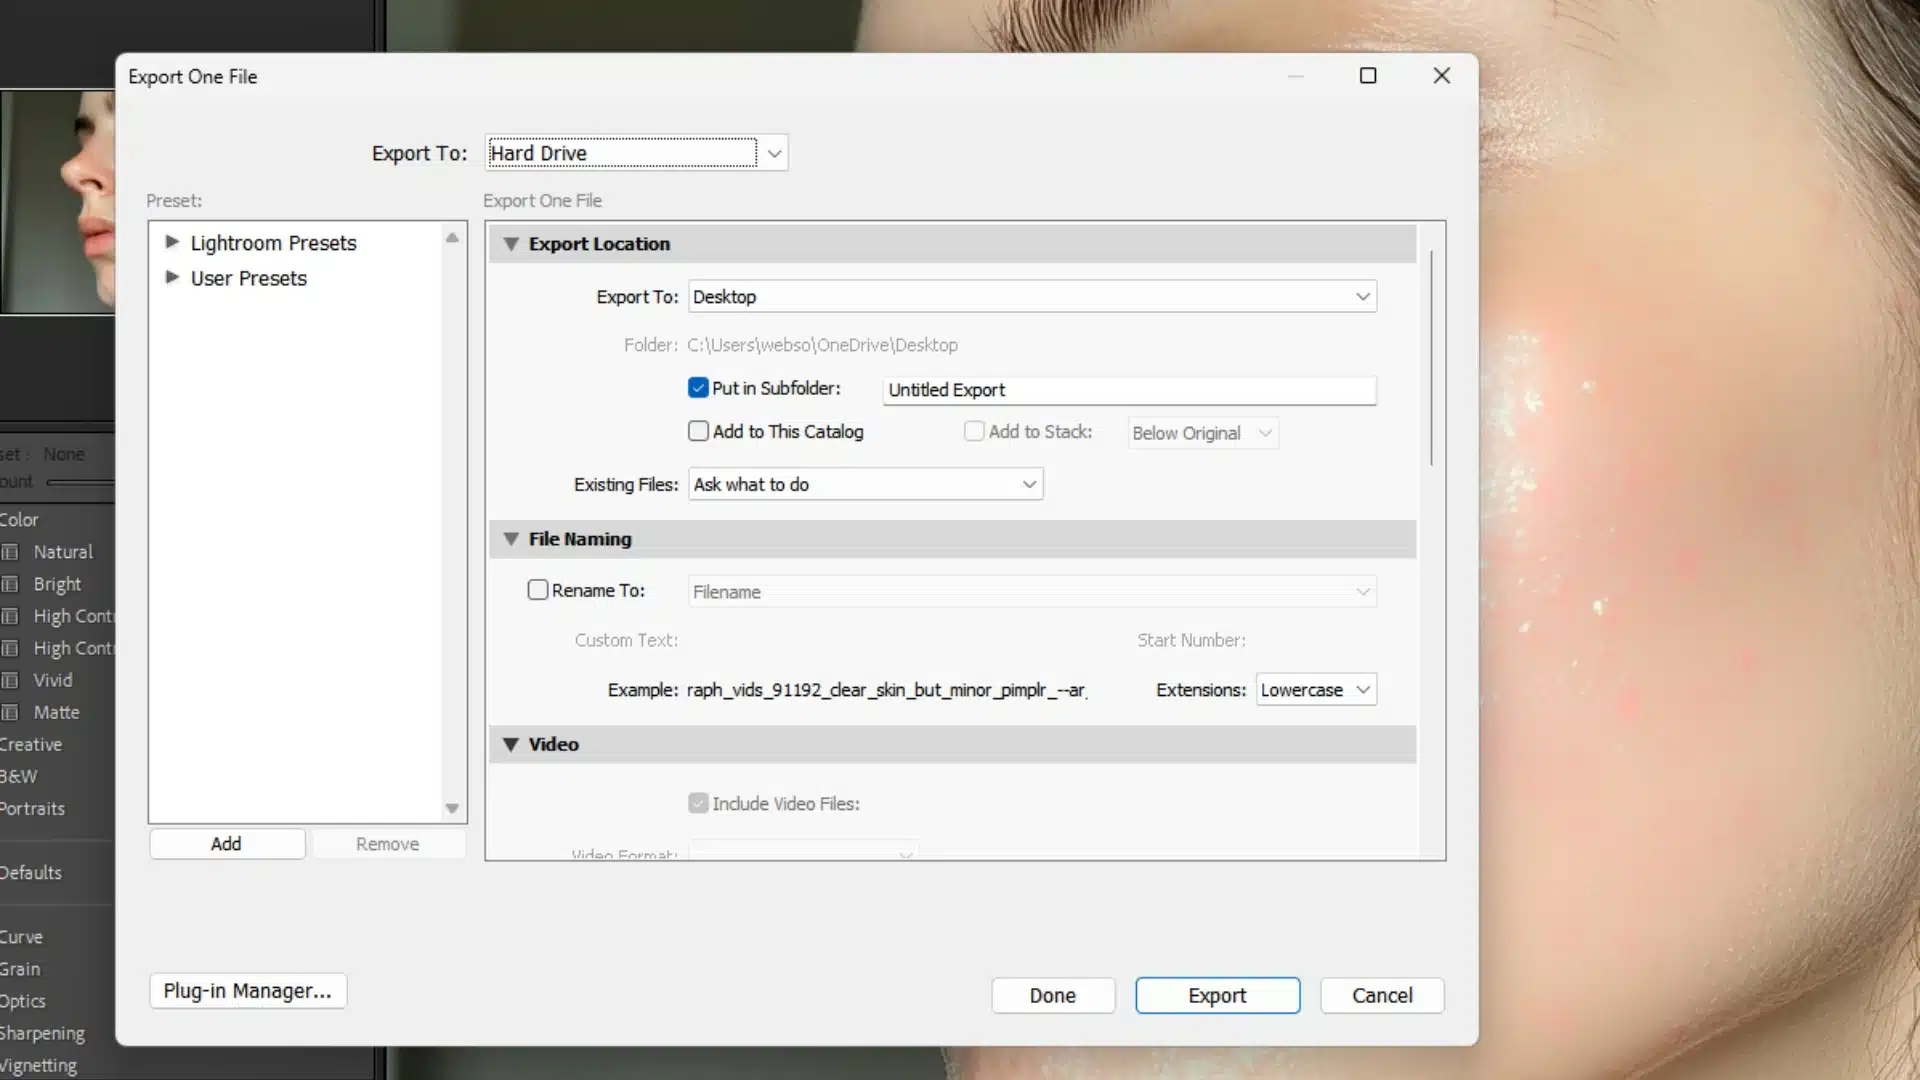
Quick edits and batch processing Professional-grade retouching with layers and masks

Lightroom is great for quick edits and easier to use for basic photo adjustments. However, Photoshop offers full control over frequency separation through layers and detailed tools, making it ideal for professionals needing precise skin retouching in photoshop.

Frequently Asked Questions

Ultimate-Lightroom-Course-Detailed-Image-Adjustments

What is frequency separation in photo editing?

This is a technique that splits an image into two parts: one for color and tone (the low frequency layer) and one for texture and details (the high frequency layer). This allows you to edit each separately, making it easier to fix blemishes, smooth skin, and adjust colors without affecting the fine details of the skin, like pores or wrinkles.

What is frequency separation in Affinity Photo?

In Affinity Photo, frequency separation works the same way as in other editing tools like Photoshop. You separate the image into two layers: one for texture (high frequency) and one for color (low frequency). Affinity Photo has a built-in frequency separation action, so you don’t need to do it manually. You can smooth out skin or fix blemishes while keeping important details like pores.

How to smooth skin in Lightroom Classic 2024?

To smooth skin in Lightroom Classic 2024, you can use tools like texture and clarity sliders to reduce skin roughness. You can also use the brush tool to apply these effects to specific areas. However, for advanced skin smoothing, you may need to export the image into Creative Cloud apps like Photoshop for more detailed work, such as frequency separation.

What is frequency separation for beginners?

For beginners, frequency separation might sound complex, but it’s a method that helps you edit skin more precisely. You split the image into a blur layer (low frequency for color) and a detail layer (high frequency for texture). This makes it easy to fix things like pimples or uneven tones without making the skin look fake or too smooth. It’s a great way to learn how to balance color and detail in photo editing.

Conclusion

Side-by-side comparison of a portrait before and after frequency separation skin retouching in Lightroom.

When I first started using frequency separation, I made the common mistake of over-blurring, which made my portraits look unrealistic. But once I learned to separate the color and texture layers, it completely changed my approach to skin retouching. Now, I can easily smooth skin while keeping natural details intact, creating a balanced and professional look.

If you’re ready to master techniques like this, enroll our  Photoshop Course or Lightroom Course today!

If “Frequency Separation Lightroom Guide for Skin Retouching” article has helped you, then Like and Share it with your friends

Facebook
Twitter
LinkedIn
Pinterest

Have a nice photoshoot!

Read more about: Photo Editing with Lightroom and Photoshop

Download Your Free Guide Now!

Discover the secrets of photography with our printable guide! Master essential techniques like aperture, shutter speed, and ISO to create stunning images. Get your free printable PDF now and start turning your snapshots into masterpieces!