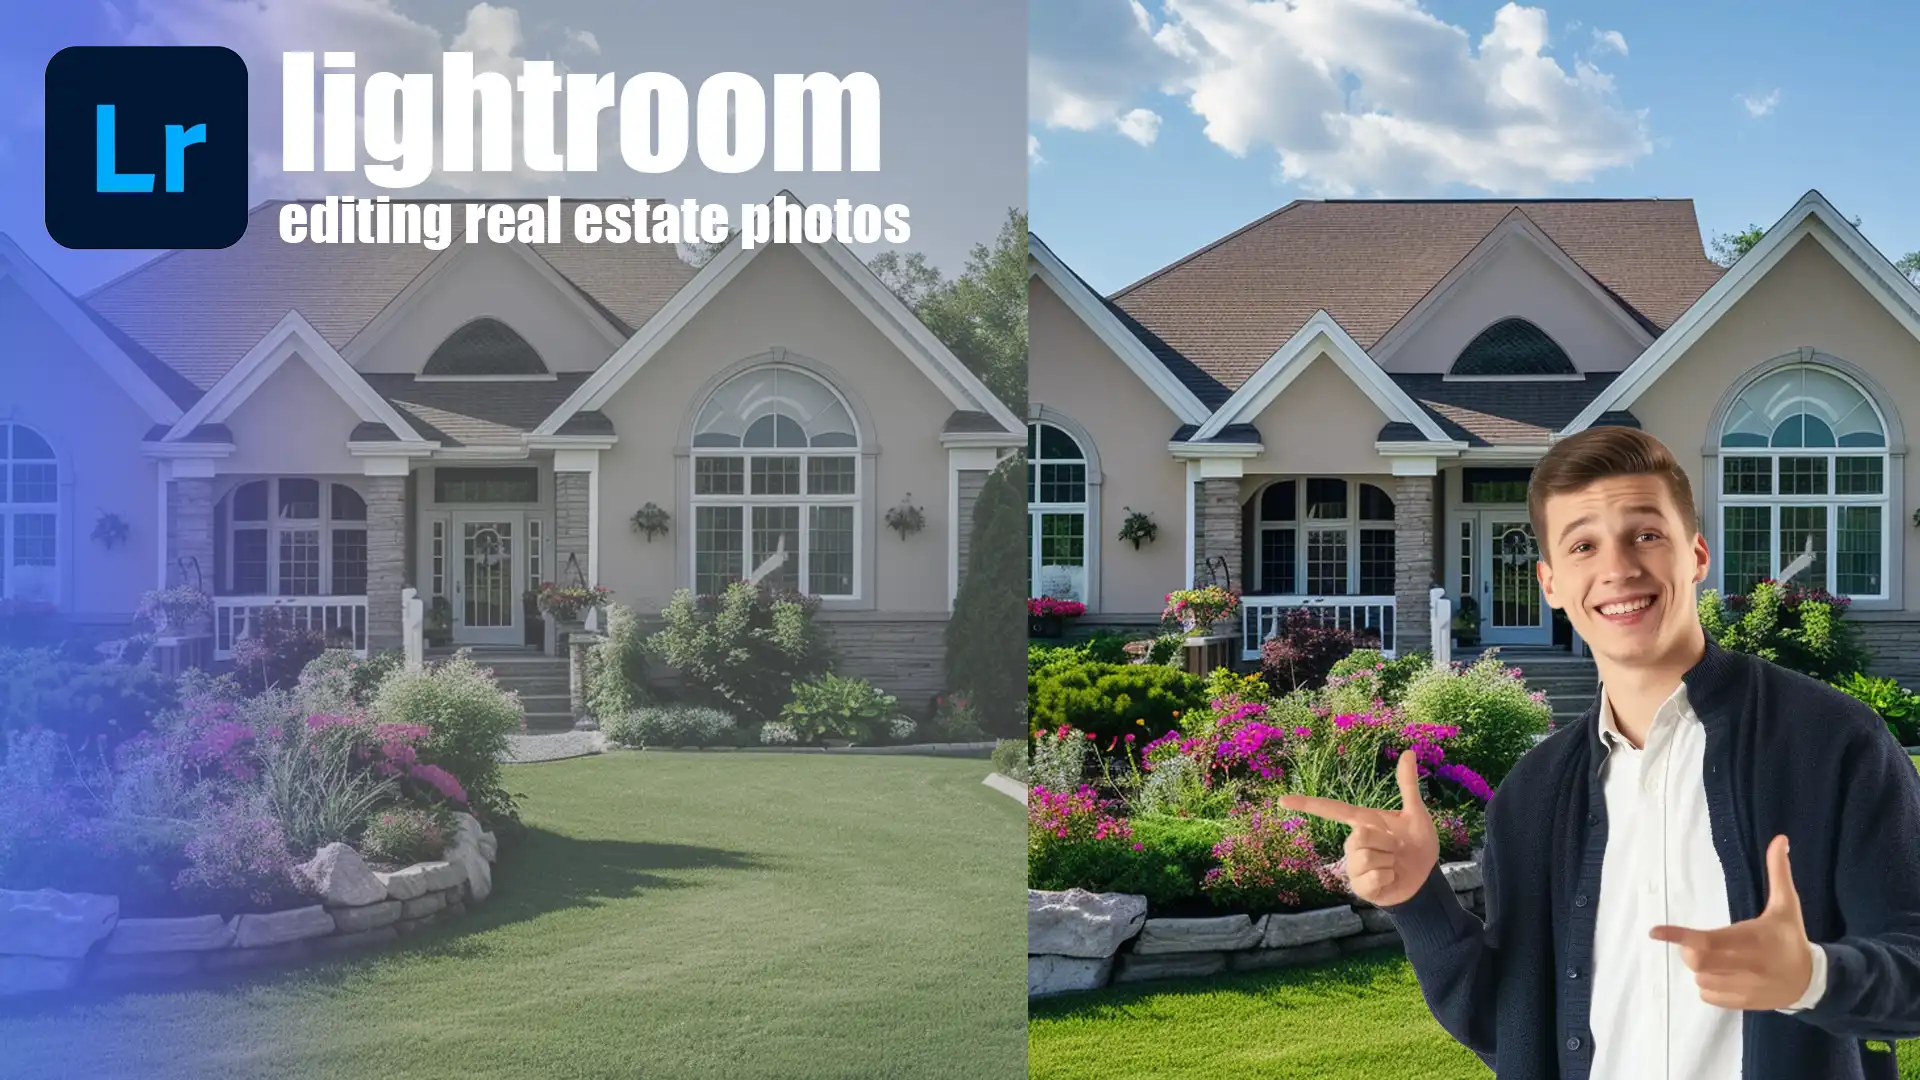
Editing Real Estate Photos in Lightroom: Tips and Techniques
Editing Real Estate Photos in Lightroom: Tips and Techniques
Editing real estate photos in Lightroom can transform ordinary property images into stunning visuals that captivate potential buyers. Imagine scrolling through a listing and being instantly drawn to bright, vibrant photo that showcase every detail of a home.
In this article, I’ll guide you through the important steps and techniques to elevate your real estate photography using Lightroom.
Whether you’re a seasoned photographer or just starting, you’ll find valuable tips to make your listings stand out. Keep reading to discover how you can create eye-catching images that attract more buyers and drive sales.
Table of Contents
Why Lightroom for Real Estate Photography?
Real estate photography plays an important role in creating attractive listings that catch potential buyers’ eyes. The visual appeal of real estate photographs can make or break a sale.
Given this significant role, choosing the right tool for editing real estate photos in Lightroom becomes significant.
An Introduction to editing Real Estate photos in Lightroom
Lightroom offers a variety of tools tailored to meet the unique needs of real estate photographers. It helps in handling the entire editing process efficiently and effectively.
Save Time with Presets
Using Lightroom presets is an excellent way to reduce time while maintaining consistency across all estate photos. Presets are pre-configured settings that can be applied to multiple photos, ensuring you achieve the same edits in record speed.
Correct White Balance Easily
Correcting the white balance in photos ensures colors appear natural and appealing. Lightroom’s temperature slider allows for quick and simple adjustments.
This feature is important in correcting any uneven lighting conditions.
Perfecting Image Quality
Enhancing the image quality of your real estate photography is straightforward with Lightroom. Tools such as the clarity slider, sharpening features, and noise reduction help improve the overall look of your images.
Main Features for Lightroom Real Estate Photo Editing
Let’s begin with the main features to real estate photo editing, starting with the Develop Module
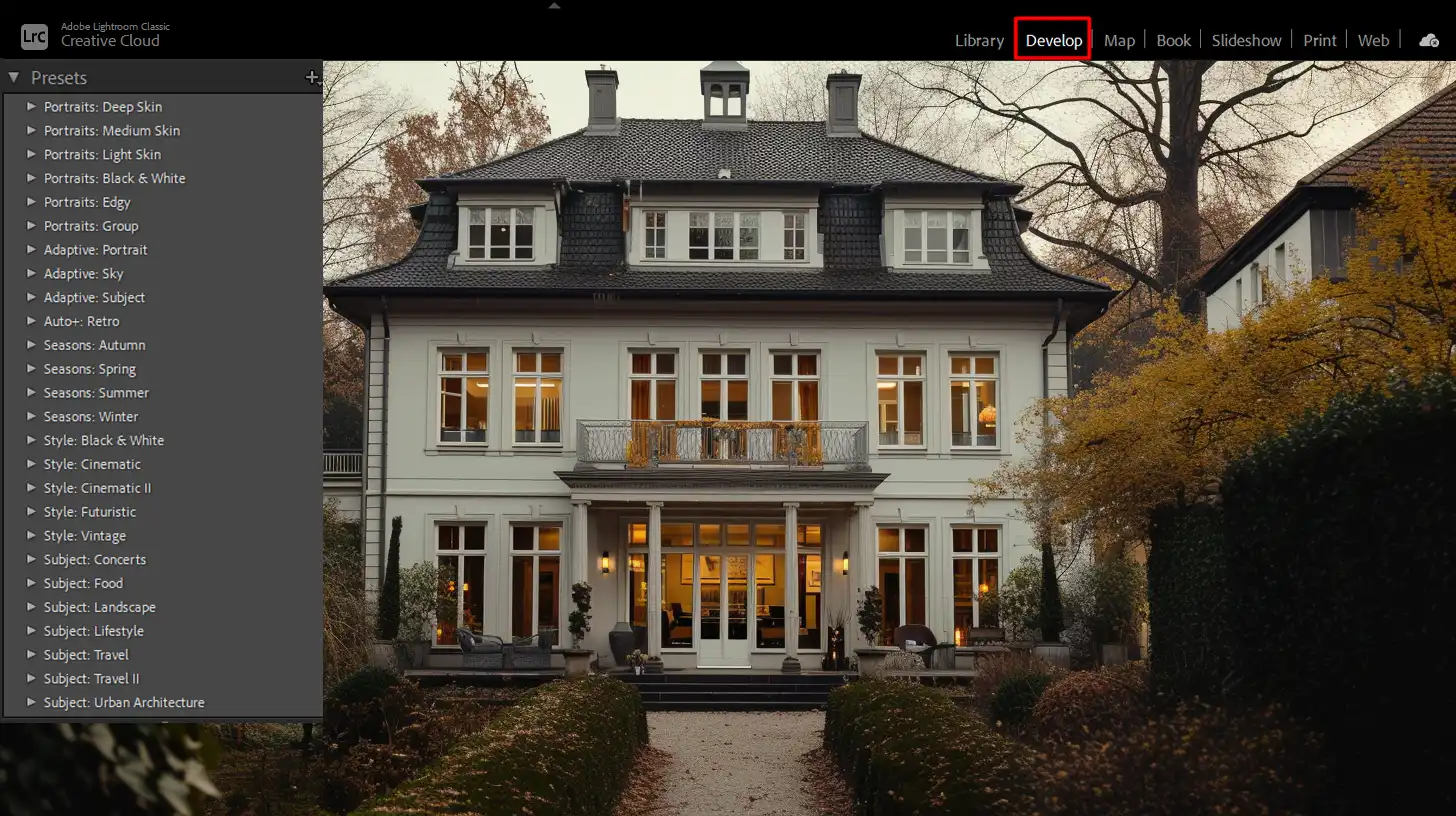
Develop Module
In the Develop module, you can handle all major adjustments including exposure, contrast, shadows, and highlights. This module forms the core of post-processing in Lightroom.
Lens Correction
Lightroom offers lens correction options to eliminate distortions and ensure your photos have straight horizontal lines. This is extremely useful in real estate photography where correct perspective matters.
HDR Imagery
For scenes with different exposures, the HDR merge feature helps create well-balanced images. This can drastically improve exposure in both interior and exterior real estate photos.
Mastering Advanced Photo Edits in Lightroom
Explore advanced editing techniques, beginning with fine-tuning using tone curves.
Using Tone Curves for Fine Tuning
This feature offer advanced control over the contrast and brightness. They allow for fine tuning the photos to achieve a more polished look.
Creative Adjustments
Lightroom includes creative tools such as split toning and color grading to give your photos a unique style. You can easily experiment with these tools to find the perfect look for your real estate photos.
Batch Processing
One of Lightroom’s standout features is batch processing, which allows editing multiple photos simultaneously. By applying the same adjustments to many images at once, you save significant time.
Practical Tips
Here are some practical tips to help you edit real estate photos, starting with the Basic Panel.
Using the Basic Panel
This panel in Lightroom is where you start most photo edits. Here, you can perform adjustments like improving exposure and fixing blown out highlights.
Healing Brush for Flaw Fixes
This tool helps to remove unwanted elements from your images, such as stains on walls or unwanted clutter. It’s a go-to tool for cleaning up your photos.
Examples of Professional Edits
Let’s look at some professional editing techniques, starting with how clarity can make a difference.
Clarity Slider
This slider enhances midtone contrast, giving your photos more depth and dimension. This is particularly useful in bringing out the textures in interior and exterior shots.
Edit Real Estate Photos with Control
Develop a habit of using the clarity slider and tone curves for precise adjustments. It ensures your photos convey the space and ambiance you’re trying to show.
Keep Adjustments Subtle
When you edit real estate photos, always aim for subtlety. It’s easy to get carried away with tools, but remember, minor tweaks often yield the best results.
With these tips, you can harness the full potential of Lightroom to produce compelling real estate photos that captivate potential buyers. Remember to also explore and use Lightroom’s vast array of features to enhance your workflow and outputs.
Pro Tip: In addition to editing in Lightroom, knowing how to draw curved lines in Photoshop can help you add creative overlays or enhance architectural features in your real estate photos
Always double-check your work on multiple devices to ensure the edits look great everywhere.
Preparing Your Photos for Editing Real Estate Photos in Lightroom
Editing real estate photos in Lightroom can be a game-changer for your listings.
Yet, preparation is important. Before diving into the software, understanding how to import and organize your photos sets the stage for a smooth refining process.
Let’s walk through these initial steps together.
Importing Photos into Lightroom
First, select your real estate photos from your camera or local storage. Launch Lightroom and navigate to the “Library” module.
Click “Import” at the bottom left. You’ll see a new window with your previous images on the left and a preview of selected files in the center.
Make sure to review and double-check your selections. Click “Import” again, then wait as your images load into Lightroom. Proper importing ensures you have all your work in one place. Once imported, you can start organizing.
Organizing and Culling Real Estate Photos
Organization simplifies your workflow. Create folders based on property names or dates. Use collections to group images by room or feature.
Good organization makes it easier to find and edit real estate photos. Next, cull your images. Go through each image and rate them using the star system:
Three stars for "keepers"
Two for "maybes"
One for "discard"
This quick rating method helps you identify the best photos to edit. After importing and organizing your photos, you’re ready for the exciting part: editing.
From adjusting exposure to fixing white balance, you’ll enhance each photo to attract potential buyers.
Pro Tip: Use Lightroom’s presets for consistent edits. It saves time and ensures all your real estate photos have a similar, professional look.
Line Straightening and Horizon Correction
Line straightening and horizon correction can greatly improve the overall look of real estate photos, enhancing their appeal.
Importance of Line Straightening and Horizon Correction
We now focus on line straightening and horizon correction. This step might seem simple, but it carries great significance. In real estate photography, straight lines and level horizons create a sense of balance and professionalism in your photos.
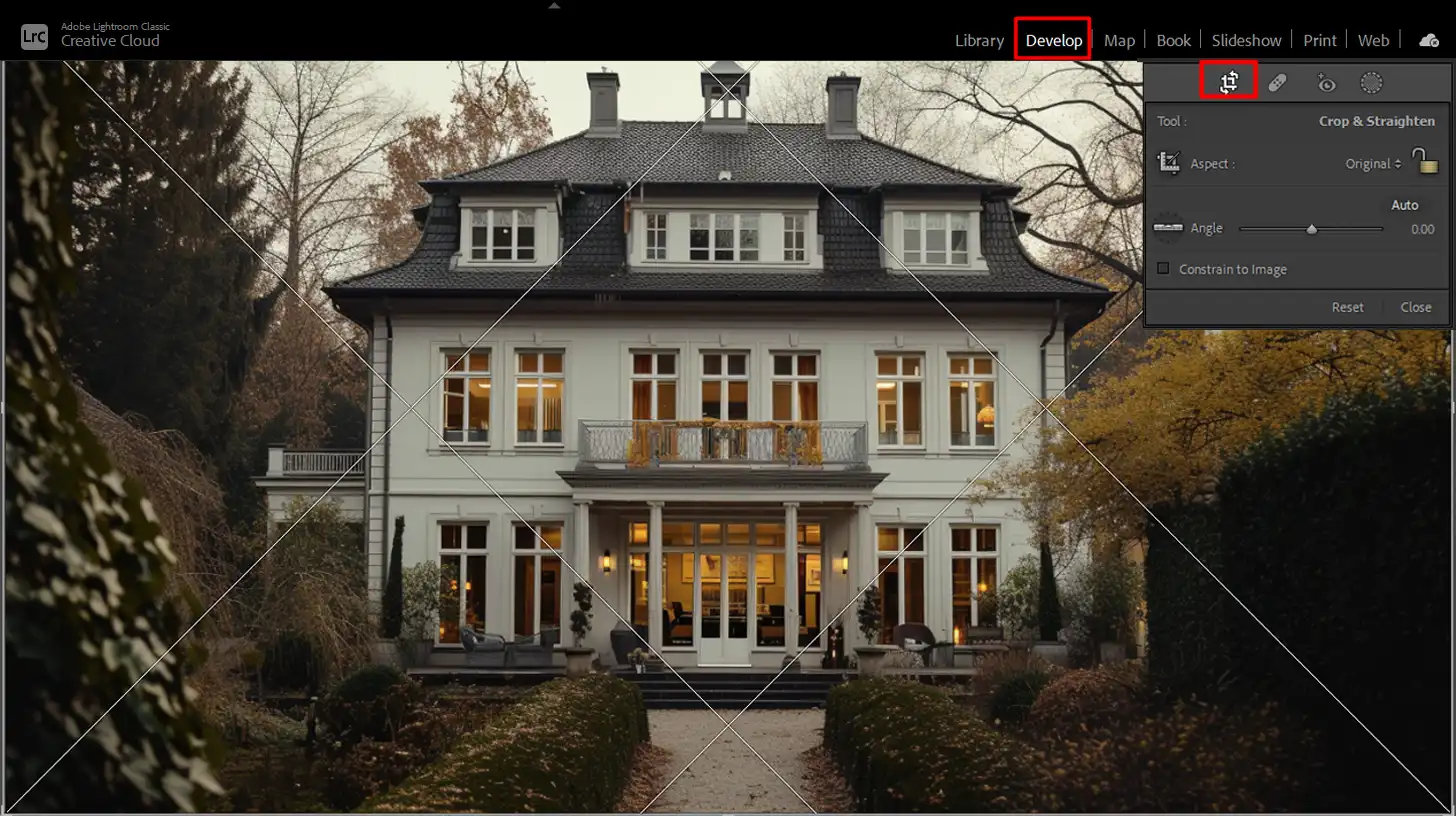
Using Lightroom's Develop Module
First, ensure you open your image in Lightroom’s Develop module. You find the crop overlay tool in the tool panel on the right. Click it and a grid appears over your photo.
Use this grid to align horizontal and vertical lines. For more efficiency, familiarize yourself with Lightroom shortcuts to speed up your workflow.
Correcting Exterior Photos
If you’re working on these photos, keeping the horizon straight is important. A skewed horizon makes even the best images look unprofessional.
Simply click on the straighten tool within the crop overlay menu, and drag a line along the horizon. Lightroom automatically adjusts the image.
Handling Slanted Walls or Buildings
Additionally, you might encounter situations where walls or buildings appear slanted. For these scenarios, use the Transform panel.
Here, the guided transform tool can help align lines even when photos have complex angles. Drag the guides along the crooked line and let Lightroom do the magic. If needed, you can further refine your adjustments using the Lens adjustment feature to correct any distortions.
Pro Tip: Always double-check horizon lines before concluding your edits. It helps maintain a cohesive, polished look in your real estate photos.
Remove Unwanted Objects
Imagine you took a perfect shot of a property, but there’s an ugly trash can in the corner. No worries! Let’s dive into how to remove unwanted objects from your real estate photos.
Step-by-Step Guide
Open Your Photo: First, launch the photo in Photoshop. Use the Lasso Tool to draw around the unwanted object.
Content-Aware Fill: Go to Edit and select Content-Aware Fill. This helps replace the selected object with matching background elements.
Refine Edges: If needed, use the Clone Stamp Tool to smooth out any remaining imperfections.
Final Touches: Adjust the contrast and shadows to blend the area seamlessly with the rest of the image.
Save: Don’t forget to save your edited real estate photo!
Tips for Effective Object Removal
Zoom In: Zoom into the object while using the selection tools. This makes it easier to achieve precise results.
Practice: Removing objects can be tricky; practice makes perfect.
Lightroom Techniques
Did you know you can also edit real estate photos using Lightroom? Simply use the Spot Removal Tool by selecting Heal or Clone mode.
Why This Matters
Clear images result in better real estate photography. Potential buyers focus on the property, not distractions. Removing unwanted objects makes your work stand out.
Pro Tip: Use a preset in the Lightroom photo editor to apply the same cleanup settings across multiple images. This technique not only saves time but also keeps your editing consistent.
More Topics to Explore
Editing HDR Images: For those stunning high-dynamic-range pictures.
White Balance: Learn how to achieve accurate colors.
Sharpening: Enhance the clarity of your real estate photos.
Reduce Noise: Clean up grainy images for a polished look.
These are just a few things you can explore to create professional-looking real estate photos. Don’t forget to check out our comprehensive guide for more Lightroom tips.
With these simple steps, removing unwanted objects from your images becomes a breeze. Push your real estate photo editing game to the next level!
Advanced Techniques for Editing Real Estate Photos in Lightroom
Explore advanced editing techniques in Lightroom that can elevate your real estate photos, starting with HDR blending.
Here’s a comparison of advanced Lightroom techniques to enhance your real estate photos with professional results.
Aspect
Overview
HDR Blending in Lightroom
Combines multiple exposure shots into a single balanced image, enhancing both interior and exterior real estate photos.
Using Graduated and Radial Filters
Focuses on specific areas of the photo to adjust exposure, contrast, and shadows, improving overall image balance.
Noise Reduction and Sharpening
Reduces noise and enhances image clarity, ensuring clean and crisp results even in low-light conditions.
Lightroom Shortcuts for Efficiency
Utilize shortcuts to speed up the editing process, allowing more focus on creativity and reducing navigation time.
HDR Blending in Lightroom
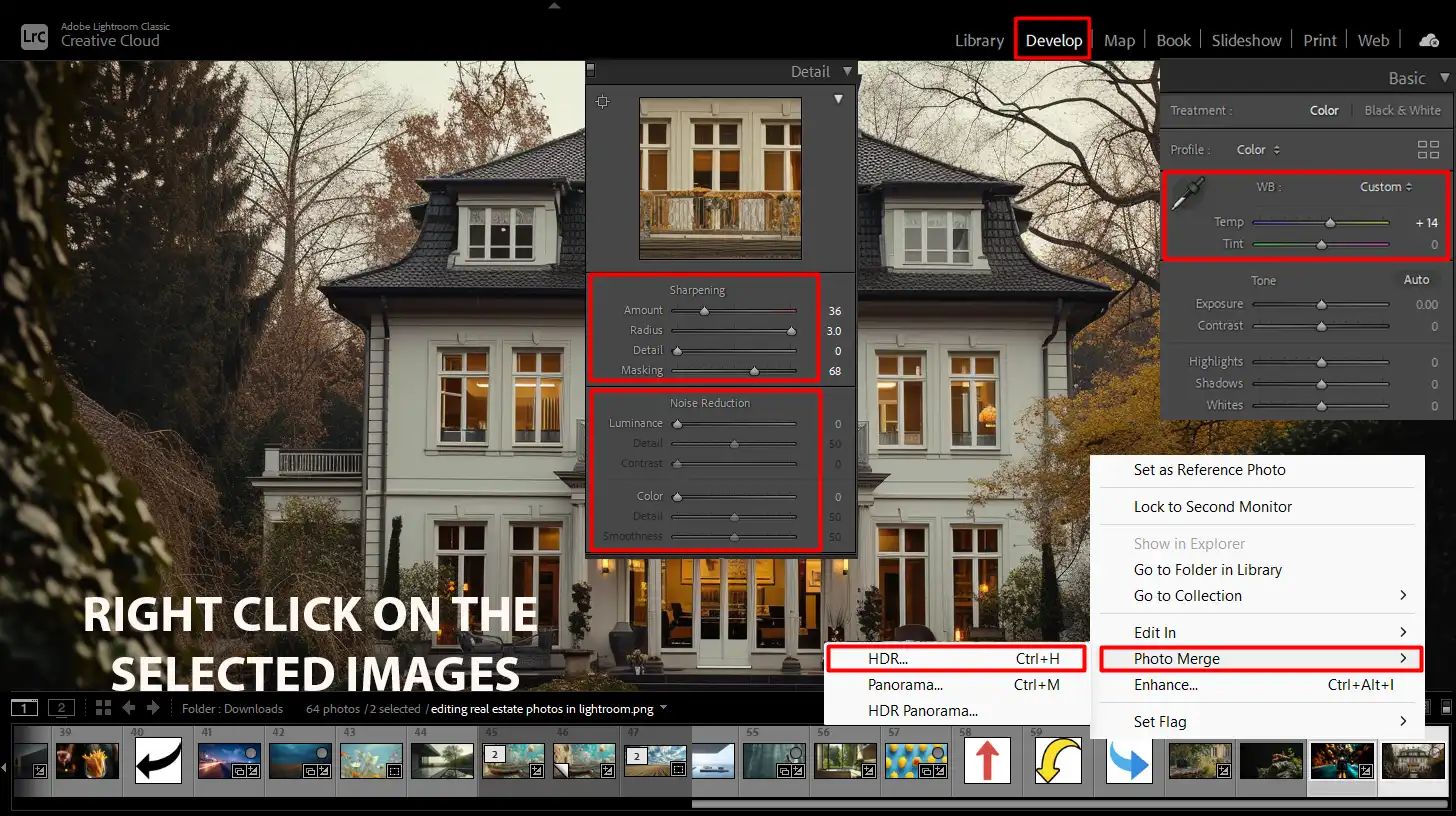
Editing real estate photos in Lightroom often involves handling varying exposures. HDR blending merges different exposures into one balanced image. To achieve this, follow these steps:
Import your multiple exposure shots into Lightroom.
Select the photos and right-click to choose "Photo Merge > HDR."
In the HDR Merge Preview, adjust the sliders for Deghosting, if necessary.
Click "Merge" to create your HDR image.
HDR blending ensures all areas are well-exposed, resulting in stunning real estate photography. This helps highlight both interior and exterior details equally.
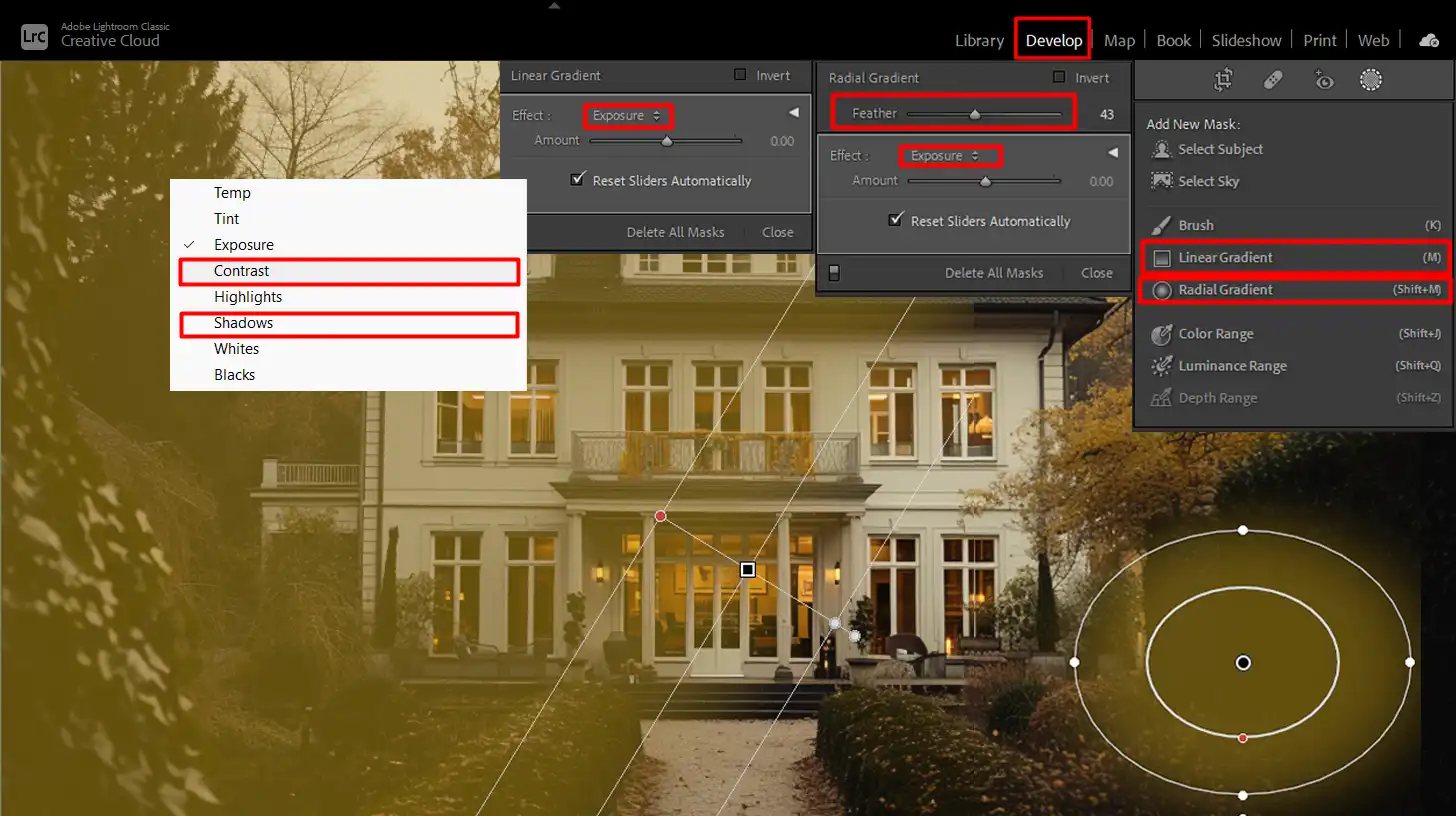
Using Graduated and Radial Filters
Graduated and Radial Filters in Lightroom help in focusing on specific areas of your photo. Here’s how:
Select the Graduated Filter from the toolbar.
Click and drag across the area where you want to apply the filter.
Use the sliders to adjust exposure, contrast, and shadows.
For the Radial Filter, click and drag a circular shape over the target area.
Adjust the settings similarly to create the desired effect.
These tools help in improving areas with too much brightness or darkness, enhancing the overall look of your real estate photos.
Noise Reduction and Sharpening
Noise can affect the quality of your images, especially in low-light conditions. To improve clarity and reduce noise:
Go to the Develop module.
Scroll down to the Detail panel.
Use the Noise Reduction sliders to reduce luminance and color noise.
Balance it with Sharpening sliders to retain detail.
This technique is important for maintaining the standard of a professional real estate photographer, helping achieve clean and crisp images.
Lightroom Shortcuts for Efficiency
Mastering Lightroom shortcuts can significantly speed up your editing process. Here are some important shortcuts:
Press "D" to switch to the Develop module quickly.
Use "R" to activate the Crop tool instantly.
Hit "O" to cycle through different overlay guides while cropping.
Press "F" to view your photo in full-screen mode.
Utilizing these shortcuts will streamline your workflow, allowing you to focus more on creativity and less on navigation.
Editing Specific Types of Real Estate Photos
Different types of real estate photos need unique editing techniques. First, let’s focus on interior photos
Interior Photos
When editing interior photos, start by adjusting the exposure. Proper lighting is important for highlighting room features.
Next, perform some color correction to balance any unnatural tints that might distract from the space. Often, indoor lighting can create a yellow cast, which can be corrected using the white balance tool.
Don’t forget to enhance the contrast and shadows. This helps in defining the elements within the room, making it more dynamic.
Finally, use sharpening tools sparingly to improve the overall clarity of the image. Over-sharpening can make the photo look harsh, so proceed with caution.
Exterior Photography
For real estate photography of exterior shots, begin by correcting the exposure. Depending on the time of day, the outside setting often leads to very bright or too dark photos.
Next, address sky replacement if necessary. A dull sky can be swapped with a more vibrant one using the replace sky tool in Photoshop. This step can make a significant difference.
Remember to adjust contrast and shadows. This will help in bringing out the structures and details of the building. Don’t shy away from enhancing colors to make greenery pop, but keep it realistic.
Use the crop tool to remove any unnecessary elements that don’t add value to the composition.
Twilight Photos
Shooting during twilight can produce dramatic effects. Start by adjusting the exposure. Twilight scenes can be tricky but aim for an evenly lit shot.
Use color correction to maintain the natural feel of the twilight hues. Pay special attention to the balance of blues and oranges.
For these photos, contrast adjustment can make or break the shot. Enhancing contrast will bring out vivid colors and make the twilight pop.
Lastly, apply some sharpening carefully to define the outlines and enhance details. Be mindful not to overdo it as the soft twilight can turn harsh.
Pro Tip: Save your common edits as preset settings in Lightroom to elevate your photography and save time during your edits. This step ensures consistency across all your real estate photos.
Frequently Asked Questions
What Makes Real Estate Photos Look Professional in Lightroom?
Exposure and Contrast: Adjust the exposure and contrast to ensure your photo is well-lit without losing details in the highlights or shadows.
Color Enhancement: Enhance colors using the Vibrance and Saturation sliders to make your photos pop.
Lens Correction: Use this tool to fix any distortion caused by your camera lens.
Sharpening and Noise Reduction: Apply sharpening and noise reduction to make your images crisp and clear.
How Do Real Estate Photographers Edit Their Photos?
Bracketing: Professional photographers often bracket multiple exposures to capture the widest dynamic range and then blend these exposures in post-processing.
Selective Adjustments: They typically use selective adjustments to enhance both interior and exterior shots, focusing on lighting and detail enhancement.
Advanced Retouching: Advanced retouching may include removing unwanted objects, correcting perspective, and sometimes adding virtual staging.
How Do I Edit Photos in Lightroom to Look Professional?
White Balance: Adjust white balance for color correction to ensure the colors in your image are accurate to the scene.
Tone Curve: Manipulate the Tone Curve to fine-tune the brightness and contrast levels throughout the image.
Local Adjustment Tools: Utilize local adjustment tools like the Graduated Filter, Radial Filter, or Adjustment Brush to apply specific changes to parts of the image.
Presets: Experiment with Lightroom's presets for a quick, professional touch or to maintain consistency across a series of photos.
What is the Best Format for Real Estate Photos?
For Online Listings: Use JPEG format for its balance of quality and file size, ensuring fast loading times and good visual quality.
Editing Formats: When editing, save your work in TIFF or PSD formats to preserve the quality and allow for further editing without loss.
For Print Materials: Consider high-resolution JPEG or TIFF files to ensure the best print quality.
Editing real estate photos in Lightroom has truly transformed my workflow and the quality of my images. By mastering this powerfultool, I’ve been able to bring out the best in every property, making them look more appealing and professional.
The ability to adjust lighting, enhance colors, and correct distortions quickly has saved me countless hours. For anyone looking to improve their real estate photography, I highly recommend checking out these courses: Photoshop course and Lightroom course.
These resources have been invaluable in my journey, offering in-depth tutorials and practical tips that have elevated my skills to the next level.
If this article has helped you, then Like and Share it with your friends
$2,061.00Original price was: $2,061.00.$1,061.00Current price is: $1,061.00. 27584
Download Your Free Guide Now!
Discover the secrets of photography with our printable guide! Master essential techniques like aperture, shutter speed, and ISO to create stunning images. Get your free printable PDF now and start turning your snapshots into masterpieces!