
Mastering Photoshop tools, especially the warp tool, is a skill that graphic designers and artists need. This instrument allows users to adjust image perspectives, create text grids, select steps for puppet images, and more. With accurate use of this feature, you can transform your jpeg files into stunning visuals.
Photoshop’s warp tool offers numerous options for editing an image. It provides the flexibility to manipulate image layers in ways that were previously impossible or incredibly time-consuming. The warp tool is much like having a miniature design studio at your fingertips; it opens up endless possibilities for creativity.
In this guide, we’ll provide step-by-step instructions on how to get the most out of the warp tool in Photoshop. By understanding its full potential and mastering its usage, you can take your digital artistry skills to new heights.
Table of Contents
Mastering the Warp Tool in Photoshop
Introduction to the Warp Tool
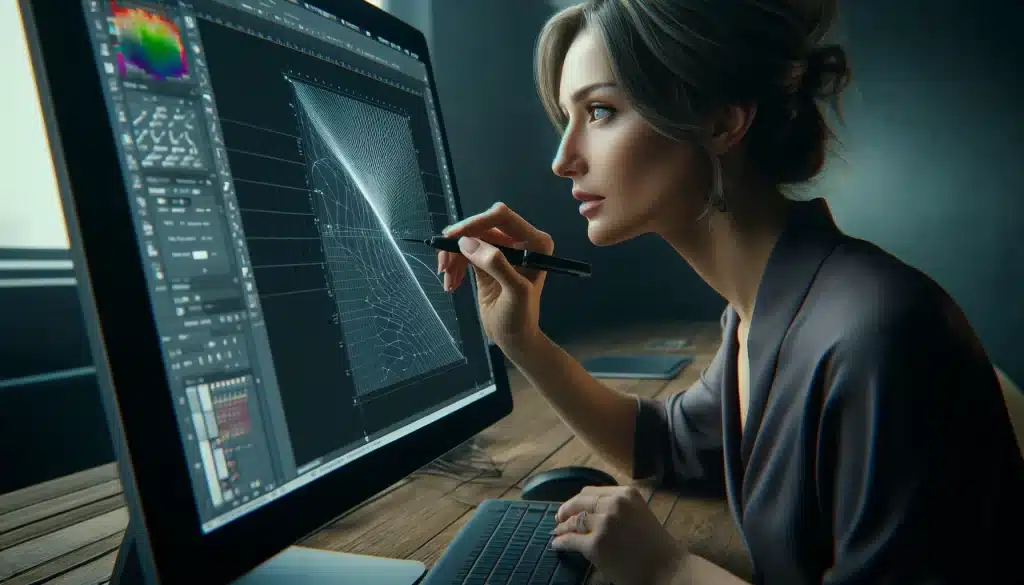
When you first approach the warp tool, it’s vital to navigate its interface with confidence. Begin by selecting the layer you wish to alter and choosing Edit from the top menu, followed by Transform, and then Warp.
A grid appears over the selected layer, presenting you with the power to distort the image by dragging points, lines, or areas within the grid.
- Familiarize yourself with the handles and anchor points; they are your main controls.
- Use the options bar to fine-tune your warp effect with predefined styles or create a custom warp.
- To apply subtle changes, work with a smaller grid by adding more grid lines.
Why Use the Warp Tool in Your Projects
The warp tool’s versatility makes it a go-to for various project needs. Whether you’re adjusting the shape of text to flow with a design element, aligning objects within a composite image, or simply bringing a dynamic twist to static images, the warp tool can be your ally.
- For text: Make your headlines more dynamic by warping text to fit design contours.
- For composites: Ensure seamless integration of multiple images by warping elements to match perspectives.
- For creativity: Give your images a surreal edge by warping objects into imaginative shapes.
Understanding the Warp Tool Interface
- Learn to adjust the grid density for more precise control.
- Explore the different warp styles available in the options bar.
- Remember that you can always undo or reset your adjustments if needed.
To further enhance your skills, consider exploring our tutorials on Selection Tools in Photoshop, which can be used in tandem with the warp tool for even more control over your image manipulation.
Additionally, for those looking to expand their design toolkit, comparing Photoshop vs Illustrator: Which One is the Best for You? can provide valuable insights into which software better suits your creative needs.
For a step-by-step guide on more fundamental skills, our Learn Photoshop: Essential Skills for Creative Excellence tutorial is an excellent resource. And if you’re interested in adding geometric elements to your projects, our article on how to add shapes in photoshop will certainly come in handy.
To ensure a visually engaging experience, consider placing images that show before-and-after examples of warp tool adjustments here. This will allow readers to see the tool’s potential impact visually.
By mastering the warp tool in Photoshop, you’ll unlock new possibilities for your creative projects, allowing you to bend reality to match your vision with a few clicks and drags.
Step-by-Step Guide to Using the Warp Tool
Accessing the Warp Tool
To access the Warp tool, you’ll need to first open your desired graphic in Photoshop. Navigate to the toolbar and choose the Transform tool, or press ‘Ctrl + T’ (Cmd + T on a Mac) as a shortcut. Right-click on the graphic, and a dropdown menu will appear with the Warp option. Here’s how you can make the most of this feature:
1. Open your project and ensure the correct layer is active.
2. Use the Transform tool to scale or rotate before warping, if needed.
3. Right-click and select ‘Warp‘ to initiate the feature.
4. A grid appears over your image, signaling you’re ready to warp.
Remember to save a copy of your original state to revert back if necessary.
Adjusting Images with the Warp Tool
Adjusting images is where the Warp tool truly shines. By clicking and dragging parts of the grid, you can manipulate specific sections of your graphic. To maintain a natural look, pay attention to the flow and direction of your adjustments.
Here are some tips to get started:
1. Begin with subtle changes to avoid over-distortion.
2. Use anchor points around the edges to fine-tune the warp effect.
3. Apply the tool to isolated areas to correct or enhance details. Consider using the Warp tool in tandem with other tools like the Quick Selection tool for precise edits.
Fine-Tuning with Control Points
Control points offer a higher degree of precision in the warping process. They can be added anywhere on your grid to create a custom warp. Here’s how to use them effectively:
- Place control points strategically to affect specific image areas.
- Adjust the bezier handles attached to control points for smoother transitions.
- Double-click on a point to remove it if it's not needed.
Integrating Warp with Other Transformations
Combining the Warp tool with other transformations can yield impressive results. For instance, after warping, you might want to rotate or skew the layer to better fit your composition. Here’s a step-by-step approach:
1. After applying the warp, don’t deselect your layer.
2. Choose another transformation like rotate or skew from the options bar.
3. Apply the new transformation for a composite effect. This method is particularly useful when working on complex projects that require multiple layers of edits.
Creating Realistic Perspective Shifts
The Warp tool can also be used to create convincing perspective shifts, making objects appear to recede into or pop out of the scene. Follow these steps to achieve a realistic perspective:
1. Identify the vanishing point in your image for a consistent perspective.
2. Use the grid to align the warp effect with the perspective lines.
3. Adjust the intensity of the warp to match the scene’s depth.
By carefully aligning the warp with the scene’s natural lines, you can create a seamless integration of your warped object. Incorporate visual aids like before-and-after images here to illustrate the changes made using the Warp tool.
By mastering these advanced techniques, you’ll be able to use the Warp tool to its full potential, creating dynamic and engaging visuals. Remember to keep experimenting with different settings and combinations to find what works best for your creative vision.
Advanced Techniques with the Warp Tool
Combining Warp with Other Tools
The Warp tool’s versatility is magnified when used in tandem with Photoshop’s plethora of other tools. Here’s how you can make the most out of this synergy:
1. Use the Warp tool after applying the Liquify filter to fine-tune adjustments without compromising on the quality of the image.
2. Incorporate the Brush tool to blend warped areas seamlessly with the rest of your artwork, ensuring a natural look.
3. Enhance the effect of the Warp tool by combining it with Layer Masks, which allows for non-destructive editing and precise control over the areas affected by the warp.
For instance, when working on a complex composite, you might warp a layer to match the perspective of the scene. Following this, a Layer Mask can be applied to blend the edges, and the Brush tool can be used to refine the mask, ensuring the warped object fits perfectly within its new environment.
Creative Uses of Warp in Design
Beyond standard image manipulation, the Warp tool opens the door to creative exploration:
- Design unique typography by warping text to follow a custom path or shape, giving life to static letters.
- Create dynamic backgrounds by warping patterns or textures, which can add depth and movement to your design.
- Manipulate photos to craft surreal scenes, using the Warp tool to bend reality in your images in a way that draws viewers into your vision.
Tips for Precision and Efficiency
- Utilize Smart Objects to preserve the original image data, allowing for non-destructive warping and the ability to revisit and tweak the warp at any point.
- Memorize and use keyboard shortcuts to switch quickly between the Warp tool and other frequently used tools, speeding up your workflow.
- Apply the Warp tool in small increments, which can be more manageable and lead to more refined results than attempting large distortions in one go.
For example, when adjusting the shape of an object to fit into a different perspective, working with a Smart Object allows you to experiment with various degrees of warping.
If the result isn’t quite right, you can simply double-click the Smart Object layer and readjust the warp settings as needed. Suggest Image Placement: A graphic showing the Warp tool interface with a highlight on the option to convert a layer to a Smart Object before applying the warp.
Incorporate the internal link for Selection Tools in Photoshop by mentioning that precise selection is often necessary before warping an element, ensuring that only the desired area of the image is affected.
Additionally, you can add shapes in Photoshop to your project and use the Warp tool to modify them, fitting them seamlessly into your design. Remember, the key to mastering the Warp tool lies in practice and experimentation.
Push the boundaries of your creativity, and you’ll discover a myriad of ways to apply this powerful feature in your digital artistry.
Real-World Applications of the Warp Tool
The Warp Tool in Adobe Photoshop is not just a feature; it’s a versatile ally in the realm of digital creativity. Whether you’re adjusting the flow of fabric in a fashion photograph or tweaking the curves on a sleek logo, this tool bends pixels to your will with precision. Let’s explore its practical uses in various scenarios.
Case Studies of Warp Tool Usage
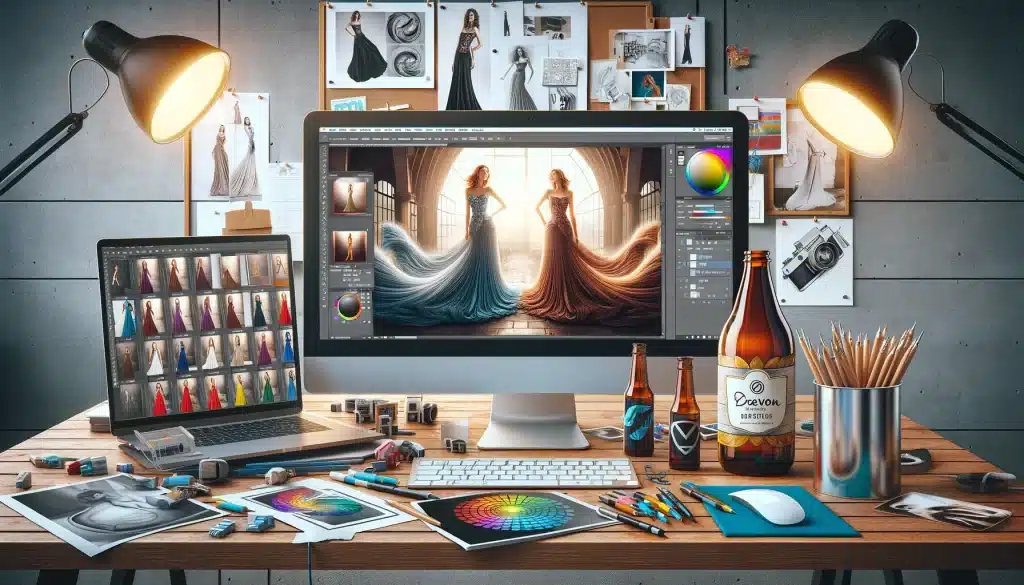
Professionals across different industries have harnessed the power of the Warp Tool to achieve remarkable results. Consider a photographer who needs to alter the contour of a model’s dress to better suit the composition.
With the Warp Tool, subtle yet impactful adjustments are made, maintaining the dress’s texture and lighting consistency. Similarly, in product photography, warping can help in aligning the product label perfectly to the bottle’s shape, ensuring the product looks its best.
- Realignment of clothing and objects
- Smoothing out imperfections in product labels
- Adjusting text or logos to fit irregular surfaces
Warp Tool for Photo Editing
In photo editing, the Warp Tool is indispensable for photographers and retouchers alike. It can be used to correct lens distortion, a common issue where straight lines appear curved in photos.
By using the Warp Tool, you can bring those lines back to their original state. It’s also a favorite for creating dynamic effects in composite images, such as making a flat photo appear to wrap around a 3D object.
- Correcting lens distortion in architectural photography
- Creating composites with realistic wrapping effects
- Enhancing the overall composition by tweaking elements
Implementing Warp for Graphic Design
Graphic designers often turn to the Warp Tool to breathe life into their creations. When designing packaging, the tool helps in visualizing how the design will look on the actual product.
For branding purposes, it allows designers to mock-up their designs on various surfaces and materials, ensuring the logo or text conforms to the product’s shape seamlessly.
- Mocking up designs on packaging
- Branding materials with realistic application previews
- Designing eye-catching promotional banners and posters Remember to bold the keywords for emphasis and include bullet points for readability.
In terms of SEO, ensure that the content contains a balanced repetition of relevant keywords, without overstuffing, to maintain the article’s natural flow.
Additionally, review the content to identify opportunities for integrating visual elements, like tables or bullet lists, which can significantly enhance reader engagement.
For unused links, seamlessly weave in an anchor text related to the “Photoshop vs Illustrator: Which One is the Best for You?” article from the provided JSON object. For example: When deciding on the best software for your design needs, it’s worth considering the strengths of both Photoshop and Illustrator.
While the Warp Tool is a feature unique to Photoshop, Illustrator offers different advantages for vector-based design. Learn more about the differences in our detailed comparison, “Photoshop vs Illustrator: Which One is the Best for You?”.
By following these guidelines, the article section will not only be informative and engaging but also optimized for search engines, providing a comprehensive and enjoyable reading experience for users interested in the real-world applications of the Warp Tool in Photoshop.
Frequently Asked Questions

How do I locate and activate the warp command in Adobe Photoshop?
To initiate the warp command, follow these essential steps:
Open your Adobe project and select the desired layer or object you wish to alter.
1. Navigate to the Edit menu, hover over Transform, and select ‘Warp‘.
2. Alternatively, right-click (Windows) or control-click (Mac) on the layer within the canvas and choose ‘Warp‘ from the contextual menu.
What are the capabilities of control points when refining an image?
Control points are pivotal in fine-tuning transformations. With their help, you can perform intricate adjustments by following this procedure:
1. Click and drag the points to modify the shape of your content.
2. Use the handles around each point to skew or bend segments.
3. Add extra points for higher precision by clicking on the grid line while in warp mode.
Can the warp feature be assimilated with other Photoshop tools for enhanced effects?
Absolutely, integration is possible and powerful. Enhance your workflow by:
1. Combining warp with selection tools for focused adjustments.
2. Using warp after color correction or before applying filters for cohesive modifications.
3. Utilizing layer masks to warp partial elements of an image.
How can I achieve realistic perspective adjustments on images?
For a lifelike perspective shift, it’s important to:
1. Use the grid function to align the object with environmental cues.
2. Gradually adjust control points to match the existing perspective.
3. Experiment with different warp styles from the options bar for the best fit.
What are some creative ways to utilize warp in graphic design?
Ignite your creativity with warp in graphic design by:
1. Fashioning text that curves along a surface or shape.
2. Adapting images to unconventional shapes for striking visual compositions.
3. Transform static elements into dynamic visuals that imply motion or depth.
Are there tips to enhance precision and efficiency while working with warp?
To boost precision and efficiency, keep in mind these tips:
1. Utilize zoom to ensure detailed adjustments.
2. Move control points incrementally to maintain smooth transitions.
3. Create snapshots or duplicates of your layers before warping to easily revert changes.
Optimizing these techniques will enhance your editing process, allowing you to craft compelling visuals that stand out. Employing this handle over your images can significantly impact the final outcome, imparting a refined and professional touch to your work.

Conclusion
Mastering the Warp Tool in Photoshop can significantly enhance your creative abilities and improve your overall workflow. This tool allows you to manipulate and transform images in unique ways, enabling you to create stunning visuals that stand out. With the step-by-step guide provided, you can easily understand and apply the functions of the Warp Tool, making your Photoshop experience more efficient and enjoyable.
Beyond Photoshop, you can also explore other Adobe software like LIGHTROOM. Both Photoshop and LIGHTROOM offer a wide range of tools and features that can help you in your graphic design journey. Mastering these tools can open up a world of possibilities, allowing you to express your creativity and produce high-quality work. So, keep practicing and exploring, and soon enough, you’ll be creating stunning visuals with ease.
Read more about Photoshop:


Course

Light Effect Photoshop


Lightroom Course 2025

Adobe Photoshop Course 2025

Photo Editing Course


