Layer in Photoshop: The Art of Stacking Creativity
Layer in Photoshop: The Art of Stacking Creativity
Have you ever struggled to figure out howto select a layer in Photoshop? You’re not alone.
Selecting and modifying layers is an important skill for navigating Adobe Photoshop efficiently. Fortunately, the process isn’t as challenging as it first appears!
In this article, I’ll guide you step-by-step through everything you need to know about selecting a layer in Photoshop, ensuring that by the end of this read, you’ll be handling your projects like a pro.
Let’s explore these simple and effective techniques, which will not only save time but also enhance your editing skills.
Table of Contents
How to Select a Layer in Photoshop: Navigating the Layers Panel
Navigating the layers panel in Photoshop is important for efficient editing.
This guide will help you understand how to identify and access the layers panel easily.
Identifying the Layers Panel
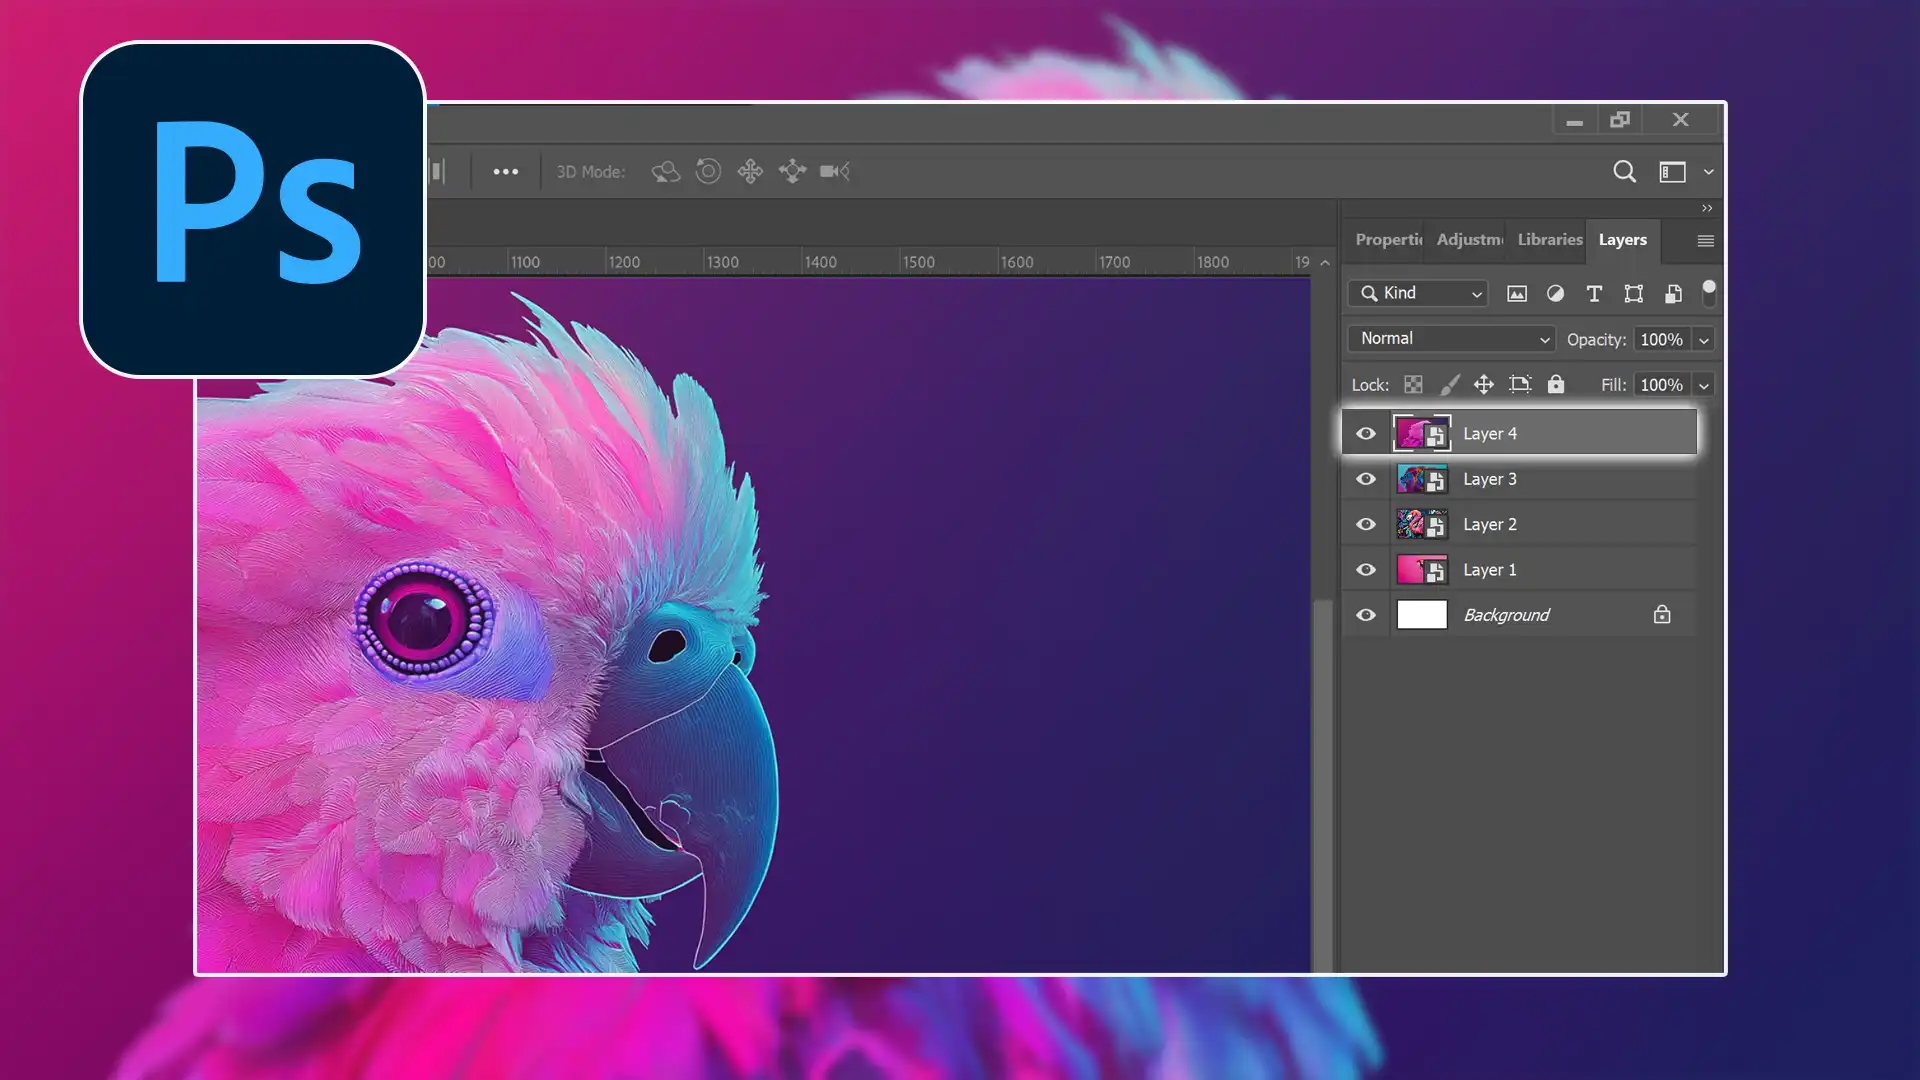
The panel of layers displays all layers and shows every individual element you’re working with.
Layers Panel Location: By default, you can find it on the right side of your workspace.
Layer Thumbnail: Each layer has a small preview icon called a **, helping you recognize layer content quickly.
A typical layers panel might look like this:
Layer Name
Description
Background Layer
The base image layer
Adjustment Layer
Layer for adjustments and modifications
Being familiar with these elements helps you easily manage and select a layer.
Using Shortcuts to Open the Layers Panel
Sometimes, you may find that the layers panel isn’t visible. Knowing how to open it quickly using Photoshop shortcuts can save time.
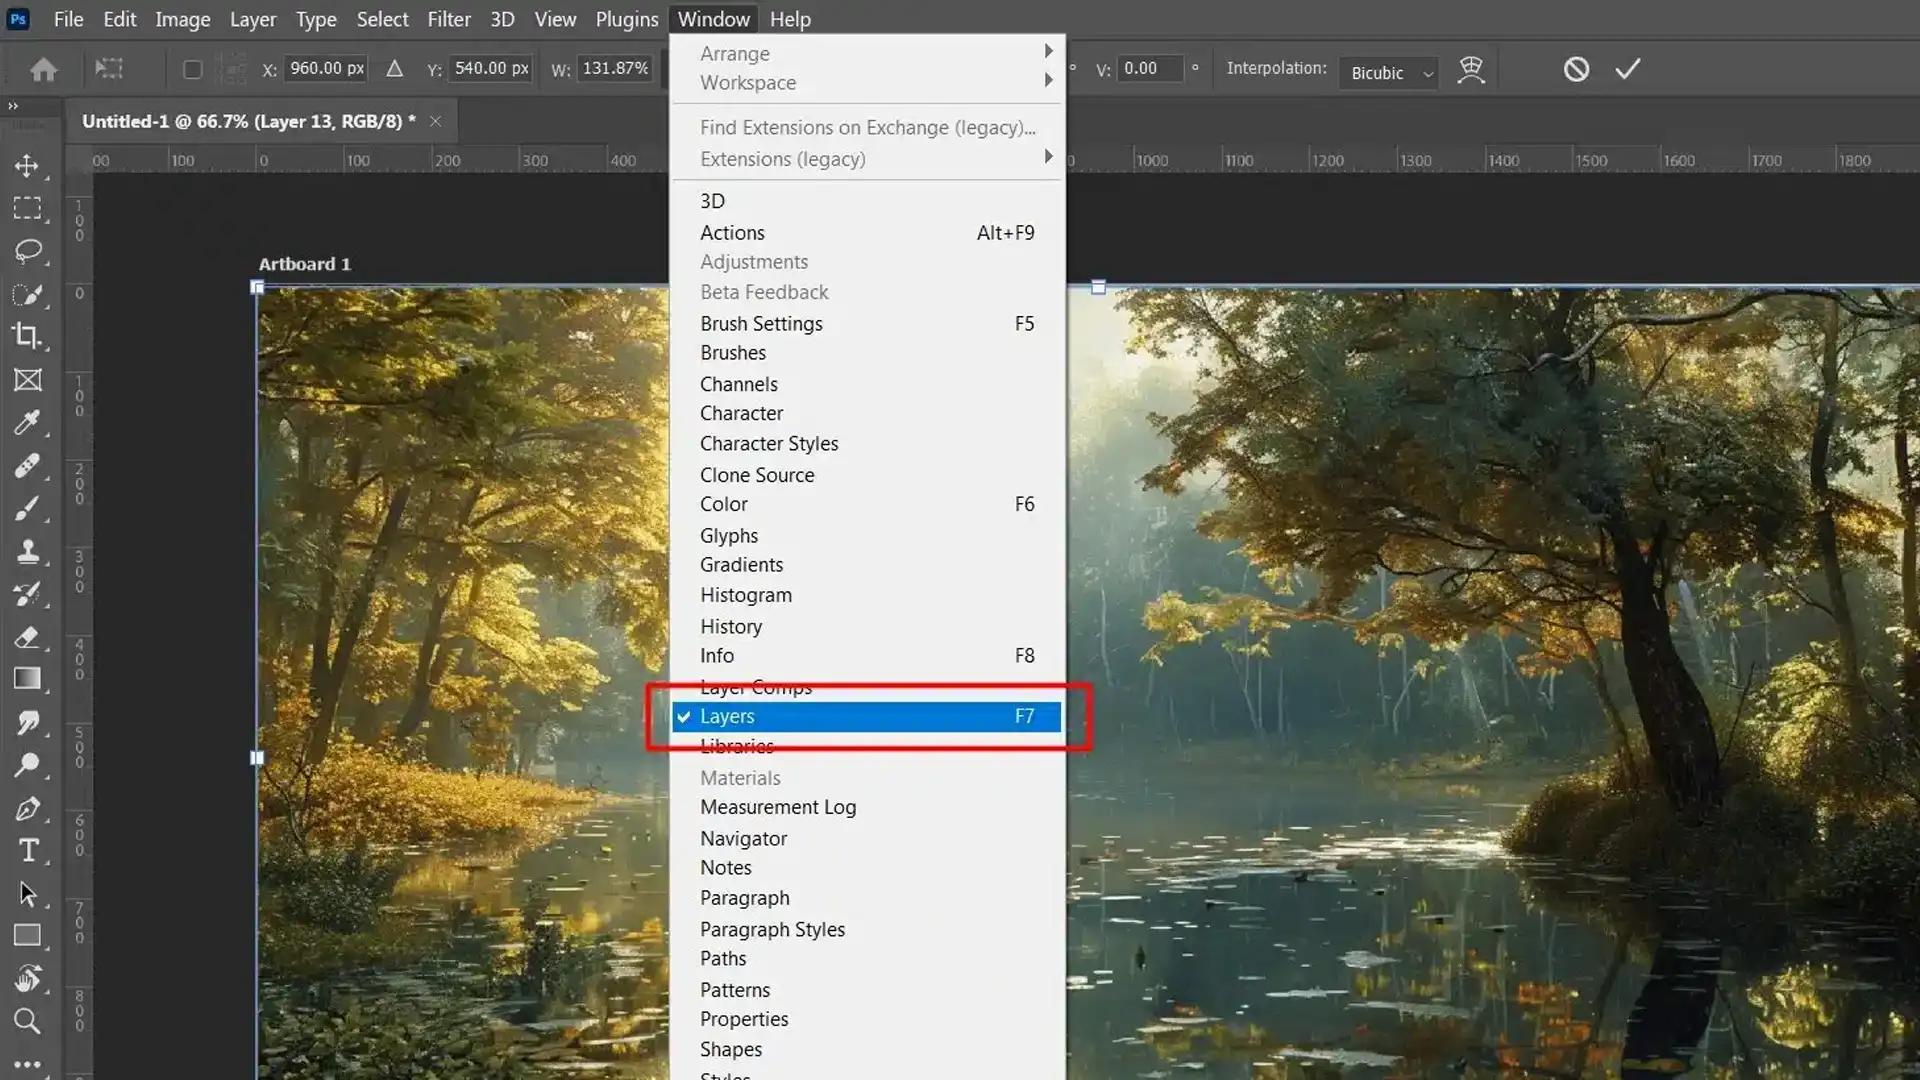
Using Keyboard Shortcuts: Press F7 on Windows and Mac to open/close the layers panel.
Menu Navigation: Go to Window > Layers if you prefer navigating through menus.
These methods ensure immediate access to your layers whenever needed.
Using these straightforward techniques, managing multiple layers in Photoshop becomes more intuitive, whether they involve text, images, or shapes in your project.
Pro Tip: Check out Photoshop layering tutorials to further enhance your understanding of layer management and organization.
These tutorials provide detailed instructions for mastering the layers panel and optimizing your workflow.
Let’s break it down into simple steps so you can easily change your images to the desired dimensions.
Accessing Free Transform Tool
The first step to resizing your image is to access Photoshop’s Free Transform tool.
This versatile tool allows you to modify the document’s size efficiently.
Fist, open your document in Photoshop.
Then, select the first layer you wish to resize from the layers panel.
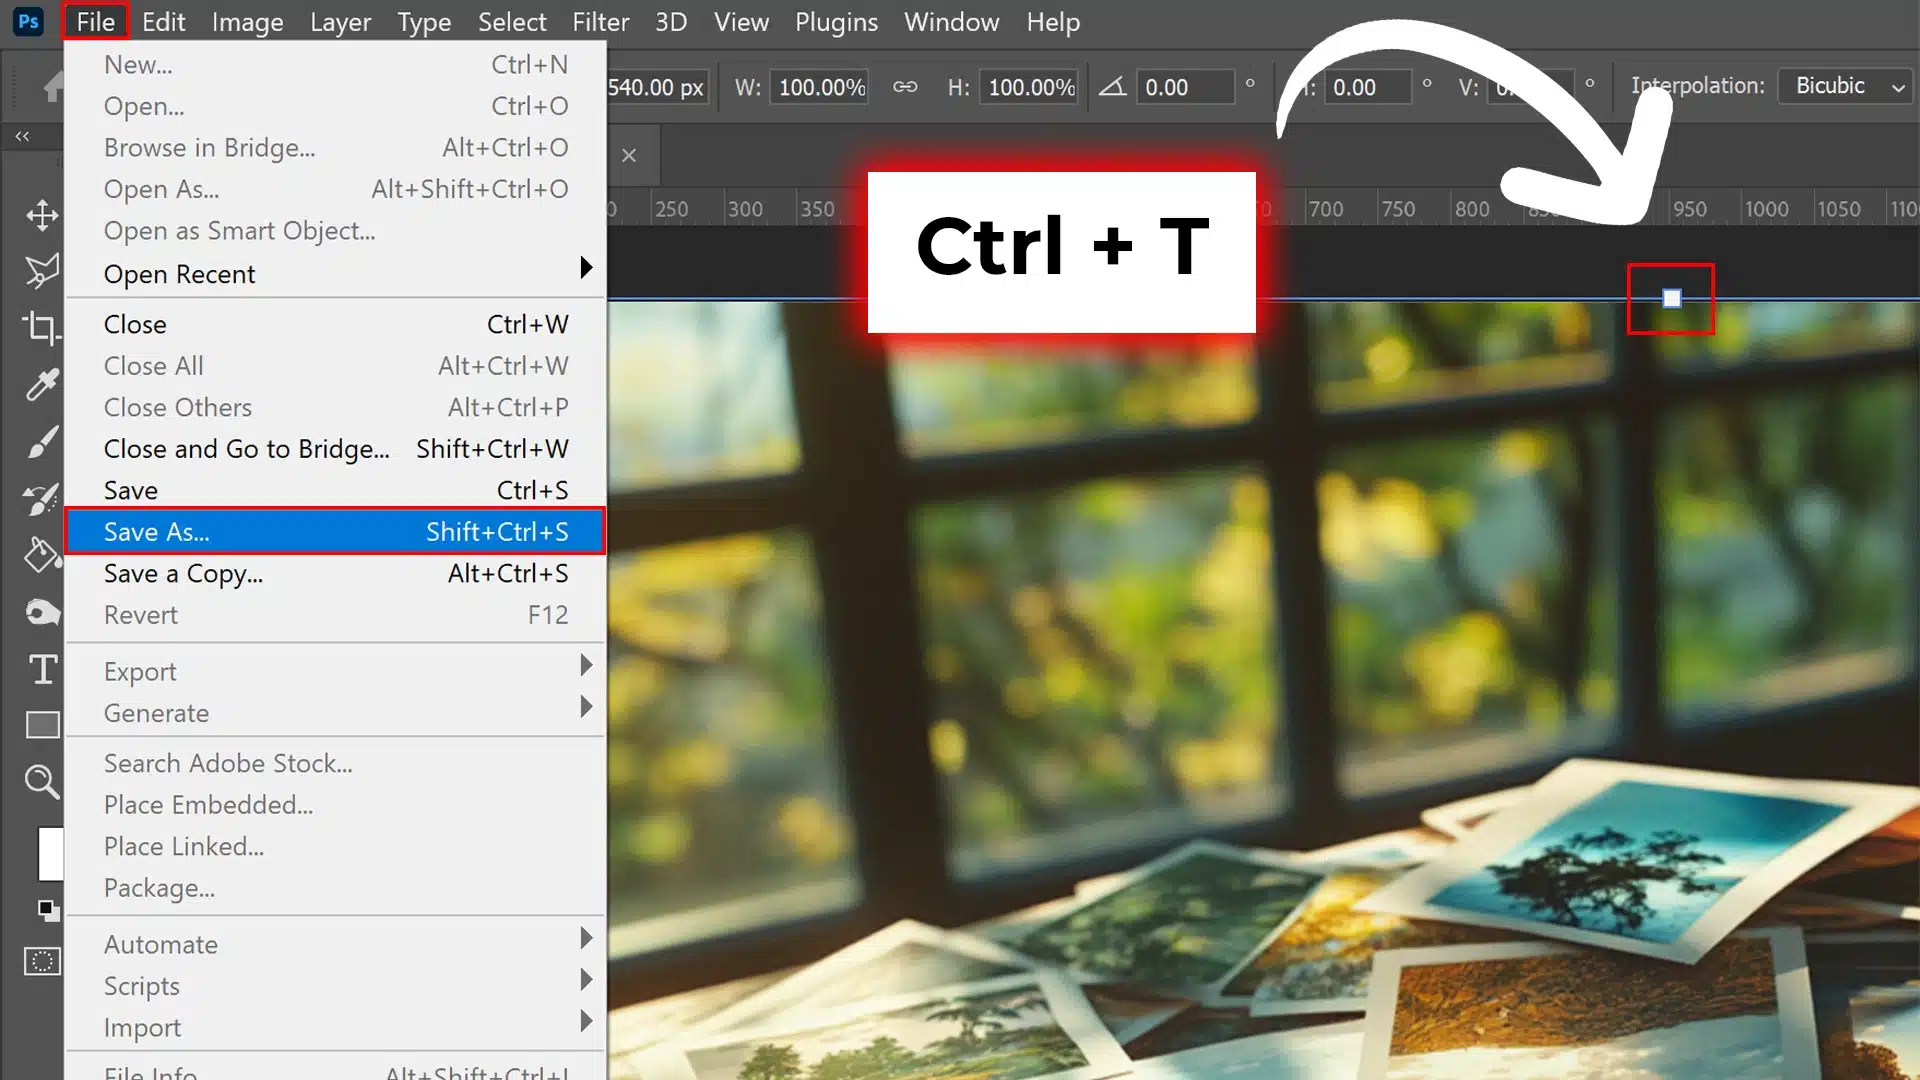
Lastly, press Ctrl+T (Windows) or Command+T (Mac) to activate Free Transform.
You should now see a bounding box around your selected layer, making it ready for resizing.
Setting the Proper Image Dimensions
After accessing Free Transform, it’s time to set your proper image dimensions.
Here’s how:
Use the freetransform box handles to resize manually by dragging inward or outward.
Hold down the Shift key while dragging a corner handle to maintain the aspect ratio.
Enter width and height values at the top in the options bar for precise dimensions for precise dimensions.
Applying and Saving Changes
Finally, you’ll want to apply these changes and save your work correctly.
Follow these last steps:
Double-click inside the transform box or press Enter/Return to apply changes.
Go to 'File' > 'Save As,' and choose the location and file format.
Click Save to complete the process.
Remember to always check if you’ve resized all necessary layers or groups accurately before saving. Using this method ensures your images are perfectly resized while keeping their proportions intact!
Pro Tip: Once you’ve mastered resizing, make sure to master moving images in Photoshop to help you seamlessly work with multiple layers and compositions.
This will further optimize your Photoshop skills and improve your workflow.
Engaging Auto-Select with the Move Tool
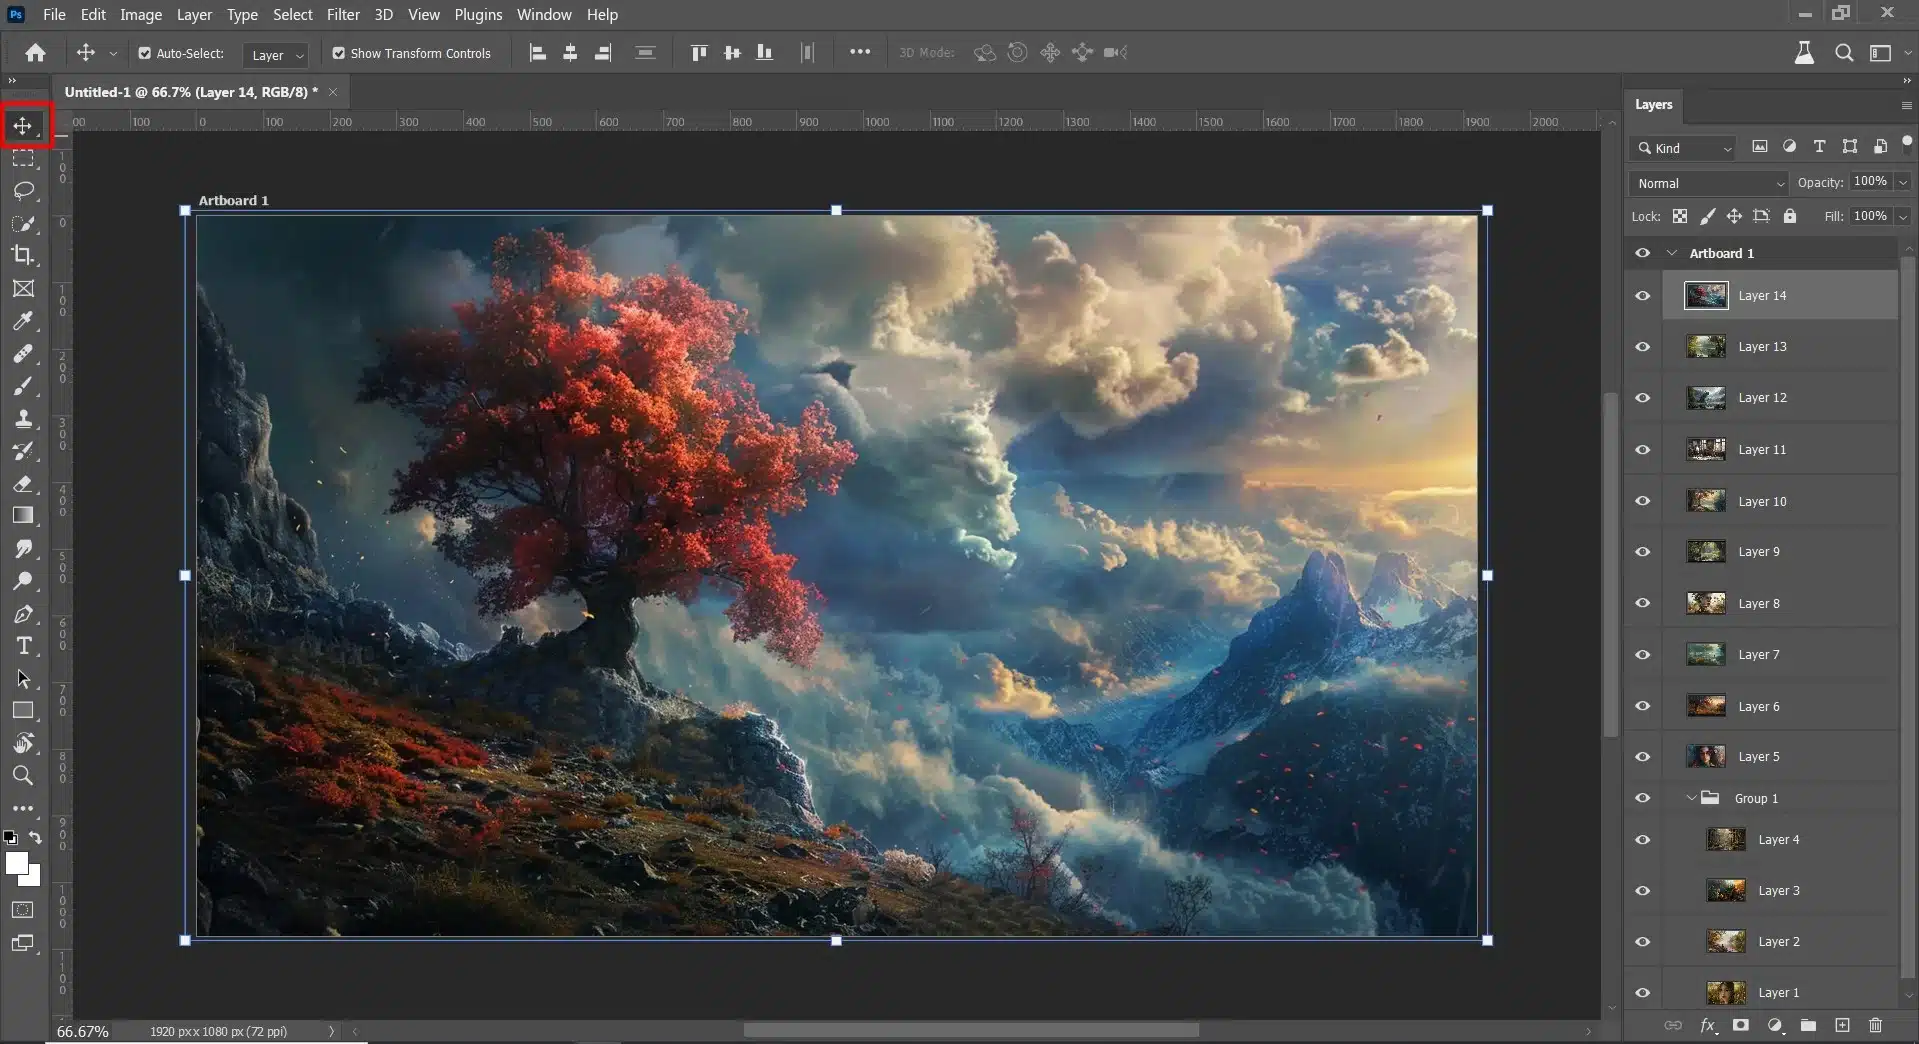
To start using the auto select feature, first activate the Move Tool.
This tool can be found at the top of your toolbar or accessed quickly using the V key on your keyboard.
Enable Auto-Select: In the options bar located at the top of your screen, check the box labeled "Auto-Select."
Selecting Layers: With this enabled, clicking on any object in your canvas will automatically select its corresponding layer. For instance: Clicking an image will highlight its layer thumbnail. Clicking text selects its associated layer.
Ensure that you have selected the correct tool. This will make moving and editing objects much more streamlined.
Adjusting Auto-Select Options
For finer control, Photoshop provides various settings to tweak how auto-select operates.
This is particularly useful when working with multiple layers or complex compositions:
Layer vs Group Selection: Directly beside the Auto-Select checkbox in the options bar, there’s a dropdown menu where you can toggle between selecting individual layer or entire groups of layers: Choose "Layer" if you want pinpoint precision for a singlelayer. Select "Group" when working with multiple grouped elements as a single entity.
Preventing Misclicks: When dealing with densely packed projects, misclicks are inevitable. Here's how to avoid them: You can temporarily turn off auto-select by holding down Ctrl (Windows) or Command (Mac) while clicking only to highlight specific items. Lock specific layers via the layers panel so they remain unaffected by careless clicks.
Enhanced Control With Keyboard Shortcuts: Press Shift while clicking allows multiple selections. Combine it with Ctrl/Command to toggle selections without deselecting others.
Tailoring these settings based on your workflow needs makes achieving precise edits significantly more accessible and less frustrating.
Integrating these tips ensures smoother navigation within complex documents, helping execute tasks efficiently without frequent backtracking.
How to Select a Layer in Photoshop: Selecting Layers Manually
When working in Photoshop, it is sometimes more efficient to manually select layers for precise edits.
Here, we will discuss how to do that easily.
Clicking Directly on a Layer
This method is quick when selecting only one layer within your image.
Make sure the Move Tool is activated from the toolbar.
Navigate to the LayersPanel and locate your target layer.
Click directly on the desired layer thumbnail in the Layers Panel to make it active.
You can also use the auto select feature by clicking “Auto-Select” in the Options Bar at the top of the screen.
This allows you to simply click on any part of your image corresponding to a specific layer, automatically selecting it without navigating through the Layers Panel.
Background Layer
The background layer in Photoshop is the base layer of your image. It’s usually locked, meaning you can’t move or change its stacking order. That’s why you need to learn how to zoom in on Photoshop.
This layer provides the foundational image upon which you build additional layers for adjustments, effects, and other edits.
To unlock and edit the background layer, double-click it in the Layers Panel and rename it.
This flexibility allows you to make comprehensive edits and create complex compositions while keeping the original image intact.
Selecting Multiple Layers
Sometimes, a single layer is insufficient, especially when dealing with complex compositions involving multiple elements.
In such cases, you need to select multiple layers effectively.
Here’s how:
Hold down Shift if you are on Windows or Command using Mac.
While holding, click each desired layer thumbnail in the Layers Panel. This will highlight all selected layers simultaneously.
Alternatively, click one of the following methods:
Drag around the object tool on an interface after enabling the Auto Select option
Use Ctrl + Click (Windows) or Command + Click (Mac) for non adjacent layers.
Example: To illustrate, let’s say you’re working with an intricate document having several types of layers and elements:
To move both text and scene together:
First, select Text Layer A
Second, hold Shift/Command
Then, select BackgroundLayerB
Choosing manual selection methods helps ensure you manipulate precisely what you intend no more, no less streamlining your creative workflow considerably.
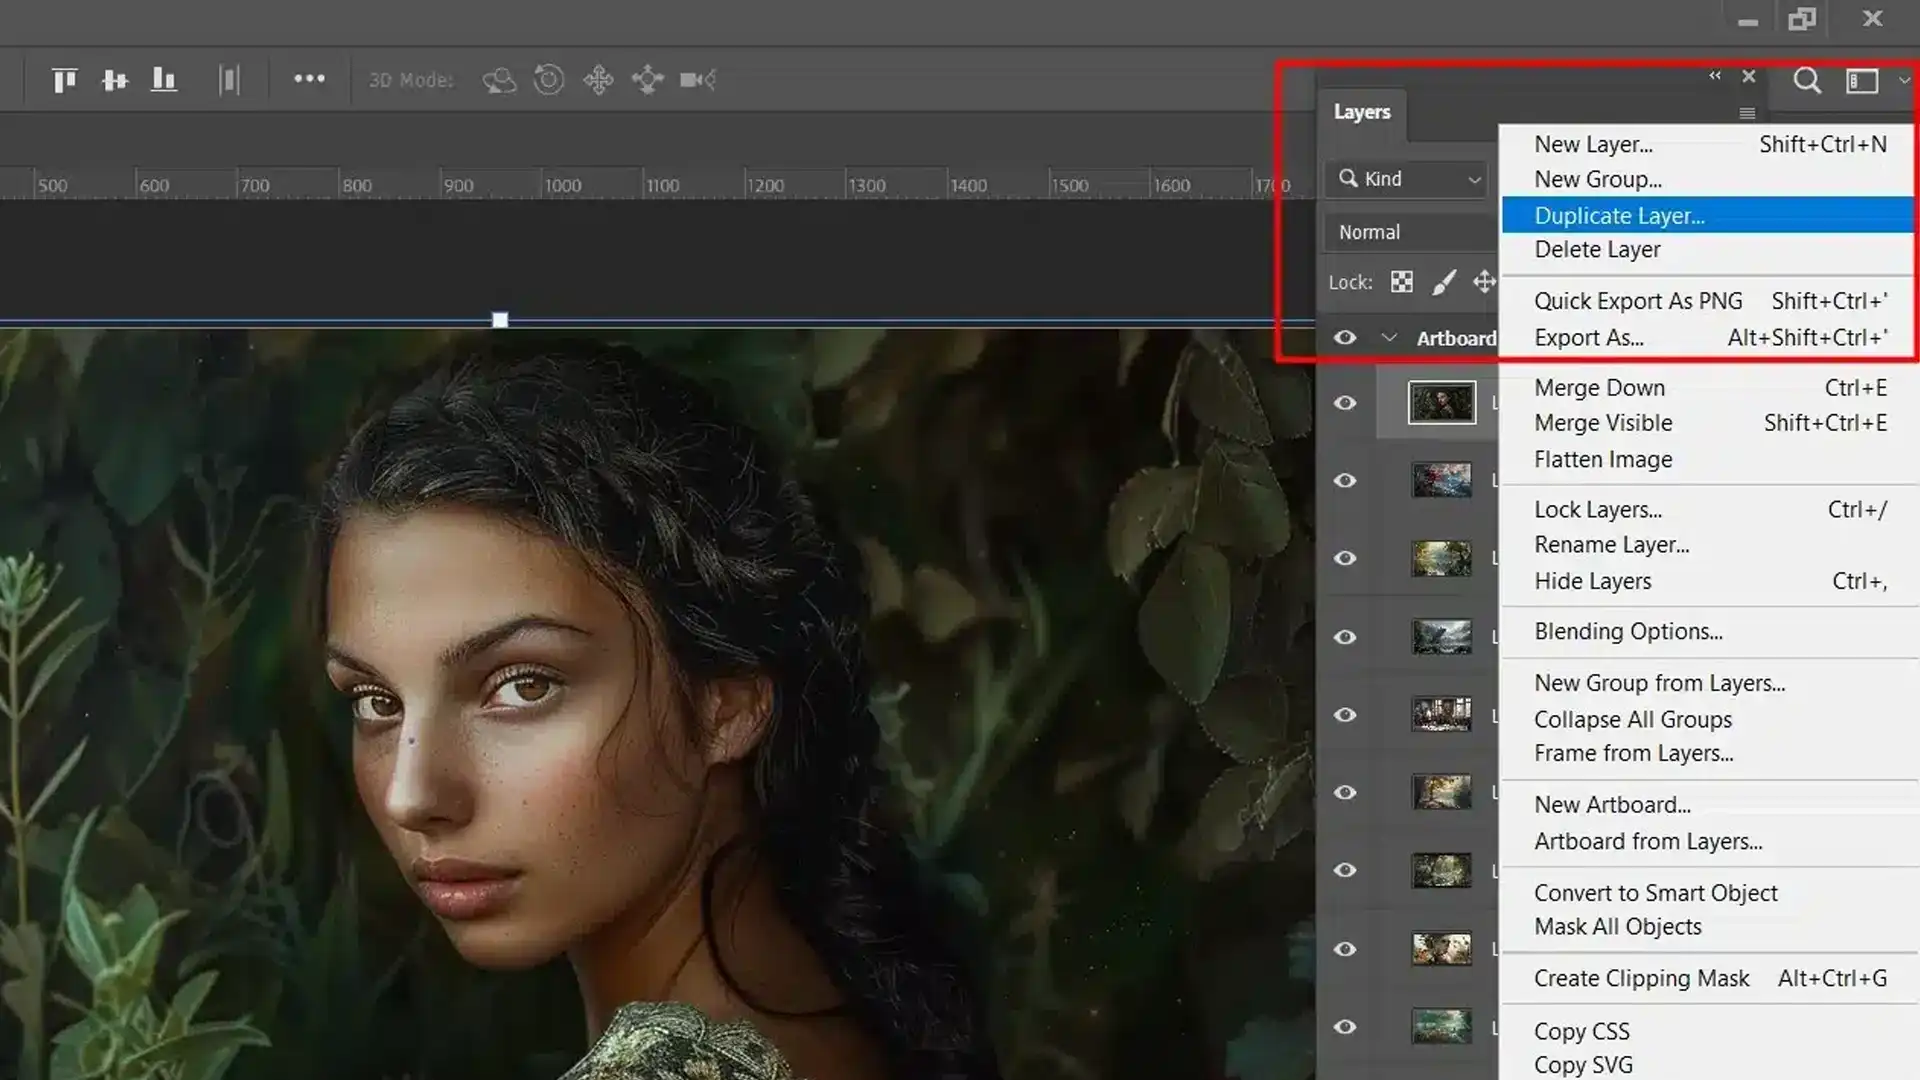
Utilizing the Layer Menu Options
The Layer Menu is a powerful tool in Photoshop that allows for advanced editing and manipulation of layers.
The options are vast, from selecting hidden significant tools to creating a layer group.
Finding Hidden Selection Tools
Sometimes, important selection tools can be challenging to find if you’re unfamiliar with them. The Layer Menu contains many of these hidden gems.
Here are some useful tips:
Use multiple layers to organize complex edits.
Enable "Auto-Select" when working with numerous elements.
Use ctrl and click on layers for precise selections.
Layer via Copy/Cut Options
You often need copies or cuts of specific portions of your work. The Layer Menu grants easy access to these actions, helping streamline your workflow.
To create one layer via copy or cut:
First, ensure you've chosen the correct document.
Navigate to the Layers Panel.
Select "Layer via Copy/Cut."
This method instantly creates an individual layer, maintaining all necessary adjustments without overwriting existing work.
Here are some steps to do it effectively:
First, make sure the desired area is active.
Second, opt for "Layer via Copy" to duplicate while preserving the original.
Lastly, opt for "Layer via Cut" if you want to move layer content from one group of layers to another.
Remember, using the appropriate methods within the Layer Menu will significantly enhance your editing efficiency and accuracy when working with your layers in Photoshop.
How to Select a Layer in Photoshop: Working with Layer Groups for Efficient Selection
Mastering the use of layer groups in Photoshop helps streamline your workflow. By grouping related layers, you can manage multiple layers in Photoshop more efficiently.
Creating a New Layer Group
Creating a new layer group is simple and offers numerous advantages. This step-by-step guide will help you get started.
First, open your document.
Then, look for the folder icon in the Layers panel or go to Layer > New > Group...
Lastly, name your layer group as needed.
The newly created group appears in your Layers panel and is ready for customization. It streamlines managing sets of related layers.
Selecting and Managing Layer Groups
Effectively selecting and managing layer groups ensures workflow efficiency and organization.
Steps to Select Layer Group:
Locate the group in the Layers panel.
Click on it to select.
Working with Layer Groups:
To add layers, simply drag them into the group.
Ensure you have chosen the correct layer inside your desired group for organizing purposes.
Remember to use the move tool found on the left toolbar when moving or transforming groups.
Use keyboard shortcuts like holding Ctrl/Cmd while clicking to streamline working with multiple selections.
Enhance selection flexibility by exploring how to select a layer in Adobe Photoshop using shortcut keys and leveraging various tools available within Photoshop’s interface.
Embracing these techniques for working effectively with layer groups enhances productivity and creative control over complex documents.
Pro Tip: For more efficient editing workflows, explore Lightroom presets to streamline repetitive tasks and create uniform looks.
Understanding essential tools in Lightroom can also help expand your editing capabilities beyond Photoshop, especially for managing bulk photo edits or color corrections with ease.
I’ve found that mastering layer selection in Photoshop is a fundamental skill that enhances my editing efficiency and creativity.
Whether I’m resizing images, navigating the layer panel, or using advanced selection tools, these techniques have streamlined my workflow and helped me produce professional-quality work.
Ready to dive deeper into Photoshop? Check out our Photoshop Course for comprehensive tutorials and tips.
If you want to take your photo editing skills to the next level, our Lightroom Course is also available
$2,061.00Original price was: $2,061.00.$1,061.00Current price is: $1,061.00. 27637
Download Your Free Guide Now!
Discover the secrets of photography with our printable guide! Master essential techniques like aperture, shutter speed, and ISO to create stunning images. Get your free printable PDF now and start turning your snapshots into masterpieces!