In this guide on how to add fonts in Photoshop, I’ll walk you through a simple process to expand your creative toolkit. Imagine transforming your designs with just the right typeface, adding that perfect touch to make your work stand out.
This tutorial will capture your attention, offering clear steps and valuable tips to keep you engaged from start to finish.
Don’t let the fear of technical steps hold you back; I’m here to make it easy and fun. Keep reading, and you’ll soon be adding new fonts like a pro!
Table of Contents
How to Add Fonts in Photoshop
Before you add Photoshop fonts, it’s helpful to know the different types of fonts. Knowing font types ensures you select the right one for your project.
The two main types are TrueType fonts and OpenType fonts. Each has its advantages. TrueType fonts are compatible across systems, while OpenType fonts support more characters and features.
Understanding these types will help you make the best choice when you add fonts to Photoshop.
Step-by-Step Guide for Downloading and Installing Fonts
Downloading and installing fonts can enhance your design projects.
Follow this step-by-step guide to quickly add new fonts to your device and start using them in your creative work.
Step 1: Downalod Fonts
When you find a desired font, you need to download font files from a reliable source. Downloading is simple. Many websites offer free fonts, but some require font licensing.
Step 2: Open and Extract the Font File
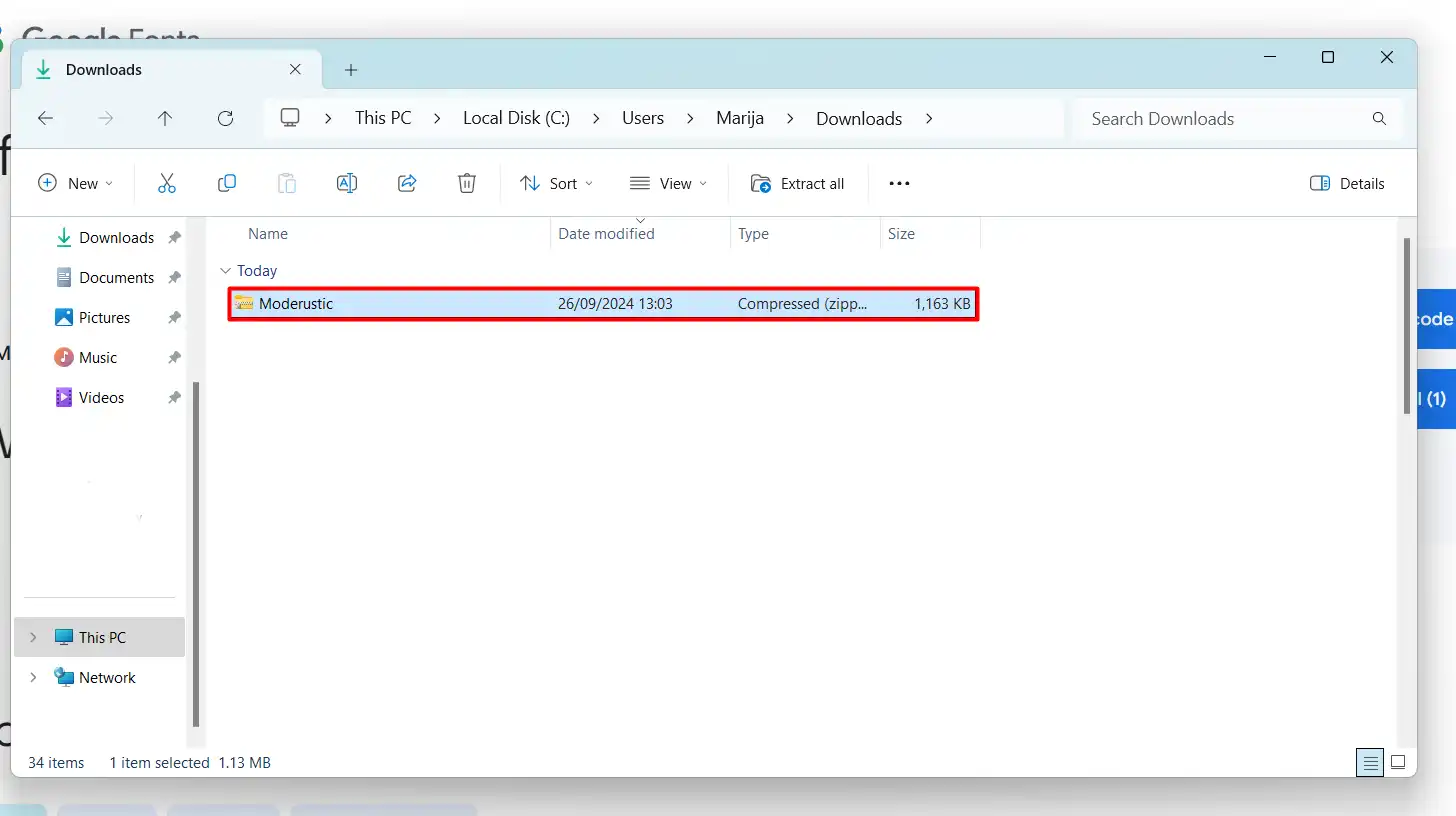
After downloading, navigate to the downloads folder on your computer. Here, you will typically find the font file compressed in a ZIP folder. Extract the files before proceeding.
Step 3: Install the Font
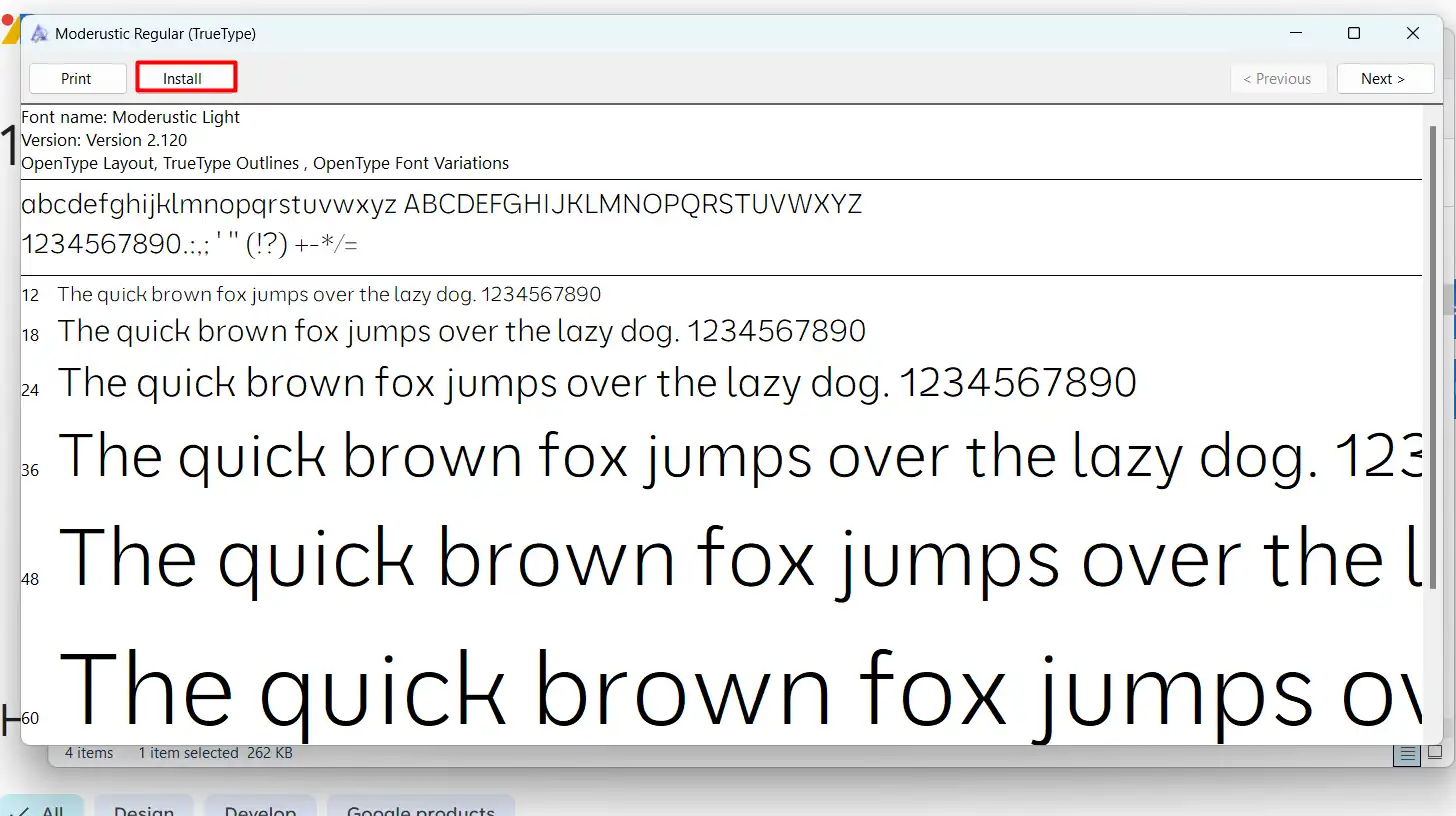
Double click the font file to open it. A window will appear displaying a preview. Then, click Install. This action adds the font to your system’s fonts library, preparing it for use when you add fonts to Photoshop.
Step 4: Find your Font in the Fonts Lbrary
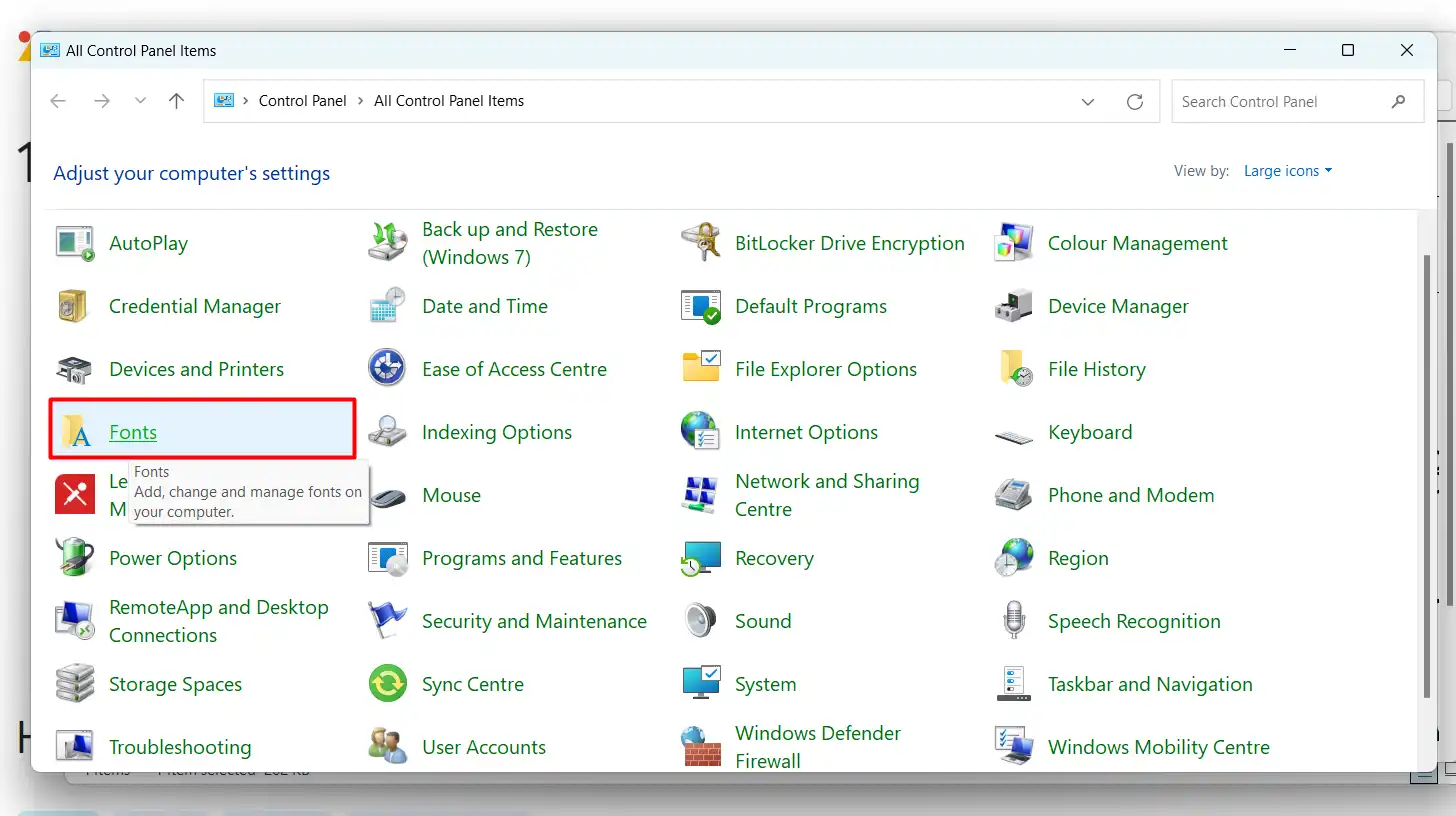
On Windows, find the fonts folder under Control Panel. For Mac users, browse through Finder and go to Library then Fonts
Troubleshooting and Tips for Adding Fonts to Photoshop
Adding fonts to Photoshop is straightforward once installed on your system. Open Photoshop and ensure the program recognizes the new font.
Sometimes, restarting Photoshop helps. In Photoshop, use the Type Tool to add text. From the dropdown menu, you can preview all your fonts, including newly added ones. Select your preferred font family.
If you face issues with missing fonts, confirm the fonts are installed properly. Checking the activated fonts in your system settings might resolve the problem.
Adobe CC users can add fonts from Adobe Fonts directly within the application. Navigate to the fonts section and browse through extensive collections.
Tips for Using Custom Fonts
Choosing the right font can make or break your design. Stick to fonts that serve the project’s overall feel to ensure the best results when you add fonts to Photoshop.
Many fonts are available online, so don’t hesitate to experiment. It’s wise to test custom fonts on various devices to ensure compatibility for personal and commercial use.
Pro Tip: When selecting a font file, look for both TrueType and OpenType formats for greater versatility.
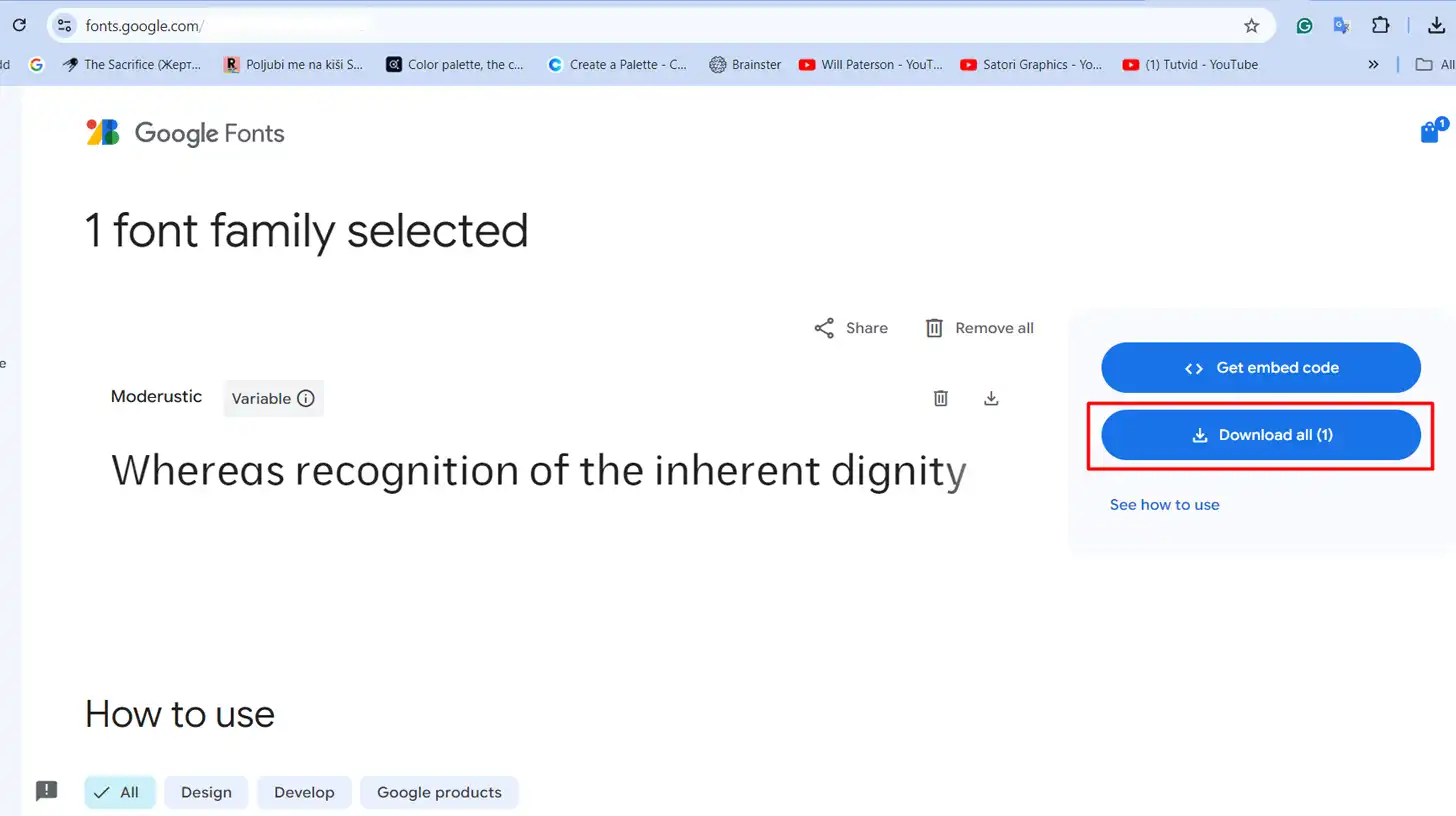
Download Fonts
First, locate some free fonts, a fundamental step before you download font files. I recommend sites like Google Fonts or those offering fonts for personal and commercial use. Download whatever catches your eye.
Before diving into the details, here’s a quick overview of the steps to add fonts in Photoshop:
Aspect
Overview
Download Fonts
Locate and download free or licensed fonts from websites like Google Fonts. Choose fonts that fit your project’s needs.
Choosing the Right Font
Select fonts based on the theme of your project. Use serif fonts for formal documents and playful or script fonts for creative projects.
Download and Install Fonts
After downloading, extract the font files from ZIP folders and install them by double-clicking and selecting “Install.”
How to Add Fonts to Photoshop
Use the Type Tool in Photoshop to create a text box and search for your new fonts. Restart Photoshop if fonts don’t appear.
Using Fonts from Adobe Fonts
Adobe Creative Cloud users can activate fonts directly from the Adobe Fonts website, making them available in Photoshop immediately.
Tips and Tricks
Always test new fonts across different sizes and styles to ensure consistency and legibility.
Choosing the Right Font
Selecting the appropriate font for your project is important. Always consider the theme of your work.
For instance, if you’re working on a formal document, a serif font might be more suitable. On the other hand, creative projects may benefit from playful or script fonts.
Download and Install Fonts
After you download fonts, navigate to your downloads folder and extract the font files if they are in a ZIP format. Once extracted, double click the font file to open it, then click “Install.” This places the font into your system’s font directory.
How to Add Fonts to Photoshop
Now, let’s add these new font packages to your workspace:
Open Adobe Photoshop.
Select the "Type Tool" from the toolbar.
Click on the canvas to create a text box.
In the text settings, search for your new font.
If the Photoshop fonts don’t appear, close and reopen Photoshop. Often, this simple action refreshes the active fonts.
Using Fonts from Adobe Fonts
For Adobe Creative Cloud users, Adobe Fonts offers a hassle-free way to add fonts. Go to the Adobe Fonts website directly from Photoshop.
Browse the font library, activate the font, return to Photoshop, and see your new fonts available immediately.
Tips and Tricks
Always test your new font, including those from Adobe Fonts, across different sizes and styles. This ensures consistency and legibility.
That’s it! To add fonts in Photoshop, including Adobe Fonts, is straightforward. Now, you have more options to make your projects unique.
Pro Tip: Organize your fonts into folders by project type. This will not only make selecting the right font quicker but also streamline your workflow when applying Photoshop text effects to enhance your designs efficiently.
Whether downloaded from the web or through Adobe Fonts, it is simple and can enhance your design options. Let’s walk through the steps to get started.
Incorporating Fonts on Windows
Incorporating fonts on Windows is straightforward. Follow these steps:
Find the right font style. Sites like Google Fonts are great places to start.
Download the font package by clicking the "Download" button. This action will save a ZIP file on your computer.
Unzip the file to extract the font files, usually in TrueType Font (.ttf) or OpenType Font (.otf) formats.
Find the extracted font package, right-click on it, and select "Install." If you see a prompt, click "Yes."
Restart your applications to ensure the changes take effect.
Installing Fonts on Mac
For Mac users, incorporating fonts follows a similar process but with slight differences:
Choose and download your font, then locate the ZIP file in your Downloads folder.
Double-click the ZIP file to extract its contents. You'll find the font package inside the unzipped folder.
Double-click the font package to open a preview window. Click the "Install Font" button at the bottom of this window.
The font will now be added to your Font Book. Restart your application to see the new font in Photoshop.
Quick Steps
Go to Font Library to choose your style.
Download the font file and unzip it.
Right-click the font inside the unzipped folder and install it.
Restart your Photoshop to add fonts to it.
For Mac, double-click the font file and install it using the Font Book.
This guide on how to add fonts in Photoshop makes these steps very manageable. Whether you’re using a TrueType font or an OpenType font, the process remains simple.
Pro Tip: When working on a project, test your chosen fonts across different sizes and styles. Utilize effects such as text portrait effect and metallic text in Photoshop to add unique touches to your designs. Photoshop and Lightroom offer various text tools that can help retain consistency.
Always restart the application if you can’t find your newly installed fonts.
Accessing Installed Fonts
So, you’ve downloaded a font and installed it on your computer. Now what? It’s time to access them in Photoshop!
Launch Adobe Photoshop. Once it's open, create a new project or open an existing one.
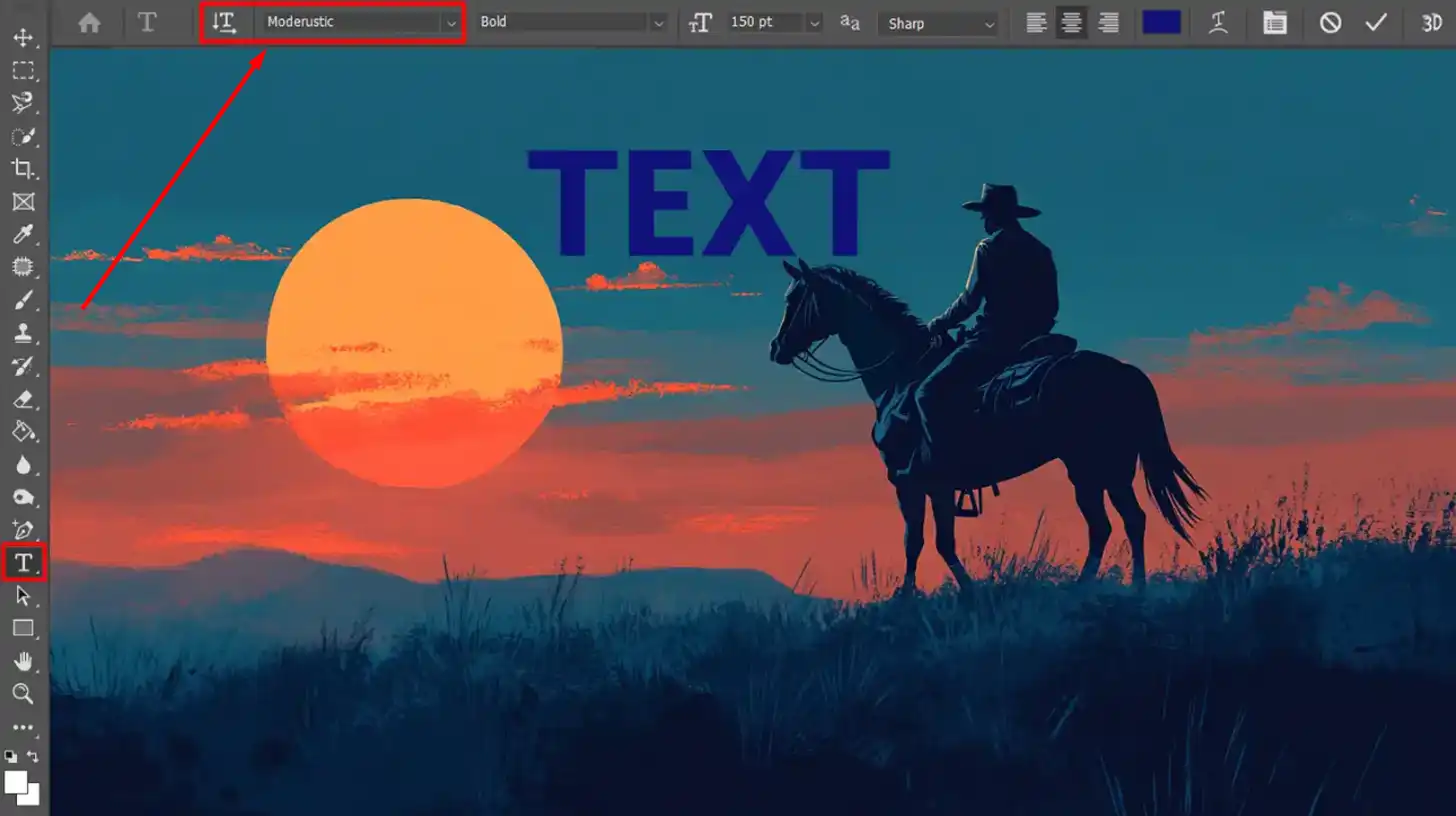
Click on the Text tool (it looks like a "T" in the toolbar on the left). This tool allows you to add text layers to your project.
Select the text layer and look for the font drop-down menu at the top of the screen. Clicking this will show you a list of all your active fonts.
Scroll through the list to find your newly installed font. If you can't see it, make sure you installed it correctly and restarted Photoshop after the installation.
Once you find your font, click on it and start typing on your canvas. Your text will appear in the chosen font.
Frequently Asked Questions
What is the process of importing a font into Photoshop?
Launch Photoshop and navigate to the 'Edit' menu.
Select 'Presets' and then 'Preset Manager'.
Choose 'Fonts' from the dropdown menu in the Preset Manager.
Click the 'Load' button and navigate to the location of your new font files.
Select the fonts you wish to import and click 'Open'.
After loading, your new fonts will be available in the font menu.
How do I add a font to Adobe?
First, ensure your font is downloaded and unzipped on your computer.
Open the Adobe Creative Cloud application.
Go to the 'Fonts' tab and click on 'Add Fonts from Typekit'.
Browse or search for your font. When found, click 'Sync' to add it to your Adobe applications.
How to download missing fonts in Photoshop?
Open your project in Photoshop.
Photoshop will alert you if there are any fonts that are unavailable.
Click the 'Resolve Fonts' button that appears in the dialog box.
This will open the Adobe Fonts library, where you can search and sync the missing font.
Where is the font option in Photoshop?
Open Photoshop and create or open a project.
Select the 'Text' tool from the toolbar or press 'T' on your keyboard.
Click on the canvas to start typing. A text layer will be created.
Look at the top horizontal toolbar; your font options will appear there once the text layer is active.
You can select the font family, style, size, color, and other settings from this toolbar.
Learning how to add fonts in Photoshop has truly transformed my design work. By expanding my font library, I’ve been able to bring more creativity and uniqueness to my projects, making them stand out.
If you’re looking to elevate your design skills, I highly recommend checking out my Photoshop course and Lightroom course. These courses offer in-depth tutorials that will guide you through mastering these powerful tools, just like they did for me.
Also, using Adobe Photoshop can make your work easier. You can get Adobe Photoshop through the official Adobe website and Adobe Lightroom from the Adobe Lightroom page.
Keep practicing how to add fonts in Photoshop, and you’ll see your designs become even better.
If this article has helped you, then Like and Share it with your friends
$2,061.00Original price was: $2,061.00.$1,061.00Current price is: $1,061.00. 27584
Download Your Free Guide Now!
Discover the secrets of photography with our printable guide! Master essential techniques like aperture, shutter speed, and ISO to create stunning images. Get your free printable PDF now and start turning your snapshots into masterpieces!