How to Increase Resolution of Image in Photoshop: A Step-by-Step Guide
How to Increase Resolution of Image in Photoshop: A Step-by-Step Guide
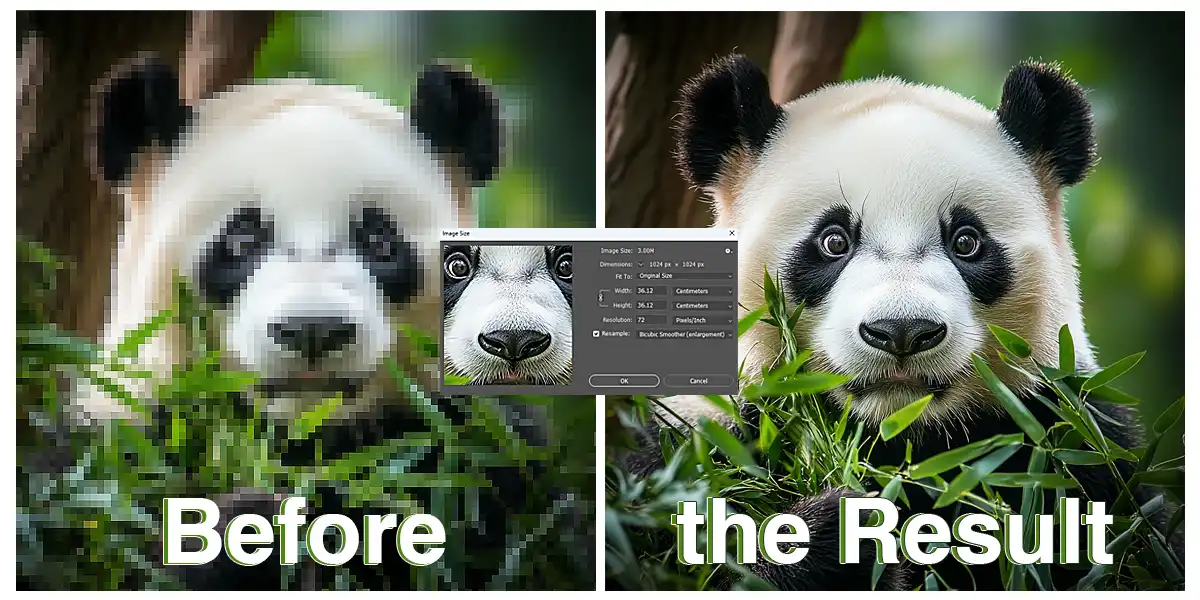
Ever wondered how to increase resolution of image in Photoshop? Many people struggle with turning low-quality images into sharp, high-resolution masterpieces.
In this article, I’ll guide you through a simple yet effective process to enhance your images. Imagine the satisfaction of seeing your photos transform from grainy to crystal clear.
Don’t let poor resolution hold you back; let’s dive in and unlock the potential of your images together.
Table of Contents
Understanding Image Resolution
Understanding image resolution is important for producing high-quality images.
It affects the clarity and sharpness of your photos, making it a core concept to grasp when working with digital images. Let’s break down what image resolution really means and how it impacts your work.
What is Image Resolution?
Image resolution refers to the detail an image holds. It’s usually described by the number of pixels in the width and height of the image.
For instance, an image that is 1920 pixels wide and 1080 pixels tall has a resolution of 1920×1080 pixels. Simply put, more pixels equal more details.
Importance of High Resolution
High resolution is important for printing large images. When you print, the photo resolution determines how crisp the final printed image will be.
If an image has low resolution, it will appear blurry when enlarged. In digital and print media, good image quality depends on having a high number of pixels per inch.
Adjusting Image Resolution in Photoshop
To adjust the resolution of an image in Adobe Photoshop, follow these steps:
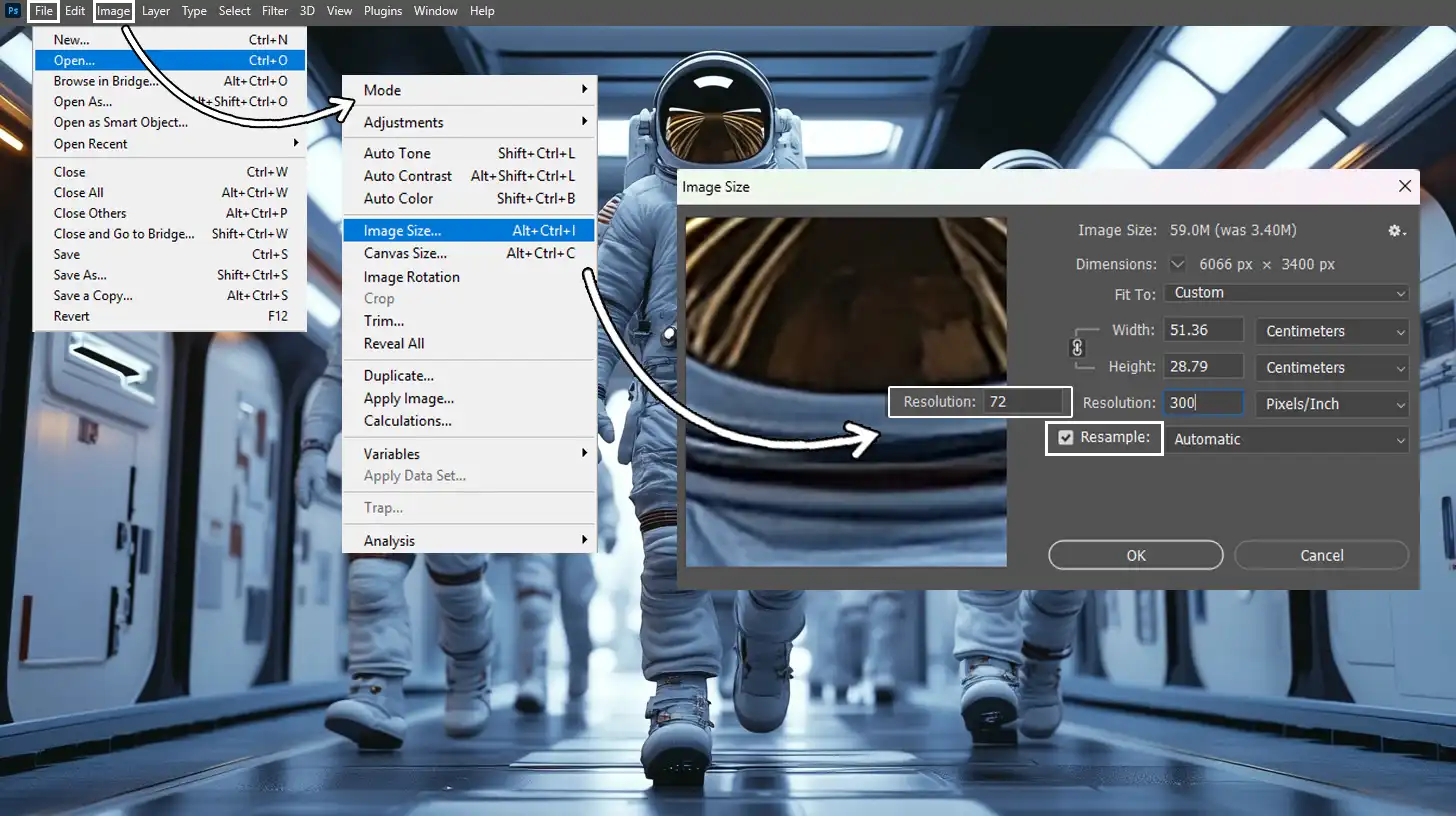
Open your image in Photoshop.
Go to the Image Size dialog box by selecting Image > Image Size.
In the dialog box, you can see the current resolution of the image and other parameters like pixel dimensions and document size.
Ensure the Resample Image option is checked if you want to change the number of pixels in the image. This tells Photoshop to add or remove pixels to match the new resolution settings without losing quality.
Enter the desired resolution in the Resolution field. For print, 300 pixels per inch is standard, while 72 pixels per inch is common for web images.
For print, aim for 300 pixels per inch for crisp details, while 72 pixels per inch is ideal for web-optimized images.
How to Make an Image Higher Resolution in Photoshop?
If you’re wondering how to increase resolution of image in Photoshop, you’re in the right place. There are simple tools that can help improve the quality of your images.
Let’s start by exploring the Image Size tool, which is one of the easiest ways to do it.
Using the Image Size Tool
First, open your image in Adobe Photoshop. Then, navigate to the ‘Image Size’ dialog box by clicking on Image > Image Size. You will see the current pixel dimensions, width, and height.
It’s important to ensure the ‘Resample Image’ box is checked; this allows Photoshop to add or remove pixels, enabling resolution adjustments without losing quality.
Enter the desired number of pixels per inch in the resolution field. For printing, aim for 300 pixels per inch; for web, 72 pixels per inch is the norm.
Click "OK" to apply the changes.
Remember that starting with a high-resolution image provides better results.
Adjusting Resolution Settings
Another way to enhance image quality involves adjusting the resolution settings directly. In the ‘Image Size’ dialog box, adjust the resolution to the desired level. Make sure to check the image closely to ensure it meets your needs.
Entering a higher resolution in Photoshop without checking the quality may result in an unsatisfactory or blurry image.
Stay mindful of the dialog box settings displayed, including the dimensions, resolution, and resample controls.
Always start with a high-resolution image if possible. This gives Photoshop more pixels to play with, resulting in a smoother and clearer final image. This process does keep the existing pixels intact, promoting better image quality without deterioration.
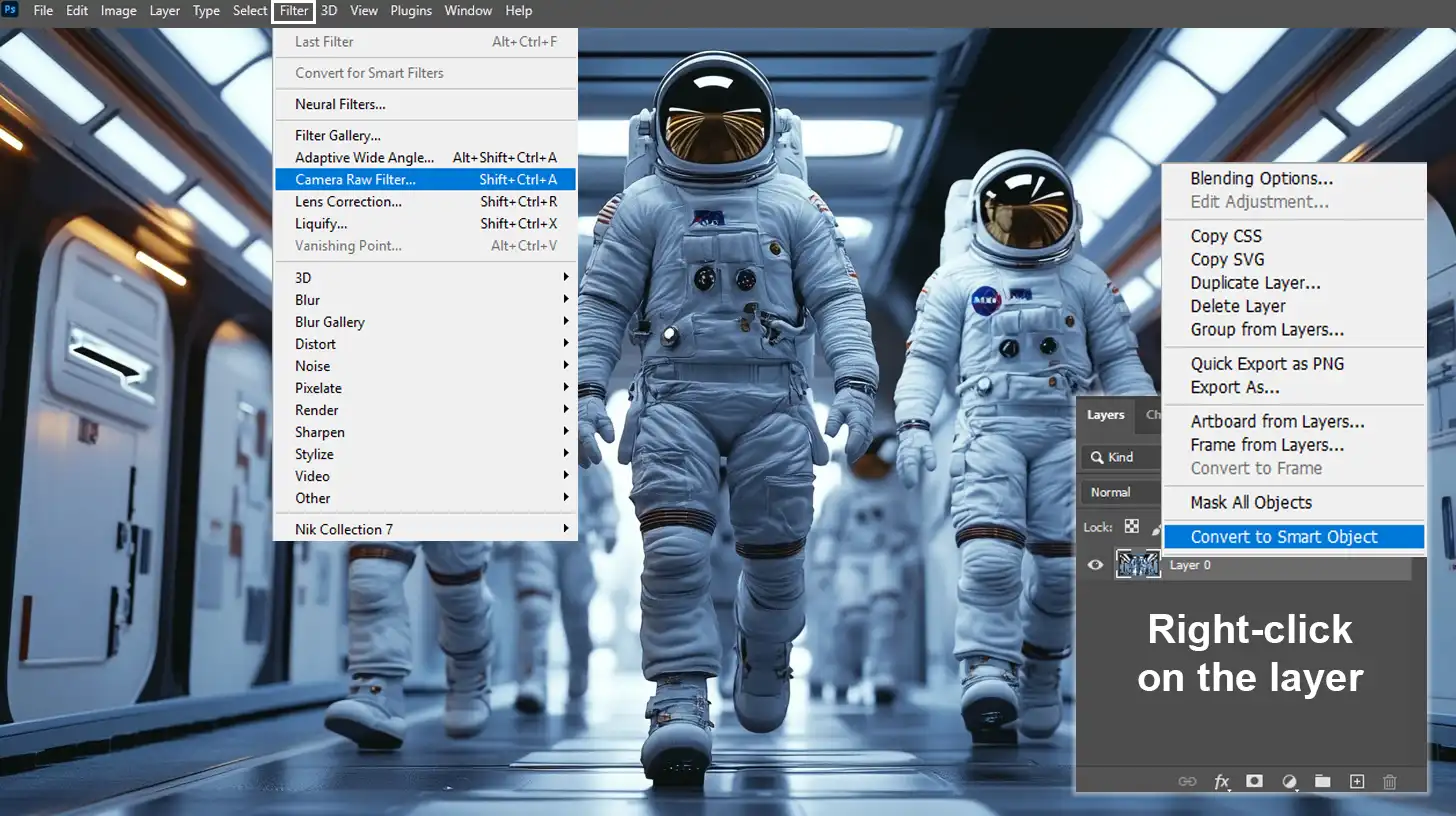
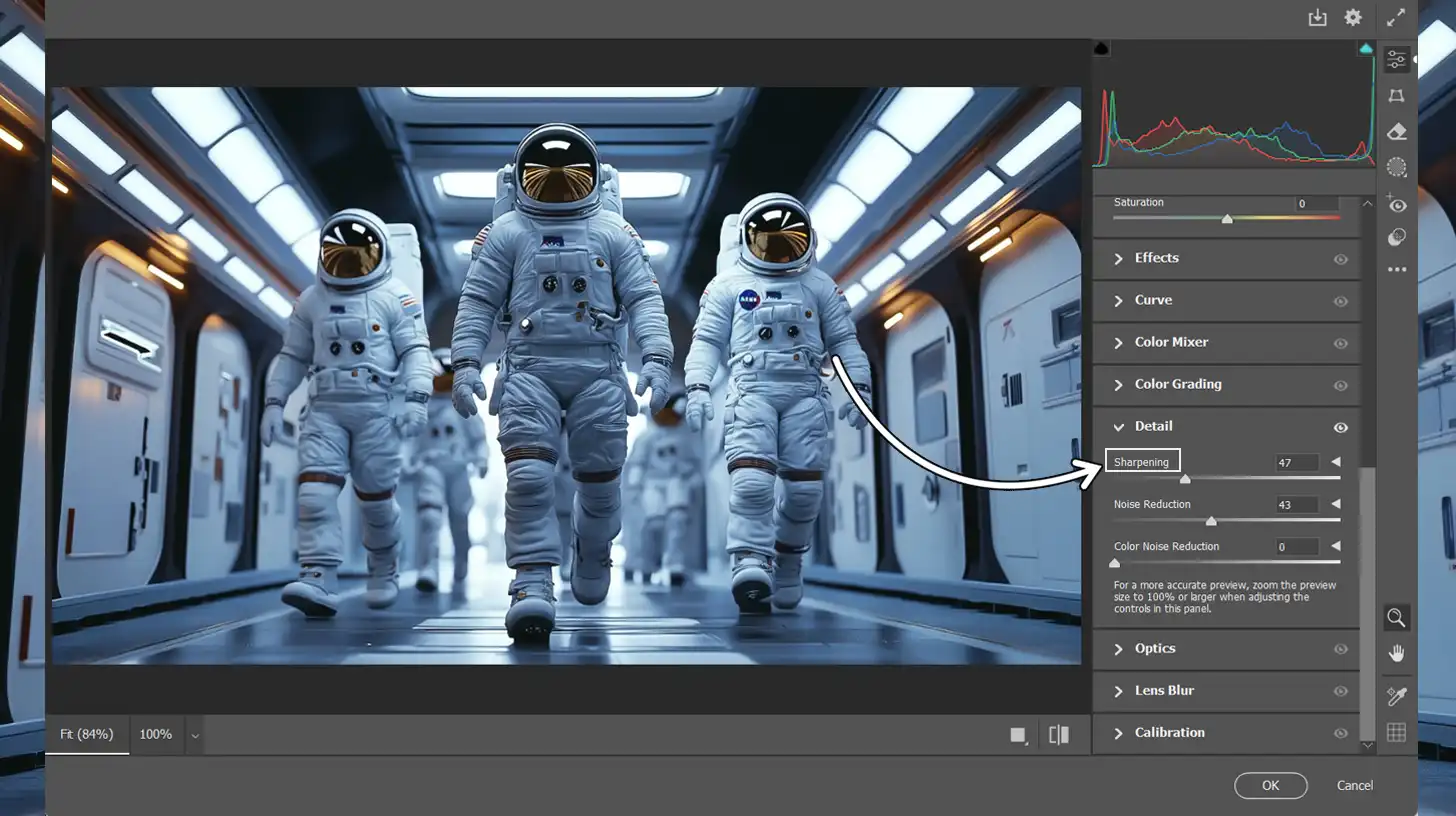
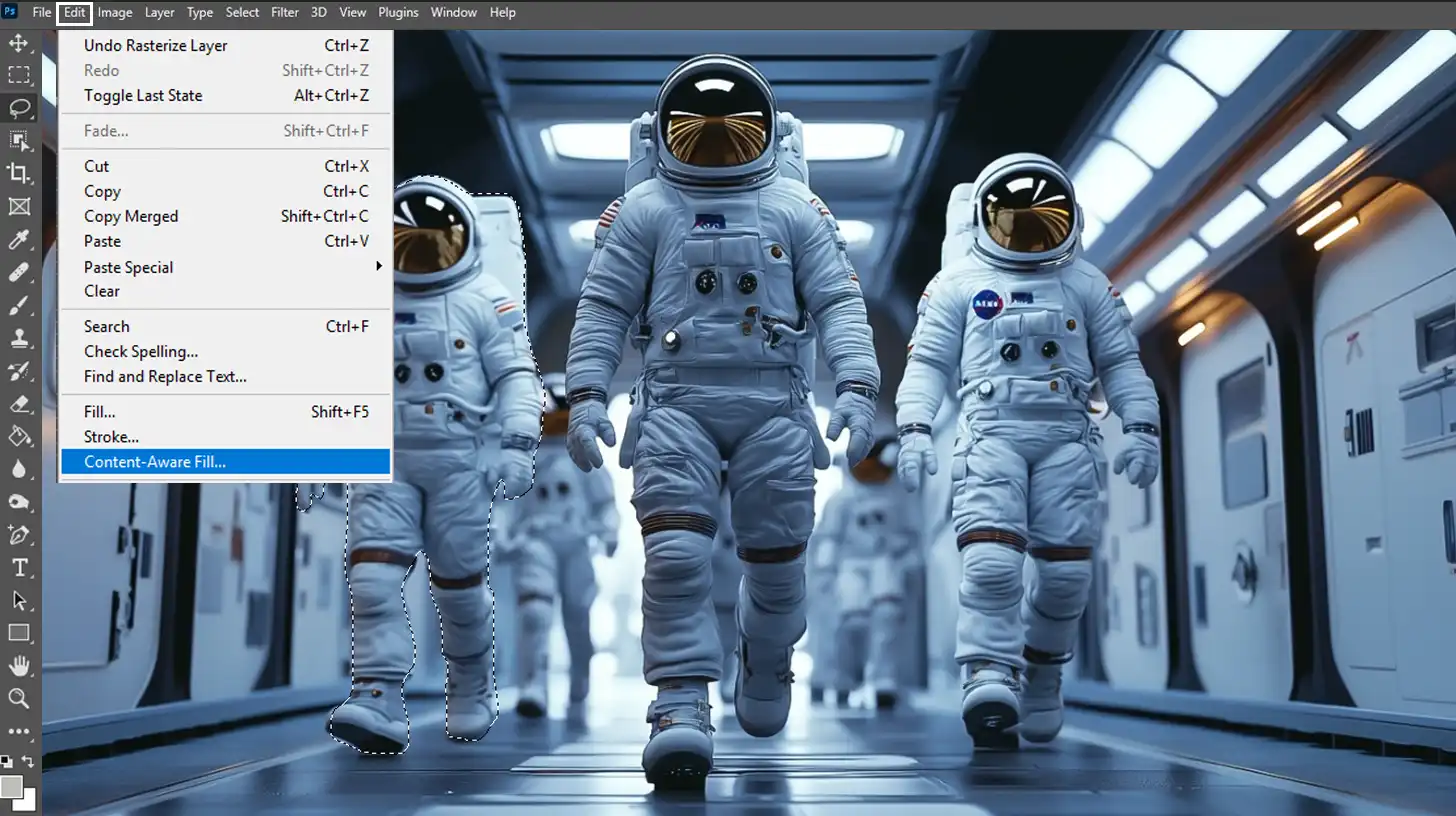
Pro Tip: Using the camera raw filter in Photoshop can help enhance image quality further by fine-tuning sharpness, reducing noise, and improving clarity. Additionally, you can utilize the content-aware fill feature to intelligently fill in missing areas when enlarging images.
For more advanced editing, consider learning about Photoshop shortcuts to streamline your workflow and make the process of enhancing image resolution more efficient.
How Do I Enlarge the Quality of an Image in Photoshop?
Enlarging an image in Photoshop while keeping the quality intact can seem tricky, but it’s definitely doable with the right techniques.
Let’s look at some ways you can upscale your images without losing clarity.
Preserving Image Quality
When working with Adobe Photoshop, preserving image quality is important. The most important first step is to start with a high resolution image.
This gives you a cushion when making adjustments. By using the Image Size dialog box, you can keep track of pixel dimensions, ensuring you don’t lose important details.
Always check that the Resample Image option is selected, as this allows Photoshop to create new pixels and maintain quality.
Document size and print size are also critical factors. When you increase the resolution of the image, it directly impacts these dimensions. Examine these closely in the Image Size dialog box to predict how changes will affect your digital image.
Appropriately handling these aspects ensures that the final result meets your requirements without compromising on quality.
Techniques for Enlargement
Several techniques can be employed to enhance an image in Photoshop:
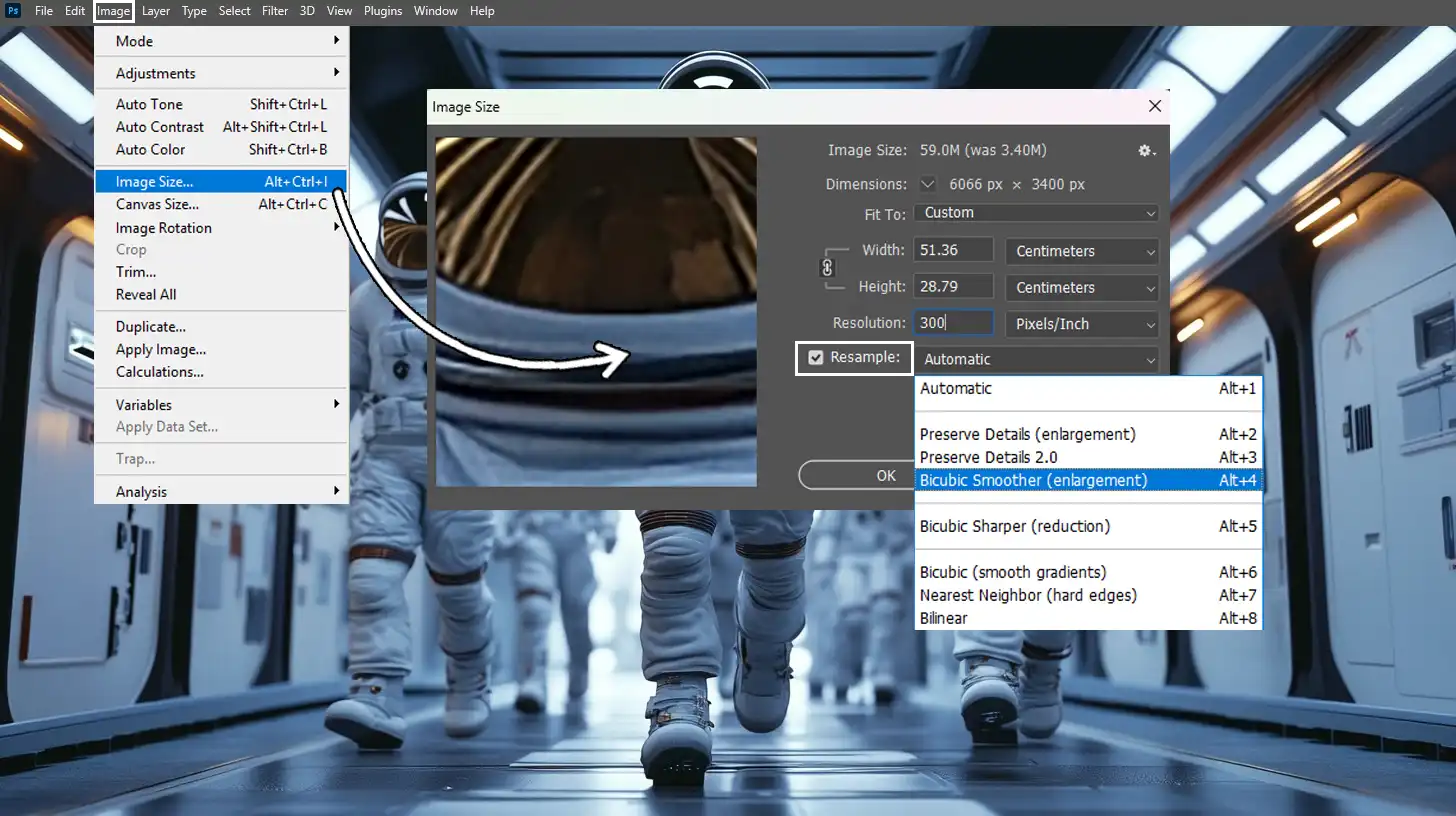
Bicubic Smoother (enlargement)
First, navigate to the Image Size dialog box. Change the number of pixels or pixel dimensions as needed. You can then select an interpolation method such as “Bicubic Smoother (enlargement)” to generate new pixels that blend well with the existing ones.
Camera Raw Filter
Using the Camera Raw Filter is another powerful method. With it, sharpening and adjusting the resolution of an image becomes much easier.
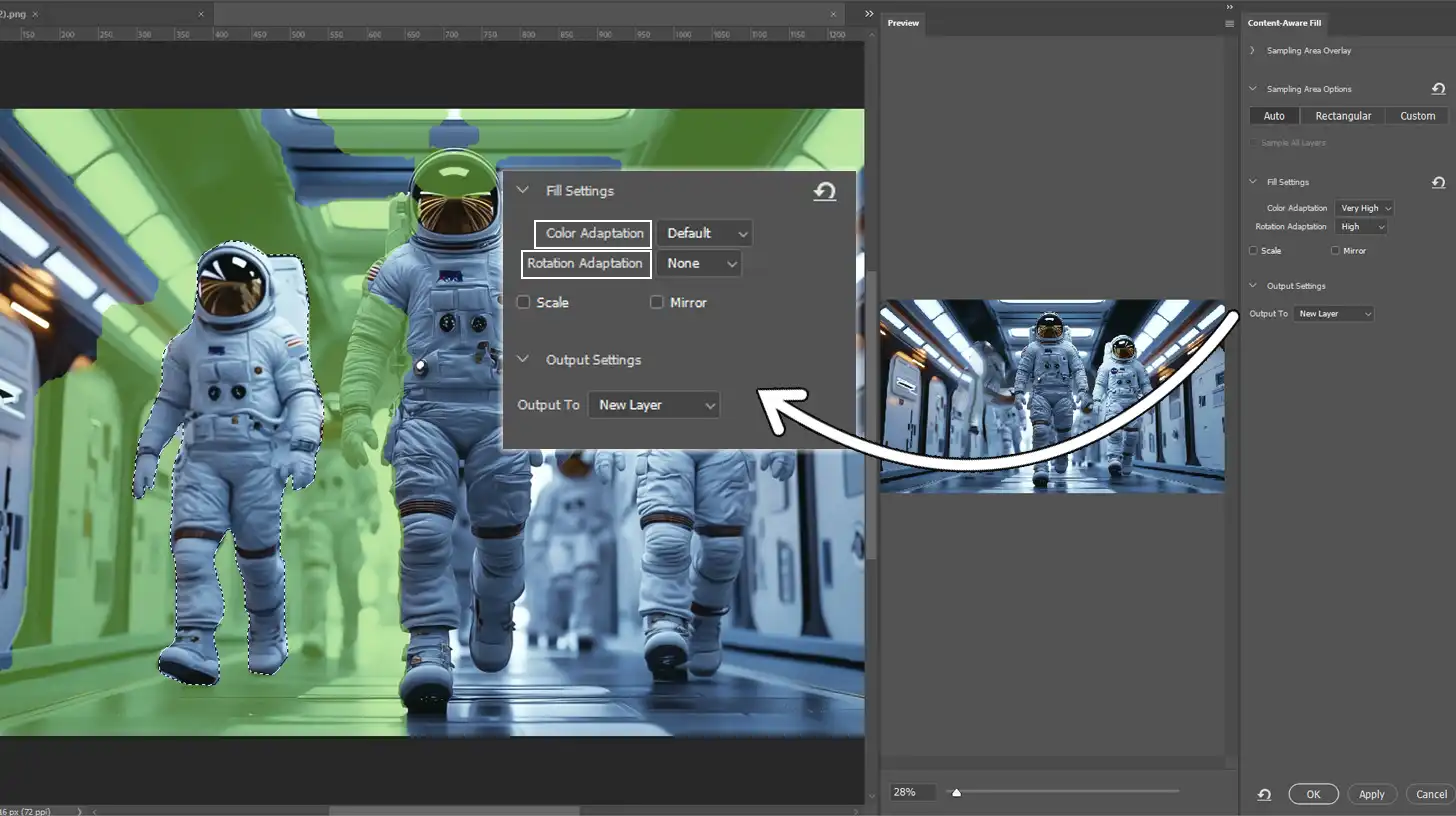
Content-Aware-Fill
Similarly, the Content-Aware Fill tool smartly fills in gaps when upsizing. Both tools enable enhancements without losing much of the original detail.
The balance between image size and file size can often be tricky. Larger image size often translates to increased file size, which might not always be practical.
Therefore, striking a balance where sufficient quality is achieved without the file size becoming overwhelming is important.
Pro Tip: Always save a copy of the original image before making enhancements. This creates a safety net, allowing a return to the original if needed.
How to Convert an Image into High Resolution?
Converting an image into high resolution can make a big difference in the overall quality. With the right tools in Photoshop, you can easily enhance the details and sharpness of your images. Let’s explore how to do it effectively.
Using Photoshop Tools Effectively
Let’s be honest, dealing with a low resolution image can be frustrating. That’s why knowing the right tools in Adobe Photoshop matters. Understanding how to use them effectively makes all the difference.
To start, open your image in Adobe Photoshop. Use the ‘Image Size’ tool to check the current image resolution. Checking the ‘Resample Image‘ option allows Photoshop to add pixels without altering the actual pixel data.
Next, change the numbers in the width and height fields to match your desired pixel dimensions. Keep in mind, starting with high-quality images results in better resolution improvements.
Step-by-Step Conversion Process
Here’s a simple step-by-step guide:
Open your image in Adobe Photoshop.
Go to Image > Image Size.
Check the 'Resample Image' box.
Change the width, height, and resolution values. Increase these to achieve higher image resolution. For printing, aim for 300 dpi; for web, 72 dpi works.
Select an interpolation method. Try "Bicubic Smoother" to enlarge images.
Click ‘OK’. Ensure you review the document size and print size to avoid surprises.
Fine-tune using filters like Camera Raw to sharpen your image further.
This conversion method retains image quality while reaching the maximum pixel dimension needed.
Another tip is to save your original image file. This creates a backup, giving you peace of mind if anything goes wrong.
Pro Tip: Always zoom in to your image after making adjustments to check the details and ensure there’s no blurriness or unwanted artifacts.
When you resize image in Photoshop, especially if you’re aiming to resize image for printing, double-check the resolution and pixel dimensions to ensure the final output meets your quality expectations without losing sharpness.
How Do I Upscale an Image in Photoshop?
If you’re wondering how to increase resolution of an image in Photoshop, upscaling is a helpful technique. It allows you to make an image larger while maintaining as much detail as possible.
Understanding Upscaling
Upscaling an image in Adobe Photoshop feels like magic. You take a small image and make it larger without losing too much quality. Imagine zooming into a picture and retaining the details. Doing this right starts with understanding the basics.
When upscaling, Photoshop adds new pixels that weren’t there before. This means it guesses what color the new pixels should be.
Getting the overall look correct requires the right techniques. Always start with the highest quality original you have. Low-resolution images, though tempting, will often disappoint.
Best Practices for Upscaling
Now, don’t click “Image Size” and blow up the dimensions thoughtlessly. There’s a method to this madness. Follow these steps:
Go to Image > Image Size.
Adjust the dimensions carefully. The goal is to increase the size while retaining quality.
Select an interpolation method. Photoshop offers several methods, such as "Bicubic Smoother," which works brilliantly for enlarging.
Always check the "Resample" box. This allows Photoshop to create new pixels and not just stretch existing ones.
View your image at 100% to examine the results closely. If something looks off, try different settings or techniques.
Common Mistakes to Avoid
When learning how to increase resolution of image in Photoshop, it’s easy to run into a few common mistakes. Let’s go over some of these errors so you can avoid them and get the best results.
Below are a few basic aspects to consider when working on image resolution adjustments.
Aspect
Overview
Avoiding Pixelation
Avoid making large jumps in image size all at once. Gradual changes and maintaining the aspect ratio help prevent pixelation issues.
Maintaining Clarity
Use tools like the Camera Raw Filter for sharpening and noise reduction. Be cautious when using the sharpen tool to avoid over-processing.
Saving Original Files
Always save a copy of the original file before making changes to avoid permanent loss of quality or details.
Avoiding Incorrect ‘Save for Web’ Settings
Incorrect settings during ‘Save for Web’ can reduce image quality. Ensure proper settings are selected for the intended output.
Avoiding Pixelation
Pixelation is every upscaler’s nightmare. Imagine seeing giant squares instead of a smooth image.
To avoid this trap, never attempt to make enormous leaps in size all at once. Making small, gradual changes is one of the most reliable ways to achieve the best results.
Consider doubling or tripling the size in stages. Also, maintain the aspect ratio. Distorting the image to fit odd dimensions introduces pixelation issues.
Maintaining Clarity
Clarity is important. You want the detail to stick around, right? One trick is using the Camera Raw Filter. It allows fine-tuning, like sharpening and reducing noise. Additionally, the sharpen tool can help but use it sparingly.
Another common trap is using the “Save for Web” feature incorrectly. It might reduce the quality if not set up properly.
Always save a copy of the original file before making major changes. This ensures you have a fallback in case things go awry.
Pro Tip: Use the “Content-aware scale” feature. It helps Photoshop intelligently decide what parts of the image to stretch, maintaining more natural proportions.
Frequently Asked Questions
How to Make an Image Higher Resolution in Photoshop?
Here is how to increase resolution of image in photoshop:
Open your image in Photoshop.
Go to 'Image' on the top menu, then select 'Image Size'.
In the 'Resolution' box, increase the number of pixels per inch (PPI).
Check the 'Resample' box and select 'Preserve Details' for better quality.
Adjust the width and height if needed, then click 'OK'.
How Do I Enlarge the Quality of an Image in Photoshop?
Load your image into Photoshop.
Choose 'Image' from the menu, then click on 'Image Size'.
Set a higher resolution in the 'Resolution' field.
Ensure 'Resample' is checked and select 'Preserve Details 2.0' from the dropdown.
Adjust dimensions as necessary and confirm by clicking 'OK'.
How to Convert an Image into High Resolution?
Here’s how to convert an image into high-resolution in Photoshop:
Open the image in Photoshop.
Select 'Image' from the top menu, then 'Image Size'.
Increase the 'Resolution' to a higher value for more detail.
Click on 'Resample' and choose 'Preserve Details' to enhance quality.
Modify the height and width if required, then click 'OK'.
How Do I Upscale an Image in Photoshop?
Start by opening your image in Photoshop.
Navigate to 'Image' in the top menu and select 'Image Size'.
Change the resolution by increasing the PPI value in the 'Resolution' field.
Check 'Resample' and pick 'Preserve Details' for a smoother result.
Adjust the image dimensions as needed and press 'OK'.
Learning how to increase resolution of image in Photoshop has been a game-changer for me. It has significantly enhanced the quality of my work and allowed me to deliver sharper, more detailed images to clients. The process is straightforward, and the results speak for themselves.
Whether you’re working on a project for a client or just trying to improve your own skills, understanding how to enhance image resolution is a must.
If you’re ready to take your editing skills to the next level, I highly recommend this Photoshop Course. It covers everything from basic to advanced techniques, including resolution enhancements. For those who prefer Lightroom, this Lightroom Course is another great resource to master image editing.
If you’re just getting started with these tools, you can also explore Adobe’s official Photoshop and Photoshop Lightroom pages to get started with the software and see what they can do for you.
If this article has helped you, then Like and Share it with your friends
$2,061.00Original price was: $2,061.00.$1,061.00Current price is: $1,061.00. 27583
Download Your Free Guide Now!
Discover the secrets of photography with our printable guide! Master essential techniques like aperture, shutter speed, and ISO to create stunning images. Get your free printable PDF now and start turning your snapshots into masterpieces!