When it comes to mastering photo editing, knowing how to export from Photoshop to Lightroom can be a game-changer.
Have you ever spent hours perfecting an image in Photoshop, only to struggle with getting it into Lightroom for final adjustments and organization?
You’re not alone. Imagine seamlessly moving your edited masterpieces between these powerful tools without losing quality or time.
In this article, I’ll walk you through the simple steps to make this process effortless, so you can focus more on your creative vision and less on technical hurdles.
Ready to transform your workflow?
Let’s dive in!
Table of Contents
Preparing Your Files for Export from Photoshop to Lightroom
Before exporting, ensure that your RAW file is properly adjusted in Photoshop and saved as a TIFF file for optimal quality, making it ready for a seamless workflow from Lightroom to Photoshop.
Understanding RAW Files
RAW files are an essential starting point if you want to maintain the highest quality possible in your images. These files hold all the information captured by your camera’s sensor without any compression or loss of detail.
When working with RAW files, you’ll have more control over your edits due to the expansive data they contain. This is particularly important for those complex edits involving shadows, highlights, and colors.
Understanding what is Camera Raw is essential when working with Raw documents. Camera Raw allows you to adjust and enhance Raw files before importing them into your editing software
Basic Photoshop Edits Before Export
Before exporting your work, you need to perform some basic Photoshop edits:
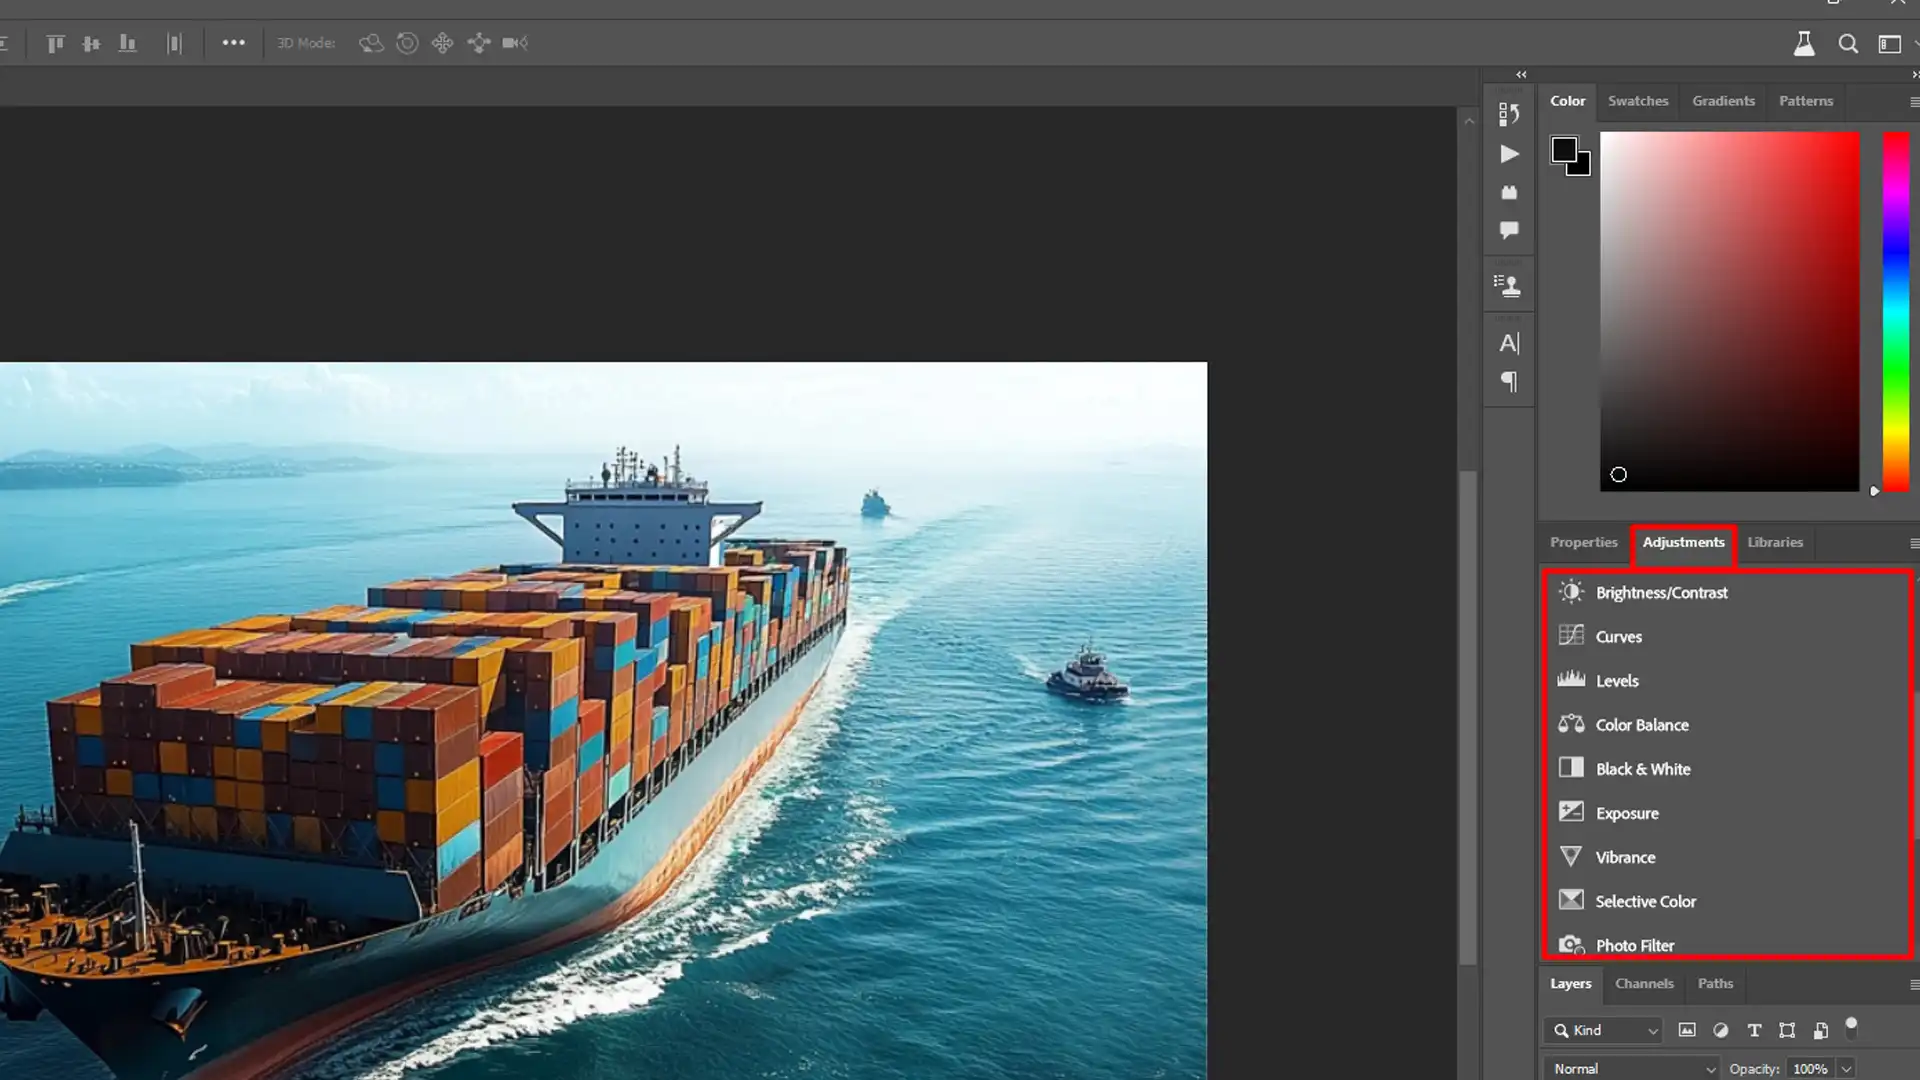
Adjust the levels, contrast, and color balance. These simple adjustments can make a huge difference in your final image.
Resize and crop your image according to your needs. It's better to do these tweaks now rather than later.
After making basic edits, save your work as a PSD file to preserve all layers and adjustments.
When performing basic Photoshop edits before export, knowing how to add texture in Photoshop can enhance your images significantly.
Adding texture helps in creating depth and interest in your edits.
Saving Your Work in Photoshop Elements
Once you’ve completed your Photoshop adjustments, saving them properly is crucial.
Use Photoshop Elements to save your edited files in different formats. For instance, you might want to save a copy as a JPEG files for easy sharing online.
However, always keep a version in the original PSD file type for future further editing. Make sure to double-check your file settings before hitting save.
Exporting from Lightroom to Photoshop
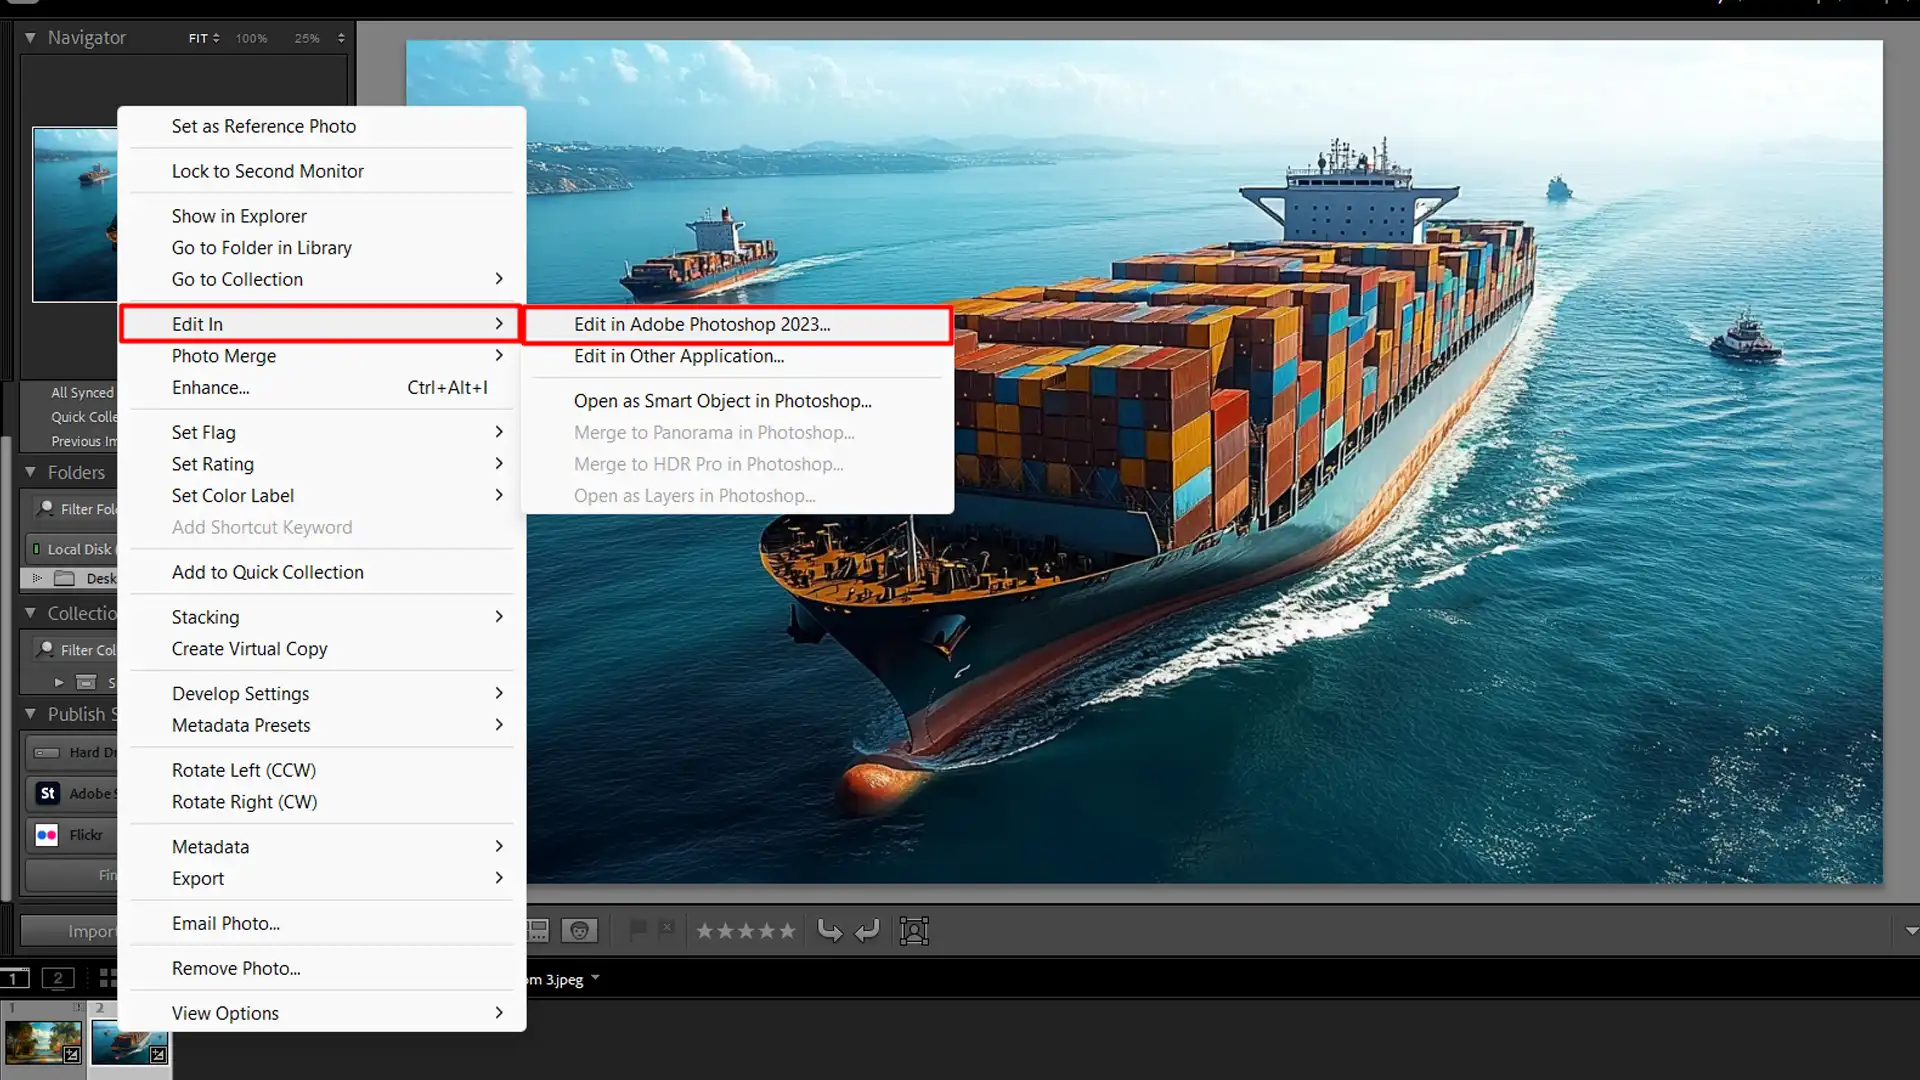
If you prefer using both Lightroom and Photoshop, you’ll need to know how to seamlessly transfer images between them. In Lightroom, select the photo you want to edit and click on Edit in Photoshop.
After making the necessary changes in Photoshop, simply hit save and the finished editing file will automatically update in Lightroom.
This smooth workflow helps keep all your projects synced and organized.
Pro tip: Always keep your photo files organized. Use meaningful file names and folders.
It’ll make finding your images later much easier.
Use these steps to make your edits more efficient and ensure high-quality results every time.
Step-by-Step Guide to Export from Lightroom to Photoshop
Follow this guide to easily export your images from Lightroom to Photoshop for advanced editing.
Step 1: Open Your Image in Photoshop
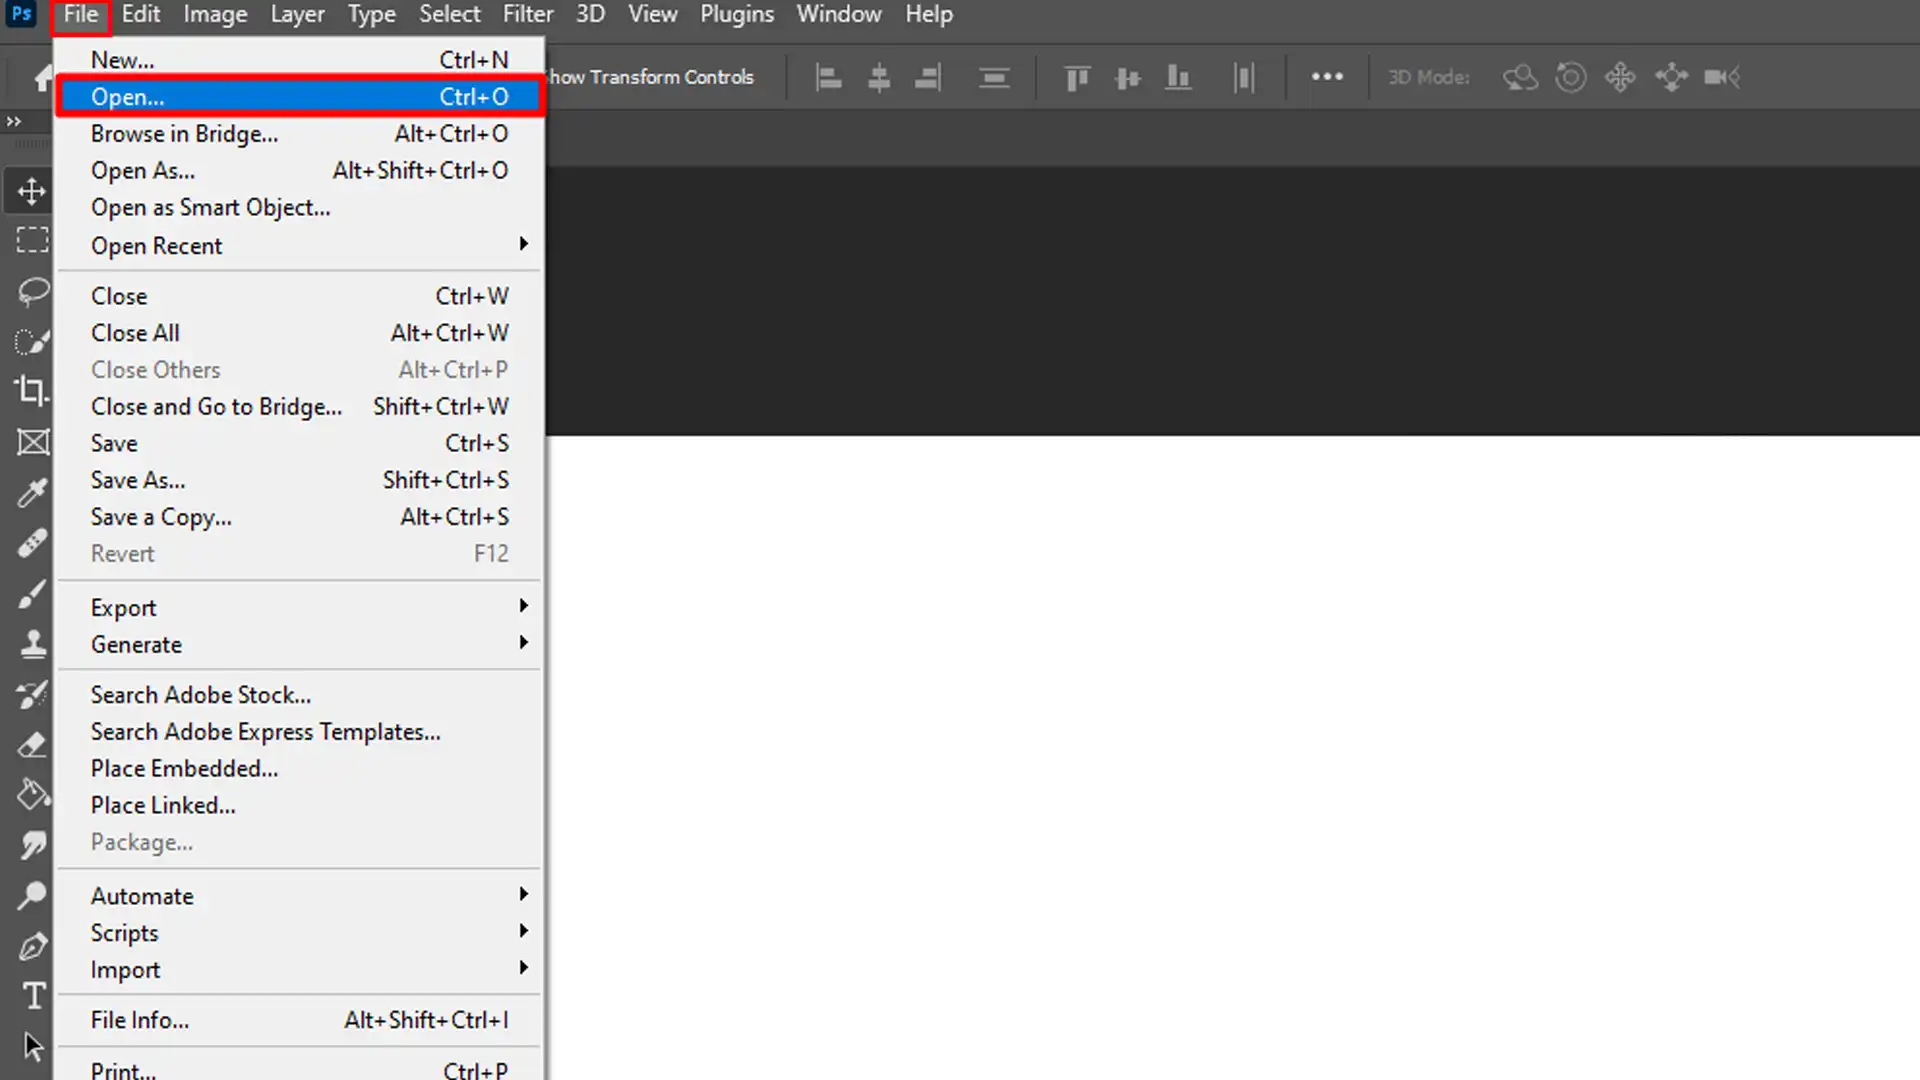
Open the image you want to edit in Adobe Photoshop. This step is crucial because you’ll make initial adjustments here.
Navigate to "File" and select your image file.
Ensure your image opens correctly before proceeding.
Step 2: Perform Necessary Edits
Make your edits in Photoshop. Adjust levels, color balance, and other elements to enhance your image.
Use tools available in Photoshop CC for this step.
Remember to save a version as a PSD file to preserve layers.
Step 3: Save Your File in a Compatible Format
Saving your edited image file in a suitable format is essential. TIF file work well for this purpose.
Use "Save As" to choose a compatible file type.
TIF file type hold quality and are easy to import to Lightroom.
Step 4: Import Your File into Lightroom
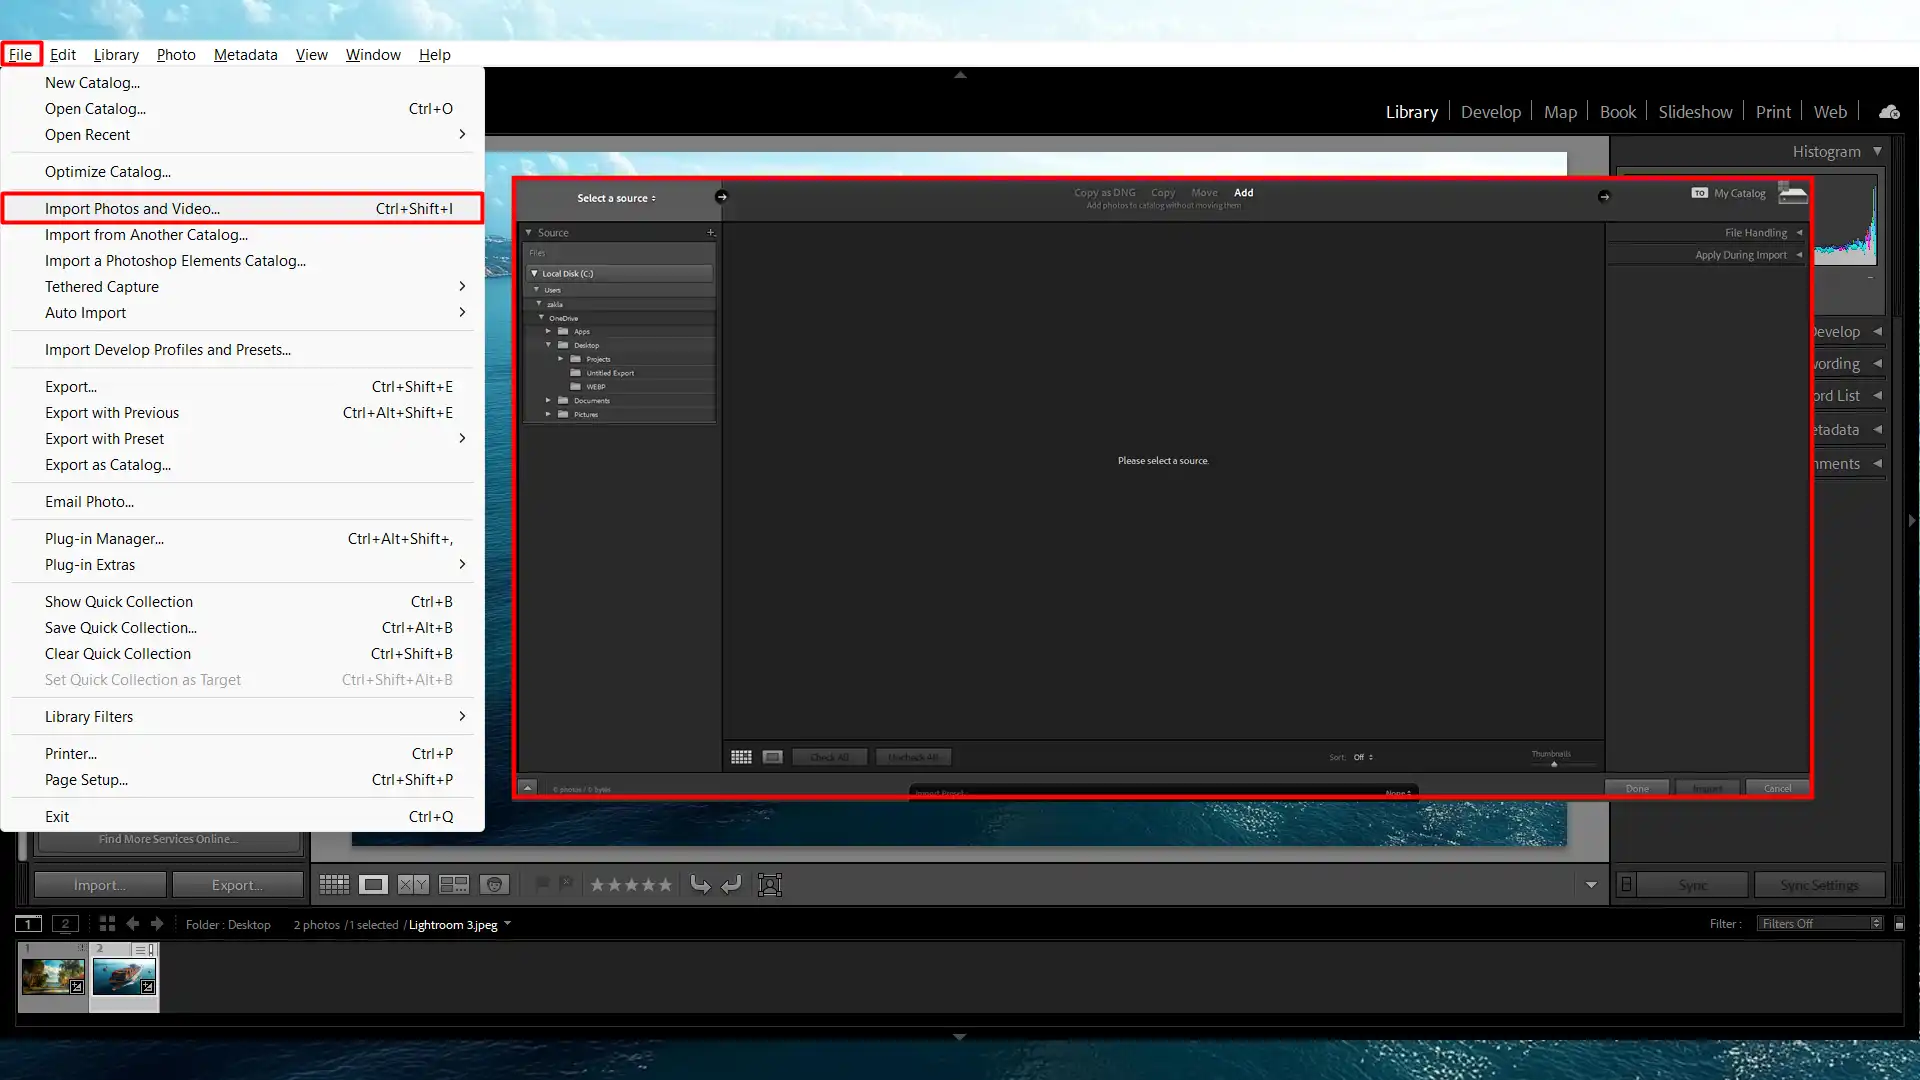
Now, open Lightroom and import your saved file. Navigate to the Catalog module for this step.
Go to "File" and select "Import Photos".
Locate your edited image and click "Import Photos".
Step 5: Final Adjustments in Lightroom
After importing, perform any final adjustments in Lightroom. Utilize the available tools for LR adjustments.
Use sliders to tweak exposure, contrast, and color.
Save your adjustments within Lightroom for consistency.
Pro Tip: Always name your files clearly and create folders for easy access. This practice saves time and keeps your workflow organized.
Common Issues and Troubleshooting
When moving from Lightroom to Photoshop, ensure that your TIFF files are correctly saved and your RAW files are fully processed to avoid common issues such as missing edits or compatibility errors.
Document Compatibility Problems
Adobe’s Photoshop and Lightroom are powerful tools, but they aren’t always perfect pals. You might face document compatibility problems.
First, ensure you save your image in a compatible format like TIF files.
If using a RAW file, make sure it's supported by both software versions. Understanding the difference between RAW or JPEG format can also help.
The PSD document type is excellent for preserving layers, but double-check both programs recognize it.
Color Profile Mismatches
Working between Lightroom and Photoshop sometimes messes with your color profiles. This mismatch can lead to unexpected results.
Always set the color space to sRGB or Adobe RGB.
Before sharing your final work, preview it in different programs or monitors, which may reveal color discrepancies.
When exporting from Lightroom to Photoshop (click Edit in Photoshop), always check the color settings.
Missing Edits After Export
You might notice some Lightroom revisions, such as cropping or color adjustments, don’t appear after exporting to Photoshop.
Ensure you're exporting images with the right settings. Remember that Lightroom Classic and CC have slightly different export options.
Double-check if you've applied all edits correctly before exporting. Click 'Edit in Photoshop CC' and see if the adjustments carry over.
If Lightroom edits go missing, open the new file in Photoshop Elements to verify.
Pro Tip: Always name your files clearly and organize them into folders. This makes your workflow smoother and helps you track changes easily.
Advanced Tips for Seamless Workflow
When you navigate the intricate world of photo editing, having a streamlined workflow makes all the difference.
Connectivity between Lightroom and Photoshop is paramount for achieving efficiency.
Let’s delve into some advanced tips to help you along.
Using Photoshop Elements for Specific Edits
Photoshop Elements is great for specific, detailed edits. It offers nifty tools without overwhelming you.
For instance, minor touch-ups like spot healing or red-eye removal become easy. Simply manage your main edits in Lightroom, then switch to Photoshop Elements for the finer details.
To do this, edit in Photoshop Elements directly from Lightroom:
Right-click the image.
Select "Edit In" and choose Photoshop Elements.
The adjustments will carry over, maintaining all your hard work.
Automating the Export from Photoshop to Lightroom
Exporting can be a tedious task, but automation simplifies it. Configure Lightroom for batch exports.
This saves time and ensures consistency. You can preset settings like file format, color space, and resolution.
Steps to automate the export process:
Select photos you want to export.
Go to the export dialogue
Set desired parameters and save them as a preset.
Apply this preset for future exports.
By automating formats like RAW file to TIF files or JPEGs, you prevent repetitive tasks from consuming your editing time.
Integrating Other Adobe Tools
Lightroom and Photoshop both shine individually, but together, they create magic.
Beyond these, don’t overlook Adobe’s other tools. Using Adobe Bridge, for example, helps in organizing your files. When transferring Lightroom edits to other Adobe apps, consistency maintains:
Open your image in Lightroom.
Make the necessary adjustments.
Export or open directly via the "Edit In" menu. For users of Photoshop CC, this integration is even smoother. Just remember to keep your workspace tidy, label your layers, and consistently check compatibility settings.
Pro Tip: Use external software editors for specialized functions. Sometimes specific tasks like noise reduction or complex retouching benefit from external software editors.
Your primary photo editor might not have all the tools, so knowing when to utilize external software editors enhances your workflow.
To enhance your workflow while integrating other Adobe tools, learning how to blend pictures effectively can be crucial.
By mastering the art of blending, you can create seamless edits and transitions between different Adobe applications.
Best Practices to Export from Photoshop to Lightroom
For optimal results when transitioning from Lightroom to Photoshop, always work with high-quality RAW file and save your final edits as TIFF files to preserve detail and ensure seamless integration.
Aspect
Photoshop
Lightroom
File Format
Save as TIFF or PSD for high quality
Import and edit RAW files for best results
Basic Edits
Perform detailed enhancements
Start with basic edits (exposure, contrast)
Automation
Use export presets and automation scripts
Set up import settings and develop presets
Workspace Organization
Label layers clearly
Organize files in folders and collections
Compatibility
Ensure proper settings for seamless export
Ensure compatibility with Photoshop settings
Best Practices for Efficient Workflow
Efficient workflow is important to mastering both Lightroom and Photoshop.
Picture this: you start with a raw file in Lightroom. To get the best results, make all your basic edits here first. You tweak exposure, contrast, and color balance.
Once satisfied with your LR edits, you then move from Lightroom to Photoshop for detailed enhancements. Getting these two software platforms to “talk” to each other smoothly is vital.
Save time by setting up automation scripts for repetitive tasks. In Lightroom, right-click the image and select file: ‘Edit’ In Photoshop.
This seamless transition ensures that your workflow remains uninterrupted. Consistency is another element of an efficient workflow.
Create preset settings for exports including document format and resolution. Moreover, don’t forget the importance of keeping your workspace organized.
Label your Photoshop layers clearly. It helps when working with external editors like Adobe Bridge or specialized noise reduction tools.
Programs play well together when compatibility settings are checked. Integration fosters a consistent look across projects from Lightroom to Photoshop.
Key Points for Efficient Workflow:
Start with basic edits in Lightroom (exposure, contrast, color balance).
Move to Photoshop for detailed enhancements.
Set up automation scripts for repetitive tasks.
Create preset settings for exports (file format, resolution).
Keep your workspace organized (label Photoshop layers clearly).
Ensure compatibility settings are checked for smooth integration.
Final Thoughts on Exporting from Photoshop to Lightroom
When exporting from Photoshop back to Lightroom, your goal is simplicity and efficiency.
First, ensure that your files are in the right format. Many prefer TIF files for their high quality. Of course, JPEG files work too, but keep an eye on quality loss. Automating the export process in Photoshop can save heaps of time.
Use export presets for consistent results every time.
Consistency extends to your organizational practices. Exporting multiple files at once? Group and label them clearly.
Then, those files move back to Lightroom seamlessly. Remember that exporting means you lock in your changes.
Be certain that your Photoshop adjustments are final. This step prevents any unwelcome surprises when the images land back in Lightroom for the finishing touches.
Pro Tip: Use shortcuts! Quickly move edits from Lightroom to Photoshop with keyboard shortcuts. It will speed up your workflow and make the process less tedious.
Frequently Asked Questions (FAQs)
How do I transfer Lightroom to Photoshop?
Transfer a Lightroom to Photoshop in few steps:
Start by saving your Photoshop project as a PSD or TIFF file.
In Lightroom, go to the catalog module and navigate to the folder where you've saved your file.
Click the 'Import' button in the bottom left corner to add the Photoshop document to your Lightroom catalog.
How do I save Photoshop files back to Lightroom?
Saving Photoshop files back to Lightroom in two steps:
After editing in Photoshop, choose 'Save' or 'Save As' and ensure you save the document in a format that Lightroom supports, like PSD, JPEG, or TIFF.
Return to Lightroom and the saved file will automatically appear in your catalog if the original image was accessed through Lightroom.
How do I open a PSD document in Lightroom?
In Lightroom, go to the 'Library' module.
Choose 'Import' from the bottom panel and select the PSD document you want to open.
Once imported, you can view and manage your PSD file within Lightroom.
How to open Photoshop edit in Lightroom?
Make sure your Photoshop edit is saved in a format compatible with Lightroom (e.g., PSD, JPEG).
In Lightroom, navigate to the 'Library' module and import the edited file.
The Photoshop edits will now be accessible from your Lightroom catalog.
Exporting from Photoshop to Lightroom can greatly enhance your photo editing workflow. I’ve found that using the right file formats, like TIFF for high quality, makes a huge difference.
By following the steps outlined, you can seamlessly transfer your edits and keep your images looking their best.
Personally, I’ve seen how this smooth process helps in achieving professional results efficiently.
For those looking to dive deeper into these tools, you might find my Photoshop Course and Lightroom Course really useful. They cover everything from basics to advanced techniques.
$2,061.00Original price was: $2,061.00.$1,061.00Current price is: $1,061.00. 27584
Download Your Free Guide Now!
Discover the secrets of photography with our printable guide! Master essential techniques like aperture, shutter speed, and ISO to create stunning images. Get your free printable PDF now and start turning your snapshots into masterpieces!