A black and white gradient overlay can transform a simple image into a timeless piece of art.
Are you looking to add a touch of sophistication to your photos?
Imagine the power of subtle shading and contrast enhancing the depth and emotion of your shots.
Whether you’re a seasoned photographer or just starting out, this technique is easy to master and incredibly rewarding.
Ready to elevate your image to the next level?
Let’s dive into the specifics and unlock the full potential of this classic effect.
Table of Contents
How to Create a Black and White Gradient Overlay
Creating a black and white gradient overlay can add a classic and sophisticated touch to your images.
This technique involves blending shades of gray to produce a smooth gradient effect, enhancing the depth and contrast of your photos

Step-by-Step Guide
- Open your image: First, open the image you want to work on in Photoshop. Ensure it’s ready for modifications.
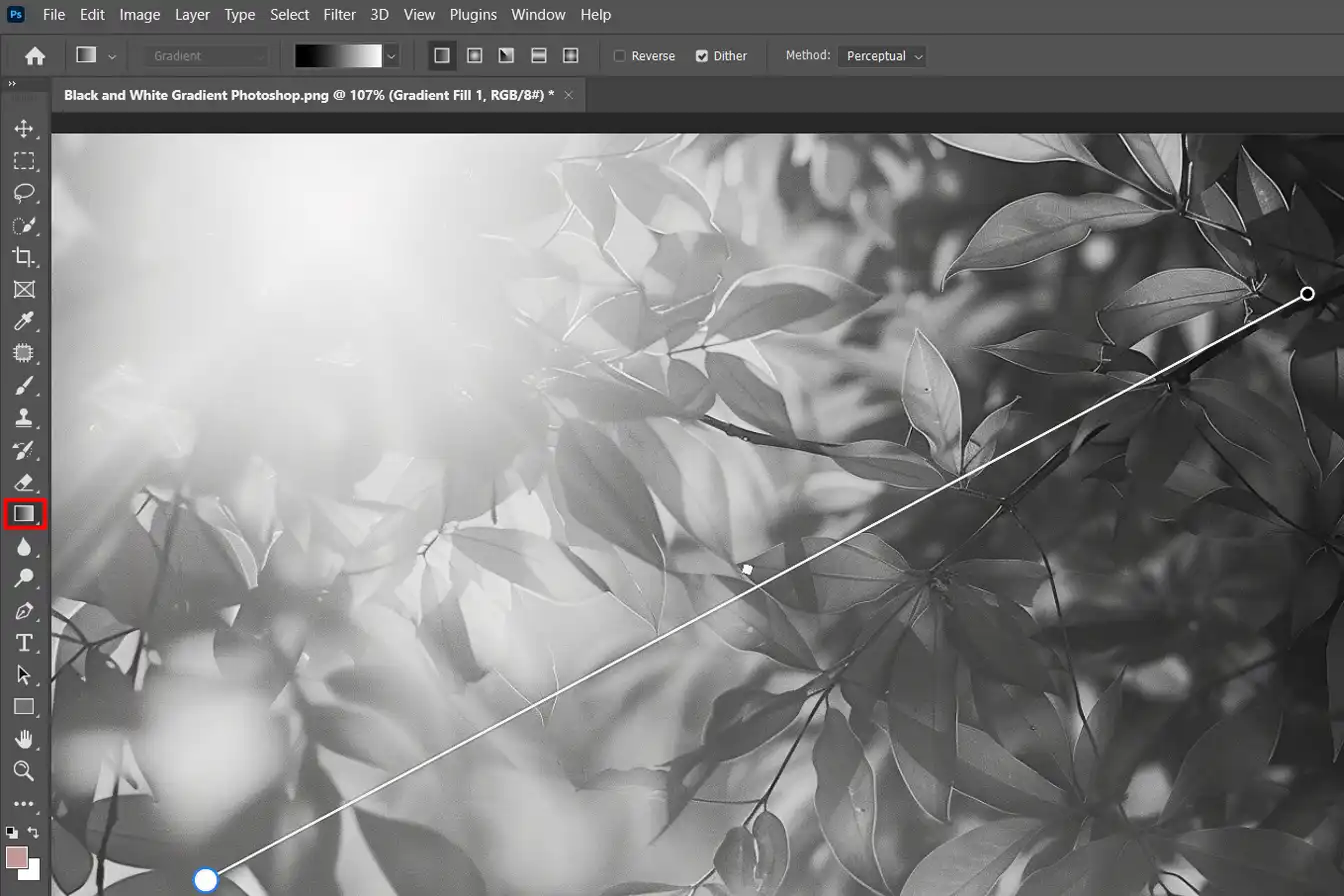
- Create a gradient layer: Go to the Layers panel, click the "New Fill or Adjustment Layer" icon, and choose "Gradient".
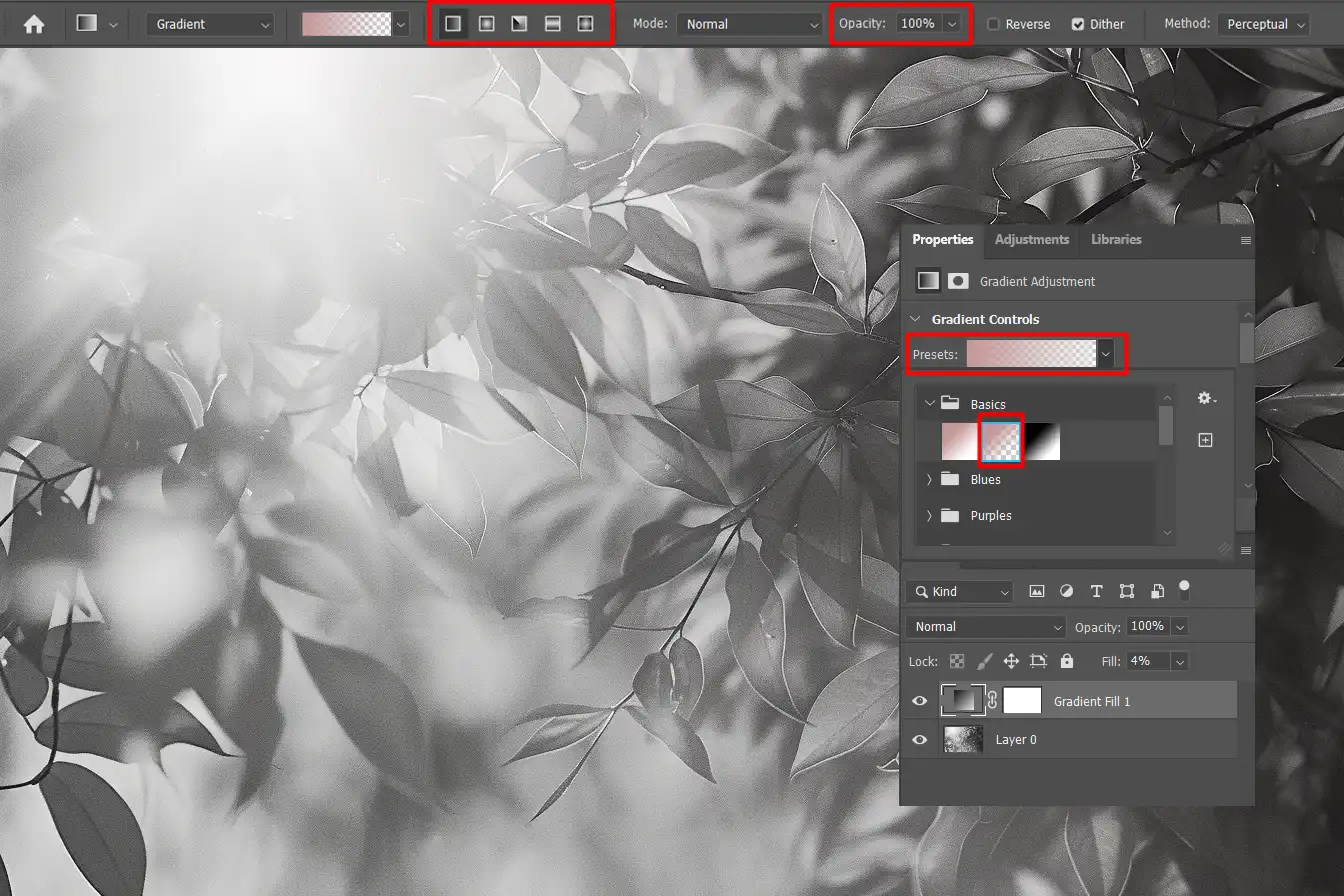
- Select the gradient type: In the Gradient Fill box, click the gradient bar to edit it. Choose the black and white gradient or create a custom one.
- Adjust the gradient angle: You can set the angle for the gradient. Typically, a linear gradient at 90 degrees works well.
- Set blending mode and opacity: Change the blending mode of the layer to "Overlay" or another mode if it suits your image. Adjust the opacity to blend it smoothly.
Advanced Techniques for Black and White Gradient Overlays
Once you’re comfortable with the basics of creating gradient overlays, you can start exploring advanced techniques to make your image stand out even more.
These methods will help you add intricate details, create dynamic effects, and achieve a professional finish in your designs.
| Technique | Key Features | Pros | Cons |
|---|---|---|---|
| Combining Multiple Gradients | Uses multiple layers and color stops | Creates complex effects; Allows smooth transitions | Can become visually cluttered |
| Animating Gradients | Adds dynamic movement using CSS keyframes | Engages viewers; Can enhance website interactivity | Requires testing on different devices |
| Using Gradient Masks | Applies gradients to specific areas via masks | Targeted application; Versatile for different effects | Can be complex to set up |
| Adjusting Gradient Angles | Changes the direction of the gradient for varied effects | Customizable appearance; Easy to adjust | May need frequent adjustments for best results |
When experimenting with gradients, it’s important to avoid overcomplicating your designs.
Ensure that any gradients you apply are allowed within the design guidelines of your project or platform.
Combining Multiple Gradients
- Select Your Element: Open your image in Photoshop and select the area where you want multiple gradients.
- Create Gradient Layers: Instead of applying one linear gradient, you can add multiple gradient layers.
- Adjust Colors: Use different color stops to adjust each gradient layers. This allows for smooth transitions between colors and a unique look.

Combining gradients is a powerful tool in both web design and photo editing.
I found that experimenting with different angles and colors helps you find what works best for your project.
When working on a black and white gradient overlay, a layer color swap can enhance your design’s depth and contrast.
Adjusting layer colors allows for precise control over how gradients blend and impact your final image.
This technique ensures your gradient overlay achieves the desired effect with greater visual impact.
Advanced Techniques for Black and White Gradient Overlays
Creating compelling white and black color gradient overlays involves mastering advanced techniques with a linear gradient.
By experimenting with gradient angles and blending modes, you can change the depth and dimension of your photos.
With a bit of time and practice, you’ll find that these advanced methods significantly enhance your photo editing skills.
Embrace the creative possibilities and elevate your images to new heights.
Common Mistakes to Avoid
- Overdoing it: Prevent from making the gradients Cover too strong. Subtlety often works better.
- Ignoring layer masks: Use layer masks to apply the gradient overlay only to specific parts of your image. This control helps manage the effect accurately.
- Gradient direction: Always check the direction of your linear gradient. An incorrect direction can lead to undesired effects.
- Wrong colors: Make sure to stick with monochromatic colors for a classic look, unless you aim to experiment with other shades.
Frequently Asked Questions (FAQs)

How is a gradient overlay used?
Gradient overlays are used to enhance the visual appeal of images by adding depth and dimension through a gradual blend of colors. They can help in setting a mood, emphasizing a subject, or simply making an image more aesthetically pleasing.
What is the use of gradient overlay?
- Open your image editing software and load the picture.
- Select the gradient tool from the toolbar.
- Choose your desired gradient type and colors.
- Apply the gradient by clicking and dragging across the area of the image where you want the gradient to appear.
How do you fill a gradient color?
- Select the object or area you want to fill.
- Open the gradient panel or tool options.
- Pick the gradient type (linear, radial, etc.) and choose your colors.
- Adjust the direction and spread of the gradient as needed.
- Apply the gradient fill to the selected area.
How to use gradient on an image in Photoshop?
- Open the image in Photoshop.
- Select the 'Gradient Tool' from the toolbox or press 'G'.
- Choose a gradient preset or create your own gradient.
- Click and drag on the image to apply the gradient.
- Adjust the opacity and blending mode for the gradient layer to blend it smoothly with your image.
Conclusion
In conclusion, using a black and white gradient overlay can truly enhance your photos by adding a sophisticated touch and bringing out subtle details.
I’ve found this technique to be incredibly useful in my own projects, making images look more professional and dramatic.
It’s a simple yet powerful way to elevate your work.
If you want to learn more about how to master such techniques, you can do this now thanks to these courses: Photoshop Course and the Lightroom Course.
These resources provide step-by-step instructions and valuable tips that can help you improve your editing skills.
Additionally, you can explore Adobe Photoshop and Adobe Lightroom to get the tools you need for perfecting your gradient overlays.
Happy editing!
Read more about Photoshop:


