Have you ever wondered how to make your photos pop by changing specific colors? I’m excited to show you how to use the powerful Lightroom replace color technique.
Imagine transforming dull skies to vibrant sunsets or turning a plain outfit into a fashionable statement, all with just a few clicks.
You’ll be amazed at how easy it is to make these changes and elevate your photography skills. Stick around, because by the end of this article, you’ll be ready to master this incredible tool and give your images that professional touch they’ve been missing.
Get ready to unleash your creativity!
Table of Contents
Understanding Lightroom Replace Color
So, you want to replace colors in Lightroom. Changing the color of an object in photos can enhance or completely transform your images.
Let’s dive in with an easy-to-follow guide.
Why Change Colors in Lightroom?
Changing colors in Lightroom allows you to fix or improve your photos effortlessly.
For ex. you can make a dull sky look vibrant blue or enhance a red flower to make it pop in the image.
Adjusting hues helps you to tell the story you want through your pictures. It enriches your creative toolkit.
How to Lightroom Replace Color
This section will break down the steps to use Lightroom to replace colors effectively.
Steps to Replace Colors in Lightroom
Step 1: Open your photo in the Develop Module. The Develop Module provides all the tools you need for editing.
Step 2: Select the Adjustment Brush. Locate it on the right panel. This brush lets you paint over areas you want to modify.
Step 3: Adjust the brush size and feathering. Use the bracket keys to quickly change the brush size. This is one of the essential Lightroom shortcuts that can speed up your workflow.
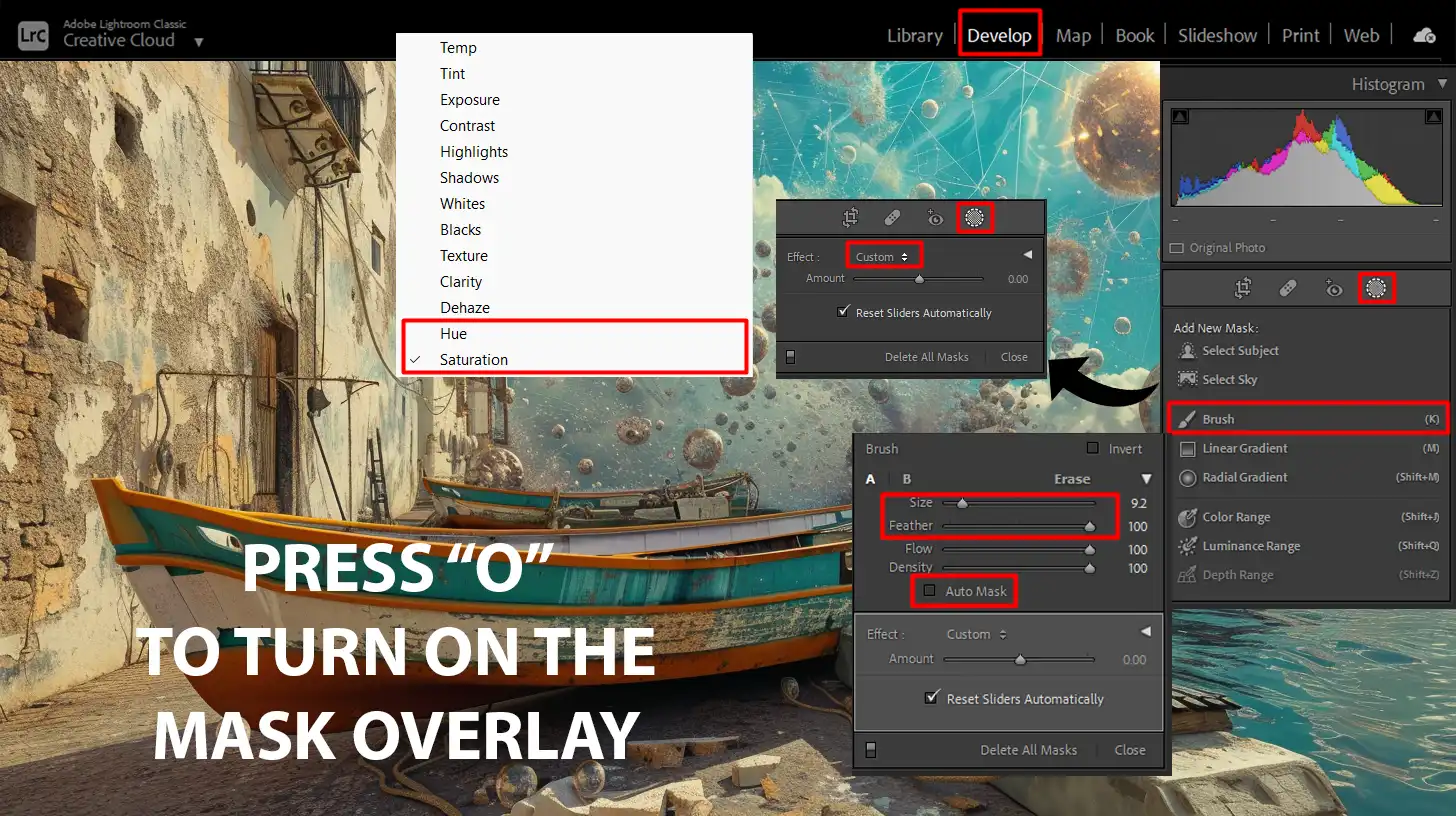
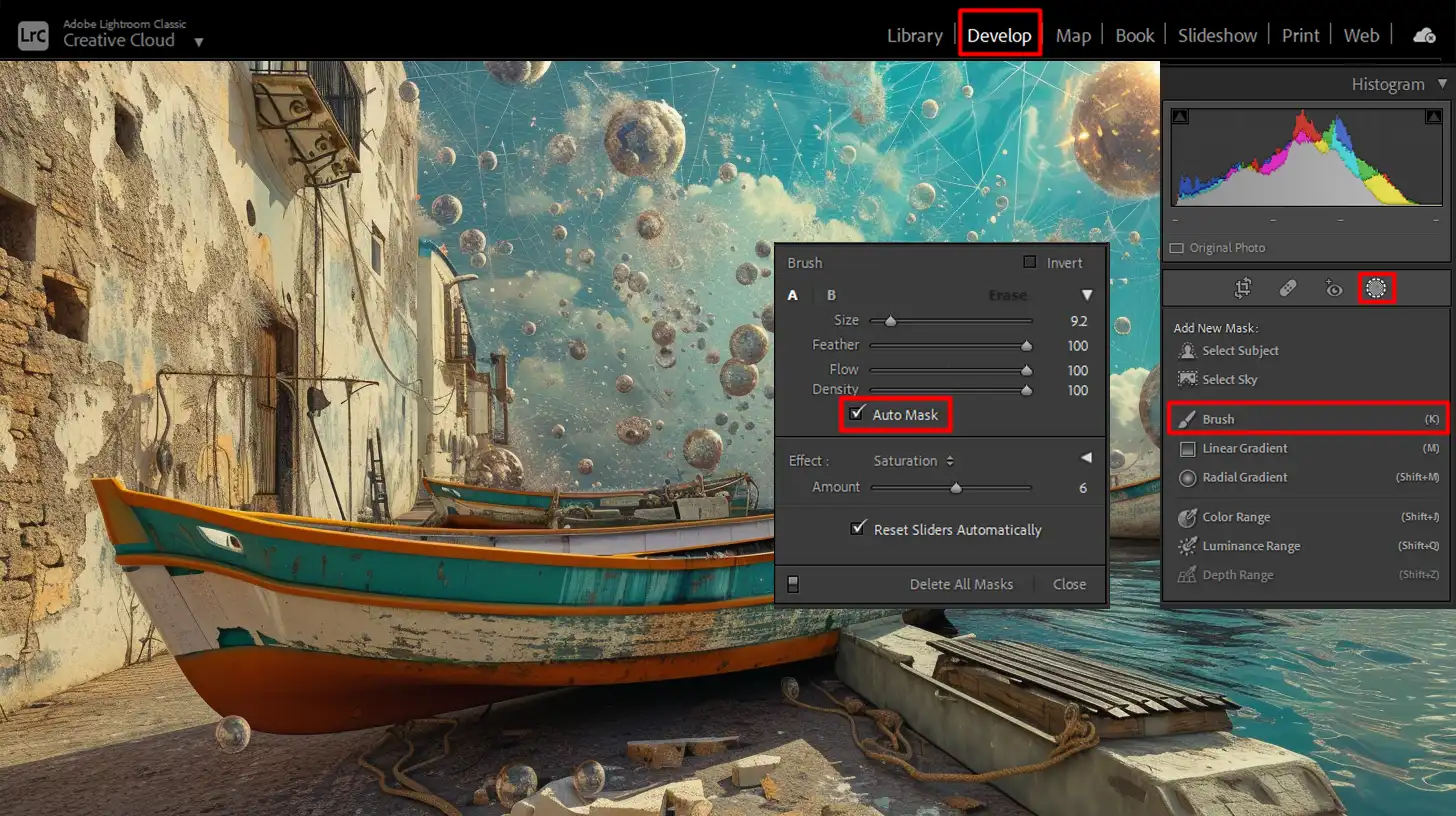
Step 4: Enable Auto Mask. Auto Mask helps keep your brush within the edges of the object you are painting.
Step 5: Turn on the Mask Overlay. The mask overlay appears as a red overlay on the selected areas. This makes it easier to see which parts you are modifying.
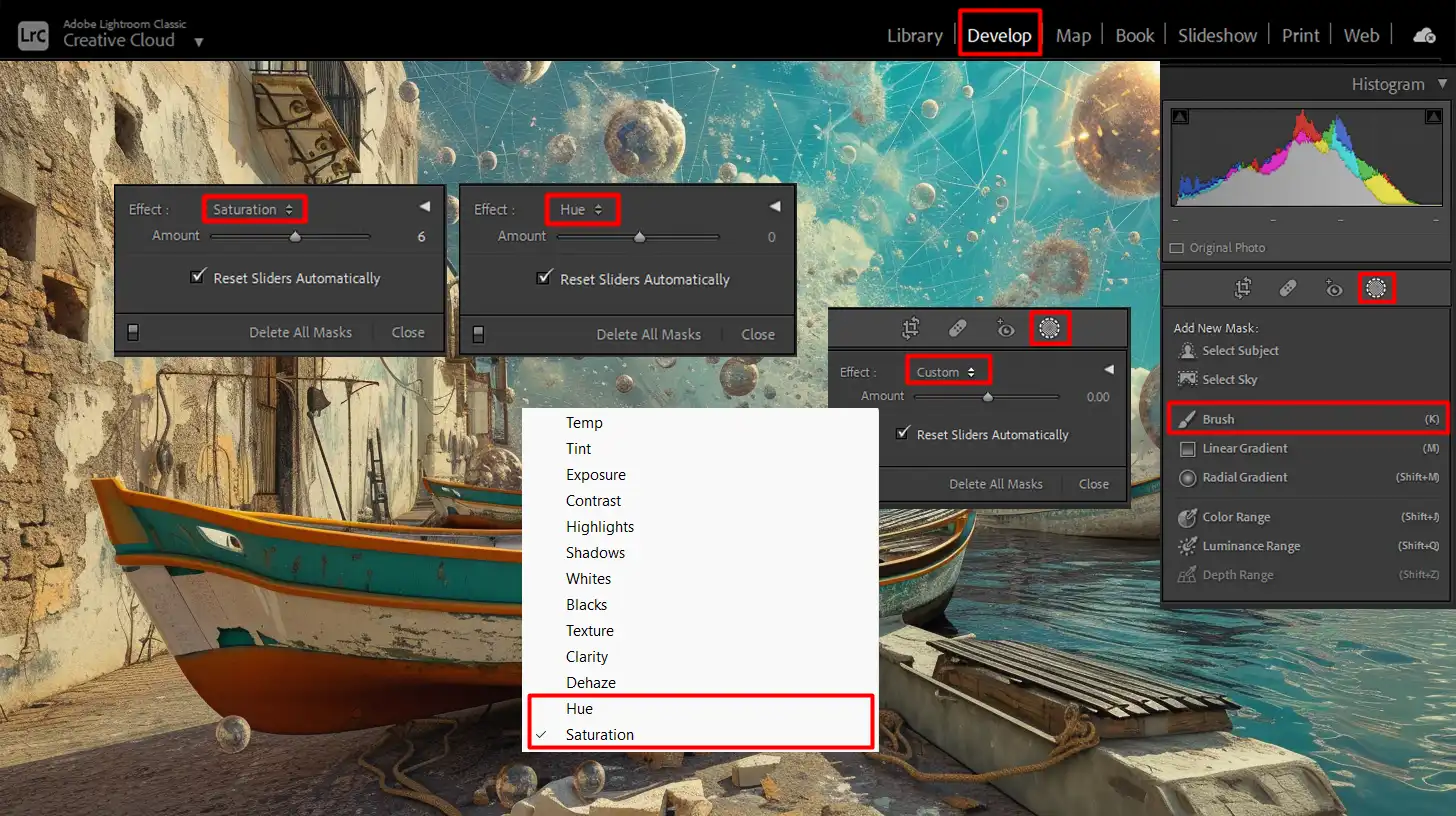
Step 6: Choose the Hue Slider. This slider lets you change the hue of the selected area. Drag it until you find the new color you want.
Step 7: Adjust Saturation. Use the saturation slider to control how intense the new color is. Less vividness means more subtle.
Step 8: Refine your adjustments. Feel free to play with all the sliders, including exposure, contrast, and temperature, to get the best final image.
When you are happy with the changes, you have successfully replaced the color of an object in Lightroom Classic.
Pro Tip: Hold the Shift key and paint to create the straight lines while using the adjustment brush. This saves time and produces precise edges.
Remember, the brush tools gives you flexibility to target specific areas. Adobe’s video tutorial materials can also help if you’re new to these features.
So go ahead, start painting those creative changes into your images!
Getting Started with Lightroom
Lightroom is your new best friend for photo editing. It’s great for changing colors, adjusting photos, and making your pictures pop.
But first, we need to get you set up.
Setting Up Your Workspace to Change Colors in Lightroom
Let’s start by setting up your workspace. Open Lightroom Classic. Once inside, you’ll see various panels and tools. We’ll focus on the Develop module. This is where you do most of your editing.
Look for the Adjustment Brush tools. It’s at the top, next to the crop tool. Click on it to activate. You’ll also see the Auto Mask checkbox. Keep this checked to ensure your brush strokes stay within the object edges.
Now, let’s customize your toolbar:
Right-click on an empty area in the toolbar section.
Choose 'Customize Toolbar'.
Remove any tools you don't need.
Make sure the HSL Panel and Adjustment Panel are visible.
This streamlines your workspace and keeps it clutter-free.
Importing Your Photos
To edit, you need photos. Importing is simple:
Click on 'File' at the top left, then select 'Import Photos and Video'. A new window will appear.
Choose the folder where your photos are stored.
Select the images you want to import.
Click 'Import' at the bottom right.
Your photos will now appear in the Library module. Navigate to the Develop section. Here, you can start editing your photos using various tools, including the brush, hue slider, and auto mask.
Start with a single photo and get comfortable with the interface and controls.
Basic Tools and Their Uses
Let’s dive into some basic tools:
Adjustment Brush: This versatile tool lets you target specific areas. Use it to change the color of an object, adjust the hue, or even enhance the green in your landscapes.
Hue Slider: This slider helps you shift colors within your photo. Slide it left or right to see the changes happen in real-time. For greater precision, use the Auto Mask feature to limit your adjustments to specific areas.
Saturation Slider: This controls how vivid the colors appear. Increase vividness for brighter, more intense colors. Decrease it for a more subdued look.
Advanced Tips and Tricks
For those looking to go a step further, consider using the Range Mask. This feature helps refine your selection based on luminance or color range. It’s especially useful for fine-tuning edits in detailed areas.
If you’re working on a sky, try enhancing the blues. Use the brush and hue sliders to adjust the hue and vividness. For elements like flowers, increase the vibrancy to make them stand out. Don’t be afraid to experiment.
Lightroom allows you to reset any mistake easily.
Pro Tip: Press Shift while painting with the brush tool to create perfectly straight lines. This trick helps you achieve cleaner edits, perfect for architectural shots or horizons.
Using the Brush Tool to Replace Color in Lightroom
First, open Lightroom and head over to the Develop section. Here, you’ll see a toolbar on the right side of the screen. The Adjustment Brush tool icon looks like a little brush, click on it.
Make sure you are in the right module by checking the right corner of Lightroom’s interface.
Adjusting Brush Size
After selecting the brush, you’ll notice options to adjust its size, feather, and flow at the top of the panel. Use your mouse wheel to change the brush diameter quickly.
Alternatively, sliders below the icons will let you refine these settings more precisely.
Remember, smaller brushes help in detailed areas and larger ones cover more ground.
Using Auto Mask
To avoid coloring outside the lines, turn on Auto Mask. This feature will help the brush automatically detect edges within the clicked area.
Check the Auto Mask option in the brush settings before you start. Auto Mask is a recommended tool, especially useful for creating intricate masks quickly when you’re dealing with objects that have distinct boundaries.
Pro Tip: If you want straight lines while brushing, hold down the Shift key. It’s perfect for those tricky horizon shots in Lightroom.
Enhancing Photos
Change colors in your photos and enhance specific objects using these steps:
To change the color of something green, apply the brush and then adjust the Hue slider.
With these tools, Photoshop transforms into an artist’s easel.
Follow this tutorial and practice regularly. You will master these features in no time.
Adjusting Colors with the Hue Slider
When you want to make your photos pop, adjusting colors with the Hue slider in Lightroom is a fantastic way to do it.
Let’s dive in and explore how.
Feature
Lightroom Hue Slider
Photoshop Hue/Saturation Adjustment
Interface
HSL/Color panel in Develop module
Adjustment Layer in Layers panel
Control Type
Slider for individual color channels
Slider for overall and individual color channels
Real-Time Preview
Yes, immediate visual feedback
Yes, with layer visibility toggles
Fine-Tuning
Adjust hue, saturation, and luminance separately
Adjust hue and saturation, limited luminance control
Ease of Use
Intuitive for quick color adjustments
More complex, better for detailed edits
Locating the Hue Slider
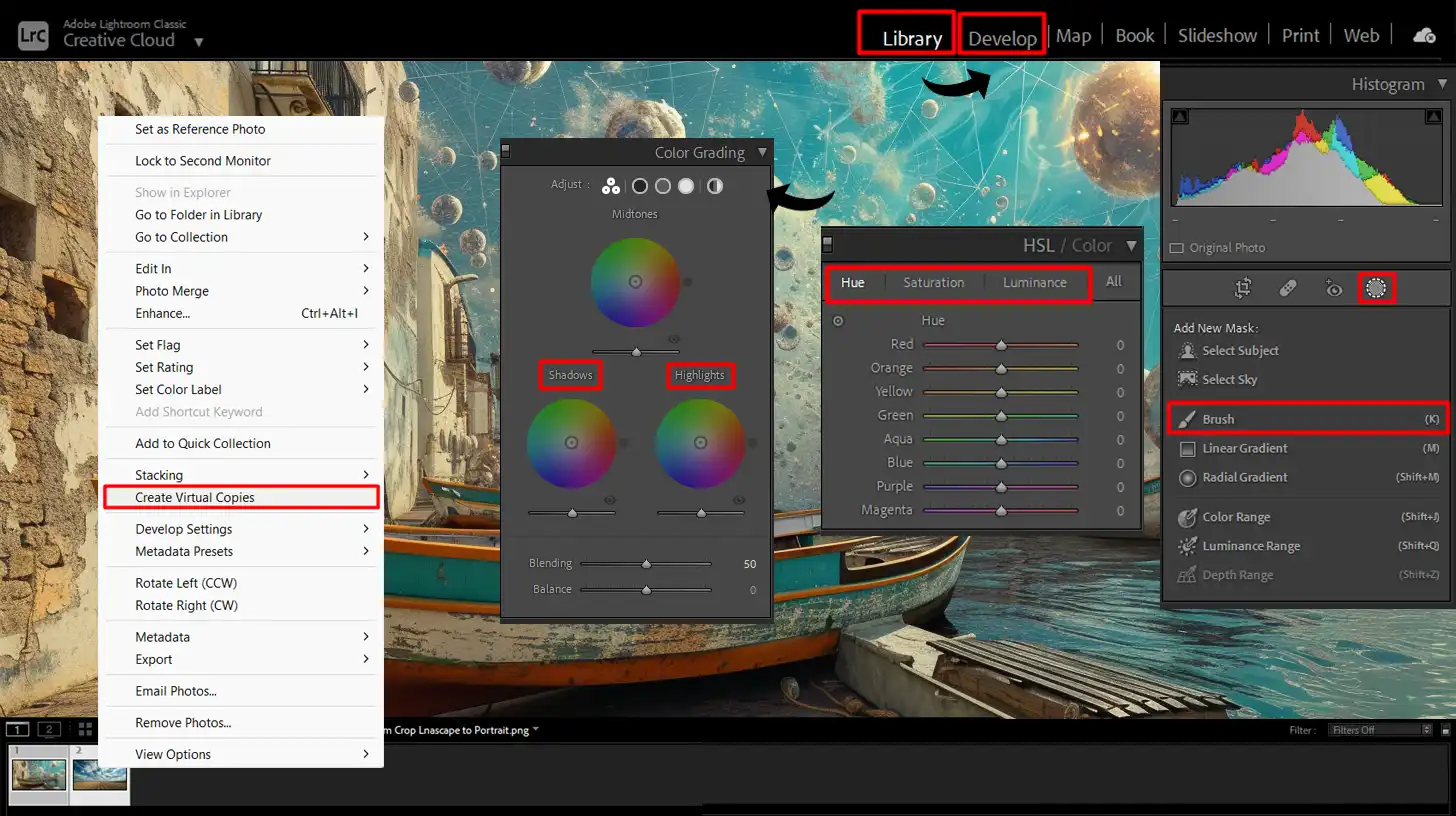
First things first, you need to find the Hue slider. No worries, it’s pretty easy. In the Develop section, look on the right-hand side. There, you see the HSL/Color panel.
Click it, and boom, there’s your Hue slider.
Fine-Tuning Colors
Now that you’ve found the Hue slider, let’s use it. Maybe you have a photo with an object that looks off. Simply start sliding and see the magic happen.
Are the trees not green enough? Slide towards green. Want to change colors? Shift it around until you’re happy.
You’re the artist! Try fine-tuning the tones for that perfect look.
Pro Tip: After you modify the hue, toggle between before and after. This gives you a clear sense of the improvements.
Additionally, if you want to make more advanced edits, consider using Photoshop for tasks like removing shadows or adding texture.
Now go ahead, experiment, and have fun with your new skills.
Your photos won’t know what hit them!
Advanced Techniques for Lightroom Color Replacement
When replacing colors in your images, precision ensures natural and professional results. By combining tools like the Hue/Saturation adjustment layer and the Color Range selector, one can get remarkable accuracy.
Select the Area to Change: Start by selecting the area to change using the Color Range tool found in the Select menu. This highlights only the specific colors needed.
Add a Hue/Saturation Adjustment Layer: Next, add a Hue/Saturation adjustment layer from the Layers panel. This allows for fine-tuning without affecting the rest of the image.
Toggle 'Colorize' Option: Toggle the 'Colorize' option in the adjustment layer for a more uniform look. Modify the sliders to achieve the desired color. This method offers excellent control for those intricate edits where just a simple hue shift won't cut it.
By mastering this tool, you can achieve precise color adjustments and enhance your images with ease.
Using Multiple Layers
The use of multiple layers makes your edits non-destructive and easily adjustable.
Create a Duplicate Layer: To replace a color without affecting the underlying image, create a duplicate layer by right-clicking the Background layer and selecting 'Duplicate Layer.'
Apply New Color Adjustments: Apply the new color adjustments on this duplicated layer, keeping the original intact. This approach is especially useful in tutorials, where initial mistakes can be corrected without starting over.
Isolate an Object: For instance, use the Adjustment Brush to isolate an object. Then adjust the color settings in the HSL/Color panel or use the brush settings to fine-tune the changes. Set the blending mode to Hue or Color to make the new color mesh well with the existing tones of the image. This technique maintains the texture and shading of the original object while changing its color.
Pro Tip: Use Layer Masks to refine the edges of your color replacement. This makes transitions smoother and helps blend changes naturally.
Adding color replacement techniques through tools like Hue/Saturation and multiple layers enhances your workflow significantly.
Each provides unique benefits, contributing to overall cleaner and more professional images.
Practical Examples and Case Studies for Lightroom Color Replacement
In this section, we’ll explore practical examples and case studies to demonstrate how effectively using Lightroom’s color replacement tool can transform ordinary images into stunning visual masterpieces.
Example 1: Changing the Color of a Car
Changing a car’s color in Photoshop is simpler than you might think.
Follow these steps:
Begin by selecting the vehicle using the Quick Selection tool. Modify its sensitivity for precision.
Use the Color Rangetool to isolate specific colors, ideal for this task.
Once you select the desired area, create a duplicate layer. Non-destructive editing keeps the original intact.
Add a Hue/Saturation adjustment layer to gain control. Toggle the 'Colorize' option for a uniform, new hue across the car.
Fine-tune the sliders until satisfied. The results can be surprisingly natural.
Example 2: Adjusting Skin Tones
Adjusting skin tones requires finesse.
Follow these steps:
Start by selecting the person using the Lasso tool or Quick Selection tool. Be careful around edges, especially hair and clothes.
After isolating the skin, add a Hue/Saturation adjustment layer. Use the sliders to achieve a balanced look.
For more complex adjustments, try the Selective Color option. It allows tweaking of specific color channels, perfect for minor imperfections.
Pair this with Layer Masks to ensure the changes affect only relevant areas.
Pro Tip: Always use non-destructive editing techniques. This way, making mistakes becomes part of the learning process, not a cause for despair.
In our practical examples and case studies, we explore how to replace a sky in Photoshop to enhance your images dramatically. By utilizing layer color swap techniques, you can seamlessly integrate new skies into your photos.
This approach not only transforms the atmosphere but also ensures a cohesive look throughout your image.
Common Photo Editing Mistakes and How to Avoid Them
This section highlights common photo editing mistakes and provides actionable tips on how to avoid them, ensuring your edits enhance rather than detract from your images.
Overusing the Brush Tool in Photoshop
The Brush Tools in Photoshop can feel like a trusted companion, but it is easy to overdo it.
First tip: use it sparingly. Applying too much with the Brush Tool can lead to unnatural and heavy-handed edits.
To avoid this, you should:
Reduce the opacity and flow settings. This gives more control and prevents the edited area from looking too intense.
Utilize layer masks. They allow for selective editing without permanently changing the original image.
When in doubt, take a step back. Look at your work with fresh eyes. If it seems too much, it probably is.
Ignoring the Hue Slider in Lightroom
Ignoring the Hue Slider in Lightroom can lead to unsatisfactory colors in your photo edits. This mistake is common among beginners.
To achieve better results, you need to understand how the Hue Slider works. It helps you refine the colors and achieve the desired effect.
For ex. adjusting the Hue Slider can turn a dull photo into something vibrant. Always experiment with it. Just slide it back and forth to see the different effects.
Do not forget to use the Preview button. It shows you a quick before-and-after comparison, which helps in making better decisions.
Pro Tip: By recognizing these common mistakes, you can elevate your editing game. Limiting your Brush Tools usage and leveraging the Hue Slider will make your workflow smoother.
Every tutorial you follow should help you get better. Watch out for new techniques.
Always keep backups of your original images. This allows you to compare and ensure that changes are indeed improvements.
Frequently Asked Questions (FAQ)
How do I replace one color with another in Lightroom?
To replace one color with another in Lightroom you have to:
Open your photo in Lightroom.
Go to the 'Develop' module.
Select the 'Adjustment Brush', 'Radial Filter', or 'Graduated Filter'.
Choose the color you want to replace by adjusting the 'Hue' slider under the 'Color' section.
Adjust the other settings such as saturation and luminance to fine-tune the new color.
How do I change the color of an item in Lightroom?
Launch Lightroom and load the image containing the item whose color you want to change.
Navigate to the 'Develop' module and select the 'HSL/Color' panel.
Click on the 'Adjustment Brush' tool.
Paint over the item you want to change the color of.
Adjust the sliders for 'Hue', 'Saturation', and 'Luminance' to achieve the desired color.
How can I replace a color in a photo?
To replace a color in a photo you have to:
Open the photo in Lightroom.
Switch to the 'Develop' module and click on 'HSL/Color'.
Select the 'Color' option to isolate the color range you want to change.
Use the 'Hue' slider to shift the color to your preferred choice.
Modify 'Saturation' and 'Luminance' for further refinement.
How do you replace something in Lightroom?
Start by opening the image in Lightroom.
Move to the 'Develop' module.
Use the 'Clone and Heal' tools to replace objects in the photo.
Select the 'Clone' tool to copy content from one part of the image to another.
Select the 'Heal' tool to blend the copied area with the surrounding pixels for a seamless look.
Mastering the Lightroom technique to replace colors can make a huge difference in your photo editing projects. From personal experience, I’ve seen how this feature can turn a simple image into something extraordinary by adjusting hues to fit your vision.
If you follow the steps we discussed and practice regularly, you’ll find it easier to enhance your photos and avoid common editing mistakes.
$2,061.00Original price was: $2,061.00.$1,061.00Current price is: $1,061.00. 27585
Download Your Free Guide Now!
Discover the secrets of photography with our printable guide! Master essential techniques like aperture, shutter speed, and ISO to create stunning images. Get your free printable PDF now and start turning your snapshots into masterpieces!