Creating HDR images in Photoshop can elevate your photos into dynamic, captivating works of art.
With HDR techniques, you can capture every detail, from the brightest highlights to the deepest shadows, all in one image. Whether you’re a beginner or seasoned editor, this guide will help you unlock the full potential of HDR, turning your photos into stunning masterpieces.
Join me as we explore step-by-step methods and tips for achieving rich tones and vivid details, and transform your photography and editing skills with the power of HDR in Photoshop.
Let’s get started!
Table of Contents
Understanding HDR Images
HDR stands for high dynamic range.
It captures a wide range of light levels in photos. It combines multiple exposures to enhance both bright and dark areas, making HDR pictures look more realistic compared to regular photos.
By using HDR image techniques, the full spectrum of light in a scene becomes visible, helping in seeing clearer details.
When editing these images, tools like Lightroom HDR Merge can be particularly useful to seamlessly blend different exposures.
Benefits of HDR Images
- HDR pictures bring out the best details in highlights and shadows.
- The shadow detail improves significantly, providing a richer visual experience.
- You can see textures and variations that are often lost in normal images.
- The dynamic range increases visibility for both very bright and dark parts.
- Improved tonal balance across the entire dynamic range makes it popular in photography.
- It allows for stunning visuals with nature and architecture shots.
Common Uses of HDR Images
HDR techniques are popular in landscape and architectural photography, as these fields require capturing all light variances evenly.
In HDR photography, HDR software helps perfect these captures. Other uses include enhancing images with varied shutter speed settings in one final image.
Digital artists use HDR photos to express creativity while maintaining tonal range. Photo editors might use merge to HDR pro to blend photos seamlessly, using this to automatically align source images for clarity and precision.
Pro Tip: To get started using HDR images in Photoshop, try experimenting with different exposure settings. This will give you a feel for how an hdr image can transform your work.
Think of the same scene shot at various exposures; this can truly show the magic of HDR. Incorporating tone mapping in your HDR workflow can help achieve stunning effects!
Additionally, learning to use Photoshop Shortcuts can speed up your editing process and enhance your efficiency.
Creating HDR Images in Photoshop
Before diving into HDR, it is crucial to set up your workspace.
Open Adobe Photoshop, which will guide us on this journey. Ensure all necessary panels are visible for easier access.
Keep things organized, and remember: a tidy workspace helps in focusing on crafting brilliant HDR photos.
Using Merge to HDR Pro
We start by gathering our source pictures.
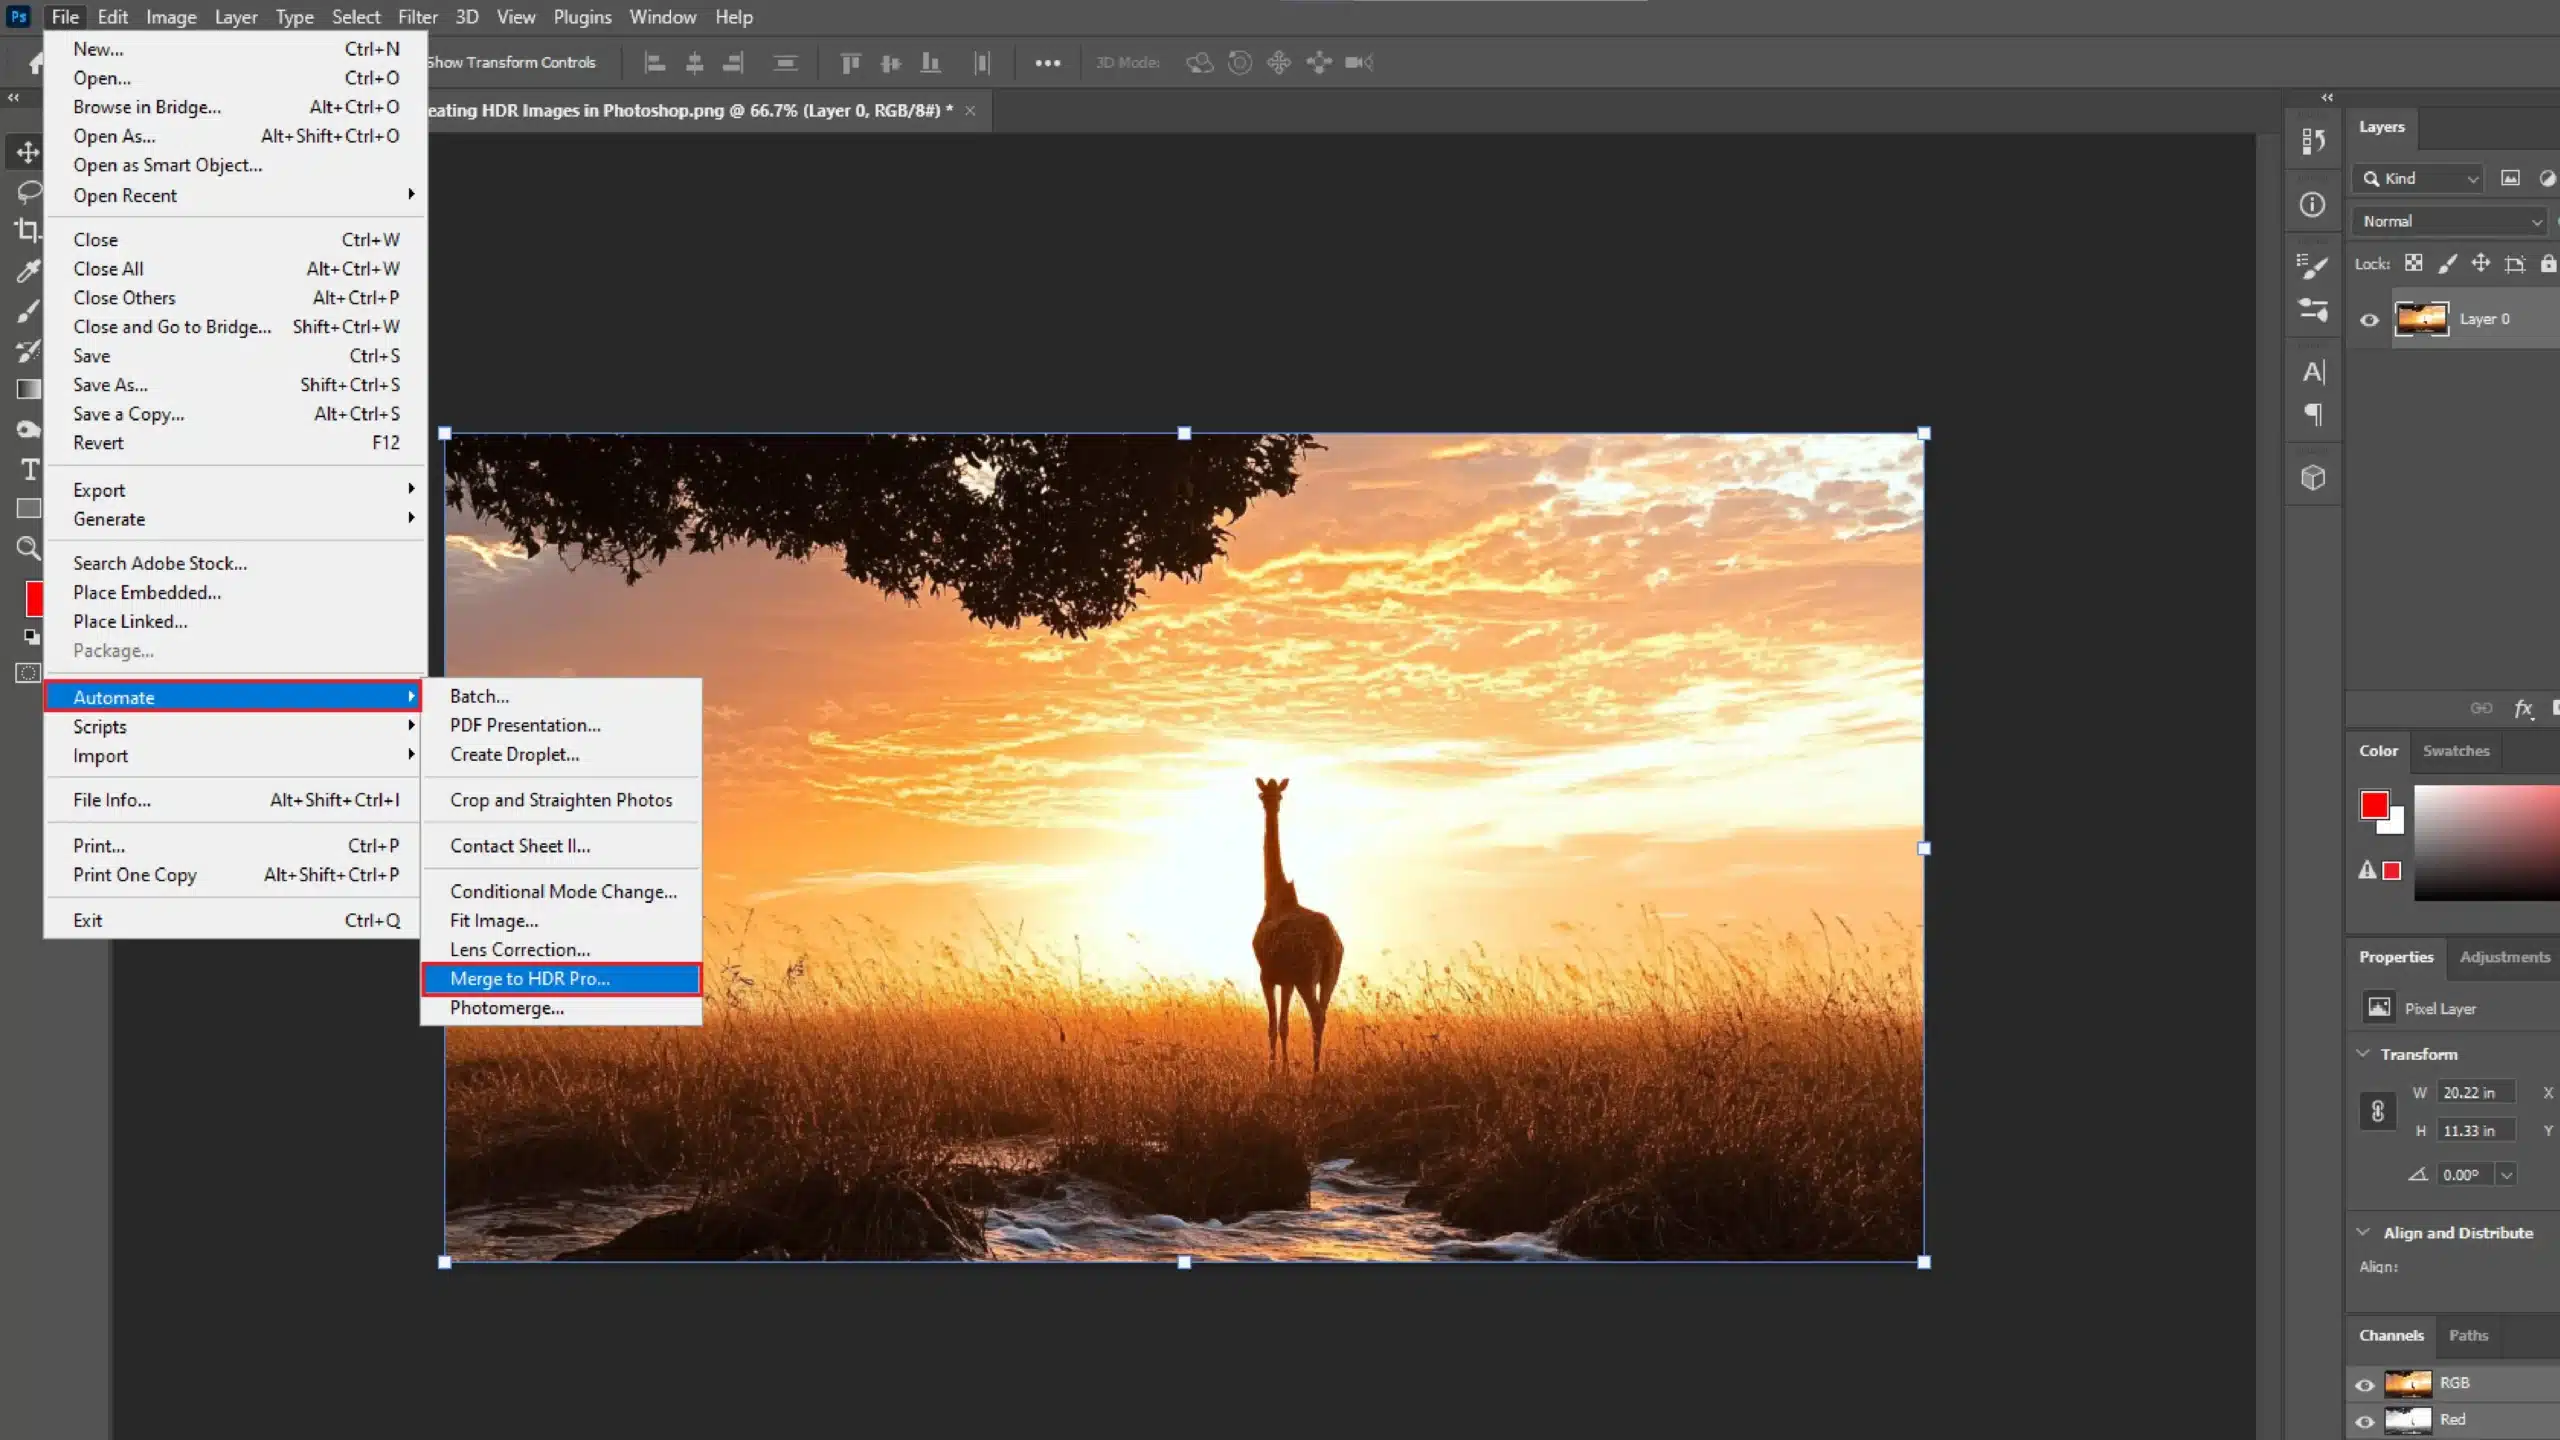
These are usually bracketed shots of the same scene taken at different exposure settings. Load them into Photoshop. Navigate to ‘File’ > ‘Automate’ > ‘Merge to HDR Pro’.
The software will automatically align source images, making life easier. Opt for a seamless blend and capture an entire dynamic range.
Adjusting HDR Image Settings
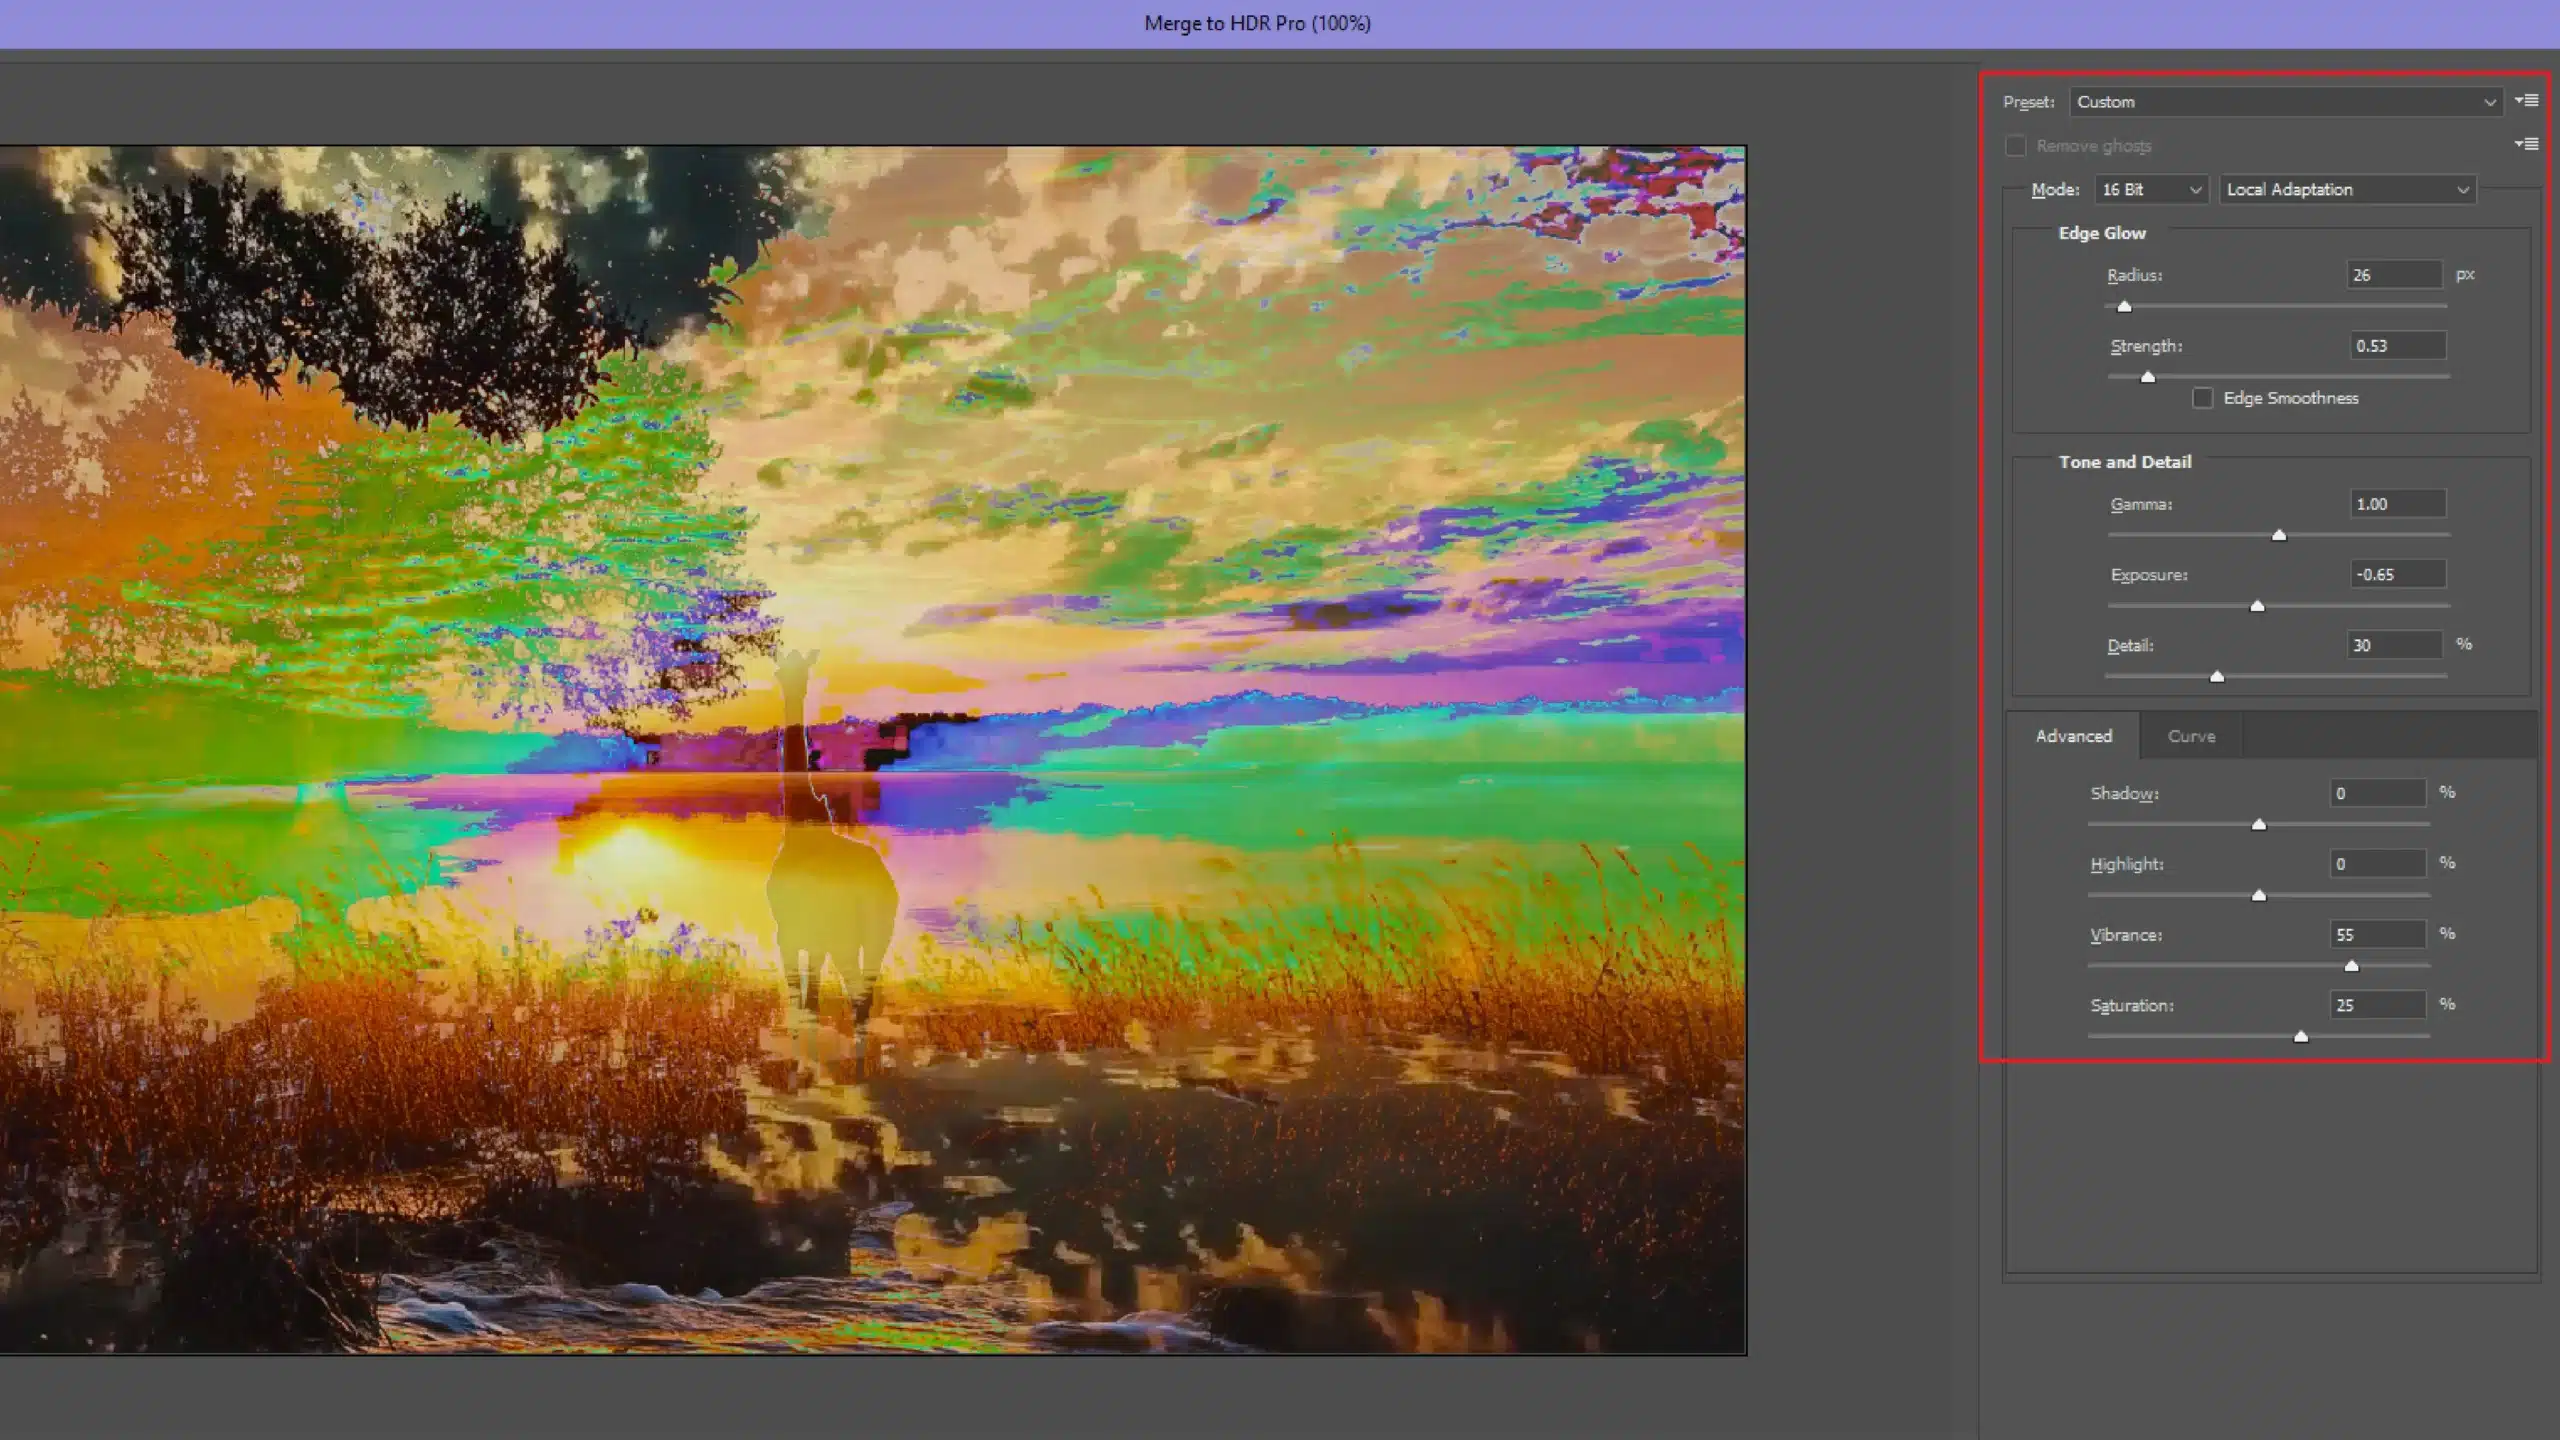
Here comes the fun part: using sliders. Adjust brightness, contrast, and shadow detail to your heart’s content.
The goal is to balance light levels, ensuring the final image retains natural beauty. Play with the tonal curve cautiously; avoid overdoing the effect.
Try not to ignore the role of shutter speed and its impact on each single image before they become one stellar creation.
Saving and Exporting HDR Images
Congratulations, you have crafted a masterpiece! Head to ‘File’ > ‘Save As’ to preserve your work.
Selecting the right format (e.g., TIFF, JPEG) affects the quality and file size of digital images. You can store your masterpiece as an hdr file for future adjustments or further enhancement.
Sharing your hdr photos? Consider exporting for web or social media platforms.
Visibility matters!
Pro Tip: On your quest to create hdr images, remember that post-editing in Adobe Camera or Lightroom complements your HDR workflow. Fine-tuning elements can elevate high dynamic range imaging beyond its initial process.
For instance, using Lightroom Shortcuts can significantly speed up your workflow, allowing you to focus more on the creative aspects of HDR photography.
Overall, when creating a single HDR picture in Photoshop, one should start with good source photos, be methodical with adjustments, and know the tools at their disposal.
The world of HDR photography is broad, but it starts with attention to detail and a willingness to experiment.
Advanced Techniques for HDR Images
Let’s dive into some advanced methods that enhance our HDR image creation.
These techniques help broaden your skills, ensuring each photo shines with clarity and detail.
HDR Toning
HDR toning is where we have fun adjusting colors and contrasts in HDR photos.
Use Adobe Photoshop’s HDR Pro to experiment carefully with your tonal range. This process reveals hidden details waiting to pop out of bracketed images.
Consider using the sliders to manage the intensity and contrast effectively.
Start small, and gradually adjust until your HDR photo tells the story you envision.
Fascinating how those hidden details come alive, isn’t it?
Steps to Effective HDR Toning:
- Experiment with Adobe Photoshop's HDR Pro.
- Use sliders to manage intensity and contrast.
- Start with small adjustments and gradually increase.
Layering HDR Pictures
Layering adds a unique touch to HDR photos by combining many exposures into one. We work with layers in digital photography to polish each image to perfection.
Play with the layer settings to mix shadows and highlights. The dynamic range of your photo expands when done correctly, creating depth and dimension.
Multiple layers give you the freedom to fine-tune intricacies. Who knew you could get so creative with a single image by sorting layers?
Benefits of Layering:
- Combines numerous exposures for enhanced detail.
- Expands dynamic range, adding depth and dimension.
- Allows for fine-tuning and creative adjustments.
Combining HDR with Other Effects
Combining HDR with other effects takes your image editing further into the realm of creativity.
Consider throwing in some vignettes or color adjustments. Try enhancing with Adobe Camera Raw for additional refinement.
Effects not only amplify the visual impact but add character to ordinary scenes. This powerful transformation improves the overall quality and mood of your images, which is essential in HDR software utilization.
Explore creative blending to achieve a masterpiece every time!
Tips for Combining Effects:
- Incorporate vignettes or color adjustments.
- Enhance with Adobe Camera Raw for refinement.
- Explore creative blending for unique results.
Pro Tip: Always automatically align source photos before merging them. This ensures that each element fits perfectly and prevents blurry or misaligned HDR pictures.
Such precision can make all the difference, doesn’t it?
Additionally, mastering Photoshop Shortcuts can significantly speed up your editing process, allowing you to focus more on creativity and less on technicalities.
Common Challenges with HDR Pictures
When creating an HDR photo, we often encounter issues.
These challenges can make or break your final HDR image. So, understanding them is essential.
Let’s dive into these common hurdles.
Overexposure Issues
Overexposure in HDR pictures can be a beast. It tends to wash out essential details.
To fix this, control the light in each exposure. Ensure that no single area gets too bright. Start by adjusting your shutter speed.
A small tweak can reduce those blowouts. Over time, you’ll train your eye to recognize potential overexposure in any scene.
Additionally, using Lightroom shortcuts can help you quickly adjust exposure settings for optimal results.
Ghosting in HDR Images
Ghosting can be incredibly frustrating.
Imagine taking a photo, only to find blurry silhouettes ruining it. This happens when subjects move between shots.
To combat ghosting, use the merge to HDR Pro tool. It aligns photos with precision. Practice using this tool and experiment with its settings.
Sometimes, a little manual touchup can save the day. The Content-Aware Fill in Photoshop can also be a lifesaver for removing unwanted artifacts.
Color Balancing
Color balancing is mission-critical.
An HDR image often suffers from strange color tones. One moment it’s vibrant; the next, it’s muted and sad.
Balancing colors revitalizes photos, bringing them to life. Use HDR software for intricate adjustments. Check white balance first. Start with small shifts.
Notice how each adjustment enhances realism. With practice, you’ll find your knack for perfect color balance.
Improving Your HDR Skills
- HDR creation can seem tricky, but tackling these challenges transforms your work.
- Anyone can grasp these concepts with patience, even those new to dynamic range.
- Improve your HDR conversion skills and watch your images pop with color and clarity.
- Our tutorials on Adobe Photoshop and Lightroom make mastering these techniques simpler.
Pro Tip: If all else fails, take a break and refresh. Often, stepping back provides fresh perspective. Return to your HDR file with renewed vigor.
Best Practices for HDR Photography
Let’s unveil some secrets about enhancing your HDR photos.
Choosing the Right Equipment
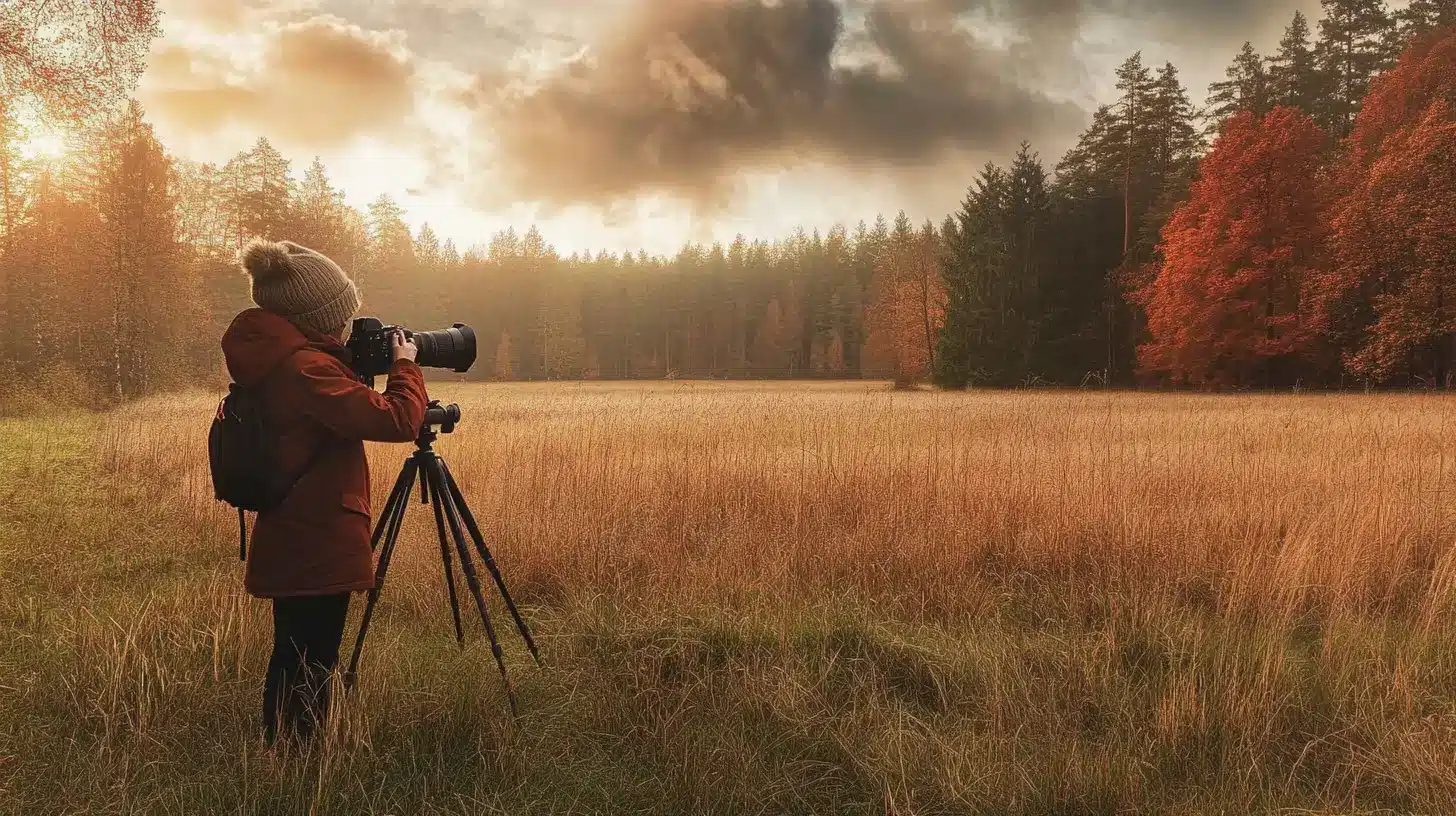
To capture that perfect HDR image, start with the correct gear.
A sturdy tripod stabilizes your camera for sharper shots. Invest in a camera with manual settings. This control helps adjust exposure for each scene’s lighting.
Don’t forget about lenses. Wide-angle lenses can be useful for landscapes, providing an extensive view of dynamic range.
However, experimenting with what you have can also work wonders.
If you’re unsure which lens to choose, consider learning more about the difference between a prime vs. zoom lens to make an informed decision.
Shooting Multiple Exposures
Capturing numerous exposures is key to high dynamic range imaging. In simple terms, you take several pictures of the same scene, but with different brightness levels
Aim to cover shadows, midtones, and highlights.
- Use the auto-bracketing feature if available. It saves time and ensures consistent shots.
- You don’t have to hover over the settings between every shot, making the process smoother.
Post-Processing Tips
Once you’ve gathered your images, it’s time to process them.
Photoshop’s merge to hdr pro tool helps combine them into a single, detailed HDR image. This tool minimizes light inconsistency.
Adjust the tone mapping to bring out colors. Be gentle with it; you don’t want cartoon-like results unless you’re after something artistic.
Use HDR software to fine-tune colors, contrast, and glow. Pay attention to balancing tones for a natural look.
For those who prefer Lightroom, exploring Lightroom shortcuts can streamline your editing process. Keep learning through practice.
Mastery over time enhances your craft without excess stress. There’s a vast library of resources out there to turn HDR into exciting explorations.
Pro Tip: Always shoot in RAW format. It provides more information for flexibility during editing. This approach ensures that your HDR file retains maximum detail.
So, don’t let overexposure steal the spotlight; control your shutter speed.
Exploring HDR Images in Photoshop
When you start with HDR pictures, choosing the right software matters.
Photoshop provides robust tools for creating HDR pictures. Its features make it easier for photographers to manage several aspects simultaneously.
Compared to other options, Photoshop stands out with user-friendly interfaces and diversified features. Using it, you can combine different exposure shots into one balanced HDR photo easily.
This guide will help you master these skills without much confusion.
Key Features of Photoshop for HDR
- User-friendly interface
- Diversified features
- Easy combination of different exposure shots
Comparing Photoshop to Other HDR Tools
Photoshop isn’t the only player in the HDR image arena. There are other tools like Photomatix or Aurora HDR.
However, Photoshop integrates a straightforward process to merge photos. Competition exists, yet Photoshop excels with its versatility and integration with Creative Cloud apps.
The program allows ample flexibility, letting users fine-tune every element of their dynamic range. This ensures novices and vets can churn out HDR pictures with a polished touch.
Advantages of Photoshop
- Versatility
- Integration with Creative Cloud apps
- Flexibility in fine-tuning dynamic range
Integrating HDR with Creative Cloud
The Creative Cloud experience enriches the HDR productivity. Access to Adobe’s cloud services means you can work on projects from any device.
Syncing your files enhances convenience, especially when you transition between Lightroom and Photoshop. The synergy between these applications ensures a seamless workflow, maximizing creativity and efficiency.
This pragmatic approach to producing HDR photos optimizes user time and effort as you explore new creative horizons.
Benefits of Creative Cloud Integration
- Work on projects from any device
- Seamless transition between Lightroom and Photoshop
- Maximized creativity and efficiency
Pro Tip: Start small with your HDR settings to avoid the dreaded overcooked look. Play around and have fun with subtle tweaks to achieve natural results.
Future of HDR Imaging

The world of HDR imaging is evolving with new trends emerging, delivering even better quality.
HDR image quality improves with every update, as devices now support higher resolution and wider color spectrums.
Phones capture clearer HDR pictures due to improved sensors, affecting how users interact with devices and view content.
New display technologies promise richer and more lifelike images. Brands focus on rolling out innovations that enhance user experience.
Expect continued growth in HDR technology.
Innovations in HDR Software
HDR software steps up to meet the demands of this dynamic field.
Developers innovate to create solutions that are smarter and faster, resulting in a seamless HDR productivity that broadens creativity.
Today’s HDR software integrates cloud technologies, enhancing accessibility and storage options. It becomes easier to work from different devices, starting projects on one and finishing on another.
Software offers more intuitive interfaces, making it simpler for users to manage HDR photos. This trend allows both novices and experienced users to experiment freely and produce stunning images.
The Impact of HDR on Visual Media
As HDR technology progresses, its impact on visual media is immense. HDR pictures offer new storytelling possibilities, transforming how we perceive and share photography, film, and video games.
The vibrant colors and enhanced details allow creators to convey emotions more effectively. Viewers gain an immersive experience with improved image quality.
HDR’s contribution to visual media is a game-changer, with new creative expressions and artistic directions emerging.
Pro Tip: When editing HDR pictures, balance intensity with realism. A natural look triumphs over overdone effects! That’s the secret sauce for achieving breathtaking HDR imagery.
For those using Lightroom, consider exploring the Lightroom HDR Merge feature to seamlessly blend many exposures into a single, stunning HDR image.
Additional Insight
For photographers looking to expand their skills, understanding the Difference Between Photoshop and Lightroom can be crucial.
Each tool offers unique capabilities that can enhance HDR editing workflows, providing more control over the final image output.
Frequently Asked Questions

Can you do HDR in Photoshop?
- Yes, you can create High Dynamic Range (HDR) images in Photoshop. This involves combining multiple photos with different exposure levels into a single image to produce a greater range of luminosity.
How do I add HDR to my photos?
- To add HDR effects to your photos in Photoshop, you can use the 'HDR Toning' feature under the 'Image' menu. This allows you to adjust various parameters, such as exposure, detail, contrast, and vibrance. The HDR Toning tool is particularly useful for enhancing the tonal span and bringing out more details in both shadows and highlights. You can either choose from Photoshop’s preset HDR styles or create a custom look. This feature is helpful for single images that you want to give an HDR-like appearance without needing numerous exposures.
Where is HDR toning in Photoshop?
- In Photoshop, you can find HDR toning by navigating to 'Image' > 'Adjustments' > 'HDR Toning'. Here, you can select from various presets or customize the HDR effects according to your preferences.
How to merge to HDR Pro in Photoshop?
- To merge images into HDR Pro in Photoshop, go to 'File' > 'Automate' > 'Merge to HDR Pro'. This function allows you to combine numerous exposures of the same scene into a single HDR image. After selecting your source photos, Photoshop will automatically align them and blend the exposures. You can then adjust the final HDR image using sliders for strength or detail. This process is perfect for scenes with a high dynamic range, where one exposure might not capture the full tonal span from highlights to shadows. Follow the on-screen instructions to achieve the desired HDR effect.

Conclusion
Creating HDR images in Photoshop has transformed my photography by allowing me to combine numerous exposures into one perfectly balanced photo.
Before mastering HDR, I often lost detail in highlights or shadows, but now I can capture scenes with full dynamic range. This technique has greatly improved both the quality of my work and my confidence as a photographer.
If you’re looking to elevate your skills, I highly recommend two resources that helped me: a comprehensive Photoshop course and an insightful Lightroom course. Whether you’re a beginner or experienced, these courses provide invaluable tips and guidance for mastering HDR, enhancing both your technical abilities and creative vision.
Happy shooting!
Read more about Photoshop:


Course

Light Effect Photoshop


Lightroom Course 2025

Adobe Photoshop Course 2025

Photo Editing Course


