Smoke bomb photography has been around for a few years, and we still see the popularity rising. Why? You might ask. It’s simple, they not only add a blast of color to the images, but the results are stunning as well. In addition to adding a quick pop of color, smoke bombs can create excellent background and atmosphere. If you want to spice up your photography, here are some smoke bomb photography ideas for you.

Choosing the Right Smoke Bomb

Making sure that you have the right smoke bomb in your hand is the foundation of extraordinary smoke bomb photography. You need to look out for three things when buying a smoke bomb: burn time, activation, and if it is safe to hold. 

Firstly, smoke bombs have different burn times, but you need one that gives you a minute, at least. Secondly, you need a lighter to ignite some smoke bombs, whereas others use the simple wire pull method. Lastly, make sure that the smoke bombs are safe to hold. Some smoke bombs get too hot to be held, so keep that in mind while shopping.

Some Smoke Brand Choices for You

If you want the best smokes bombs in terms of ease of use, burn time, and range of colors, then go for Enola Gaye. They have been in this business for a long time. They started making smoke bombs for paintball games but quickly gained popularity among photographers for their high-quality smoke bombs. For a more economical option, you can pick Smoke Fountains. They will give you around 45-60 seconds in a much more cost-effective manner.
Red and blue smoke bombs

Photo edited in Lightroom.

Visualize the Shot

Unless you can spare a few smoke bombs for a test shoot, one of the best smoke bomb photography tips that you can get is to visualize the shot before you ignite the smoke bomb. A better idea would be to rehearse the poses with your model. Also, make sure that you do the shoot on a calm day. You will be annoyed if the wind blows away all the smoke. Preparation is the key to getting perfect images.

Get the Light Right

You might have heard it before; lighting can make or break your image. Using studio lights or strobe, you can make the smoke well-lit. It will truly enhance the color of the smoke bombs. This is true for most smoke bombs, which produce opaque smoke. However, if your smoke is not entirely opaque, you can still create interesting light streaks with it.

Use the Smoke as Background

One of the basic smoke bomb photography ideas you can try is to use smoke as a background. It is less tricky to do, so it will be perfect for learning the ropes. However, it does not mean that it will not yield amazing images. If properly handled, then you will be able to create some stunning photographs. Let the smoke settle in as a background, and have your model pose in front of it.

Create Smoke Trails

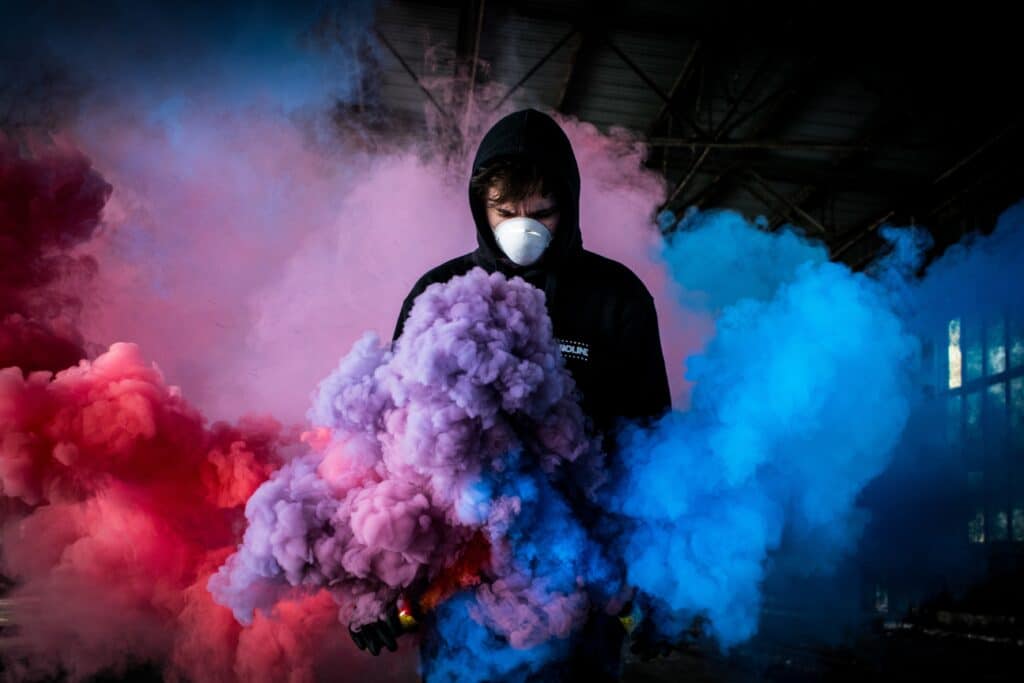
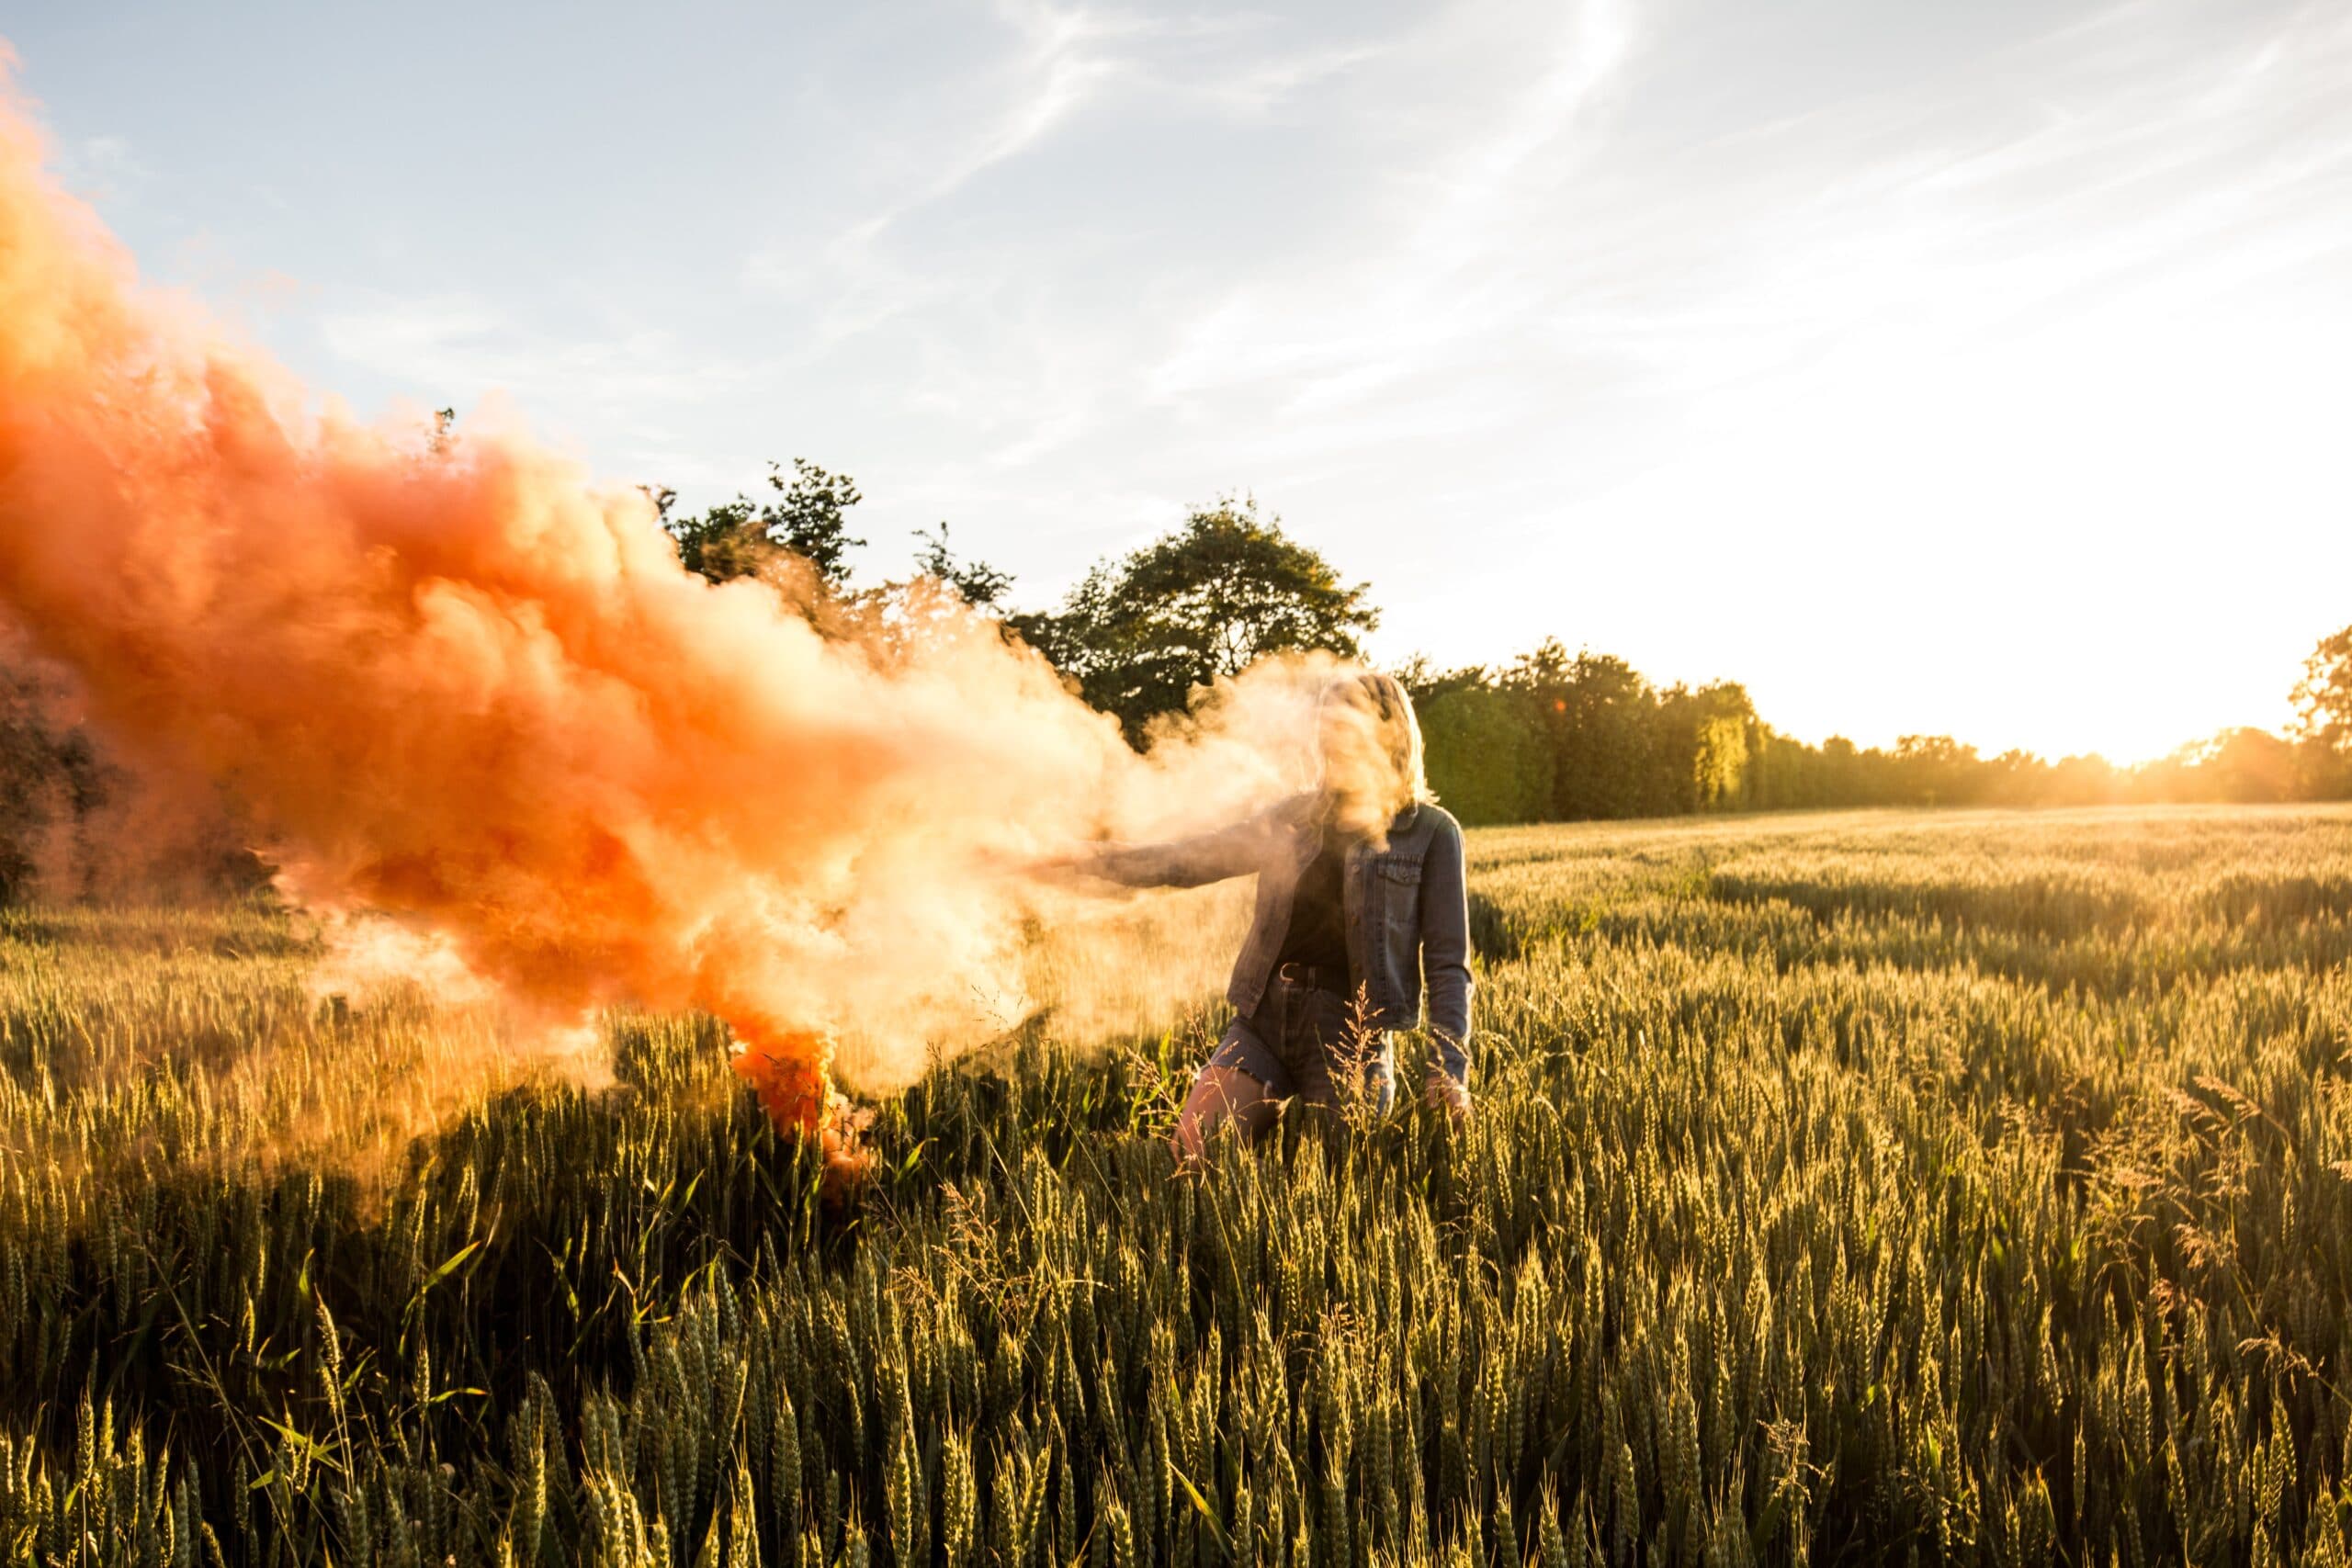
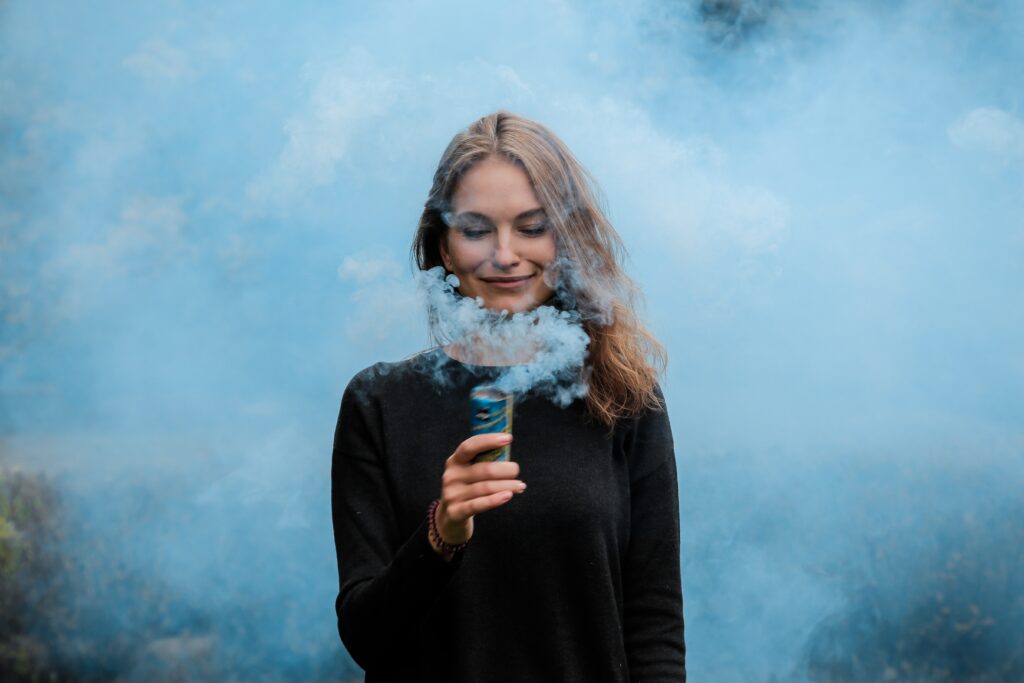
Another idea to create some stunning images is to have the model hold the smoke bomb. Then, tell them to move slowly. The idea behind this is that when they move slowly, the smoke will start making some trails. This will add a sense of motion to the image. Also, holding the smoke bomb in hand shrouds the model in smoke which helps in adding some mystery to the mood.

Smoke bomb portrait

Choose the Colors Carefully

This is one of the smoke bomb photography tips which will save you a couple of smoke bombs and plenty of time. Make sure the colors you choose are consistent with your theme. Bright colors such as yellow will create an inviting atmosphere, on the other hand, darker colors such as purple will paint a gloomier and darker image. Also, make sure that the model’s outfit does not clash with the smoke bomb colors.

Use Props

Once you have tried the basic smoke bomb photography ideas, you can try this one. You can use a prop such as a lantern, or even a transparent box. Place the smoke bomb inside it and have the model hold the box. Then wait for the colors to do their magic and take the images. Keep in mind that you do not have to conceal the smoke in the prop, you have to portray that the smoke is coming out of it, magically.

Be Safe!

Lastly, make sure that you keep yourself and your model safe during the shoot. As discussed, smoke bombs heat up when they burn. Even the safe smoke bombs can get too hot. Therefore, make sure your models are holding them from the bottom, where they are the coldest. 

Also, put them in a metal container after they stop emitting smoke because they can continue heating up.

Conclusion

There you have it, the best smoke bomb photography ideas and tips that will help you set up your own smoke bomb photography shoot. So what are you waiting for? Buy a few smoke bombs and get to work!

If the “Smoke Bomb Photography Ideas” article has helped you, then Like and Share it with your friends!

Facebook
Twitter
LinkedIn
Pinterest

Have a nice photoshoot! 

Lightroom and Photoshop Tutorials

Photoshop Course
Lightroom Course
Lens Flare Effect
Lightroom & Photoshop Course