Photoshop is widely popular not just because of the great features that it offers but also because it is always making changes to make the workflow of a photographer easier. One such example is the smart objects in Photoshop. This tool allows you so much flexibility while editing an image without even worrying about the destructive process. Read along if you want to learn more about smart objects.

What are Smart Objects

If you take an image and apply some edits directly to it, without using layers, then they will make a permanent change to the image. If you would want to undo that change, then it would be hard or even impossible in certain cases. This is referred to as ‘destructive editing’. What if there was some way to make changes to the image without causing permanent damage? Fortunately, we can do it by  using Photoshop smart objects. Smart objects work like a container and store the original data of the image which can even be a vector image. And when the need arises, you can simply remove that container to get the original image. So this is the best form of non-destructive editing.

Advantages

Before learning how to create a smart object, let us look at some of its benefits. First of all, as mentioned above, it is the easiest and perfect way for non-destructive editing. You can apply scale, distort, skew, transform perspective, and many others on the image without losing any data. However, you cannot apply the actions that directly alter the pixels such as dodging or burning. For doing this, you will have to convert the smart object back into a regular layer. Secondly, you can also apply and edit filters on smart objects without the loss of original image data. Thirdly, when you had to edit vector images from Illustrator in Photoshop, they needed to be rasterized first. With the use of smart objects in Photoshop, you can do it directly. Lastly, if you are working with linked instances of smart objects, you do not need to apply changes to them individually. Just editing the smart object will update all of them individually.

Creating Smart Objects

There are two ways to create photoshop smart objects: embedded smart objects and linked smart objects. Now, let us discuss each one in detail.

Embedded Smart Objects

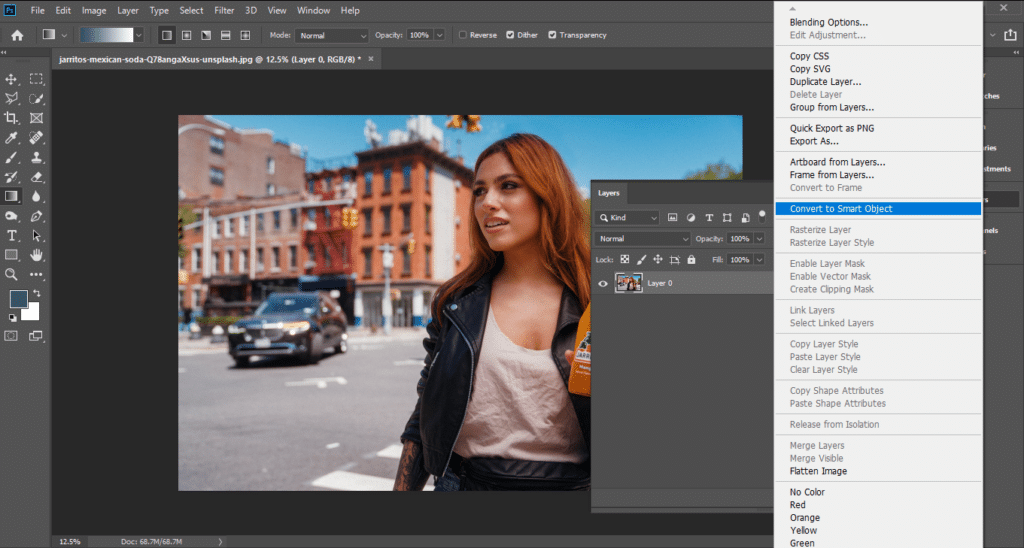
There are different ways to create embedded smart objects in Photoshop. You can do any of the following for this purpose.

If you want to convert a layer into a Photoshop smart object, then first choose that layer. Then, select Smart Object and then Convert to Smart Object. Alternatively, to convert a bundle of layers into a smart object, you do not need to do it individually. Simply, select all the layers, and then perform the same steps as the previous method. If you are working with PDF files or Illustrator layers, then you can simply drag them into Photoshop. However, if you want to paste work from Illustrator, then you will have to choose Smart Object in the paste dialog box.
Smart object in photoshop

Linked Smart Objects

Creating linked smart objects in Photoshop is even easier. And if you change the original image file, it will automatically produce the changes in the linked objects. This feature is useful when you have to use artistic assets across different designs or even when different teams are working on the same design. Instead of individually updating the changes, you can use linked smart objects.

There are only two steps required for the creation of a linked smart object. 

Convert Embedded to Linked

The best part of using smart objects in Photoshop is that an embedded smart object can be easily converted into a linked smart object without even losing any of the edits performed on it. It even preservers the filters and transforms during the conversion. 

Follow the steps to do this:

Conclusion

You have not only learned the importance of Photoshop smart objects but also how to create them easily. Use this information to make your workflow easier and more efficient than before. Keep learning new things and practicing.

If the “Smart Objects in Photoshop” article has helped you, then Like and Share it with your friends!

Facebook
Twitter
LinkedIn
Pinterest

Have a nice photoshoot! 

Lightroom and Photoshop Tutorials

Photoshop Course
Lightroom Course
Lens Flare Effect
Lightroom & Photoshop Course