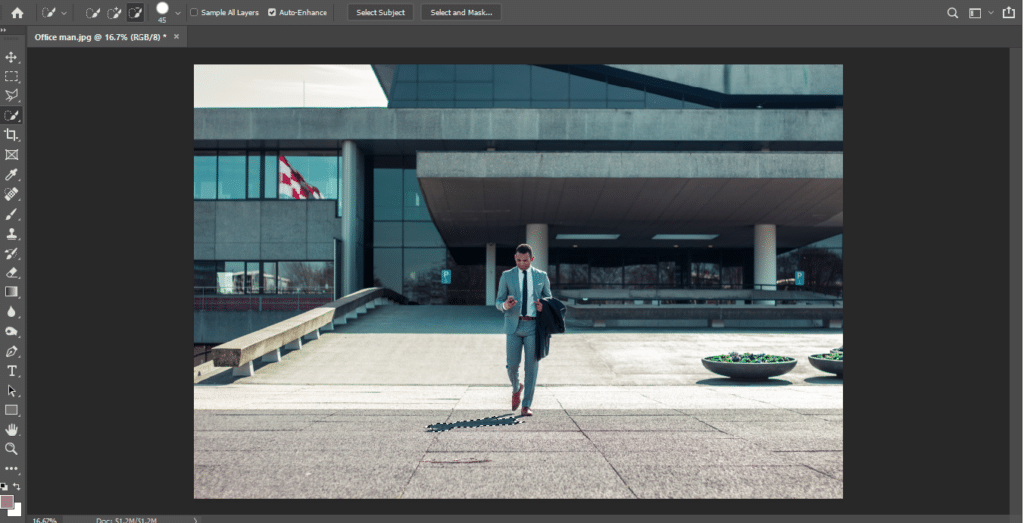
Shadows in a photo are great for adding a sense of the depth of field. However, some wanted shadows in the frame could also have a negative impact by creating distractions. You don’t want such dark spots ruining your photos. In this article, we will discuss various ways of Removing Shadows in Photoshop.

How to Refine Edges in Photoshop:

Adobe keeps on adding new and more advanced features with every update. Photoshop has now become the industry standard among photo editing software. Moreover, this versatile software is the go-to solution for every photographer who wants to fix any problem in their photos to make them flawless. With the advanced and vast list of tools, you can basically do anything with your photos. The only limit is your imagination. For our problem i.e. removing the unnecessary shadows, we will be using the content-aware tool as the prime solution. We will also teach you to remove the shadows by reducing the harshness through layers as a secondary option.

Removing Shadows with Content-Aware Fill:

Using the Content-Aware Fill is the perfect solution if you want to remove the smaller shadows.

Step 1 – Duplicating the Background:

Firstly, we need to create a background layer to duplicate the image. It is an essential step because we do not want to destroy the original photo. The duplicate layer will act as a backup in case if the content-aware tool creates a mess. The shortcut to creating a duplicate layer is Crtl + J / Command + J.

Step 2 – Patch Tool

Select the Patch Tool from the toolbar and the content-aware option in the drop-down menu. Using the content-aware patch tool will create new pixels by identifying the pixels in the surrounding areas of the selected patch.

Step 3 – Removing the Shadow

Now that we have done all the pre-requisites, let’s get to the main part. Start by making the selection of the shadow. Depending on the complexity of both the shadow and its shape, decide the selection tool that can make a precise selection. After that drag the selection towards the area this is the most similar to the selected shadowed area. Photoshop will take the pixels from that area to replace them with the shadow by using its AI algorithms. You might not always get the perfect look on the first try. So try changing the various color and structure properties of the area. The color and structure options in the patch toolbar will allow setting a filter on the intensity of how much Photoshop should copy from the referenced area. If the area is selected, you can change its exposure, saturation, etc. without affecting the original image. You can even blend it using the healing brush tool.
Removing shadow in Photoshop using the selection and clone tool

Reducing Shadows using Layers:

Most of the times shadows are not much of a distraction. However, they look a bit harsh. In such scenarios, there is no need to spend your time and effort entirely removing them. Instead, softening these harsh details will do the job while maintaining a sense of depth that the shadows produce.

Step 1 - Selecting the Shadow:

Similar to while working with the content-aware tool, we will need to make a selection first. In order to select the shadow, you will have different selection tools on the toolbar panel. If it is an easy selection, then we recommend using the quick selection tool. Otherwise, you can also use Lasso tools or object selection.

Step 2 - Copy Shadow:

The next step is to copy the shadow to a new layer so we can freely perform the changes on it. Copy the shadows by pressing Ctrl + C/ Command + C and then paste it on a new duplicate layer.

Step 3 – Adjustments:

The shadows are the darkest part of a photo, so lightening them up would be a perfect solution. However, shadows are also cooler than the surrounding parts of the image. To perfectly lighten up the shadows, you will also need to warm the temperature of the unselected area. Otherwise, both parts will not blend. Both of these settings can be easily adjusted in Photoshop using the Adobe Camera Raw. Press Shift+Ctrl + A/ Shift+Command+A to open the camera raw window. On your right, you will see a number of adjustment sliders. Use the temperature slider to warm up the image and the shadow slider to control its harness. Remember that you have to perform adjustments on two separate layers. You can also use other sliders such as the Clarity slider if the shadows are extra harsh.

Conclusion

In this article, we extensively looked upon two effective ways of removing shadows in Photoshop. Frist was focused on completely removing the unwanted shadows in Photoshop. However the second on was revolving around making a few adjustments in order to soften harshness in the photos. If you want to become perfect at both these methods then you should start practicing. Always keep learning.

If the “Removing Shadows in Photoshop” article has helped you, then Like and Share it with your friends!

Facebook
Twitter
LinkedIn
Pinterest

Have a nice photoshoot! 

Lightroom and Photoshop Tutorials

Photoshop Course
Lightroom Course
Lens Flare Effect
Lightroom & Photoshop Course